Fix Ethernet Connection Issues in 8 Steps
Encompassing solutions to solve PC won't connect to Ethernet

If your Ethernet not working on Windows 10, the issue may be caused by hardware faults, power settings, or incorrect adapter configurations. Below are effective solutions that don’t rely on driver updates, reset tools, or antivirus checks.
Table of contents
Why Ethernet Stops Working on Windows 10
Several hardware and system-level factors can cause Ethernet to stop working:
- Damaged or loose cables: Breaks or poor contact in the cable prevent proper signal transmission.
- Disabled adapter: The Ethernet adapter may be turned off manually or by power-saving features.
- Incorrect IP or DNS settings: Manual entries or corrupted profiles can block network access.
- Hidden or missing adapter: Device Manager may not show the adapter if it’s malfunctioning or disabled in BIOS.
- Router issues: A faulty or overloaded router may fail to assign an IP address over Ethernet.
These factors can affect desktops and laptops alike, even when Wi-Fi works normally.
What can I do if my Ethernet connection is not working?
1. Enable the connection
1. Right-click on the Start button and select Network Connections.

2. Click on Ethernet from the left and choose Change adapter options from the right.

3. Lastly, all you have to do is right-click on your connection and select Enable.

First of all, you can check if your Ethernet not working error is caused by a disabled connection. If this is the case, you can simply enable your connection.
2. Check your drivers
- Right-click on the Start button and select Device Manager.

- Expand the Network adapters list and check whether there are any device issues.

- Right-click on the Ethernet card and select Properties.

- The Device status window should say that your device is working properly.

- Click the Driver tab and select Update driver.

- Finally, click on Search automatically for drivers or select the second option if you have downloaded a dedicated driver.
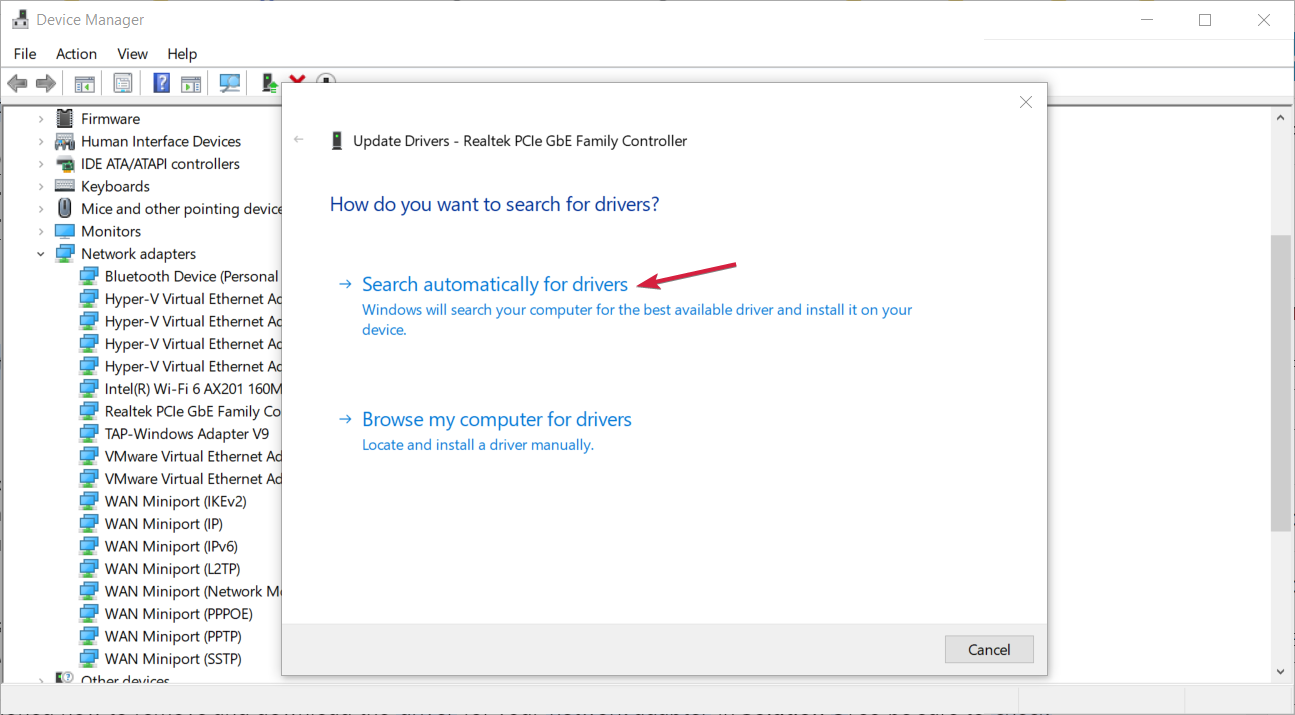
- If the system finds a new driver, it will install it.
After you have uninstalled your drivers, we recommend reinstalling them automatically, and the safer and easier way to update drivers on a Windows computer is by using an automatic driver updating tool.
Drivers can then be updated in batches or one at a time without requiring the user to make complex decisions. Driver updaters are user-friendly and use very few system resources.
3. Check your connection details
- Right-click on the Start button and select Network Connections.
- Click on Ethernet from the left and choose Change adapter options from the right.
- Right-click on the Ethernet connection and select Properties.

- Double-click on the Internet Protocol Version 4 (TCP/IPv4) option in the Ethernet Properties window.

- In most cases, you have to enable Obtain an IP address automatically and Obtain DNS server address automatically. Still, there are situations where you have to input the details manually.

- Finally, verify that the ethernet not working issue is fixed.
For this, you’ll have to consult your router/switch/modem configuration manual or obtain the details from your ISP or network administrator.
4. Check for viruses
- Type windows security in the Search tab and click on the app from the results.

- Select Virus & threat protection.

- Now, if you have a third-party antivirus installed, it will override the default Microsoft Defender protection, and you can click on the Open app option. That will take you to the main menu of the antivirus, and you will be able to perform the scan.

- Lastly, opt for the Microsoft Defender Full or Offline scan options if you don’t have one, and verify that the ethernet not working issue is fixed.
We recommend you try an advanced virus removal tool with all the features necessary to keep your PC fully protected.
Thankfully, plenty of Windows 10 compatible antivirus software tools have great Internet security and can detect any network threats immediately.
5. Run the Internet connection troubleshooter
- Go to Start and select Settings.

- Go to Update & Security.

- Now select Troubleshooter from the left, then click on Additional troubleshooters.

- Choose Internet connections and hit the Run the troubleshooter button.

- Finally, verify that the ethernet not working issue is fixed. If not, restart your computer and test again.
6. Roll back the network adapter driver
- Right-click the Start button and launch Device Manager.
- Go to Network adapters, right-click the network adapter, then select Properties.

- In the Properties window, select the Driver tab, then click Roll Back Driver.

- Follow the on-screen steps to install a previous driver version. However, if the button is unavailable, that means there’s no driver to roll back to.
7. Turn off your antivirus/firewall and VPN software
- Type windows defender firewall and click on the app from the results.

- Click on Windows Defender Firewall properties.

- Select the Firewall state drop-down menu, click on the Off option, then click on the Apply and OK buttons.

- Finally, recheck your Ethernet connection.
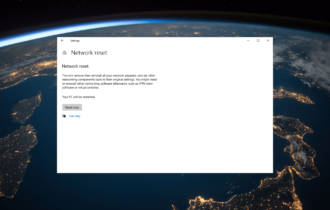
8. Reset your network
- Click the Start button and select Settings.

- Select Network & Internet.

- Go to Status, scroll down and click on Network reset.

- Lastly, click on the Reset now button and click Yes.

- Verify that the ethernet not working issue is fixed.
9. Disable and Re-enable the Ethernet Adapter
Refreshing the adapter can resolve internal conflicts without reinstalling drivers.
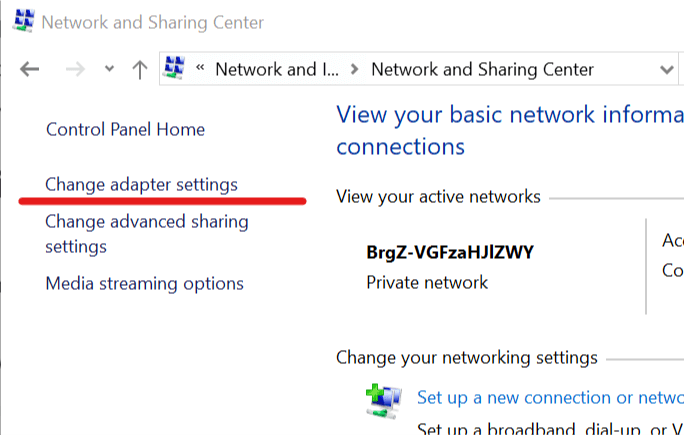
- Open Control Panel > Network and Sharing Center

- Click Change adapter settings
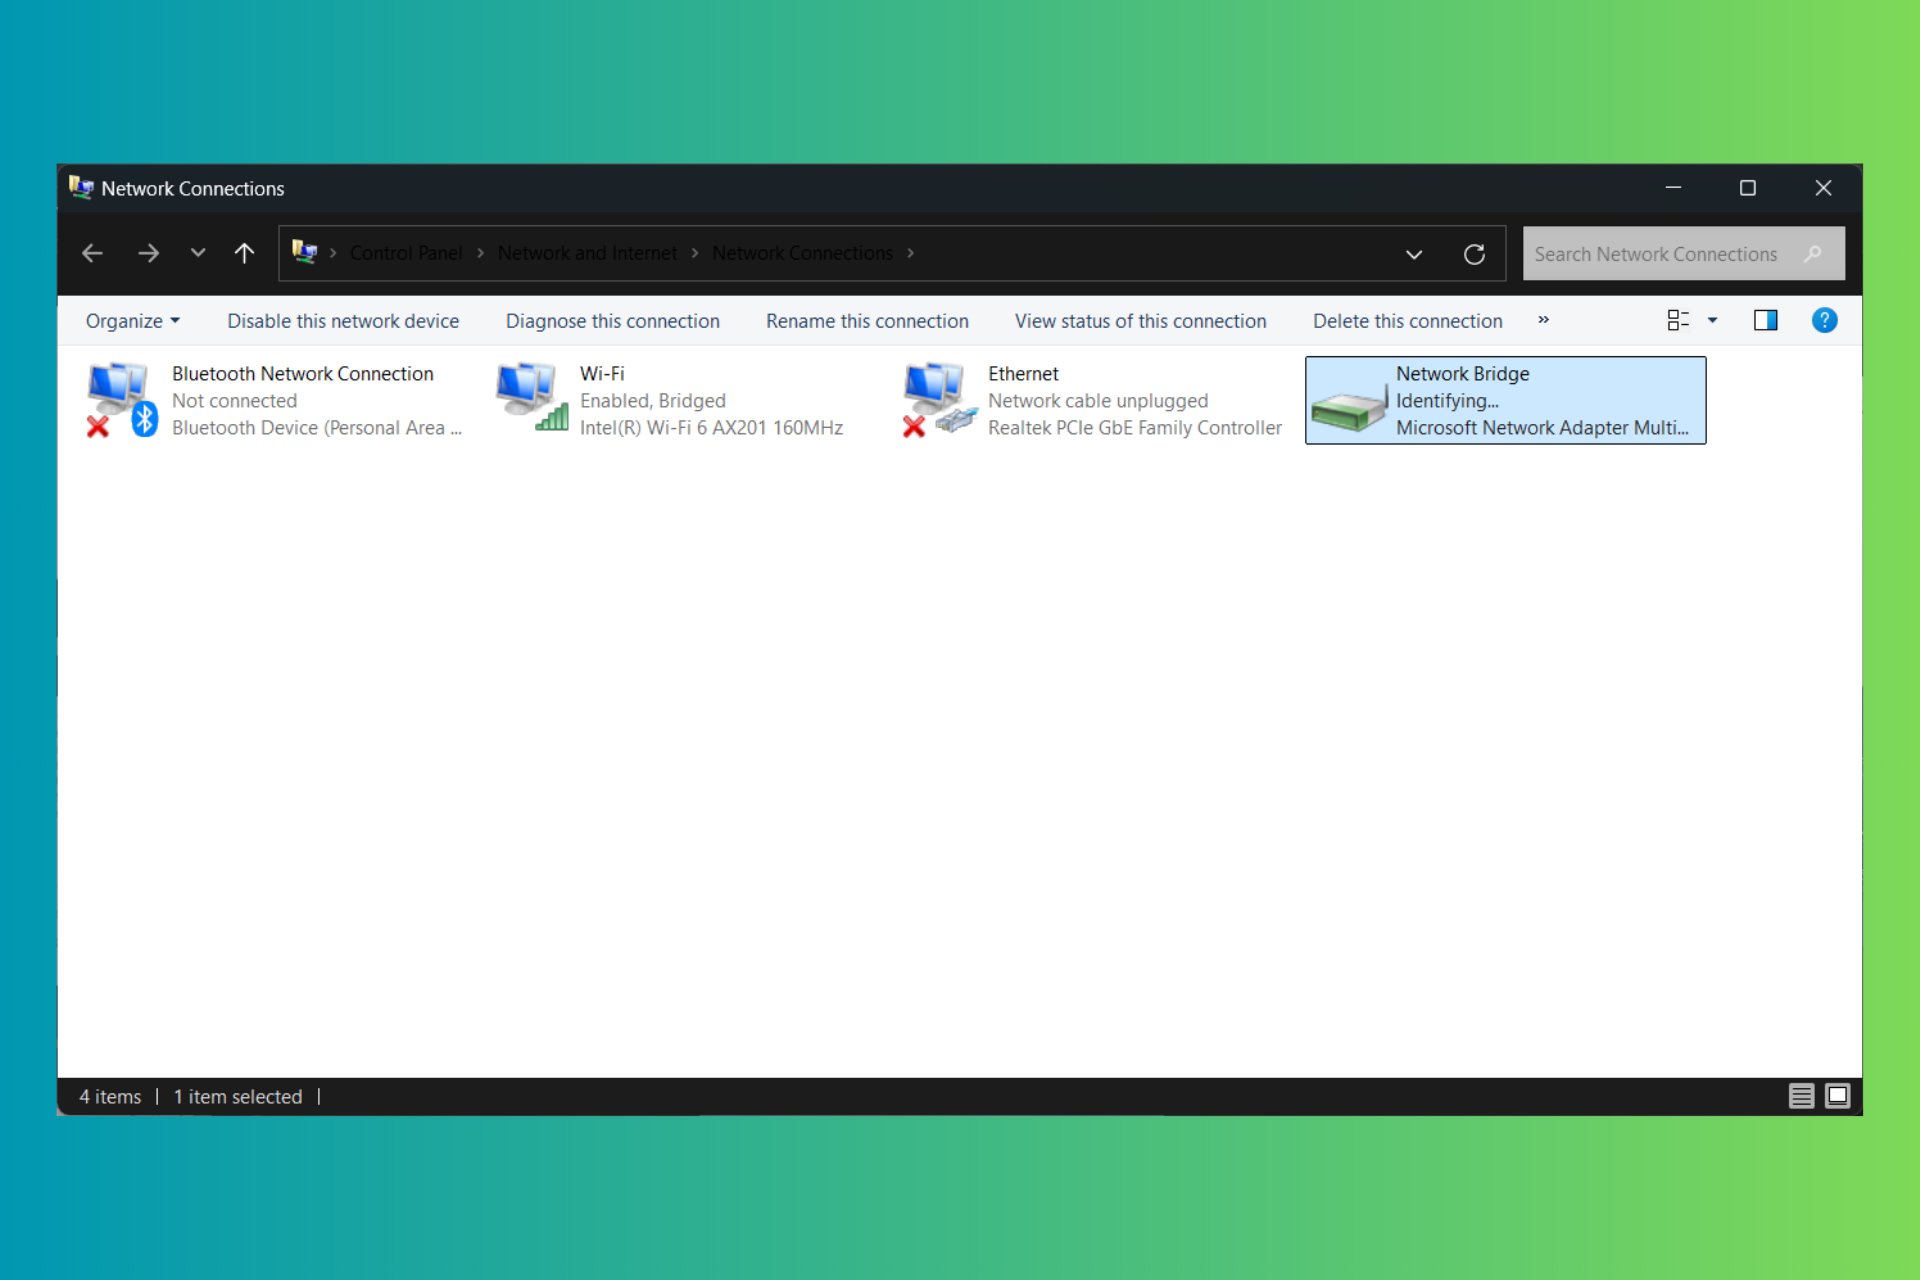
- Right-click the Ethernet adapter > Disable
- Wait five seconds, then right-click again > Enable
10. Configure Ethernet Settings on This Computer
Incorrect manual IP or DNS entries can prevent a proper connection.
- Go to Control Panel > Network and Sharing Center
- Click Change adapter settings
- Right-click your Ethernet connection > Properties

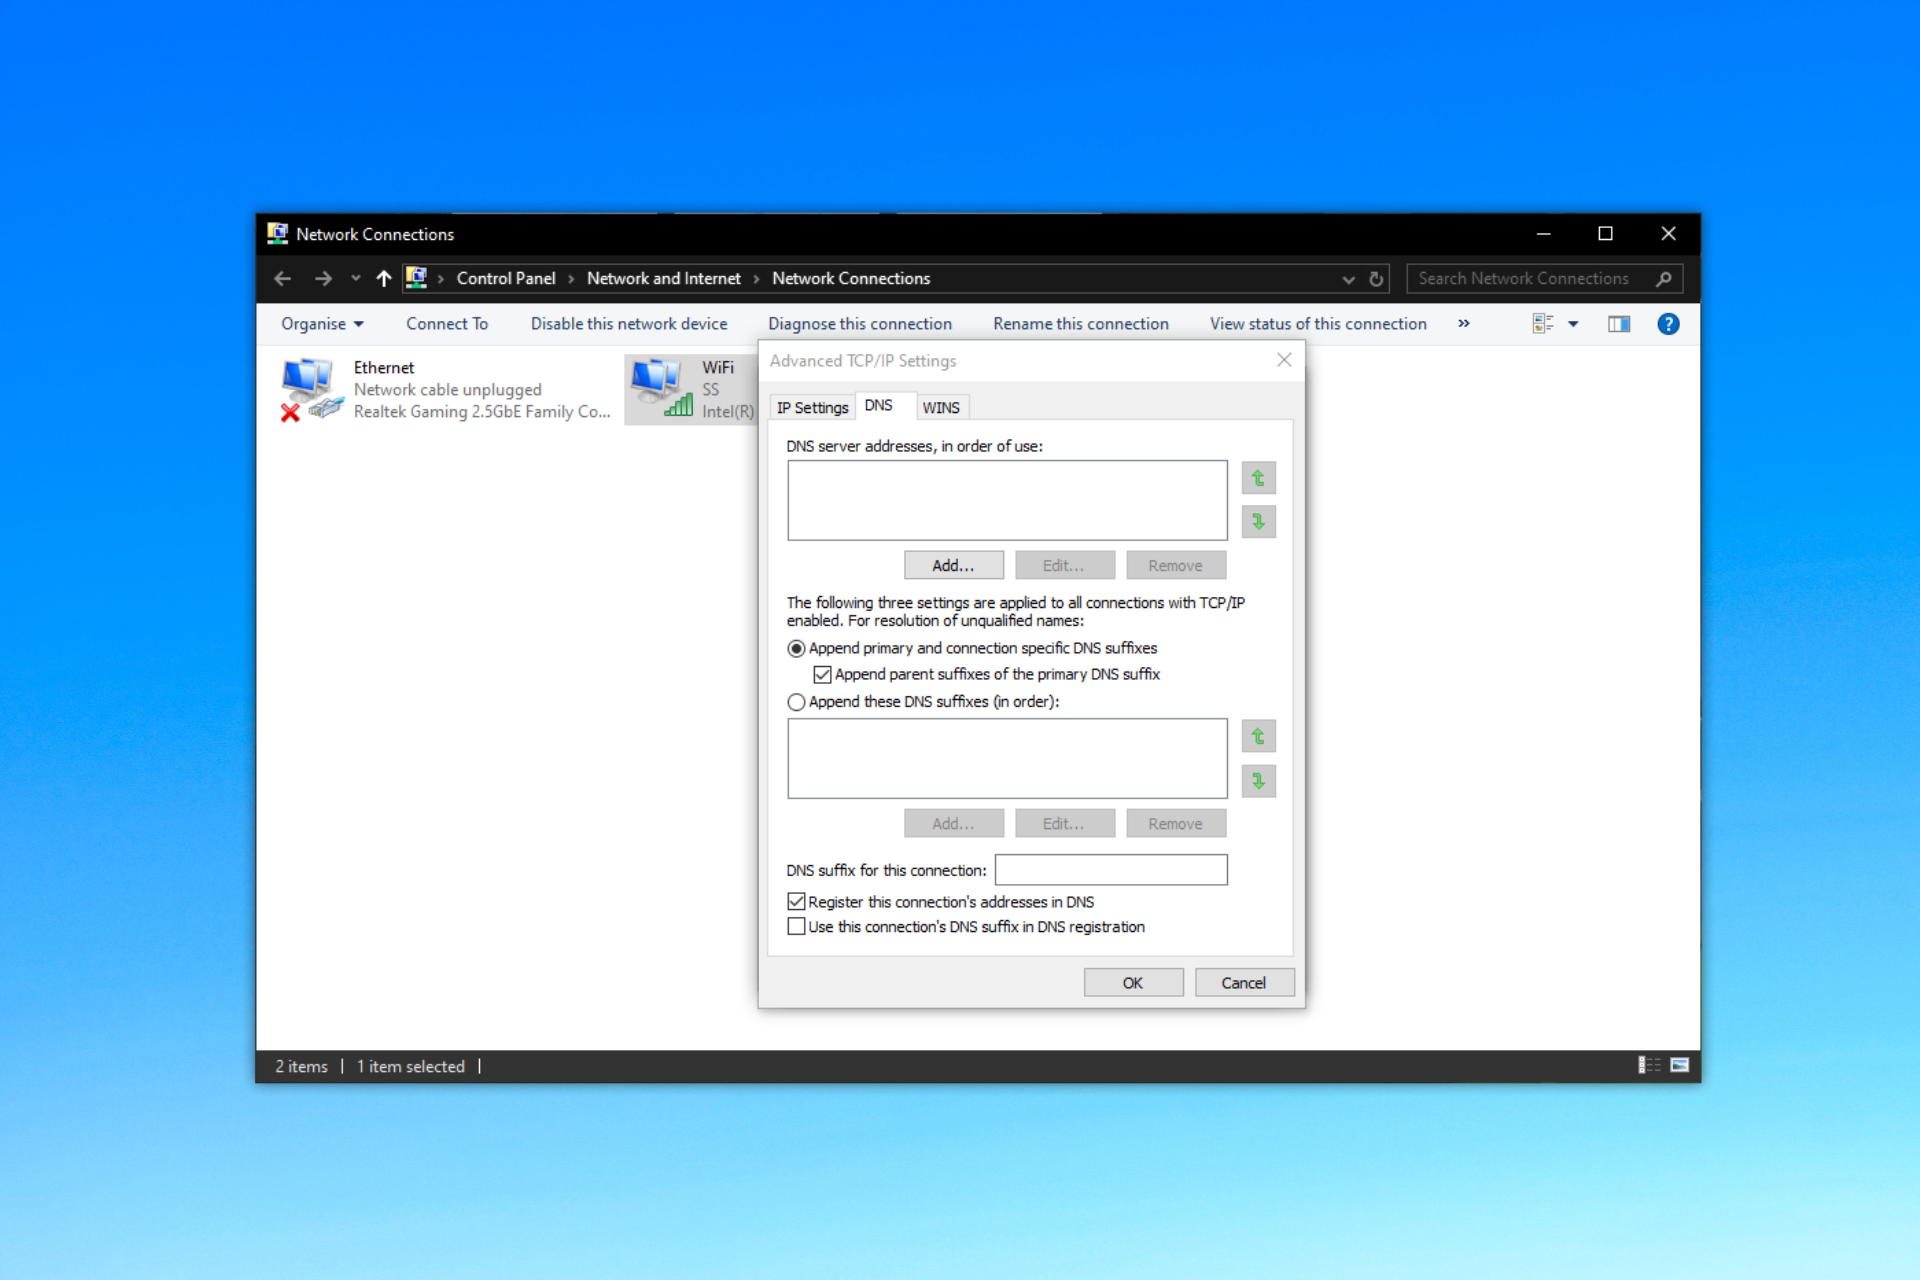
- Double-click Internet Protocol Version 4 (TCP/IPv4)

- Ensure Obtain an IP address automatically and Obtain DNS server address automatically are selected
11. Disable Power-Saving Options for the Adapter
On some devices, Windows turns off the Ethernet adapter to save power.
- Open Device Manager
- Right-click your Ethernet adapter > Properties
- Go to the Power Management tab
- Uncheck Allow the computer to turn off this device to save power

Wrapping up
We hope that your Ethernet connection has been restored by using one of our solutions presented in this article.
For more troubleshooting steps, check out our guide on how to fix Windows 11 Ethernet if it’s not working.
If your WiFi doesn’t work but Ethernet does, check out our guide to find out what solutions can be used.
Lastly, if you want to use WiFi and Ethernet at the same time, we can teach you how to do that as well.
We also have guides on what to do if Ethernet doesn’t have a valid IP configuration, or if the Network cable is not properly plugged or may be broken so don’t miss them.
If you’re sure the network you’re trying to connect to is set up properly and still can’t connect, please use the comments section below to ask for further assistance.
Read our disclosure page to find out how can you help Windows Report sustain the editorial team. Read more


Improve this guide

User forum
3 messages