0x00000b11: How to Fix This Error on Windows 10 & 11
Explore the easiest methods to resolve this problem
5 min. read
Updated on
Read our disclosure page to find out how can you help Windows Report sustain the editorial team. Read more
Key notes
- The printer error occurs due to corrupt or pending Windows updates, faulty hardware, or outdated drivers.
- This guide will discuss all expert-recommended solutions to fix the issue, including uninstalling the last Windows update.
Many users have complained that Windows cannot connect to the printer, Error Operation failed with error 0x00000b11 when trying to print something on their network-shared printer.
This is a perpetual issue on Windows 10 & 11. In this guide, we will discuss some of the tested methods to fix the error on your computer.
What does the 0x00000b11 error code mean?
This error code is a printer connecting error that occurs when your computer tries to connect to a network printer on a remote PC. The connection between the shared printer and remote computer seems OK.
This problem started appearing on Windows 11 & 10 computers when Microsoft released the CVE-2021-1678 vulnerability security patch. Many users have also reported getting this error after installing the Windows Malicious Software Removal Tool x64 – v5.111 (KB890830) update.
What causes the 0x00000b11 error code on Windows 10 & 11?
There could be various reasons for this error code to occur; some of the common ones are mentioned here:
- Outdated printer driver – If the printer driver is outdated, missing, or corrupted, this could lead to printer error. You must keep the printer driver up to date to avoid all sorts of errors.
- Bad Windows updates – Sometimes, Windows updates can various issues; if the issue has started after updating Windows, you need to consider uninstalling the latest update.
- CVE-2021-1678 – If the migration for CVE-2021-1678 is enabled, it might lead to this error. This will ensure your network is not exposed to PrintNightmare and MSHTML vulnerabilities.
- Faulty hardware – A defective network card or hardware component can cause this error. Check your hardware for any signs of damage or malfunctioning, and consider replacing it if necessary.
Now that we know about the causes, let’s move to the fixes to resolve the error asap.
How can I fix the 0x00000b11 error code on Windows 10 & 11?
Before engaging in advanced troubleshooting steps, you should consider performing the following checks:
- Restart your computer.
- Turn off your printer, unplug the power cables, wait for 30 seconds, and plug it in to restart.
1. Uninstall the last Windows update
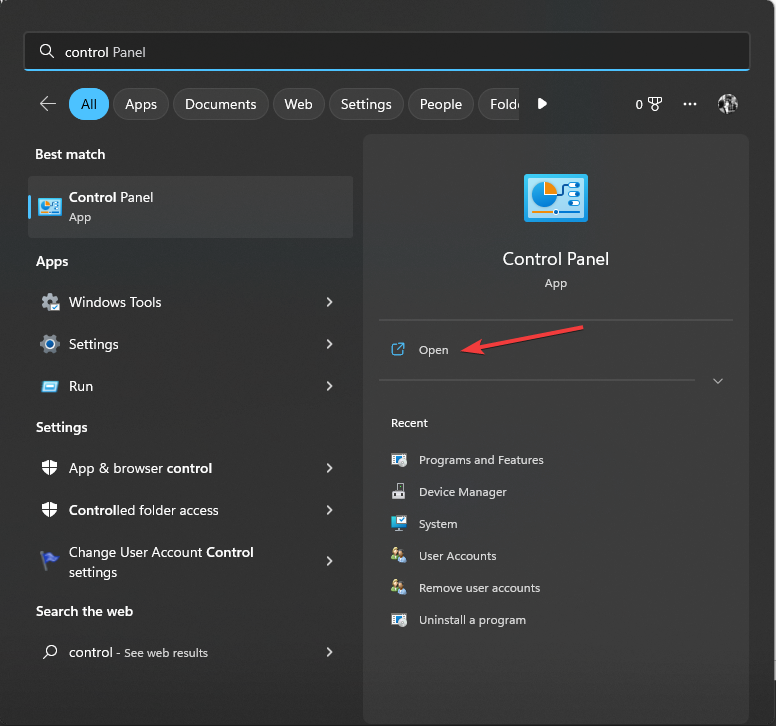
- Press Windows key, type control panel, and click Open.
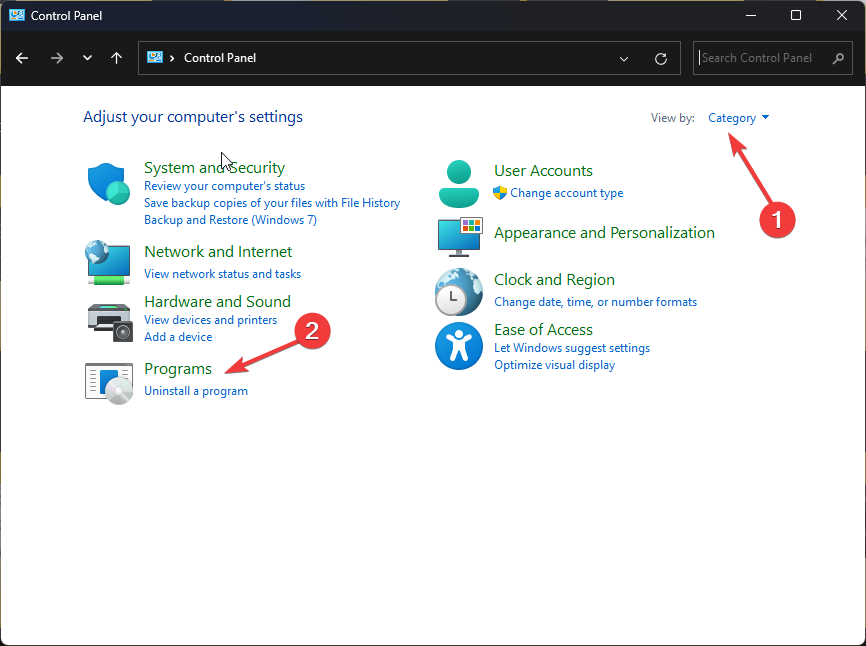
- Select View by as Category, and click Programs.
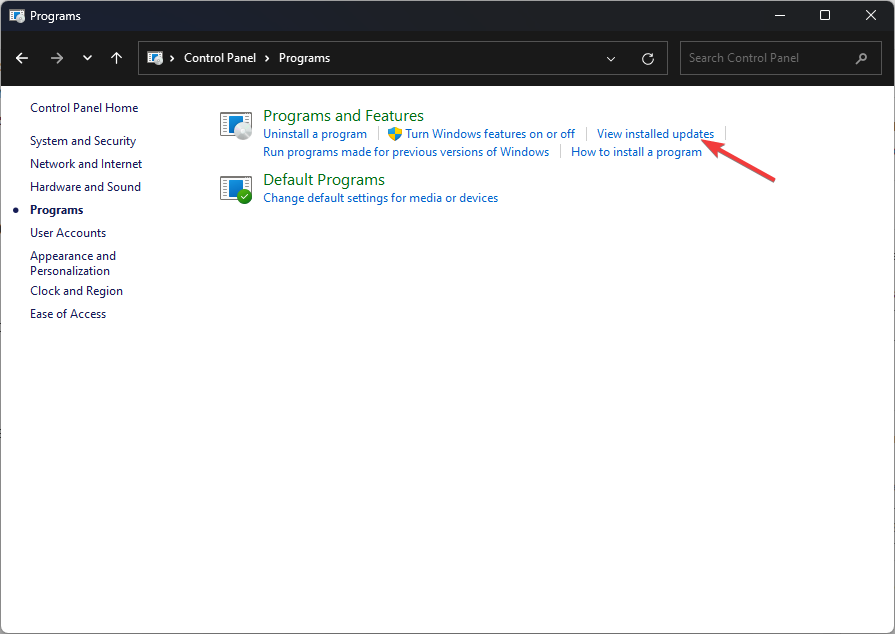
- Click View installed updates.
- Locate the update you want to uninstall and click Uninstall.
2. Install pending update
2.1 Windows 11
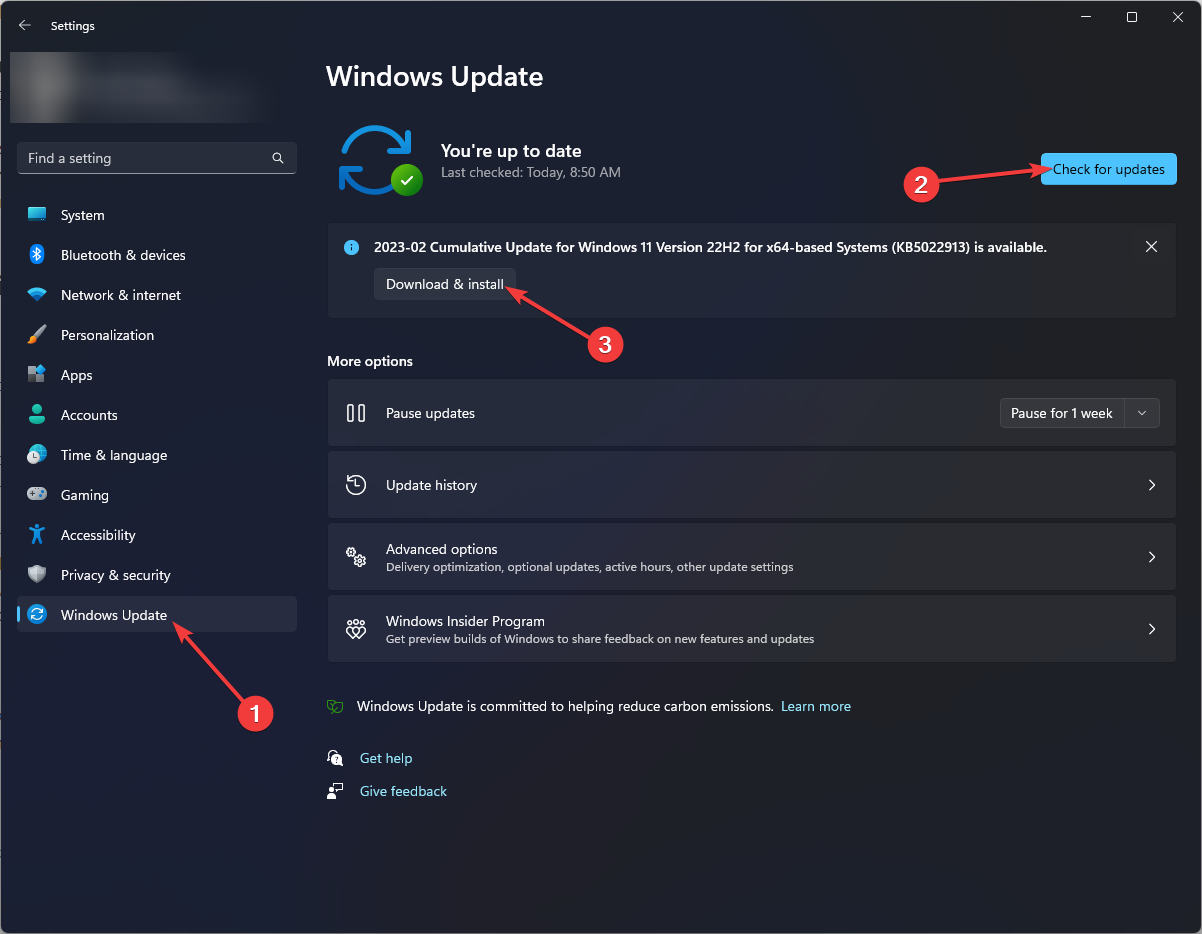
- Press Windows + I to open the Settings app.
- Go to Windows update, and click Check for updates.
- Download and Install the update if available. You will have to restart the computer. Please click Restart when prompted.
2.2 Windows 10
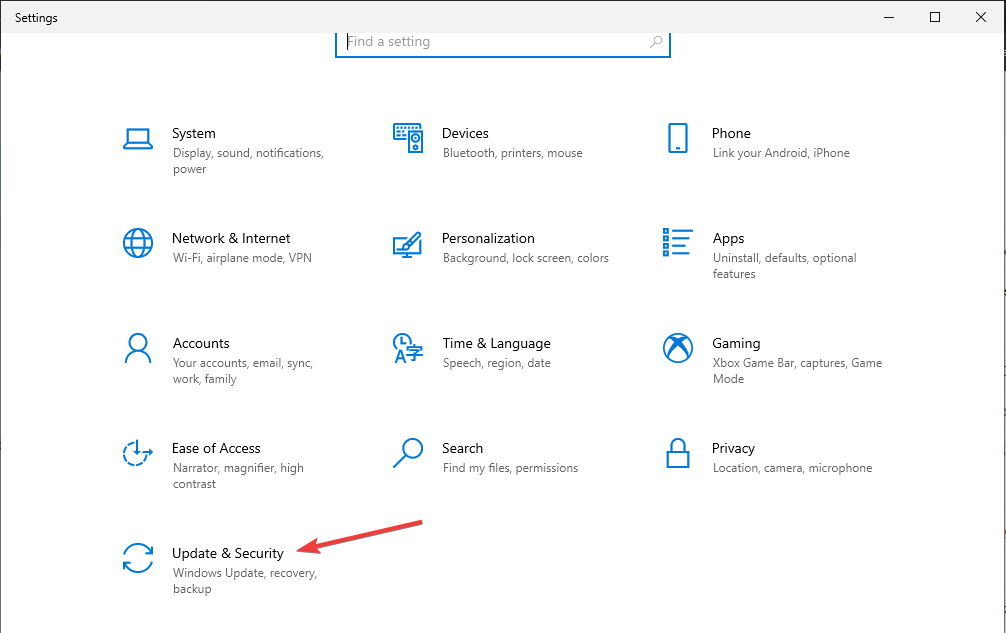
- Press Windows + I to open the Settings app.
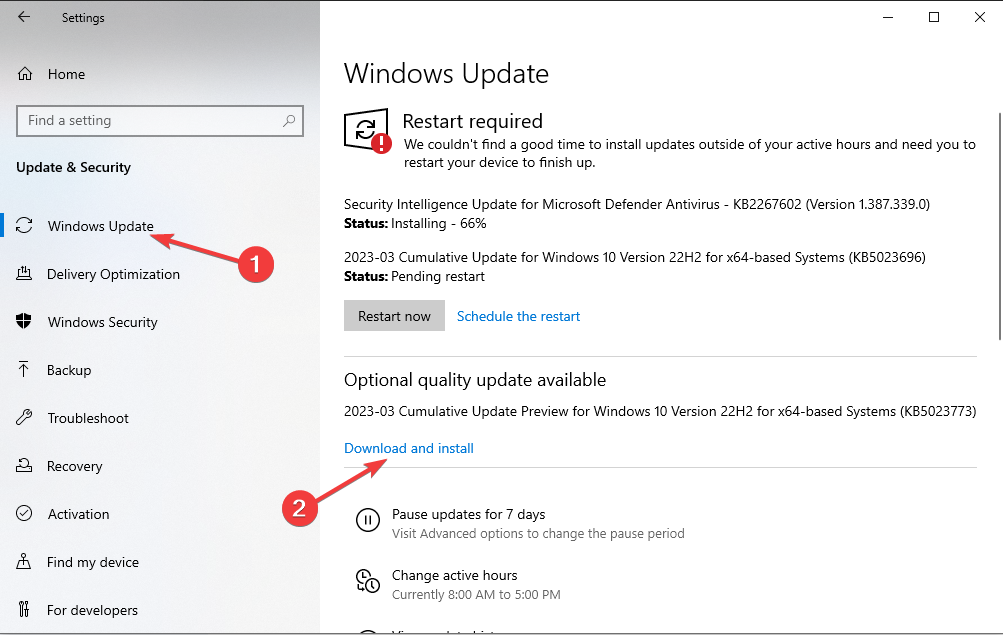
- Go to Update & security.
- Click Check for updates and then Download and Install to install the updates. Restart your computer when prompted.
3. Restart the Printer Spooler service
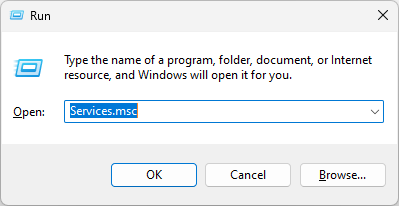
- Press Windows + R to open the Run window.
- Type services.msc and click OK to open Services.
- Locate and right-click the Printer Spooler service and select Restart.
- Now close the Services app.
4. Run printer troubleshooter
4.1 Windows 11
- Press Windows + I to open the Settings app.
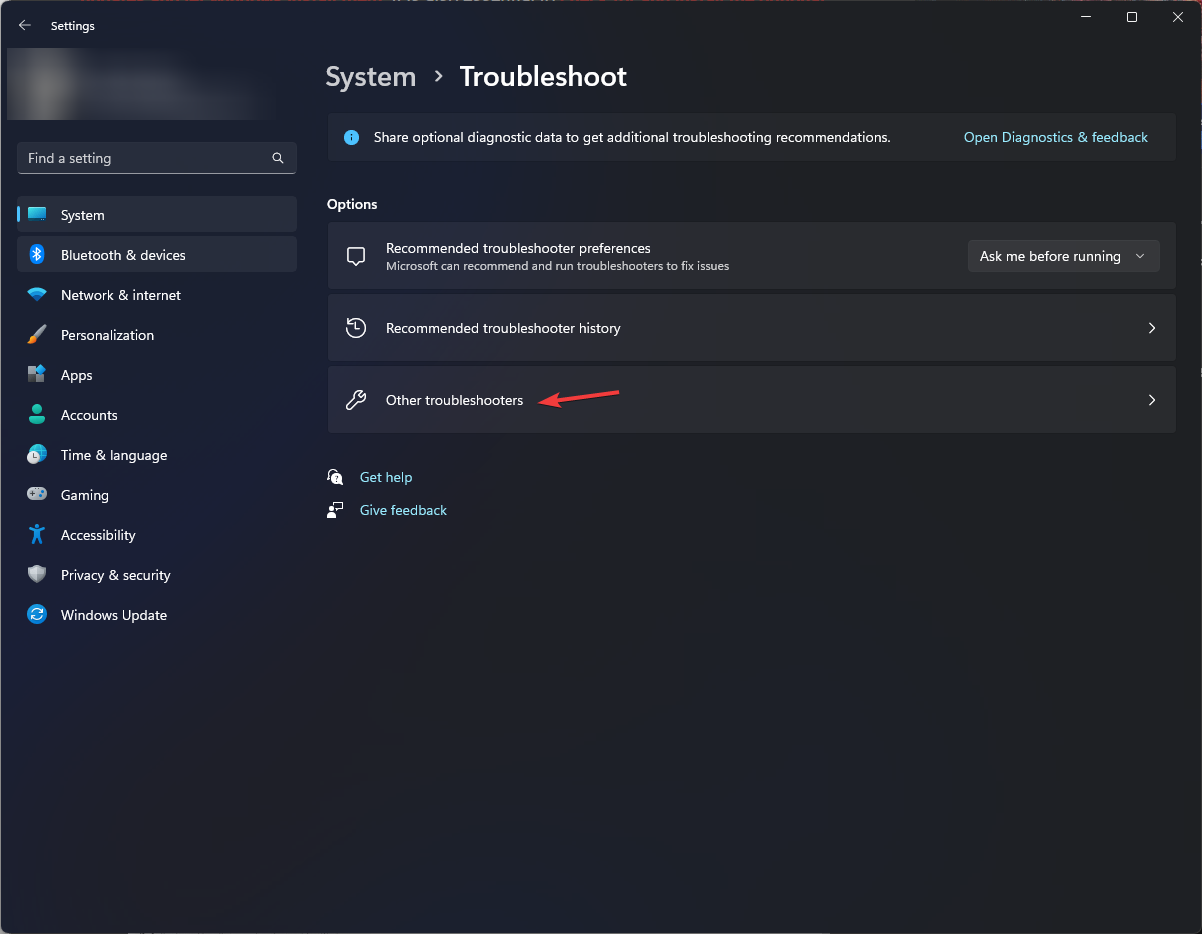
- Go to System, and click Troubleshoot.
- Click Other troubleshooters.
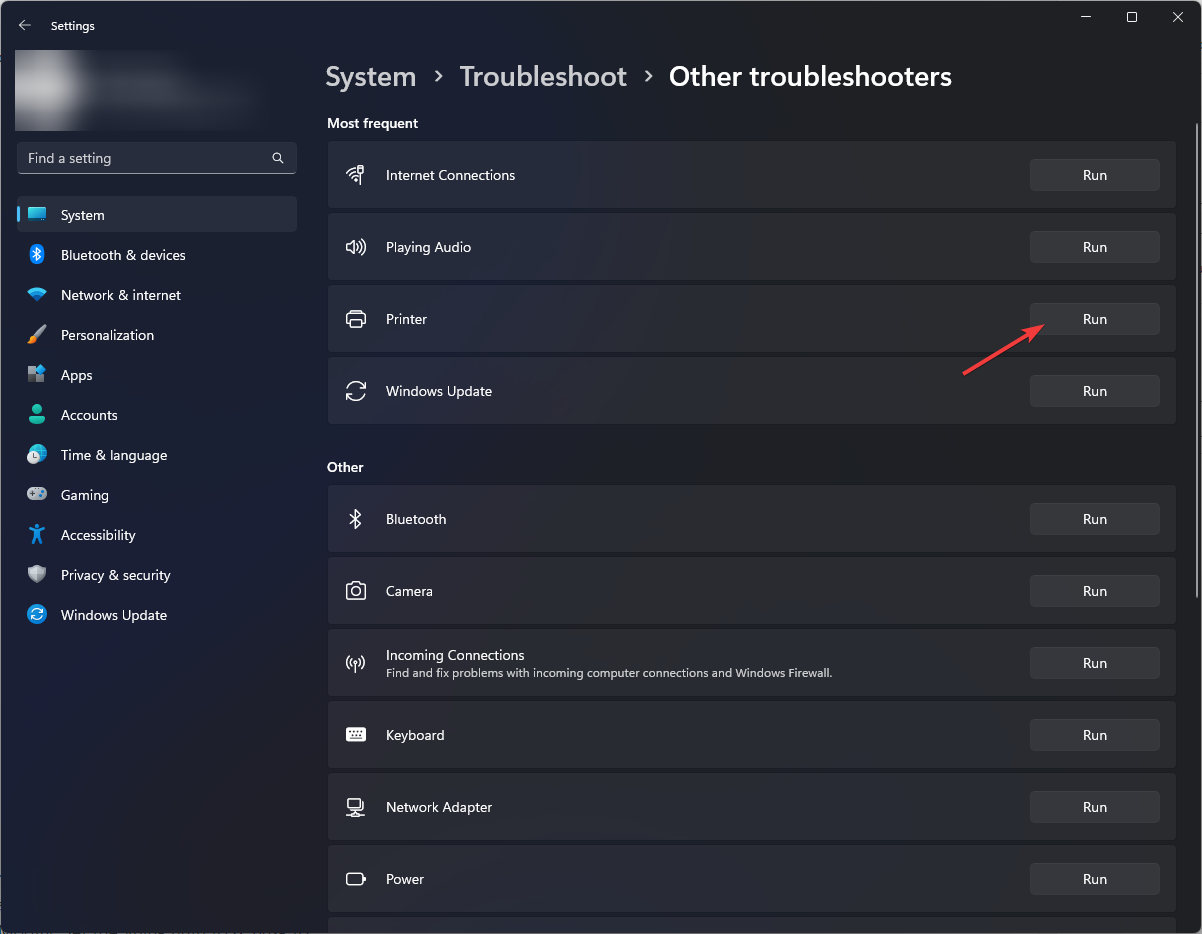
- Locate the Printer and click Run.
- Follow the on-screen instructions to complete the process.
4.2 Windows 10
- Press Windows + I to open the Settings app.
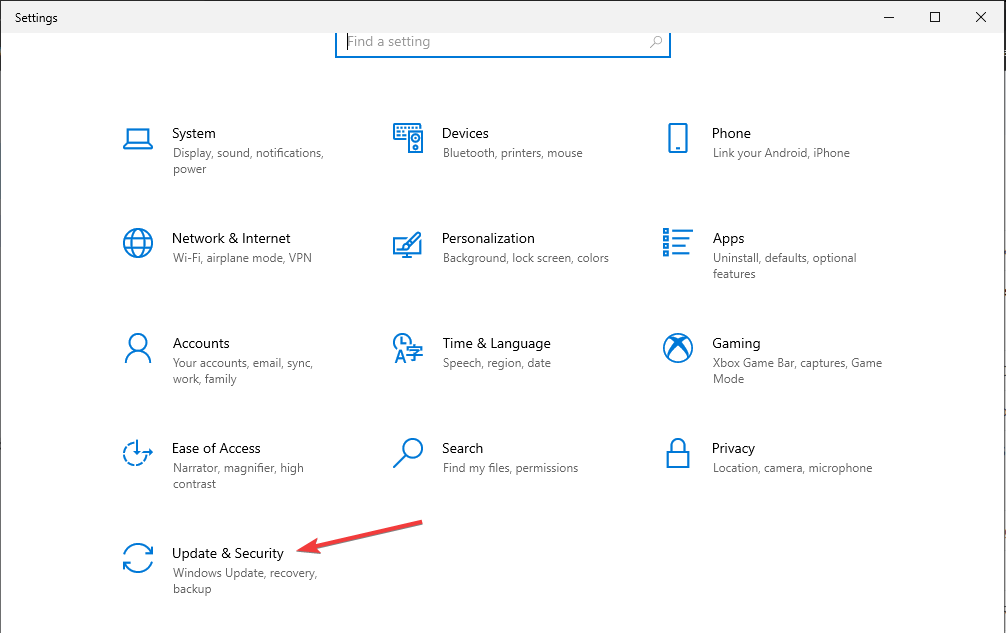
- Go to Update & security.
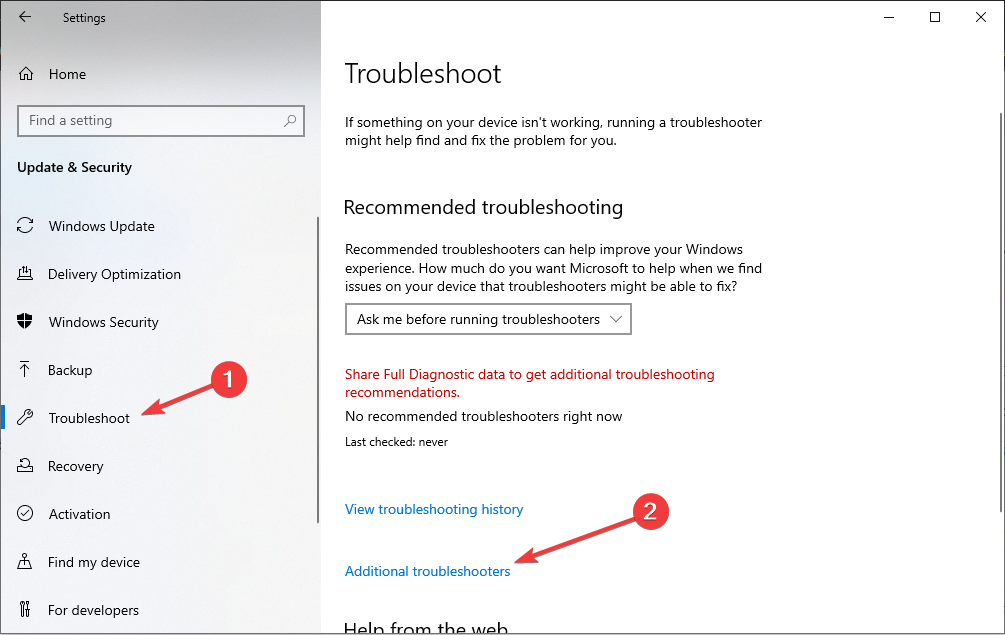
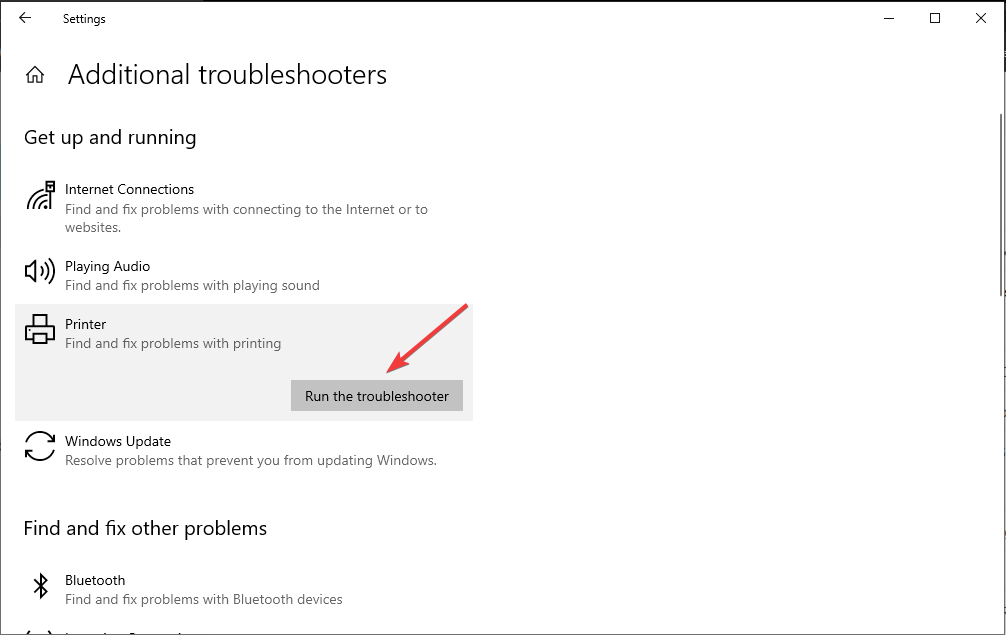
- Click Troubleshoot and select Additional troubleshooters.
- Locate the Printer and click Run the troubleshooter.
- Follow the on-screen instructions to complete the process.
5. Disable CVE-2021-1678 migration
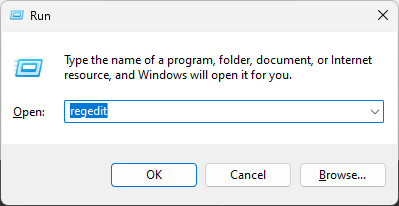
- Press Windows + R to open the Run dialog box.
- Type regedit and hit Enter to open Registry Editor.
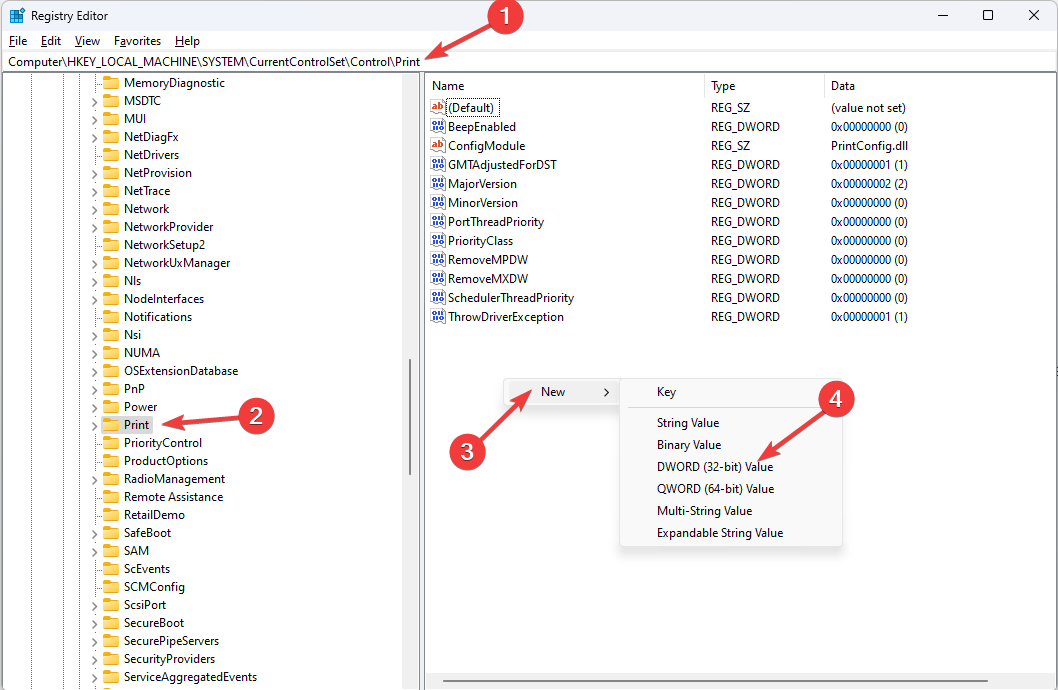
- Navigate to this path:
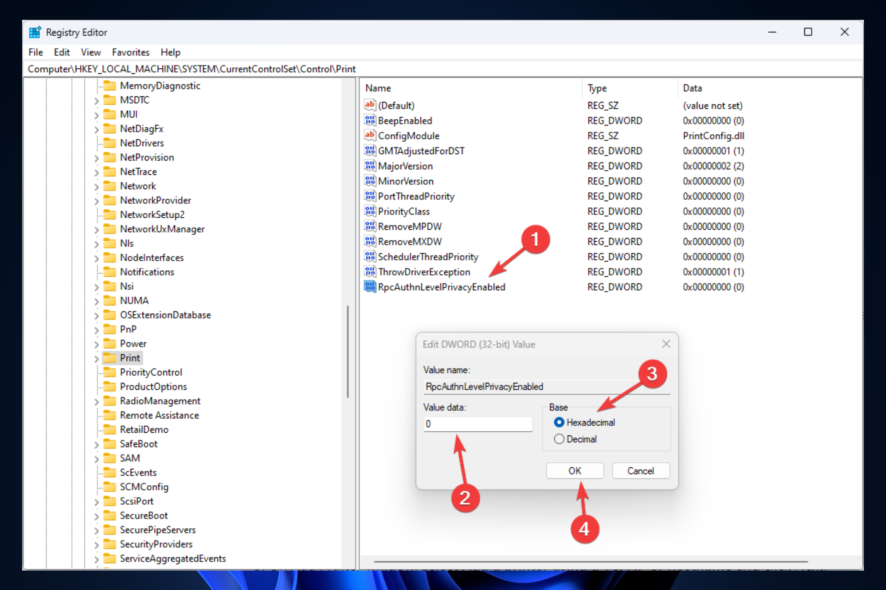
Computer\HKEY_LOCAL_MACHINE\System\CurrentControlSet\Control\Print - Right-click Print, click New, then click DWORD-32 bit Value.
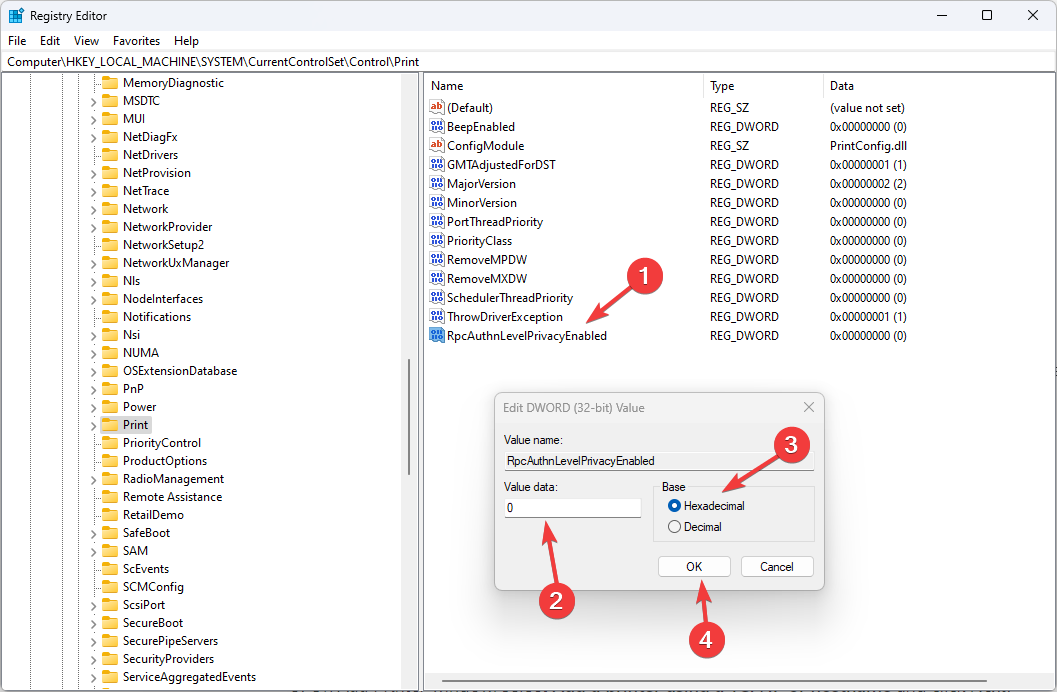
- Name it RpcAuthnLevelPrivacyEnabled, double-click it to Modify. Set the Value data to 0, Base to Hexadecimal and click OK.
- Restart your computer to let changes take effect.
6. Add local printer driver
6.1 Windows 11
- Press Windows + I to open the Settings app.
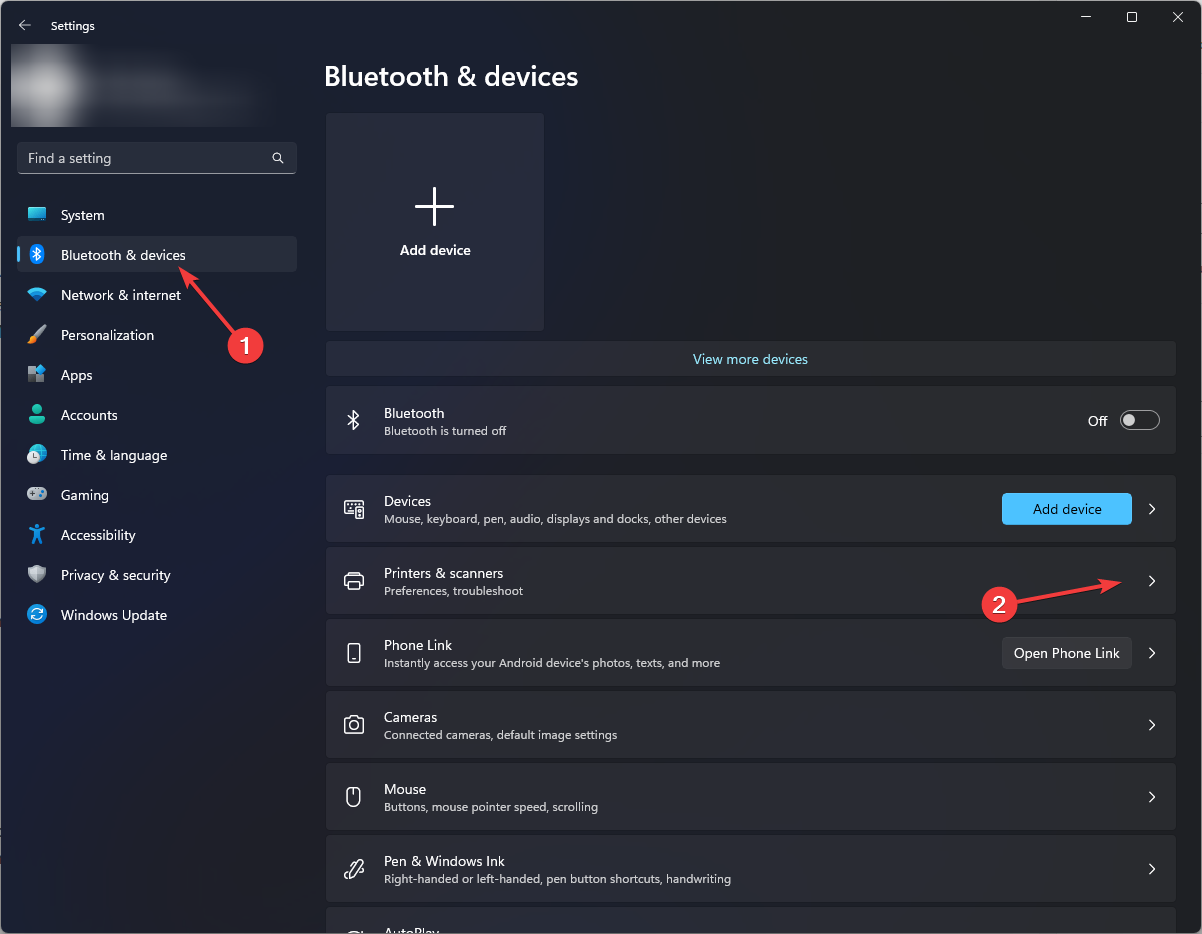
- Go to Bluetooth & devices and click Printers & Scanners.
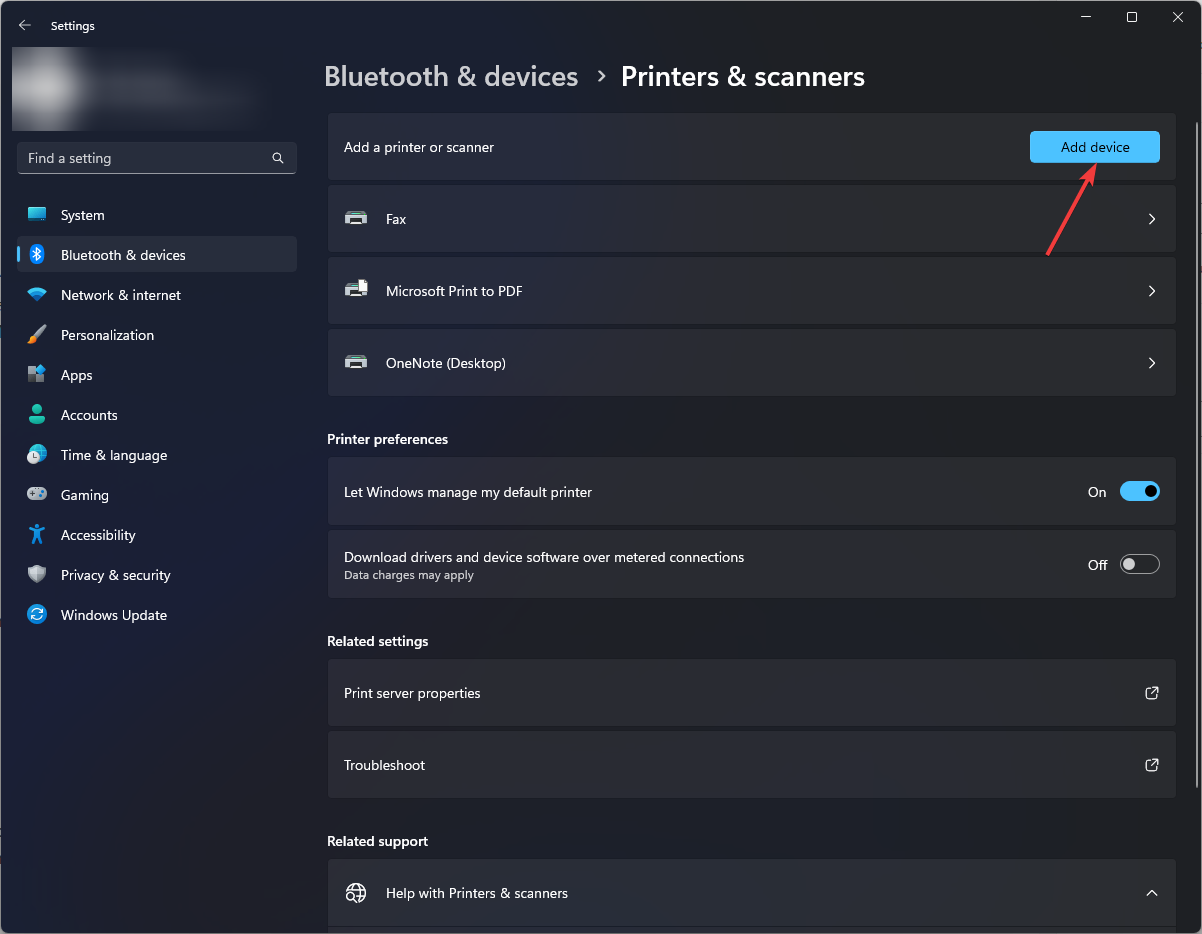
- Select Add device.
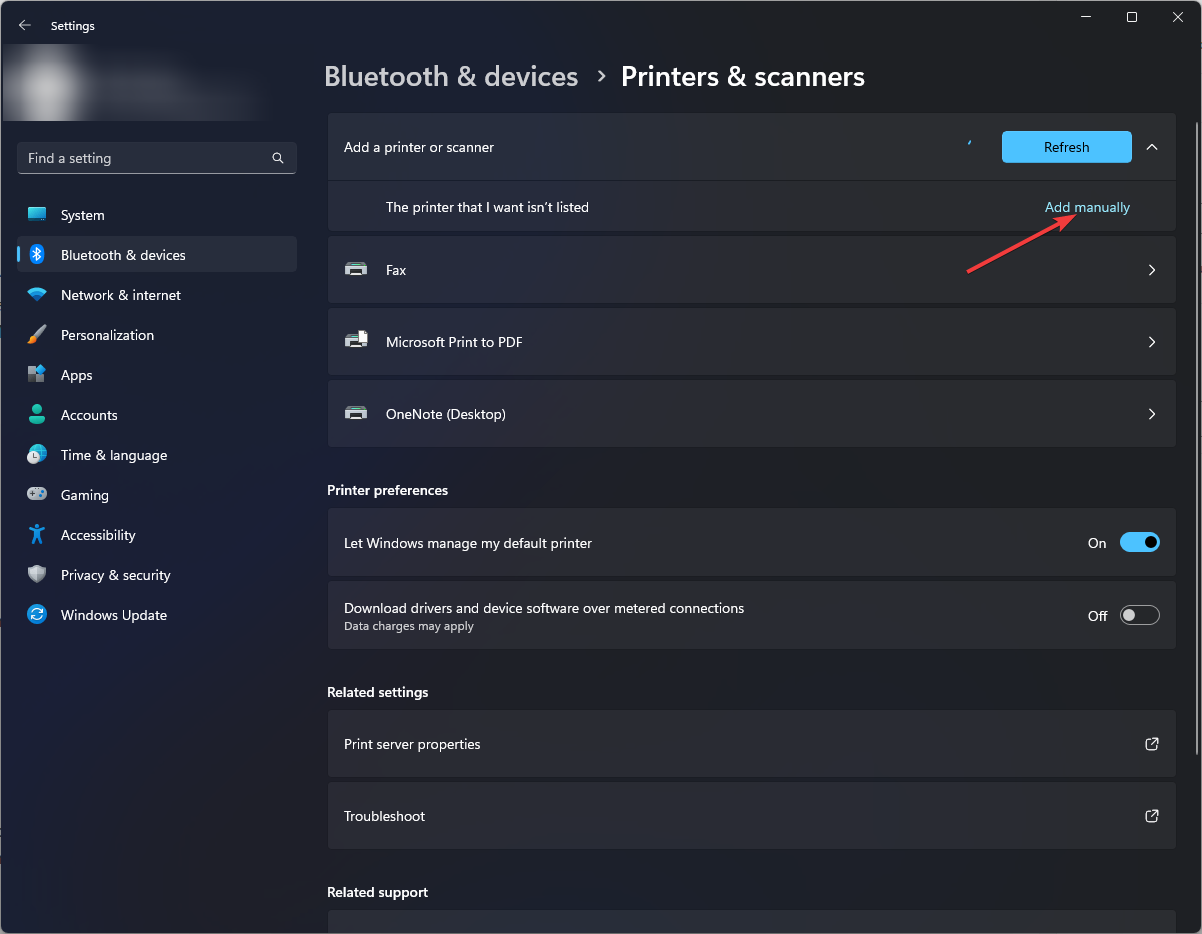
- Locate The printer that I want isn’t listed and click Add manually.
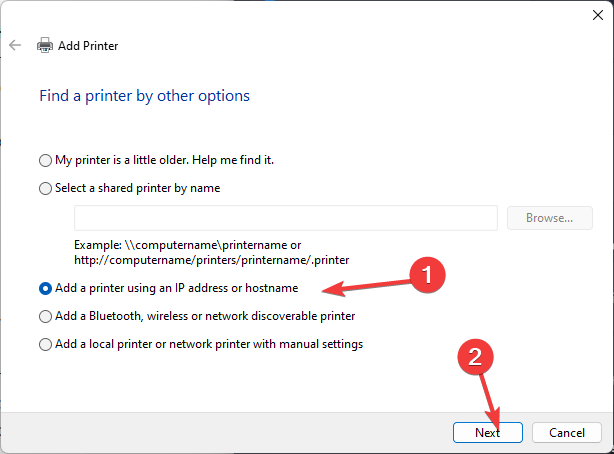
- On Add Printer window, select Add a printer using a TCP/IP or hostname and click Next.
- Follow the onscreen instructions to complete the process.
6.2 Windows 10
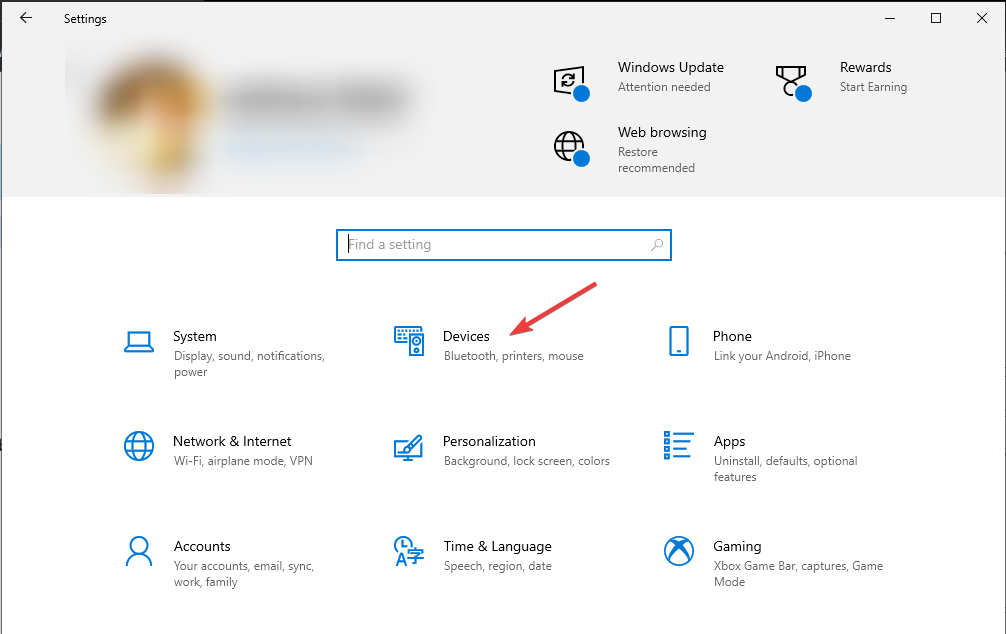
- Press Windows + I to open the Settings app.
- Go to Devices.
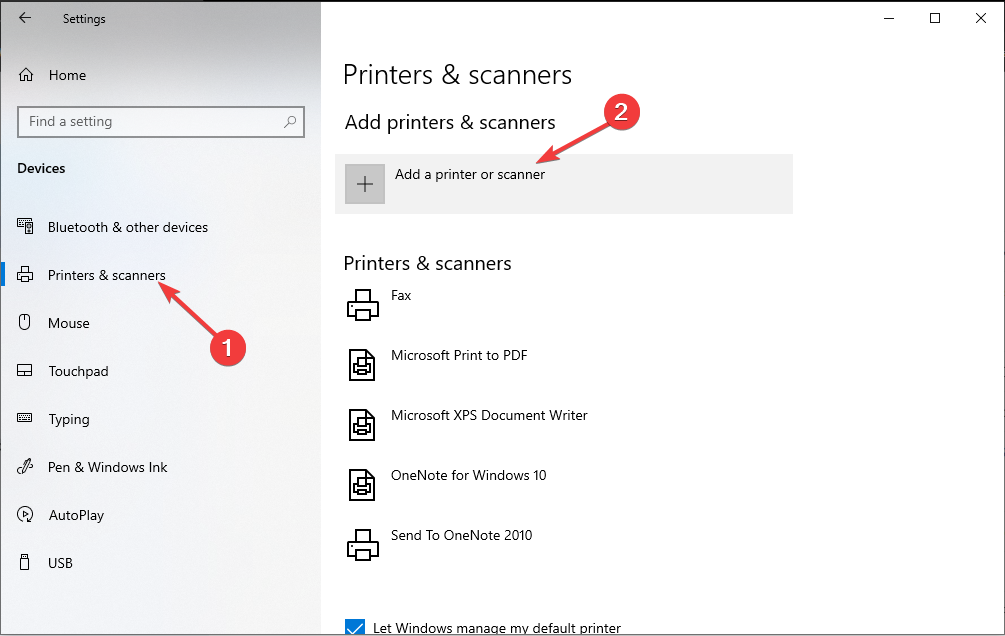
- Click Printers & Scanners from the left pane, and select Add a printer or scanner.
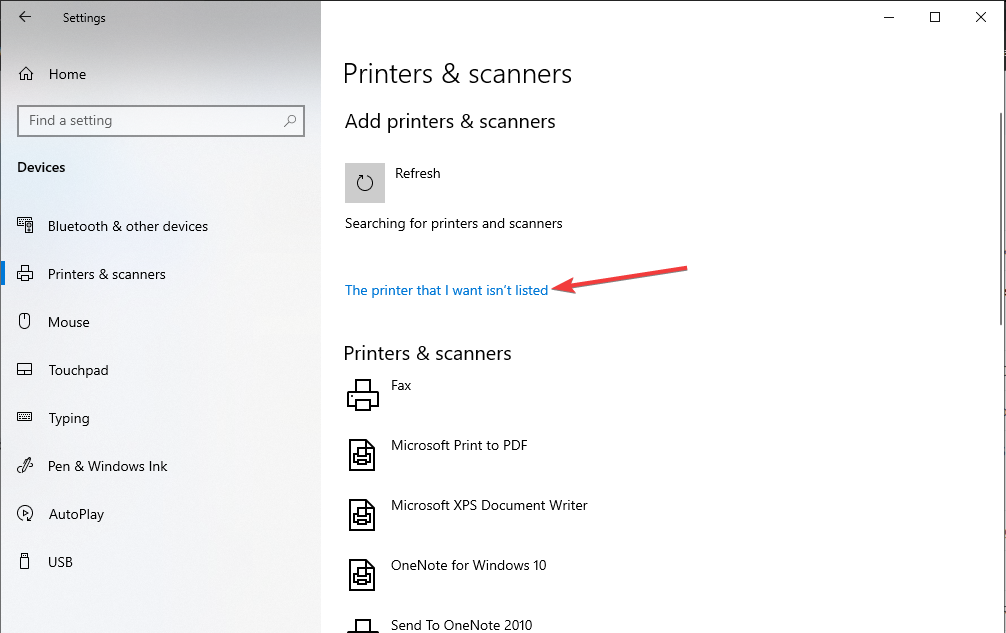
- Click The printer that I want isn’t listed option.
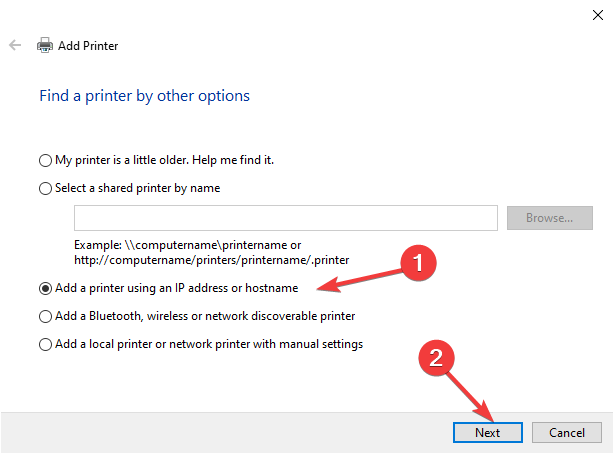
- On Add Printer window, select Add a printer using a TCP/IP or hostname and click Next.
- Follow the onscreen instructions to complete the process.
7. Reinstall printer driver
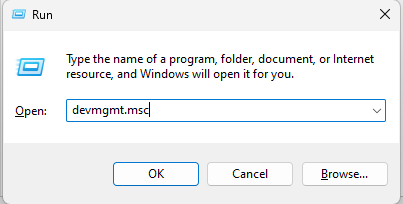
- Press Windows + R to open the Run console.
- Type devmgmt.msc and hit Enter to open Device Manager.
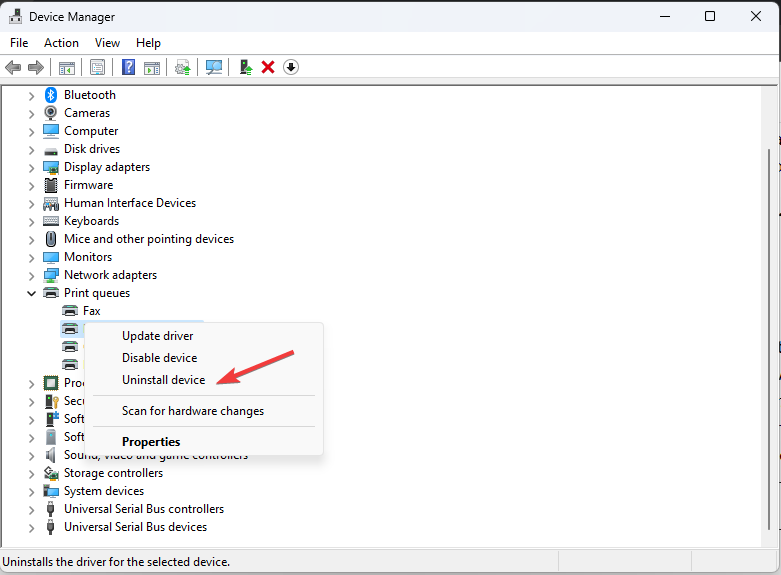
- Go to Print queues and expand it. Right-click the printer driver and select Uninstall driver.
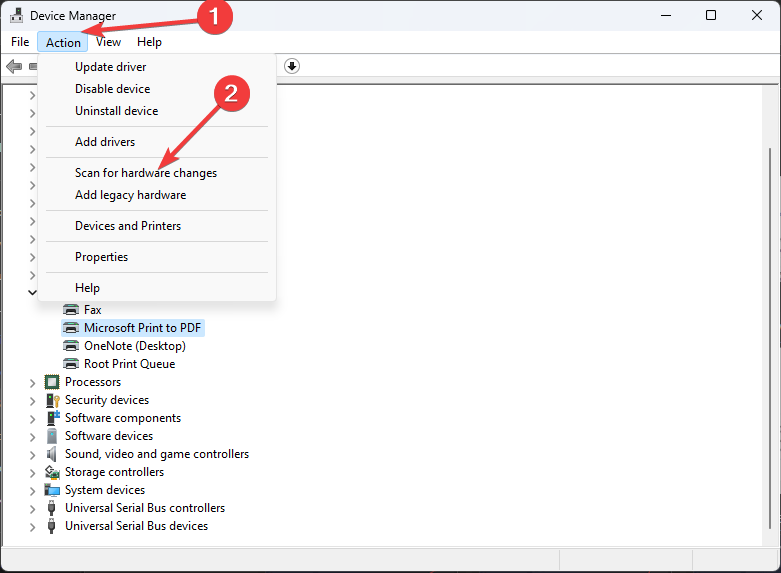
- Click Action and select Scan hardware for changes.
Windows will reinstall the appropriate driver. Once done, restart your computer to confirm the changes.
We also recommend reading our article on Printer Error 0x000003e3 because the problem is similar.
So, these are some of the methods you can follow to fix the Error Operation failed with error 0x00000b11. If you have questions or suggestions, please let us know






User forum
0 messages