0x80070001: Windows Can't Install Required Files [Fix]
A broken Windows Update mostly leads to the 0x8007000 error
![]() 4 min. read
4 min. read
![]() Updated on
Updated on
Share this article

Improve this guide
Read our disclosure page to find out how can you help Windows Report sustain the editorial team Read more
Key notes
- Windows cannot install required files is a common error that usually shows up after a Windows update, Windows download, post backup and restore, or during an installation.
- While the issue could arise due to failed or improper installation of Windows software, etc., it’s more often due to a malfunctioning Windows Update service.
- However, an unstable internet connection, a virus or malware, or corrupted system files, could also trigger the 0x8007000 error.
Sometimes, you may encounter an error message, Windows cannot install required files with an error code – 0x80070001.
This error may often arise after a Windows Update, or while performing a Windows backup and restore.
What causes error code 0x80070001?
Some of the reasons why you may come across the 0x80070001 error code on your Windows 11 are as below:
- After a Windows update – It can be initiated by a problem with the Windows update components or malfunction in your system.
- A Windows software not installed correctly or failed to install – When a Windows software is incorrectly installed or it did not install at all, you may see the 0x80070001 error.
- Corrupted system files – It’s when the Windows system files are missing or corrupted, you can bump into this error.
- Damaged programs and apps – When the programs and apps on the system are damaged, it can trigger the 0x80070001 error code.
- Corrupted USB or DVD drive – Sometimes, you may see the error message if the installation media is damaged.
What does error code 0x80070001 mean?
If you see the age, Windows cannot install required files message with the error code – 0x80070001, which means, it’s an invalid function.
According to Microsoft, you often encounter this issue when you try to back up a specific library or when you accept the default settings in Windows Backup and Restore.
How do I fix error 0x80070001?
Before you try the primary troubleshooting methods below, here are a few checks you may want to perform:
- Disconnect any external devices.
- Create a new bootable USB drive for Windows 11.
- Run an antivirus scan to check for malware or virus infection on your PC.
- Check your internet connection.
If none of the above methods helps fix the issue, you can try the below workarounds to fix the 0x80070001 error.
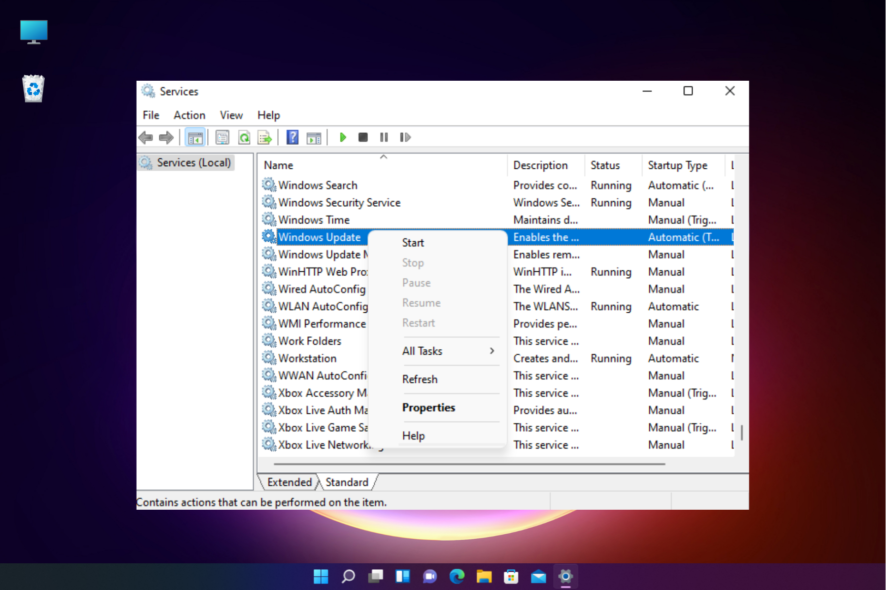
1. Clear the Windows Update cache
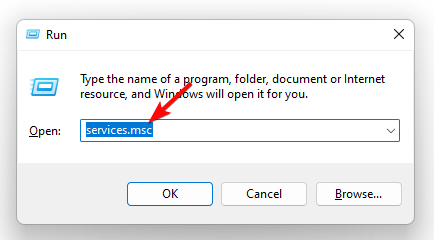
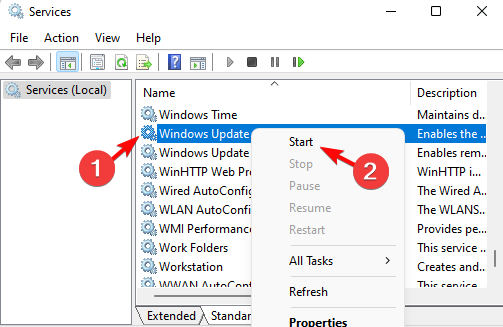
- Press the Win + R shortcut keys, type services.msc in the search bar, and press Ctrl + Shift + Enter keys simultaneously to launch the elevated Services window.

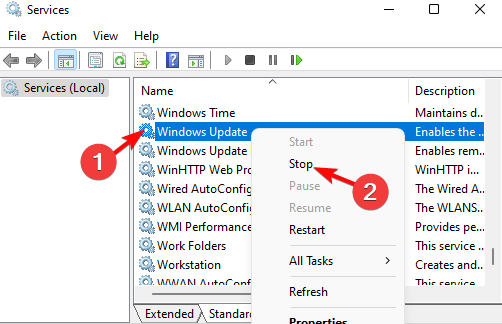
- On the right, under the Names column, locate Windows Update. Right-click on it, then click Stop.

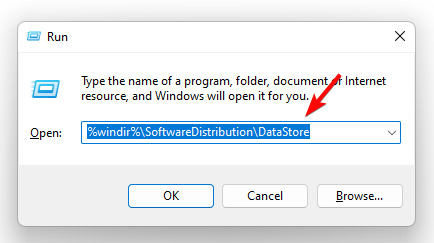
- Again, open the Run dialog by pressing the Win + R keys together.
- Type this command and hit Enter:
%windir%\SoftwareDistribution\DataStore
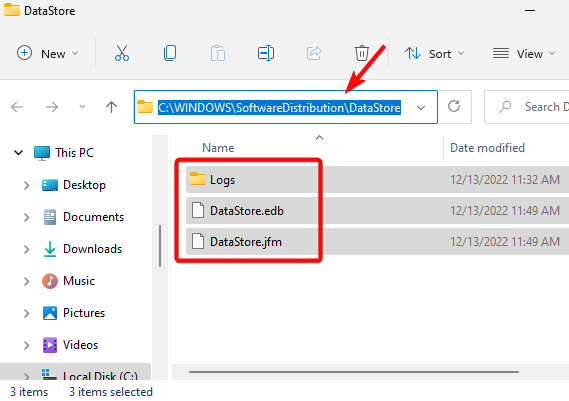
- This will open Windows Update’s download folder. Select all the contents in this folder and hit Delete.

- Now, press the Win + R keys again to launch the Run console, type services.msc, and hit Enter to open the Service manager window.
- On the right, under the list of services, look for Windows Update, right-click on it and select Start.

You have successfully cleared the Windows update cache, and you should not see the 0x80070001 error code again.
2. Reset Winsock Library
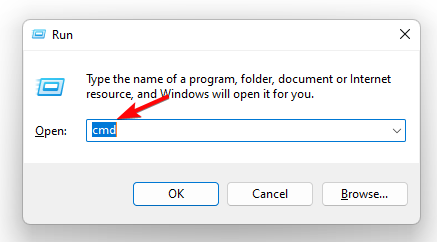
- To open the Run dialog, press the Win + R keys together.
- Type cmd in the search bar, and press the Ctrl + Shift + Enter keys simultaneously to launch the elevated Command Prompt.

- Next, run the below command in the Command Prompt (Admin) and hit Enter:
netsh winsock

Once the command has been successfully executed, restart your PC and now check the status of your connection. The Windows Update service should be running fine without any errors.
3. Re-install the TCP/IP Stack Protocol
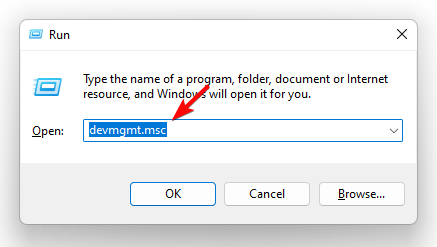
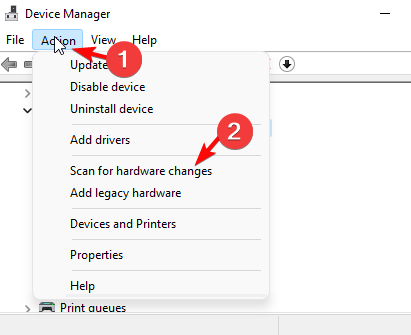
- Press the Win + R shortcut keys to open the Run dialog, type Device Manager, and hit Enter to open the Device Manager window.

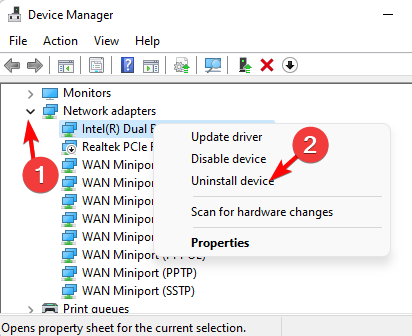
- Next, expand the Network adapters section, right-click on your adapter, and select Uninstall device.
- Press Uninstall again in the confirmation prompt to continue.

- Now, go to the Action tab in the toolbar, and select Scan for hardware changes. Windows will now scan for the latest version of the network adapter, and re-install the device automatically.

Now, restart your PC and check if you still encounter the message, Windows cannot install required files with the error code – 0x80070001.
You can also repair and restore corrupted system files on your PC using the methods shown in our detailed guide, which is also applicable to Windows 11.
Alternatively, you can also disable the hibernation mode in Windows 11 to increase storage space.
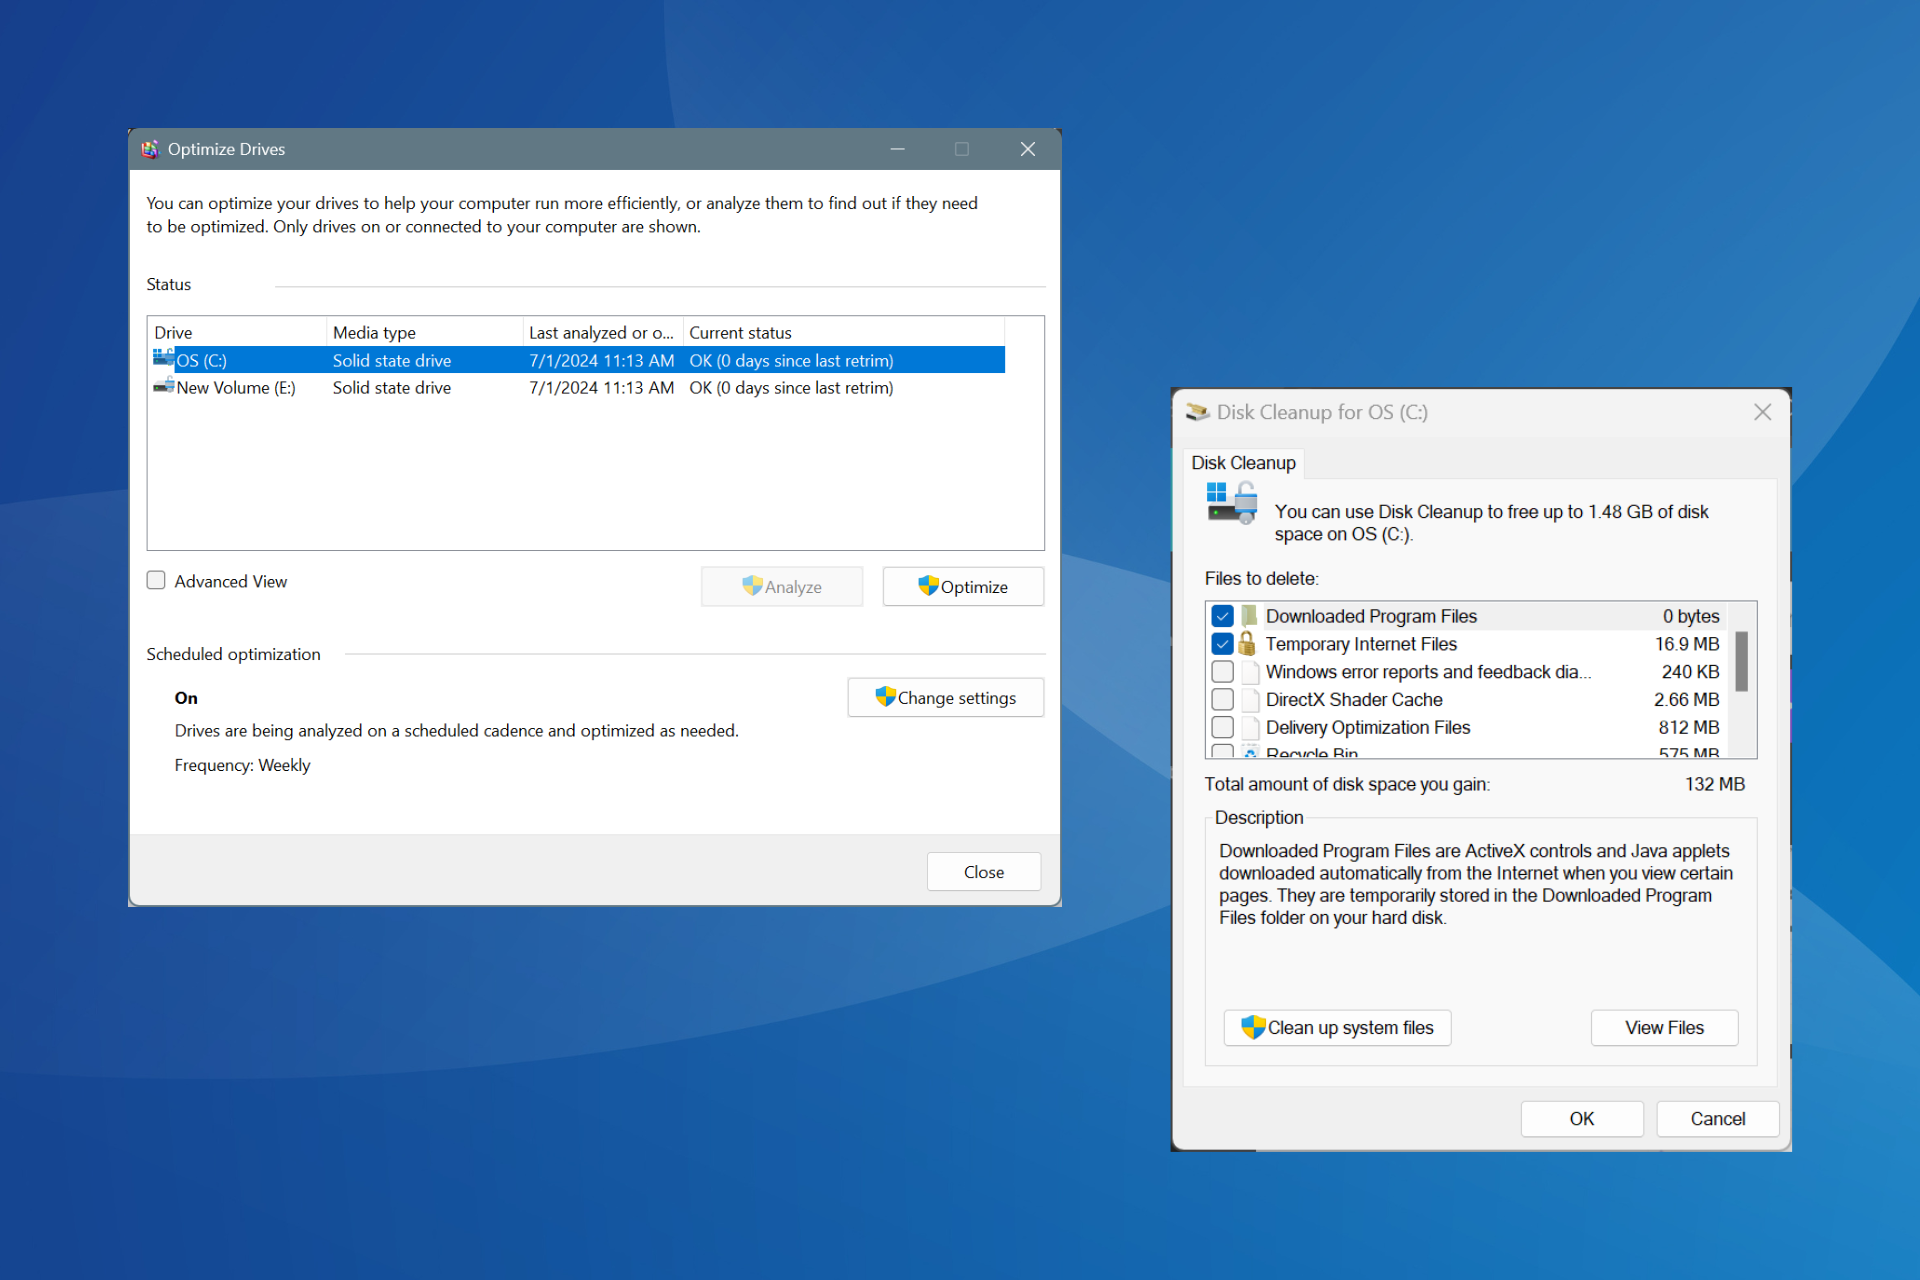
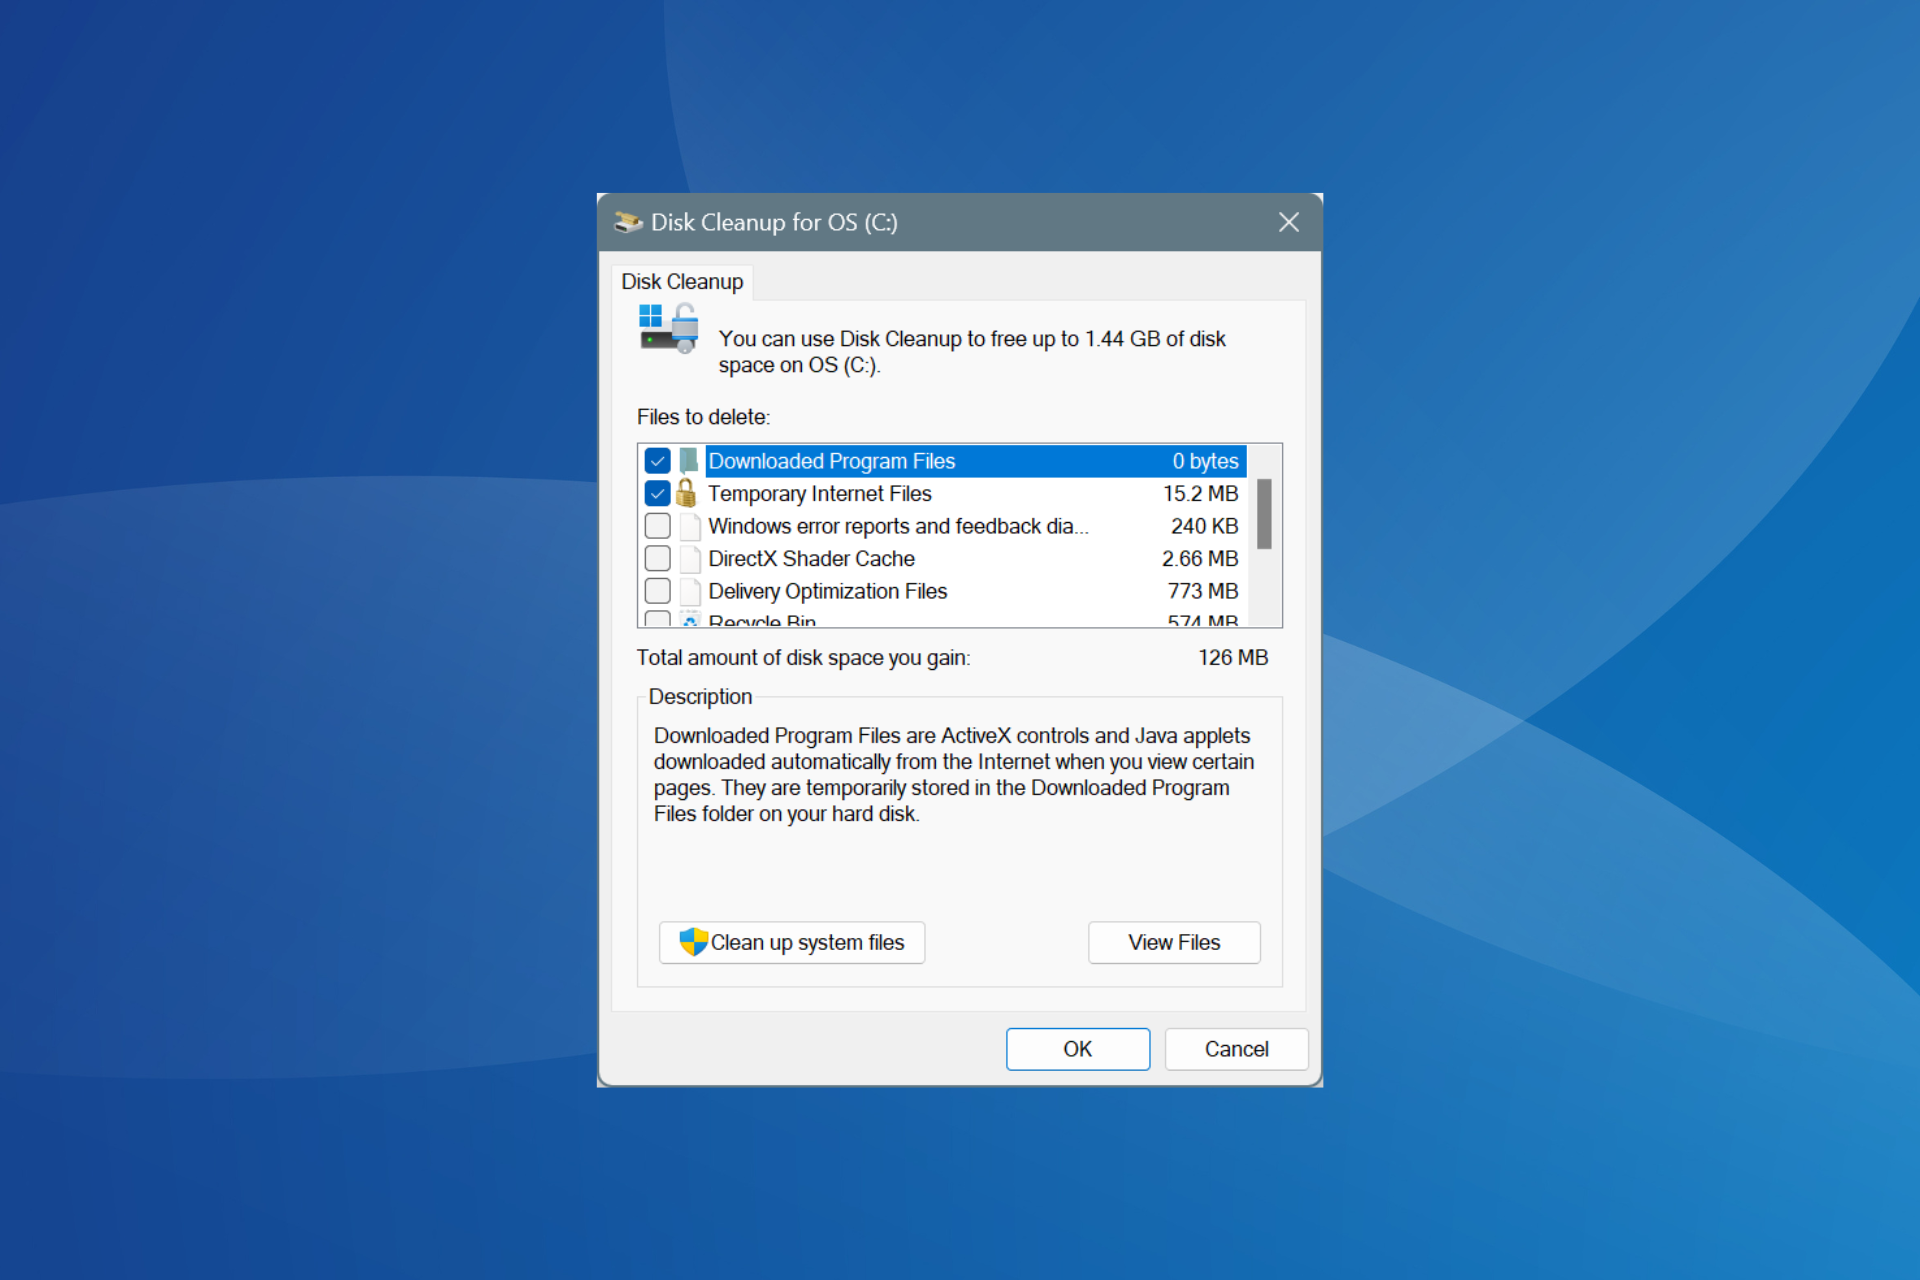
You may also run the disk clean-up tool on Windows 11 to free up disk space and fix the 0x80070001 error.
If you have any other queries related to Windows 11 installation, do leave a message in the comments box below.