Error 0x800705aa (Windows Update): Solved
Adjusting your time and date may be the fastest solution
7 min. read
Updated on
Read our disclosure page to find out how can you help Windows Report sustain the editorial team. Read more
Key notes
- Error 0x800705aa can arise because of corrupted Windows Update components and system files, limited hard drive space, and even incorrect time settings.
- You might need to repair or reset Windows Update components when Windows can’t install updates.
- Correcting time and date settings might fix the error 0x800705aa in no time.
- Both Windows 11 and 10 include built-in tools and troubleshooters that can feasibly solve this issue for good.
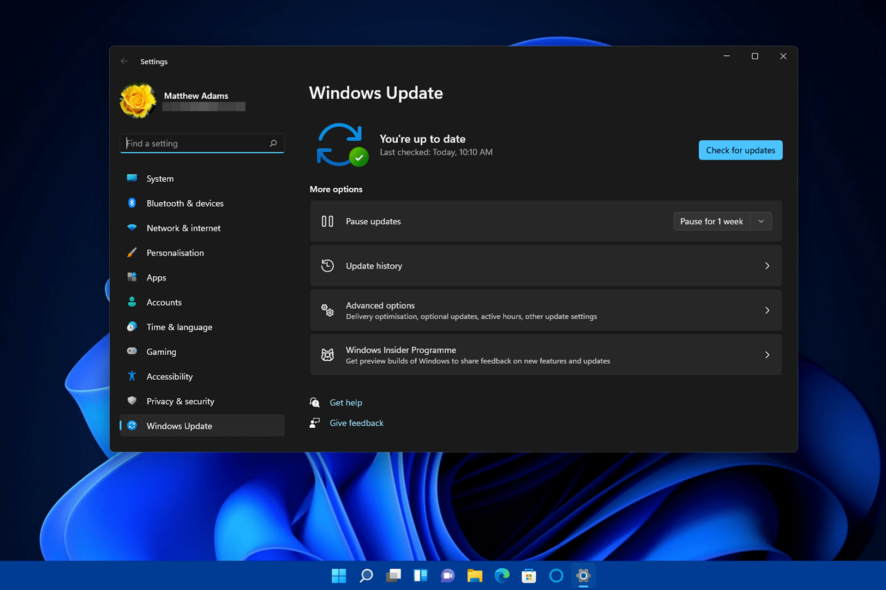
Error 0x800705aa is another of those not entirely uncommon Windows update issues. However, numerous users have posted on Microsoft’s forum about the 0x800705aa error. That issue can arise in both Windows 11 and Windows 10 operating systems.
The 0x800705aa error can arise for cumulative (patch) and build (feature) Windows updates. When this happens, users see an install error message with 0x800705aa codes in Settings’ Windows Update tab like the one directly below:
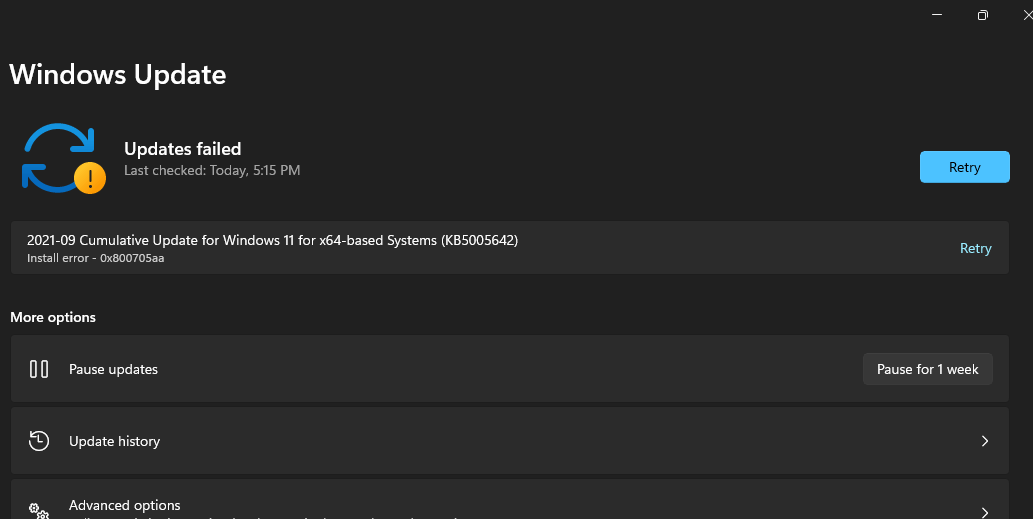
Consequently, the Windows Update service doesn’t download and install updates because of error 0x800705aa.
However, you can feasibly resolve it with the potential fixes below but not before understanding more about the actual causes.
What are the causes for the install error – 0x800705aa?
This error’s causes are similar to numerous other Windows update issues. These are some of the more likely aspects to keep in mind:
- Incorrect time and date settings: Windows update issues can arise because time and date settings are configured right on users’ PCs
- Corrupted system files: Error 0x800705aa can be due to corrupted system files
- Broken Windows Update component: This issue might arise because of corrupted Windows Update components
- Conflicting programs: Software conflicts are another potential factor behind the 0x800705aa error
- Limited hard drive space: This issue can also occur because your PC’s hard drive has little storage space left
As there are various potential reasons behind the 0x800705aa error, there are numerous possible fixes for it. So, to solve it right away, try applying these potential resolutions.
How can I fix the error 0x800705aa?
1. Correct time & date settings in Windows
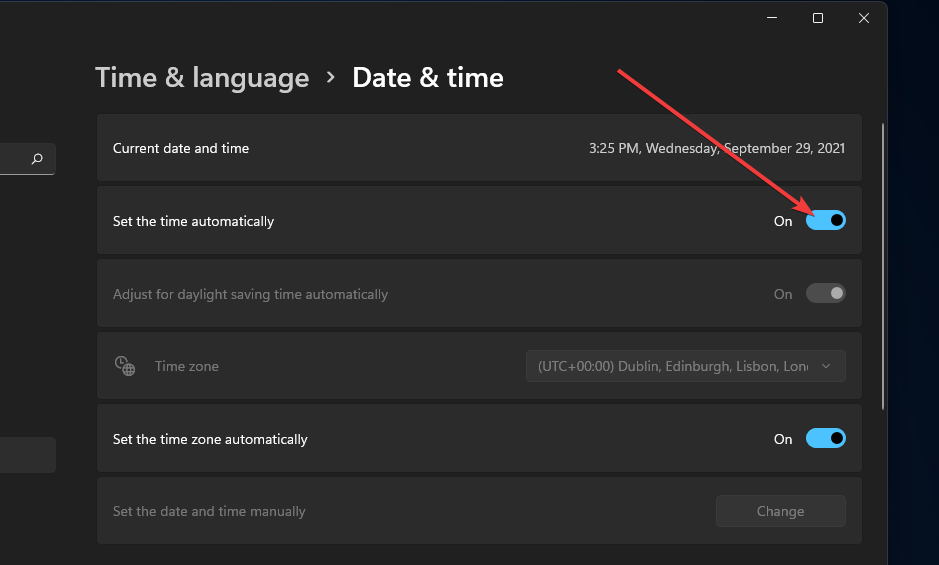
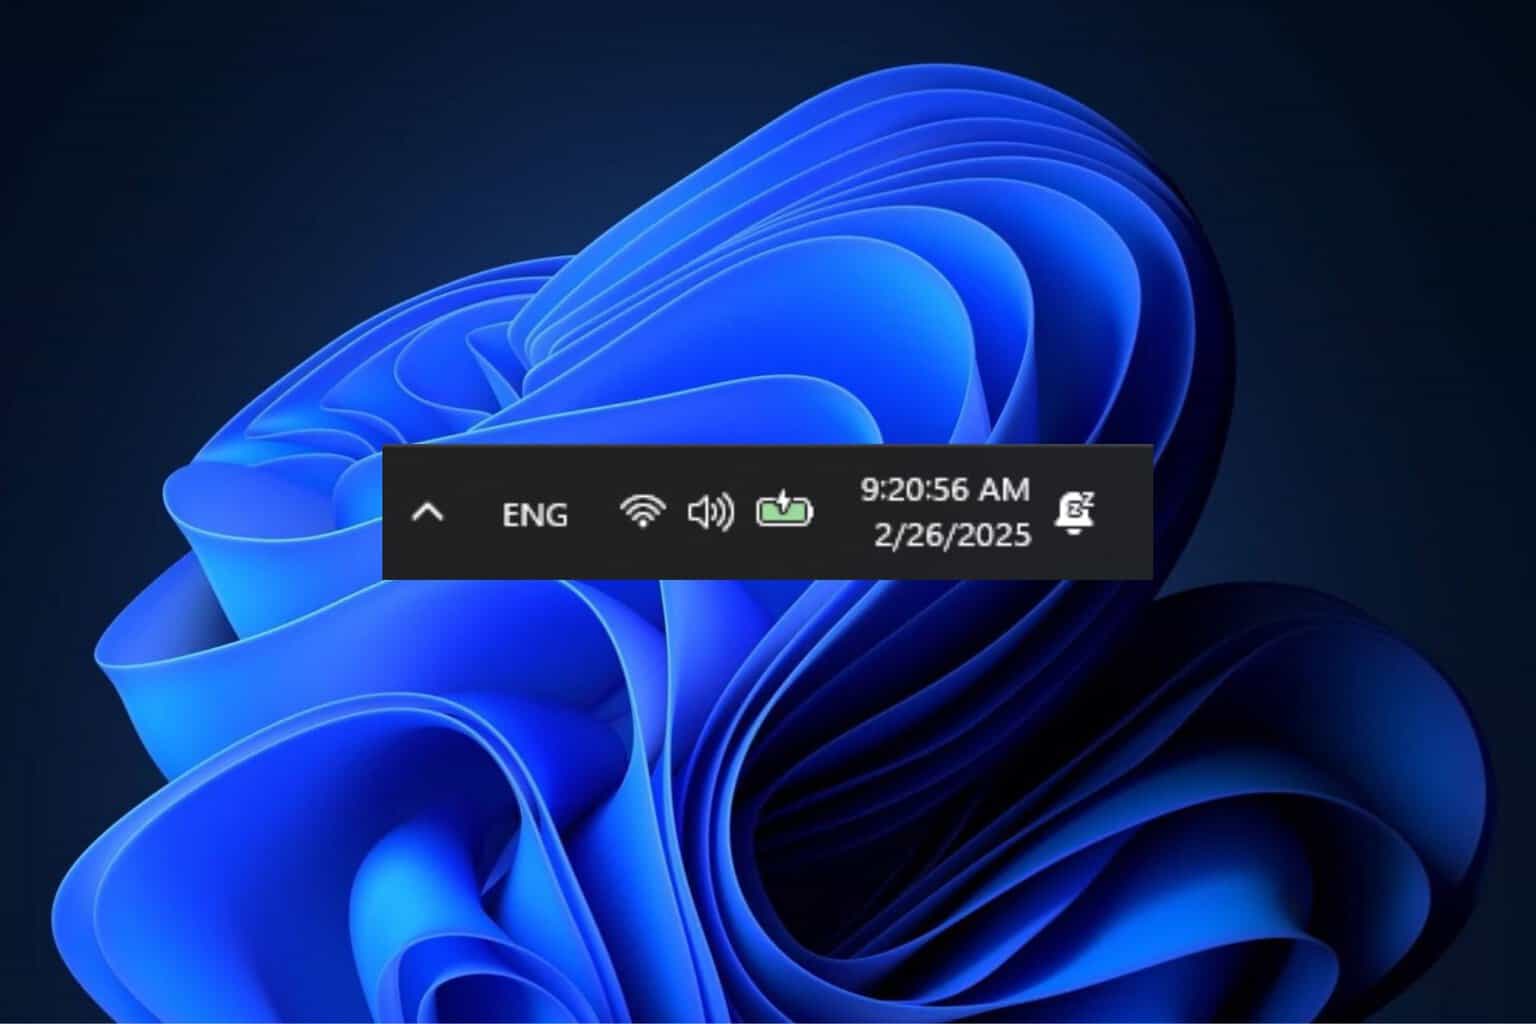
- Right-click the clock on the Taskbar and select Adjust date and time.
- Toggle on the Set the time automatically option if it’s off.
- Click Set the time zone automatically to turn on that option.
 NOTE
NOTE
2. Run the Windows Update troubleshooter
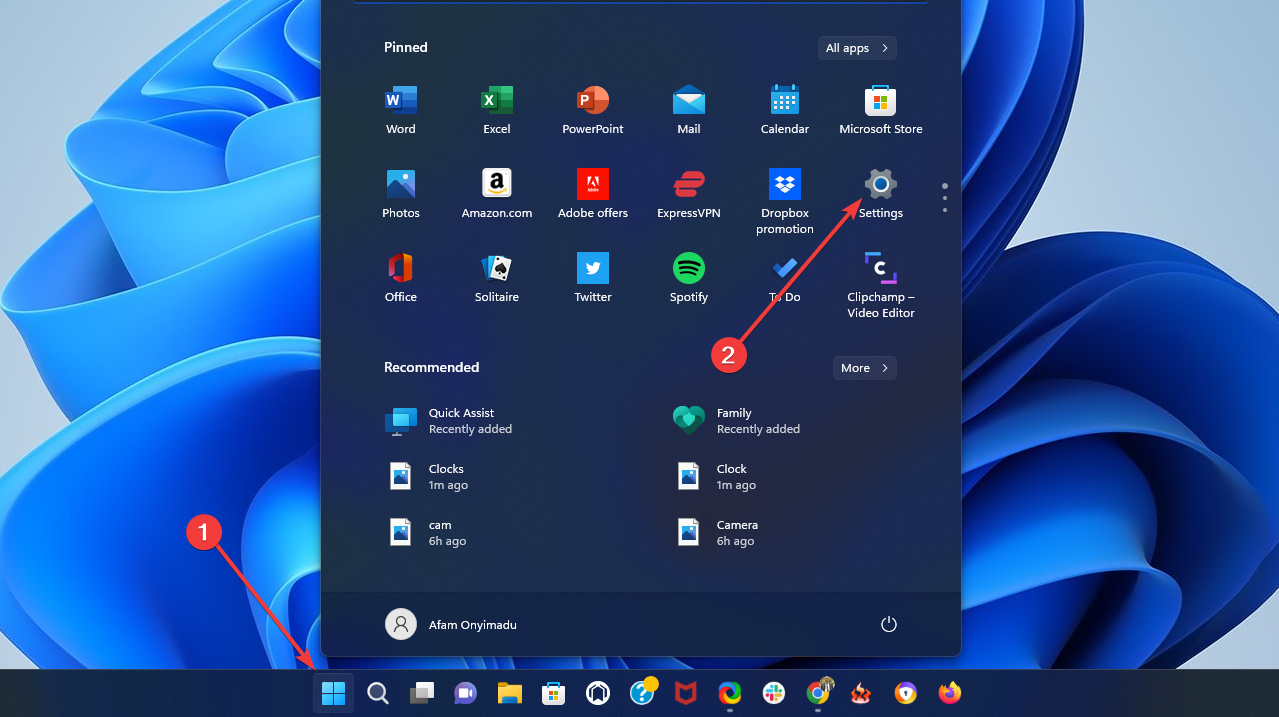
- First, press the Start button on your Taskbar and select Settings.
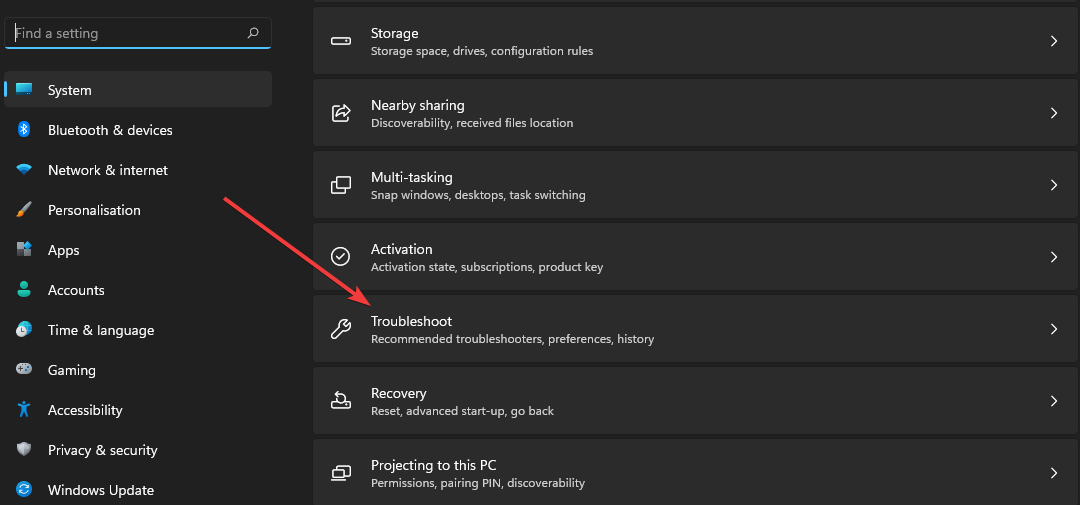
- Select Troubleshoot on the System tab.
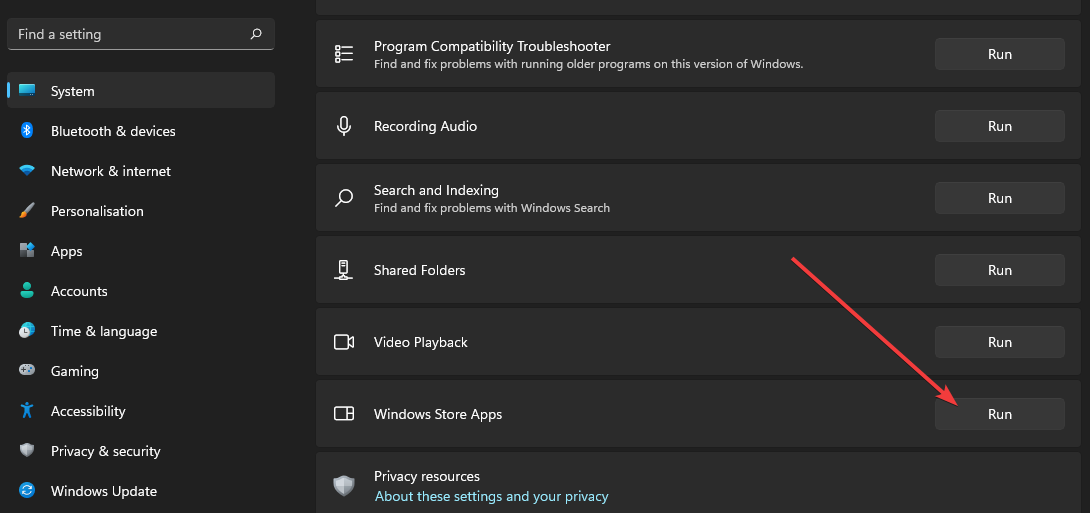
- Click Other trouble-shooters in Settings.
- Press the Run button for the Windows Store Apps troubleshooter listed there.
- After that, wait for the troubleshooter to detect why the Windows 11 Update installation has failed. Then, if it makes any suggestions, apply the proposed resolutions.
3. Run a system file scan
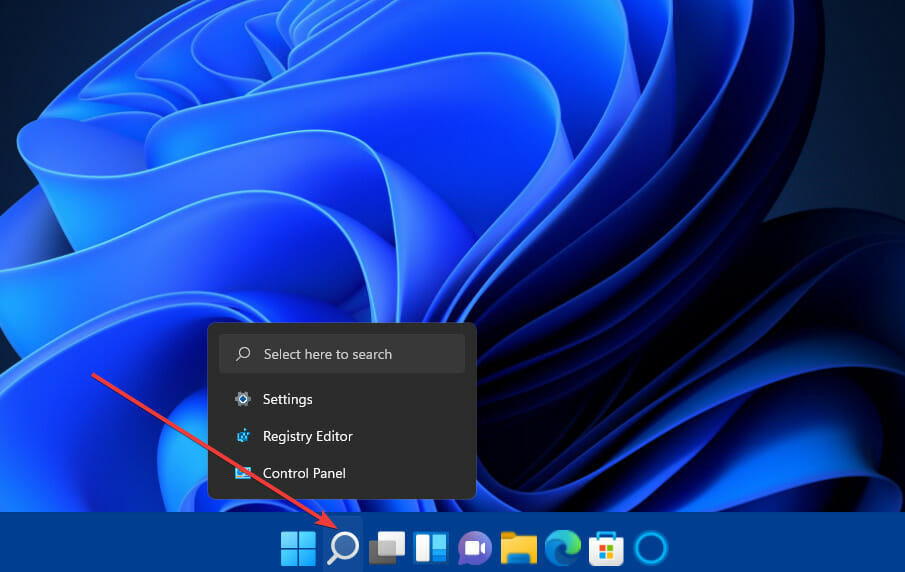
- Press the magnifying glass button on the Windows 11 taskbar to bring up a search utility.
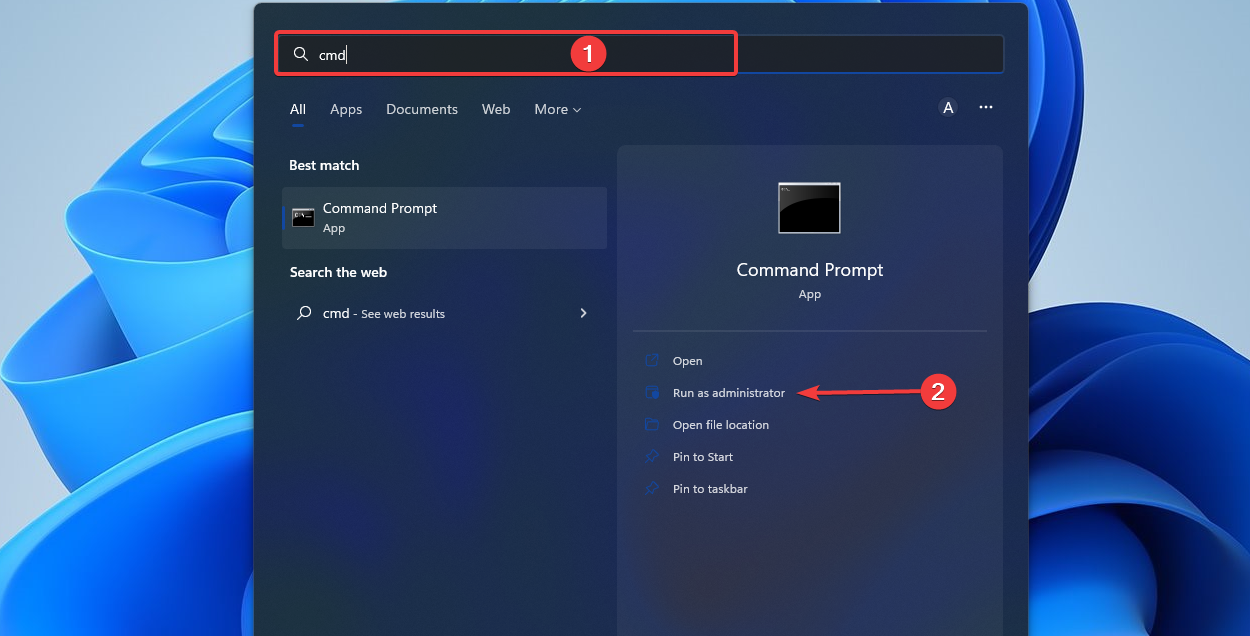
- Type cmd in the search utility’s box.
- Click the Command Prompt’s Run as administrator option in the search tool.
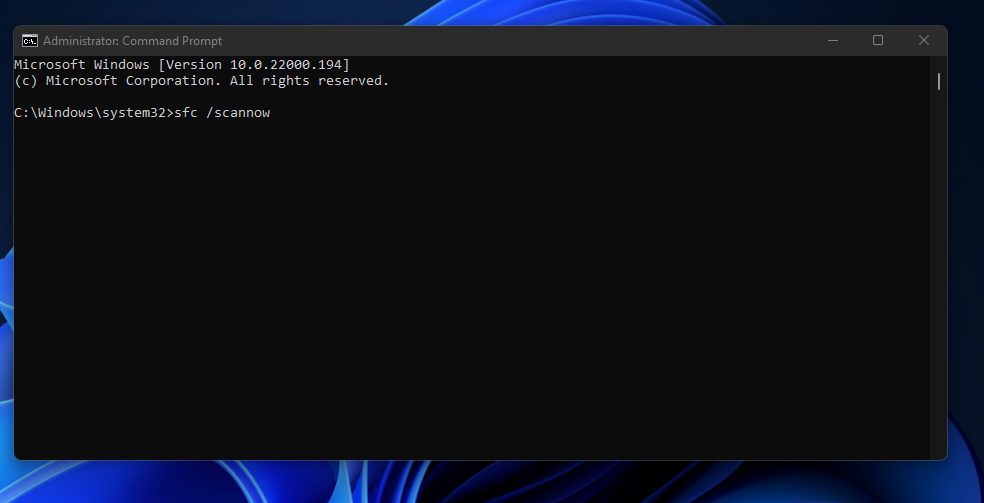
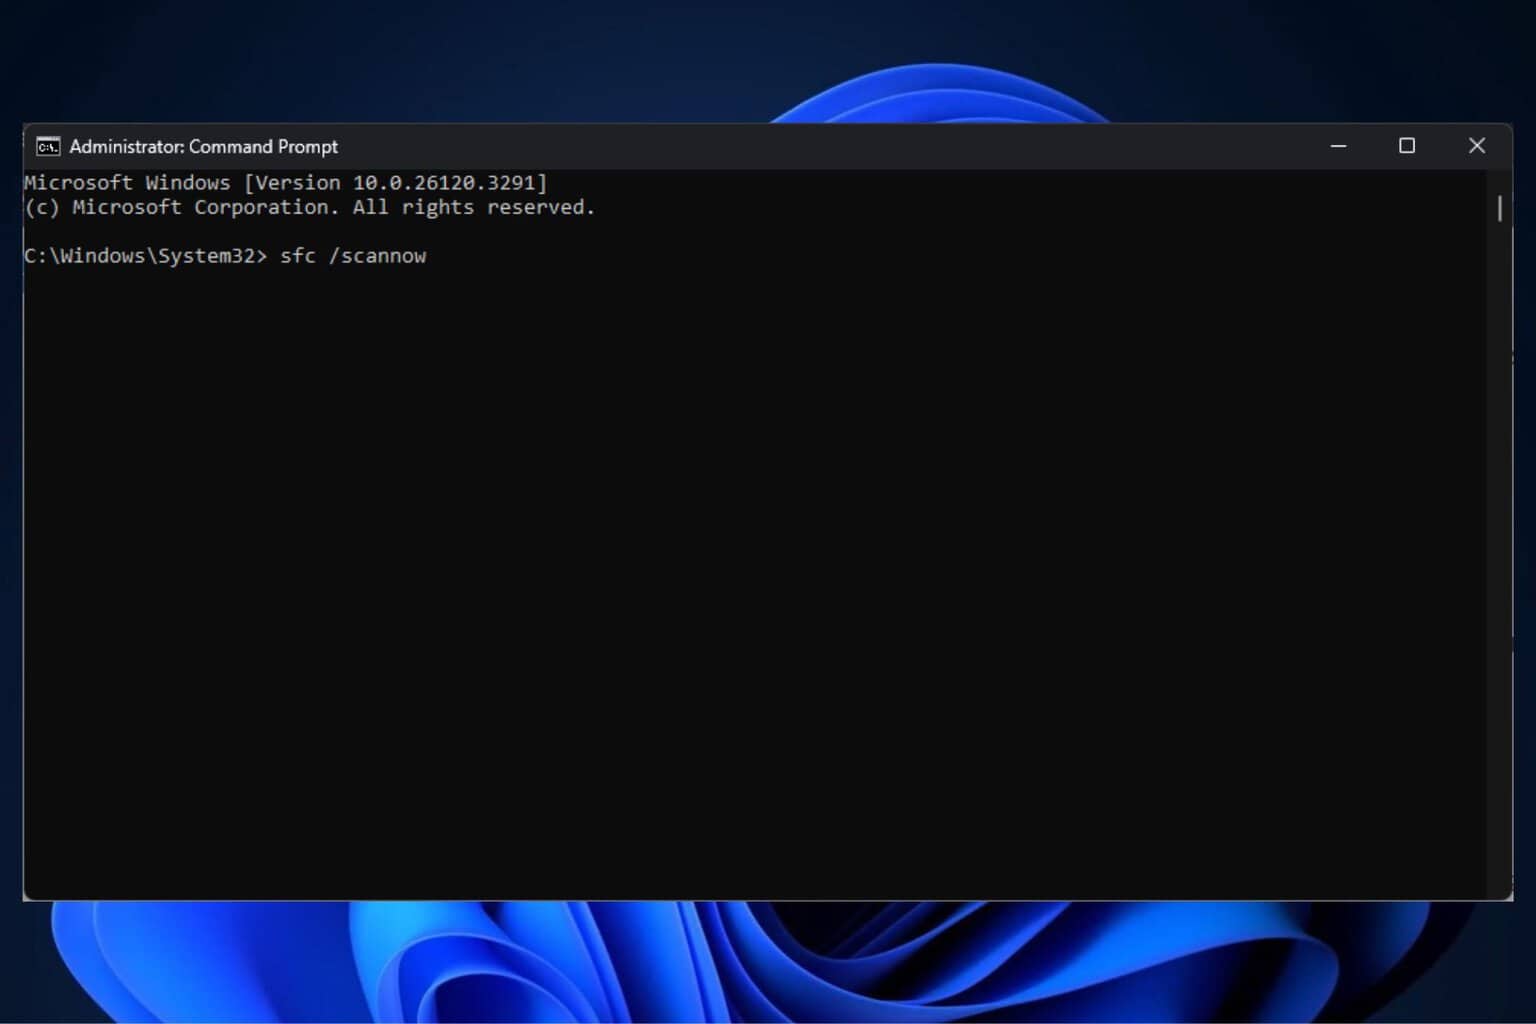
- Next, input this Deployment Image Servicing command and hit Enter:
DISM.exe /Online /Cleanup-image /Restorehealth - After that, type this System File Checker command within the Prompt’s window and press Return:
sfc /scannow - Wait for the SFC scan to complete before closing the Command Prompt.
To run a complete and in-depth file integrity scan, we recommend using specialized software that can automatically scan for and replace any broken system files.
4. Free up drive space
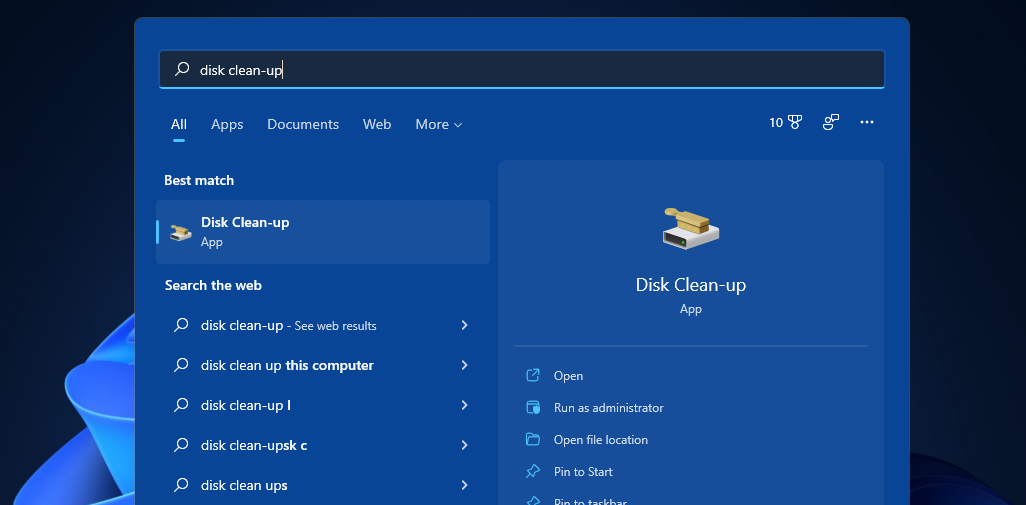
- Open the search tool in Windows by clicking its taskbar button.
- Type the keyword Disk Clean-up in the search text box.
- Select the Disk Clean-up tool to open a new window.
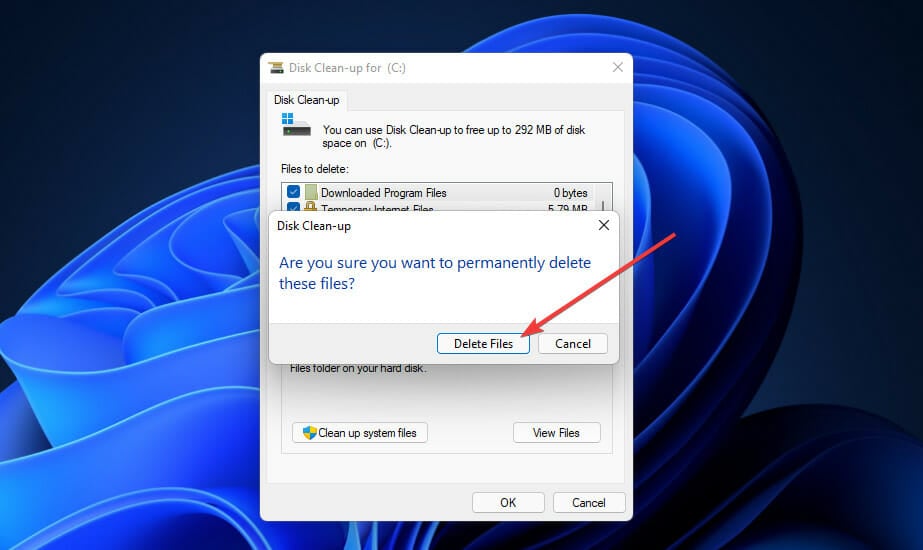
- Now select some file deletion options in the Disk Clean-up utility. Please select all of them to free up some storage space.
- Press the OK button, then click the Delete Files button to confirm.
- You can also clear up space by clicking the Clean up system files button. Then, repeat steps four to six to erase superfluous system files with Disk Clean-up.
Alternatively, users can free up disk space in Windows with third-party system maintenance software like CCleaner. Don’t hesitate to try it; rest assured that it protects your privacy and makes your PC faster.
 NOTE
NOTE
5. Fix Windows Update components
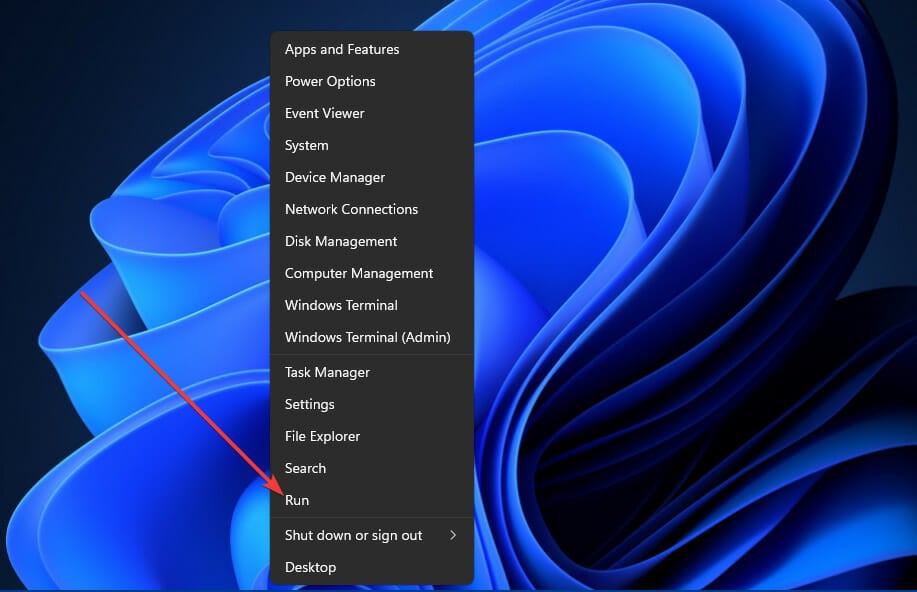
- Right-click Start and select the Run accessory shortcut.
- Type in this command below and press Enter.
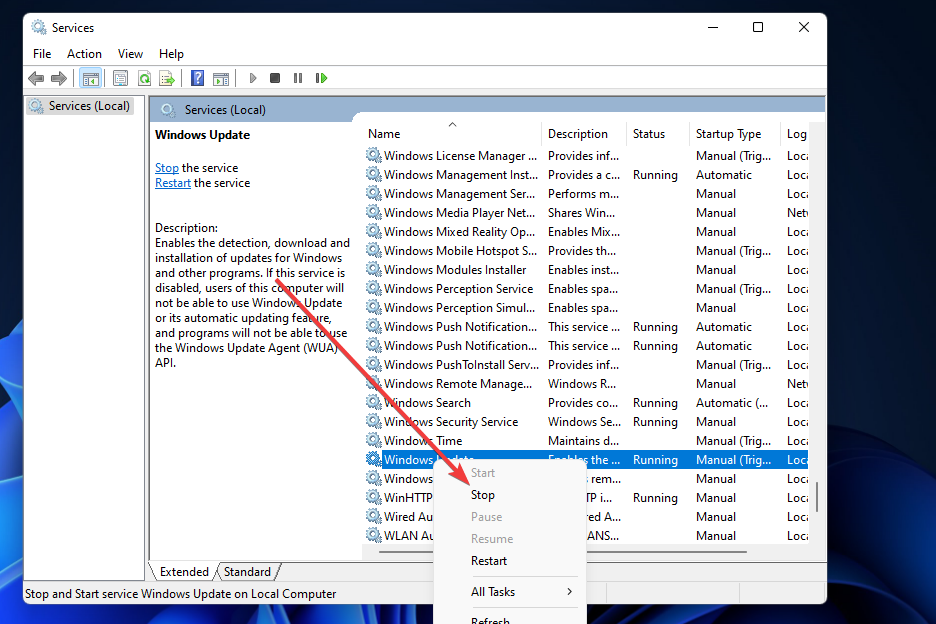
services.msc - Next, right-click the Background Intelligent Transfer Service, Cryptographic Services, and Windows Update services and select their Stop options.
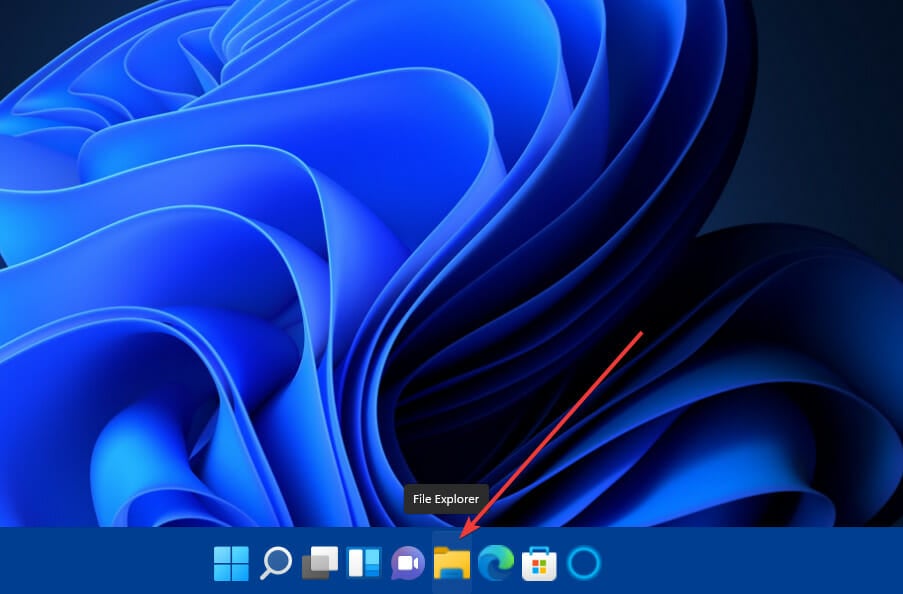
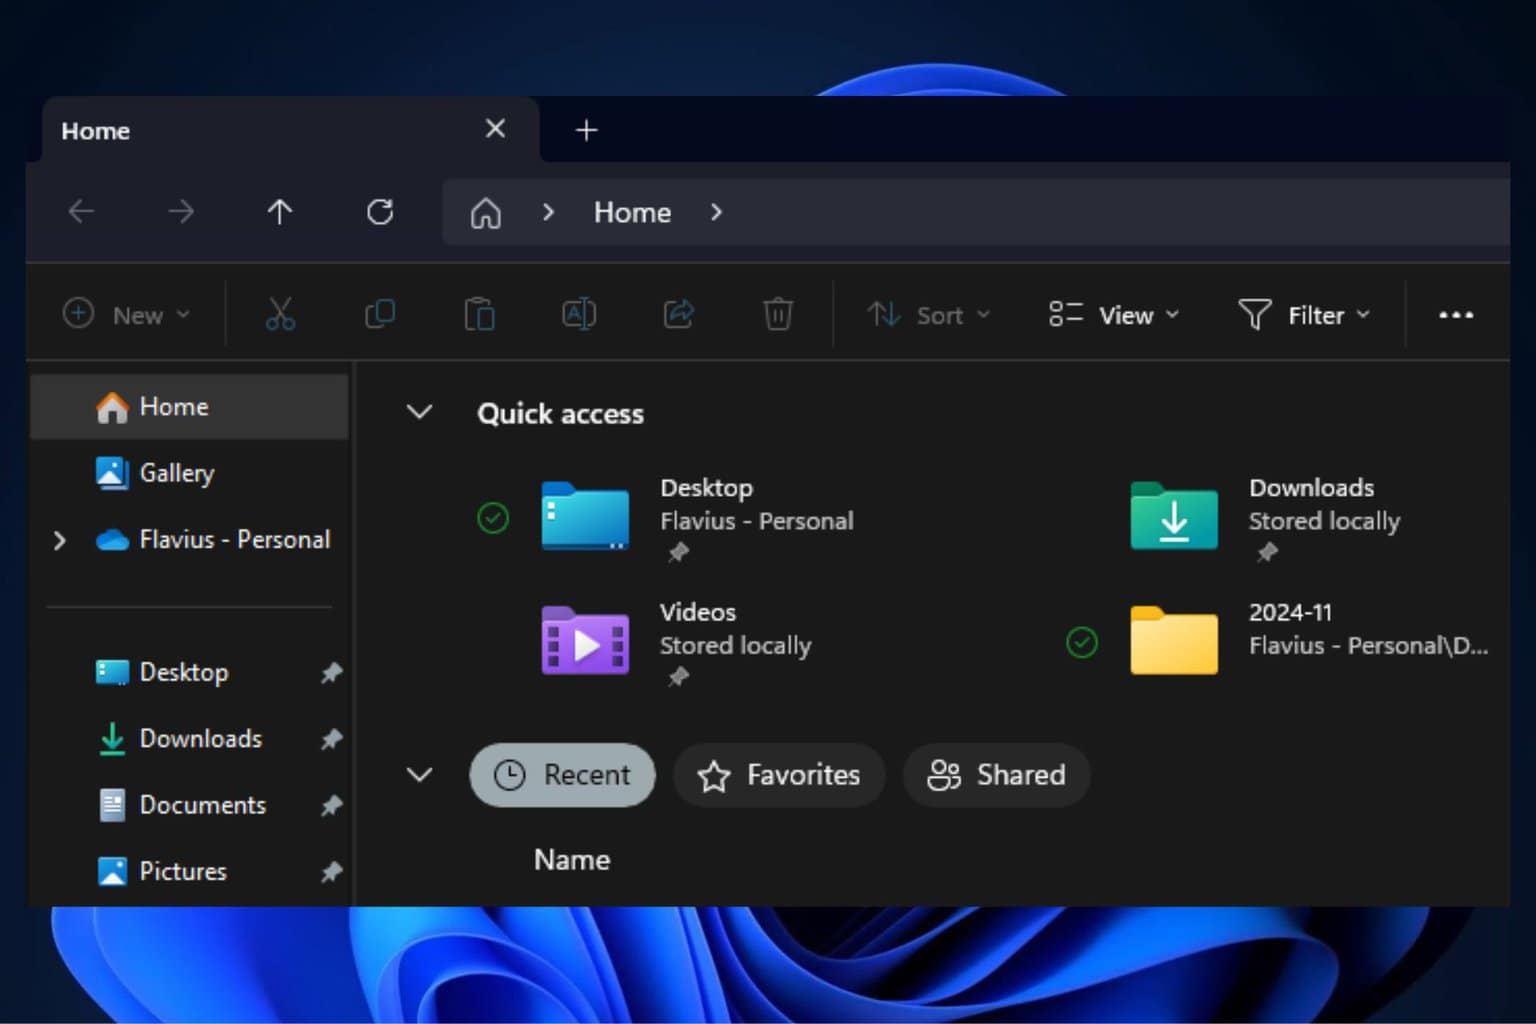
- Now click File Explorer’s Taskbar button.
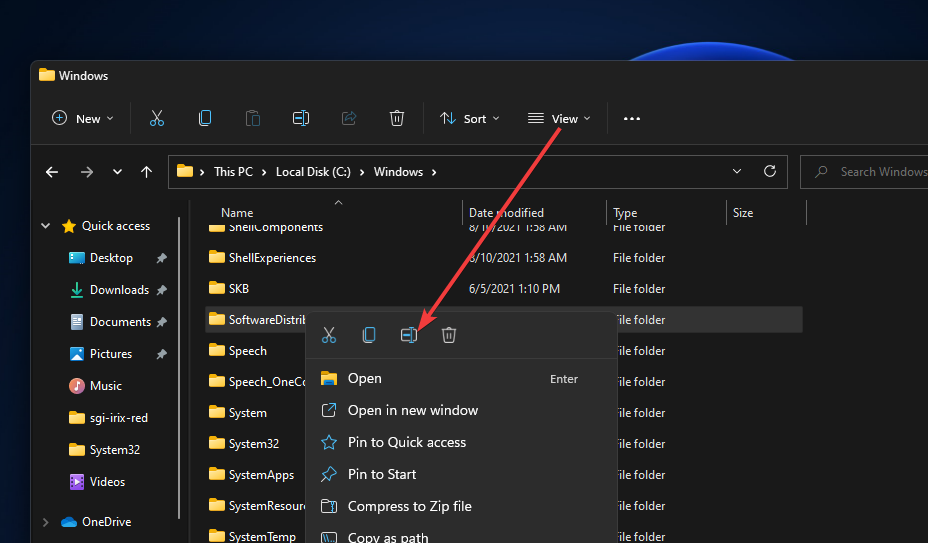
- Open this folder path:
C:\Windows - Right-click the SoftwareDistribution folder and select Rename.
- Then enter sd.old as the new folder name.
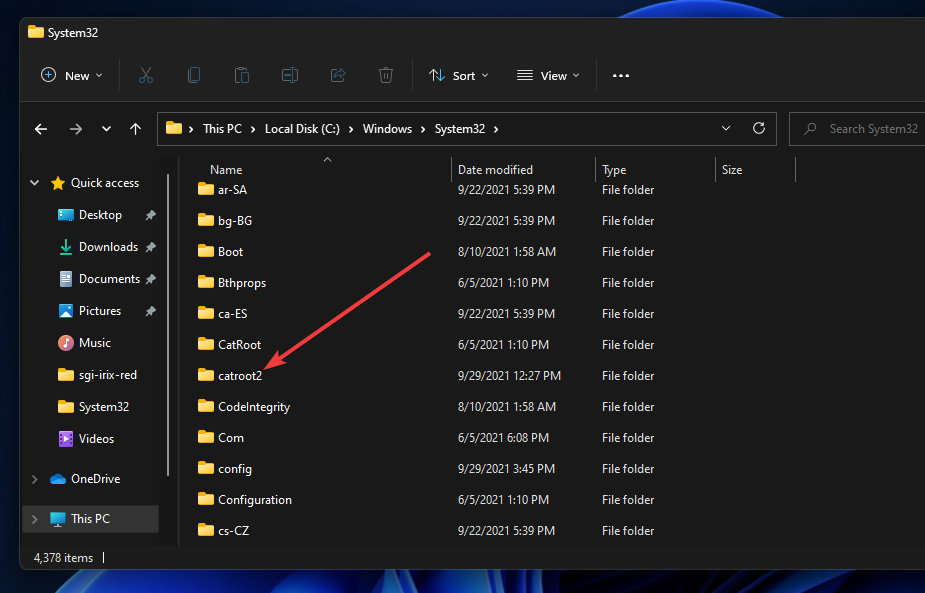
- After that, navigate to this path in File Explorer:
C:\Windows\System32 - Next, right-click the catroot2 folder and select the Rename option.
- Input catroot2.old as the folder’s new title.
- Please return to the Services window, and restart the Background Intelligent Transfer Service, Cryptographic Services, and Windows Update services by right-clicking them and selecting Start.
- Finally, click the Power and Restart options on your Start menu to reboot.
6. Clean-boot Windows
- Open Run as outlined in the first step of the previous resolution.
- Type this command in Run’s text box and click OK:
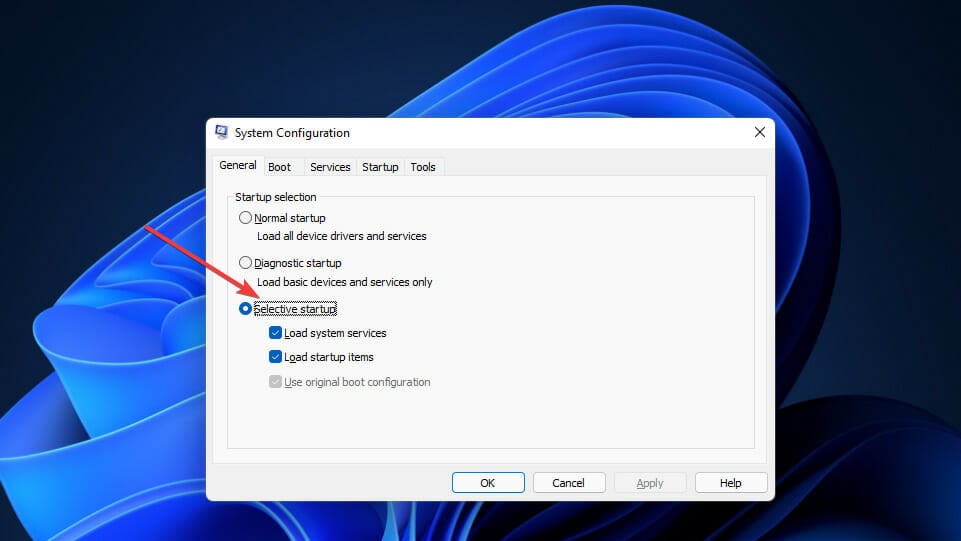
msconfig - Next, click the Selective Startup radio button on the general tab to select it if required.
- Uncheck the Load startup items checkbox to deselect it, and ensure the Load system services checkbox is enabled.
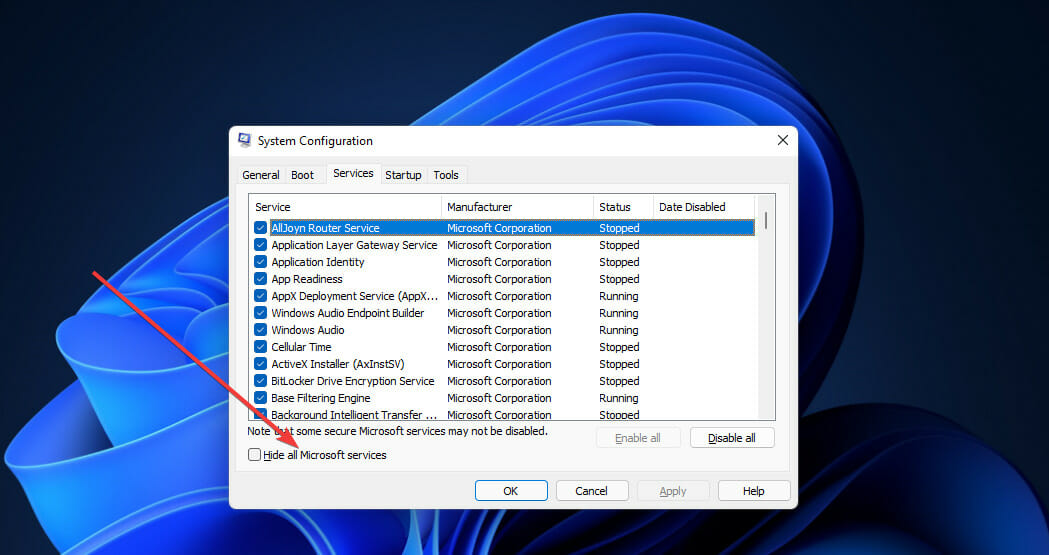
- Click Services to open that tab.
- Deselect the checkbox for Hide all Microsoft services.
- Press the Disable all button to uncheck all the checkboxes for remaining third-party services.
- Click Apply and OK to save settings and close the System Configuration window.
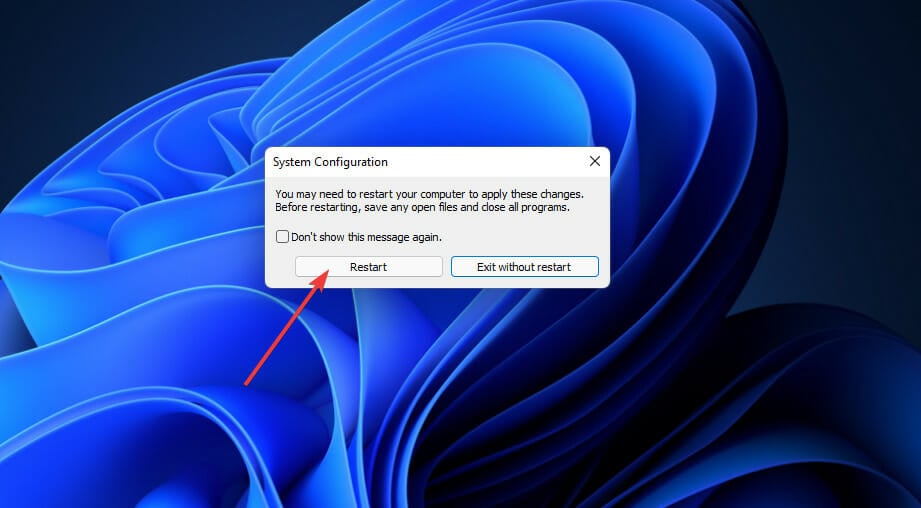
- Select Restart on the dialog box that pops up.
- Try applying updates via Settings after clean-booting Windows to see if error 0x800705aa still arises.
7. Reset Windows
 NOTE
NOTE
- First, press the Start button on your Taskbar and select Settings.
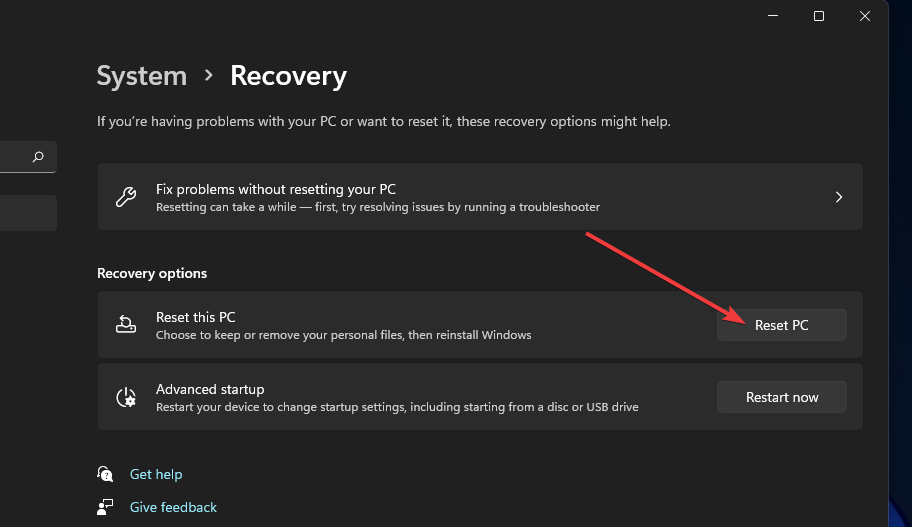
- Select Recovery on the System tab.
- Click Reset PC to open that utility.
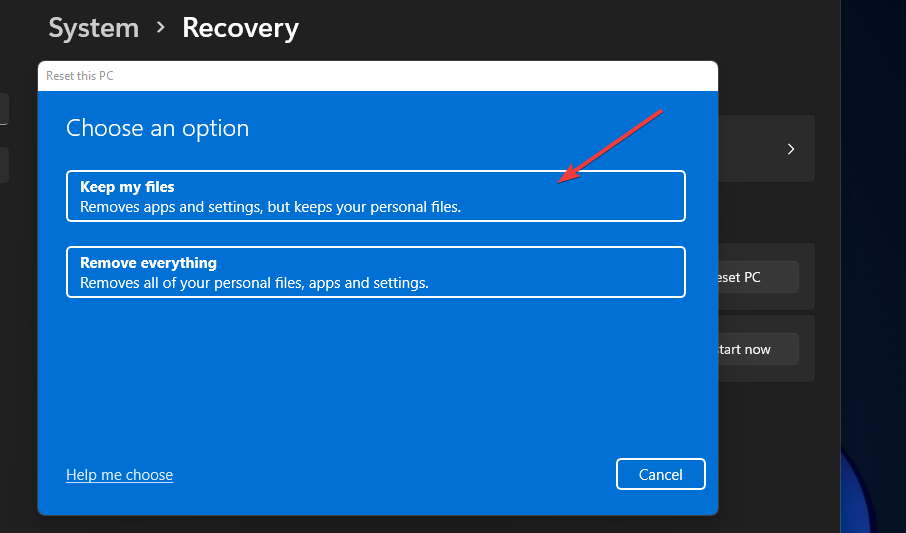
- Select Keep my files in the Reset this PC window.
- Click the Cloud reinstall option.
- Press the Next button to confirm.
Can I install updates without using the Windows Update service?
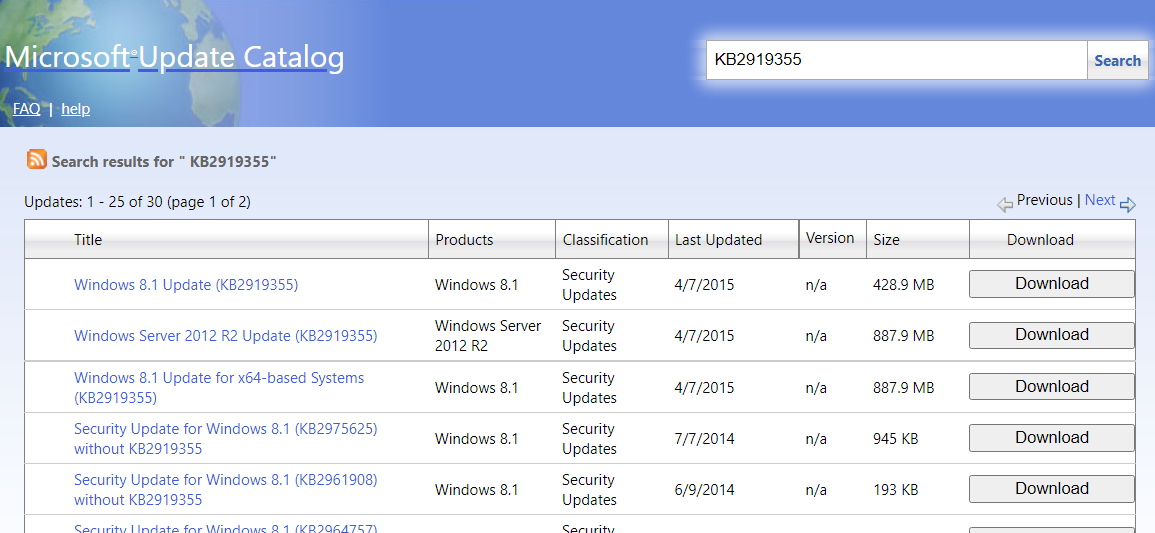
You can manually download and install updates without the Windows Update service. The Microsoft Update Catalog includes a repository of Windows updates for download. This is how users can download updates from that website:
- Open the Microsoft Update Catalog website in a browser of your choice.
- Input a KB number for an update to download in the search box.
- Click the Download button for the update that matches your PC’s Windows platform version and system architecture.
- Then click the download link that opens to save the file.
- Open the folder that includes the downloaded update file.
- Click the Windows update file to install it.
If the error code 0x800705aa arises when installing a Windows version (feature) update via Settings, try updating the platform with the Media Creation Tool instead.
Who can I contact about error 0x800705aa?
Contact Microsoft’s support service for Windows if you still need more potential fixes for the 0x800705aa error. To do so, click Get Support on the Contact Microsoft Support webpage. Afterward, type a description for the error in the text box and click Get help, then Contact Support.
Microsoft’s community forum also helps many users fix Windows errors. To add a post about the error, click the Ask a question option on the Windows forum. Then enter the details for the error in the text editor, and click the Submit button.
However, you might not need to contact Microsoft’s support service if you apply the Windows 11 resolutions above. Those will probably fix the problem for most users.
There are also a few other potential solutions for this issue that might work. Rolling Windows back to an earlier date with System Restore and uninstalling third-party antivirus utilities might help resolve error 0x800705aa.
Things are no different for a similar error code 0xa00f4271. Again, corrupted driver files are often to blame, but the solutions from our guide will most likely do the trick.
We’d like to hear more from you on this subject, so feel free to drop us a comment in the comments section below.






User forum
0 messages