0x8024002d: How to Fix This Windows Update Error
Error 0x8024002d might be caused by corrupted system files
4 min. read
Updated on
Read our disclosure page to find out how can you help Windows Report sustain the editorial team. Read more
Key notes
- Error 0x8024002d has been reported to occur when users try to install Windows updates related to Microsoft Office packages.
- This issue might be caused by corrupted system files or cached data for updates.
- Clearing the SoftwareDistribution folder could be another possible solution for Windows Update error 0x8024002d.
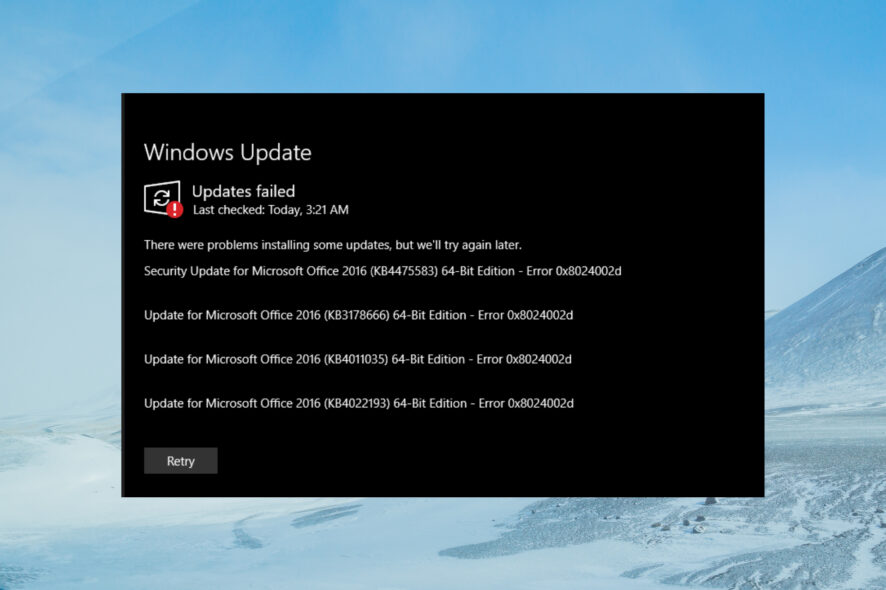
Error code 0x8024002d is an issue that arises for some users when they try to install security updates in Windows. That error displays a message along the lines of, There were problems installing some updates, but we’ll try again later… (update reference) Error 0x8024002d.
What causes error 0x8024002d?
Users can’t install patch updates for which error 0x8024002d arises via Settings. To fix error 0x8024002d, we recommend applying the potential Windows 11 solutions below.
Also, Microsoft nor anyone else has identified a specific cause for error 0x8024002d. However, this issue can arise for similar reasons other Window Update errors occur, such as the following:
- There are corrupted system files – Updating Windows is a system process that can fail because of damaged system files.
- Corrupted data in the SoftwareDistribution folder – Corrupted (damaged) files in that cache can cause update errors to occur.
- Incorrectly configured or damaged update components – Some specific Windows Update components are damaged.
Now that we know what causes this problem, let’s start fixing it with the solutions below.
How can I fix the Windows Update error code 0x8024002d?
1. Open the troubleshooter for Windows Updates
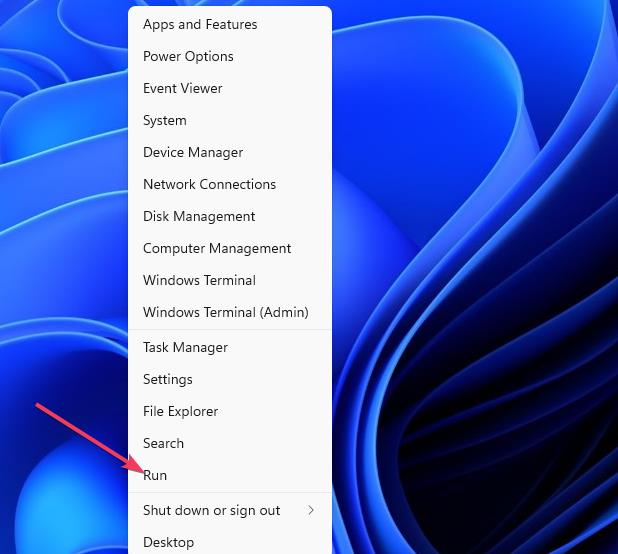
- Use the Windows + X hotkey to access the Power User menu, and select Run from there.
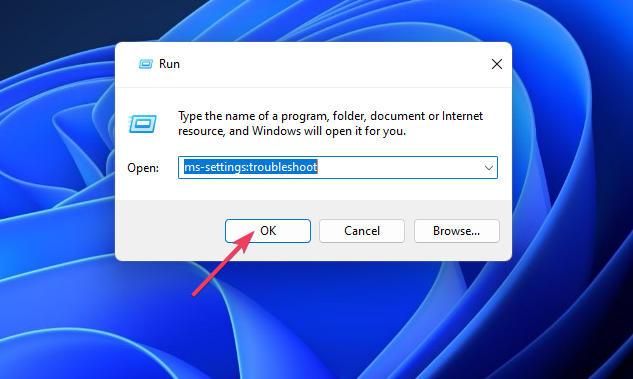
- Type in the following command and click OK to access troubleshooters:
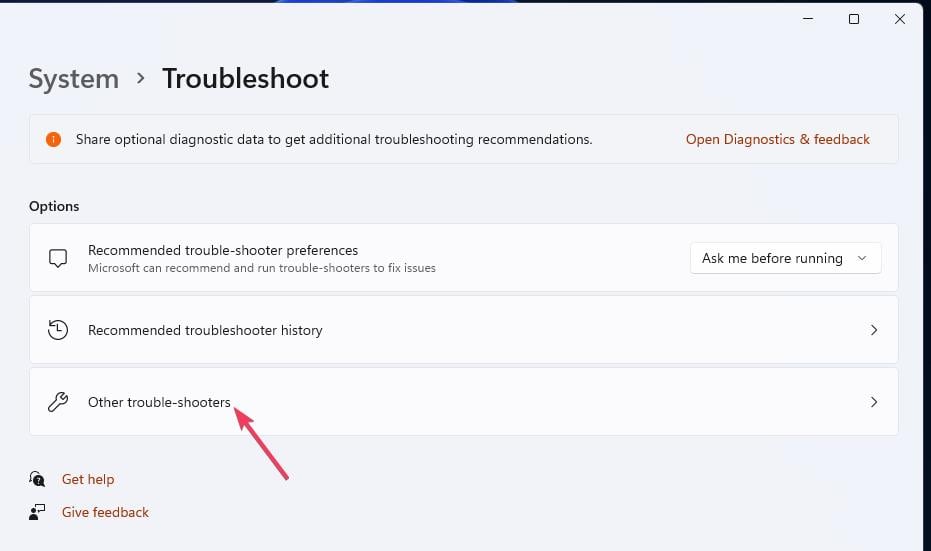
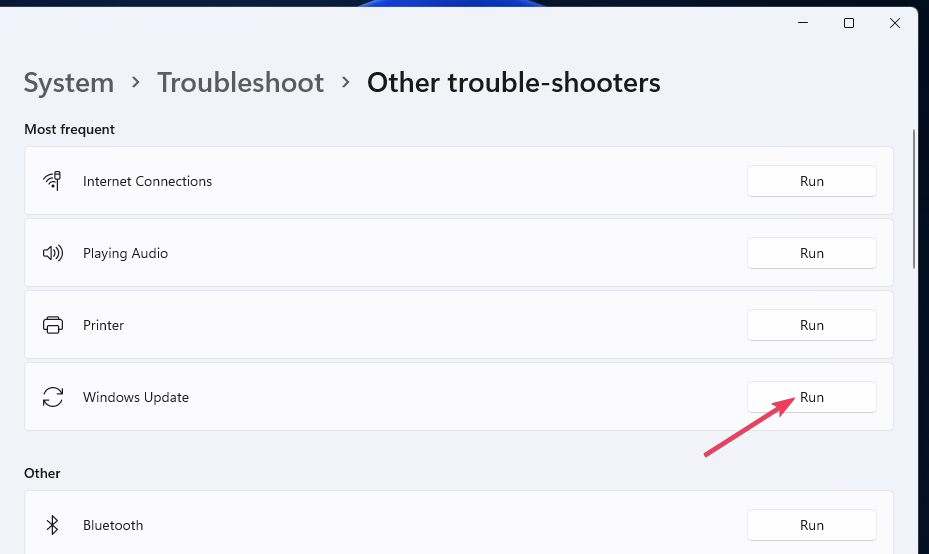
ms-settings:troubleshooters - Click Other trouble-shooters in the Windows 11 Settings app.
- Select Run for the Windows Update troubleshooting tool.
- Wait to see if the troubleshooter detects anything and applies fixes.
2. Run SFC and DISM scans
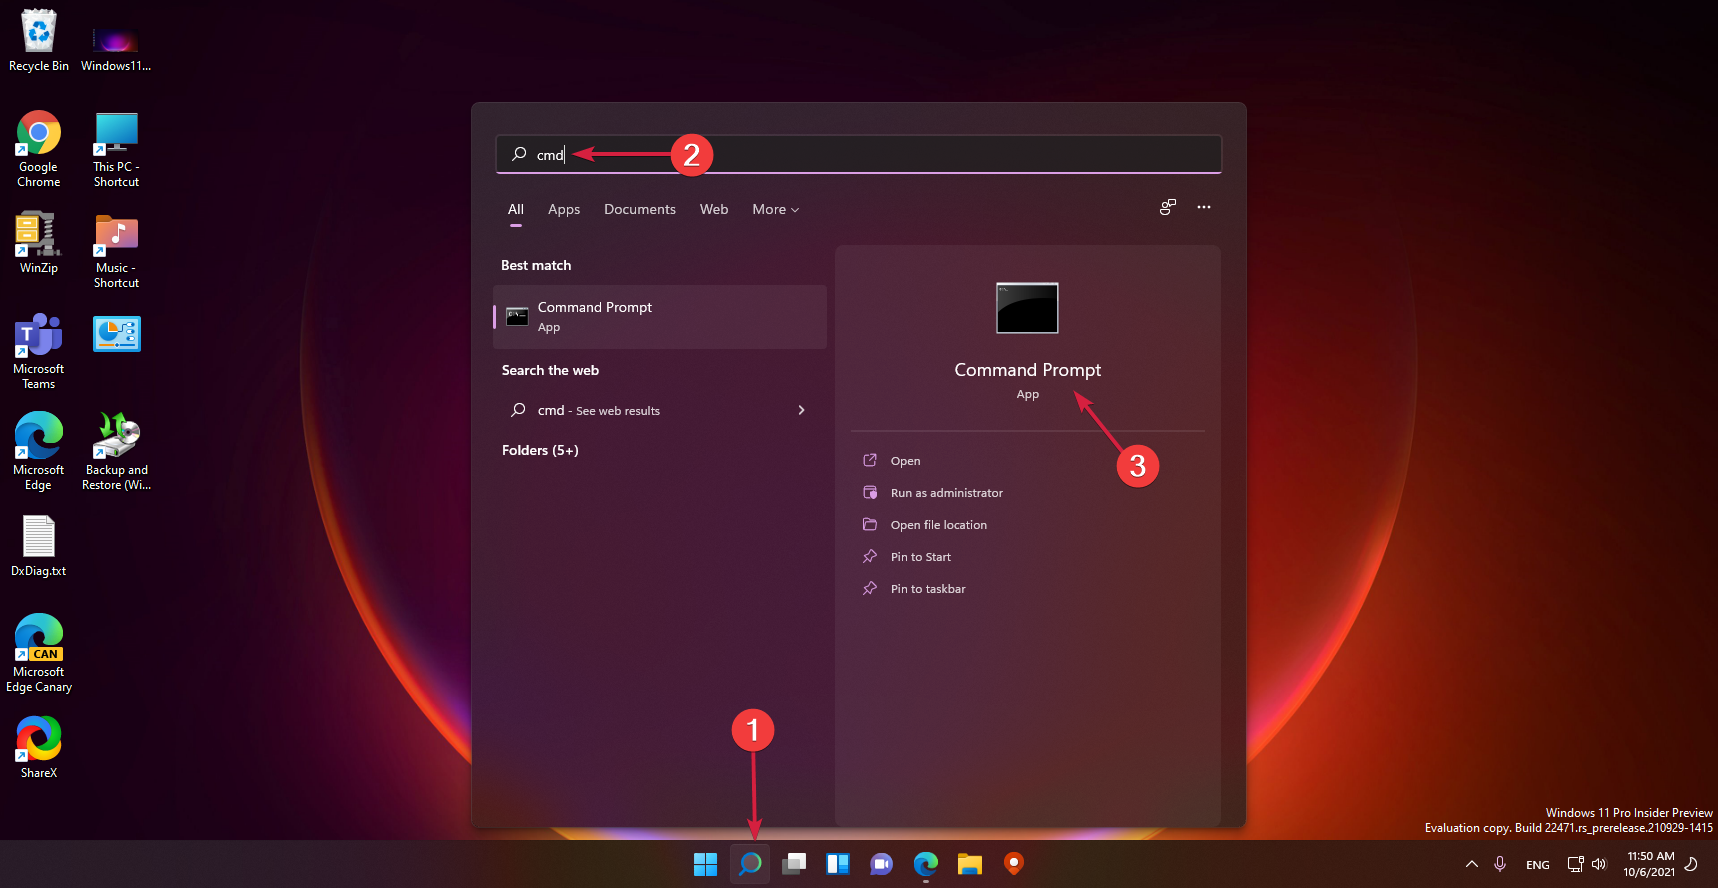
- Click the Search icon from the taskbar, type cmd, and select Run as administrator.
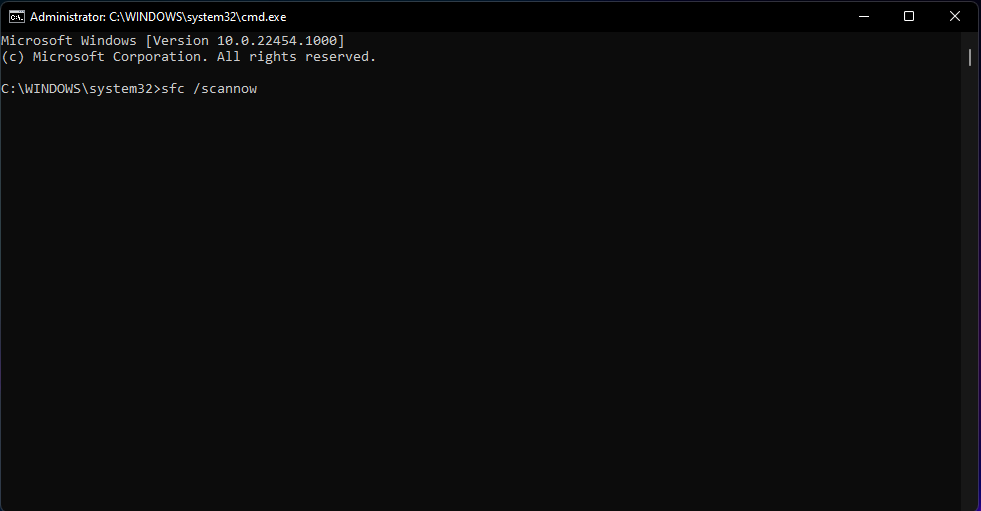
- Type the following command and press Enter to run it:
sfc /scannow - Wait for the scan to finish, then execute the following command:
DISM /Online /Cleanup-Image /RestoreHealth
The SFC and DISM scans will correct any system file problems or bad sectors on your drive.
3. Erase data in the SoftwareDistribution folder
- Click the Start button, type cmd in the search window, and select Run as administrator from the results.
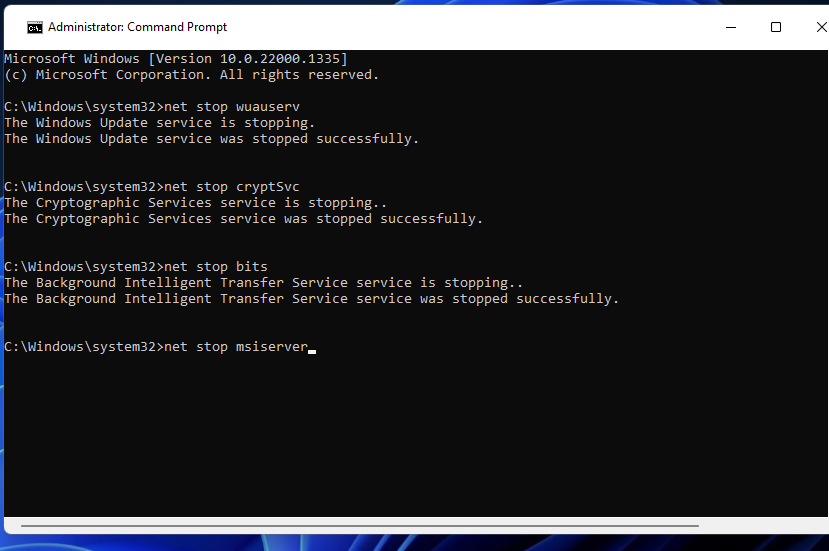
- Stop some update services by executing these separate commands, one by one, and pressing Enter after each:
net stop wuauserv
net stop cryptSvc
net stop bits
net stop msiserver - Return to Run, and input the following in that accessory’s command box:
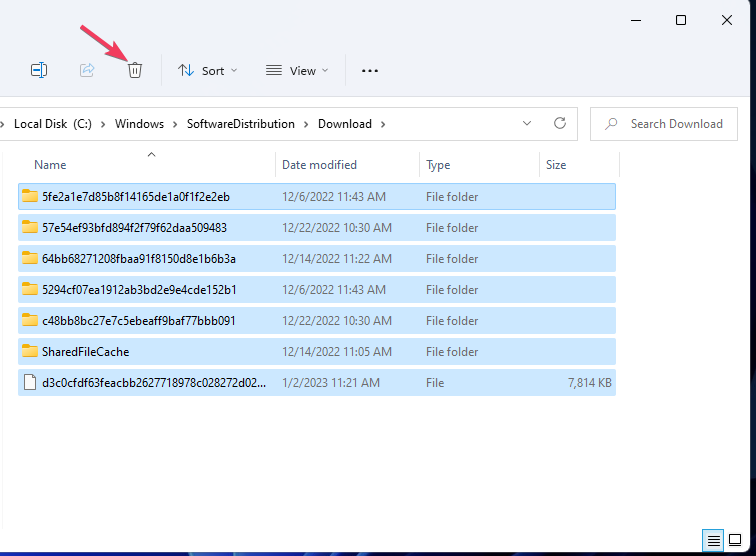
C:\Windows\SoftwareDistribution\Download - To select all the data there, press the Ctrl + A key combination.
- Click Explorer’s Delete option.
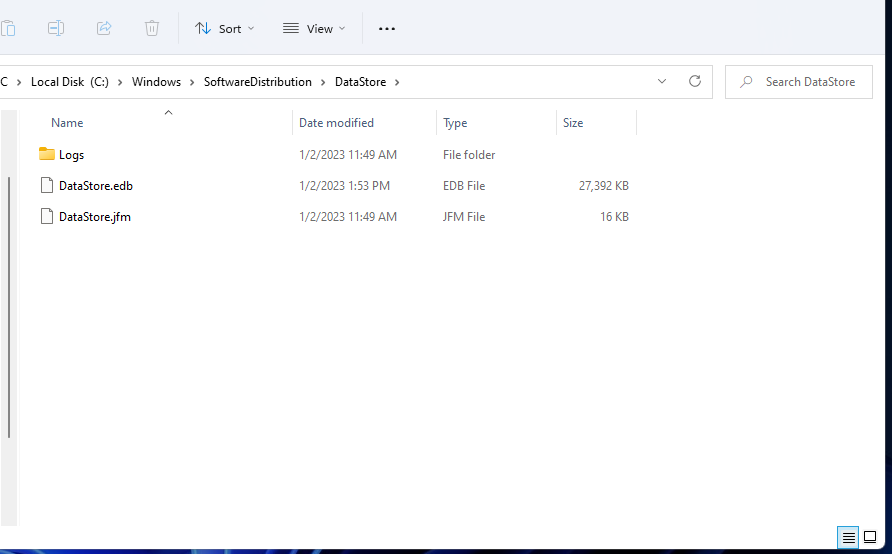
- Then go to this folder path:
C:\Windows\SoftwareDistribution\DataStore - Clear the DataStore folder by pressing Ctrl + A and clicking Delete.
- Go back to the Command Prompt and restart the services by executing these four commands:
net start wuauserv
net start cryptSvc
net start bits
net start msiserver
4. Reset update components
- Download the script needed to reset the update components.
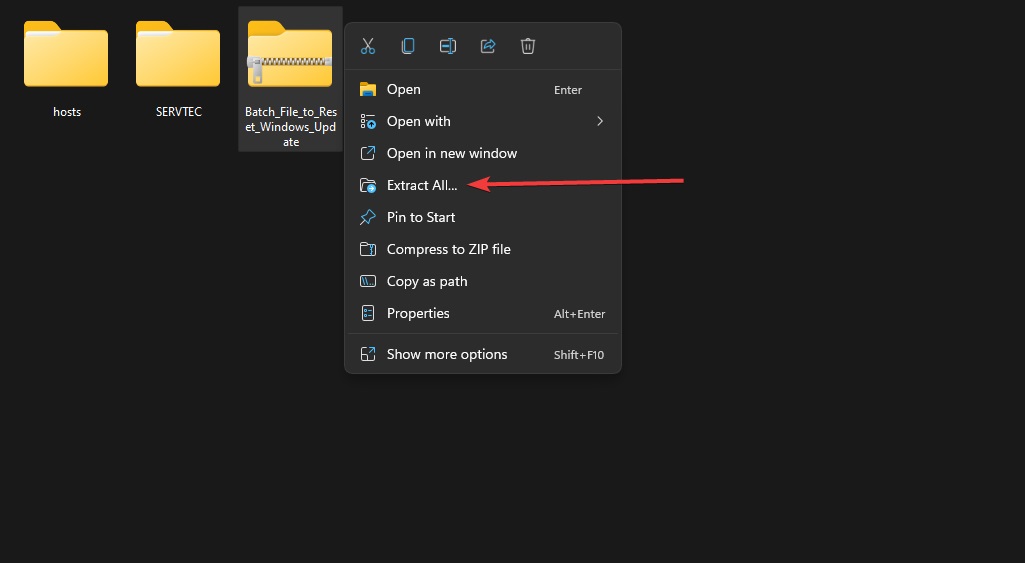
- Press the Windows key + E to start File Explorer, go to the download location, right-click on the zip file, and select Extract All.
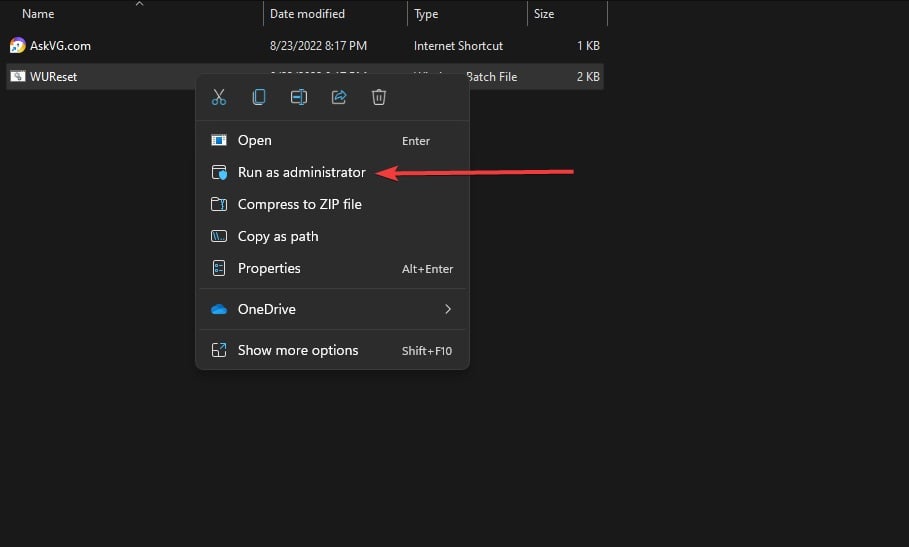
- Open the file, right-click on the WUReset file, and select Run as administrator.
- Wait for the script to execute completely.
This simple batch script resets all Windows Update components, like the SoftwareDistribution folder, BTS service, Cryptographic Services, etc.
We also have a complete guide on how to reset the update components and you will find more information.
5. Reset Windows 11 to factory defaults
If error 0x8024002d persists after going through resolutions one to four, we recommend resetting Windows. That final solution will restore Windows to factory settings.
Most of your software will not be preserved after a reset, but you can at least select to keep user files. Have a look at our how-to reset Windows guide for further details.
Those potential error 0x8024002d solutions will address some of the more probable causes for updates failing. There isn’t any widely confirmed fix for this issue, but the ones above are worth a try.
Yet, there could be more ways to resolve that issue as well. Users who’ve found different ways to fix error 0x8024002d are welcome to share their solutions below.
User forum
0 messages