0xc0000242 Boot Configuration Error: How to Fix it
Manually rebuild the BCD if you are faced with this error
4 min. read
Updated on
Read our disclosure page to find out how can you help Windows Report sustain the editorial team. Read more
Key notes
- 0xc0000242 boot configuration error appears during Windows startup.
- The error can appear due to a corrupted BCD store and misconfigured boot settings.
- Try to use the Automatic repair or perform an in-place upgrade to fix it.
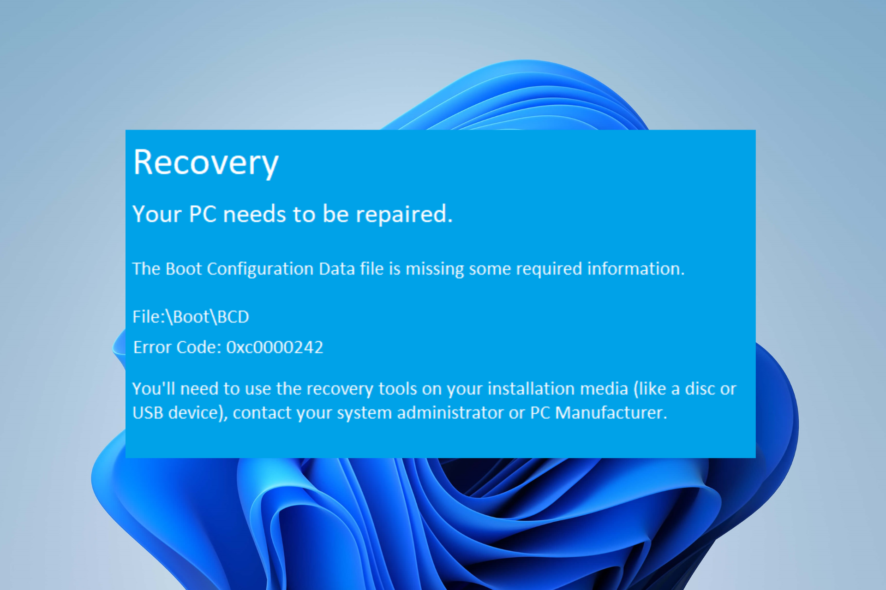
Windows users complain about the Boot BCD Error 0xc0000242 that occurs during startup. The error doesn’t allow you to sign into your computer. However, we’ll take you through some detailed steps for resolving the problem.
Alternatively, you can check our article about ways to fix slow boot issues on your Windows 11 PC and make it faster.
What causes the 0xc0000242 boot configuration error?
Several factors liable to cause the error are:
- Corrupted BCD Store – If the BCD store is corrupted or contains incorrect entries, it can result in the 0xc0000242 error.
- Misconfigured boot settings – Incorrect boot settings or misconfigurations within the BCD store can result in Windows 11 not booting. This can happen if changes were manually made to the boot configuration or by third-party software.
- Disk errors or failure – Errors or failures in the hard disk or storage device where the BCD store is located can cause boot configuration errors. Issues like bad sectors, file system corruption, or disk failure can prevent Windows from accessing the necessary boot information.
- Hardware issues – Faulty or incompatible hardware components, such as a failing hard drive, malfunctioning memory modules, or connectivity issues, can affect the boot process and trigger the error.
These factors may vary on different computers depending on the circumstances. Nonetheless, we’ll discuss effective steps for resolving the issue on Windows 11.
How can I fix the 0xc0000242 boot configuration error?
1. Use the repair your computer menu
- Insert the Windows installation disk or connect a bootable USB flash drive containing the Windows 11 installation files.
- Start the computer and boot the computer from the drive.
- Select the language and keyboard if prompted, then click Next.
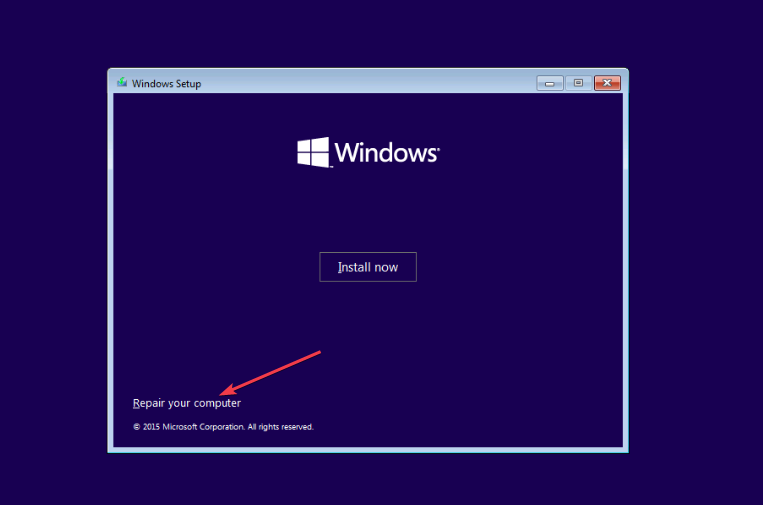
- Click on Repair your computer in the screen’s bottom left corner.
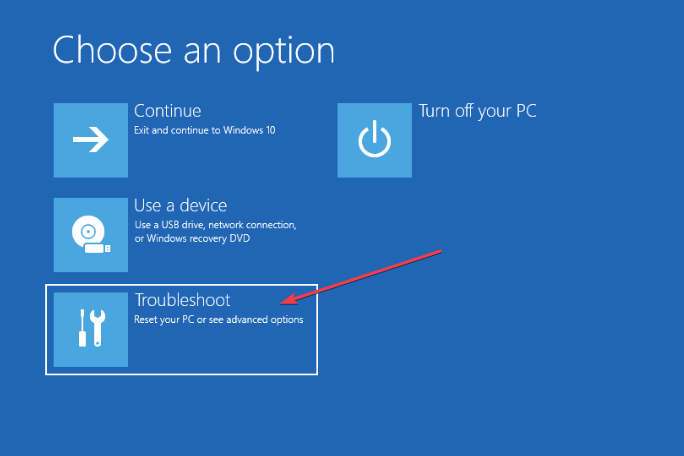
- Click on Troubleshoot.
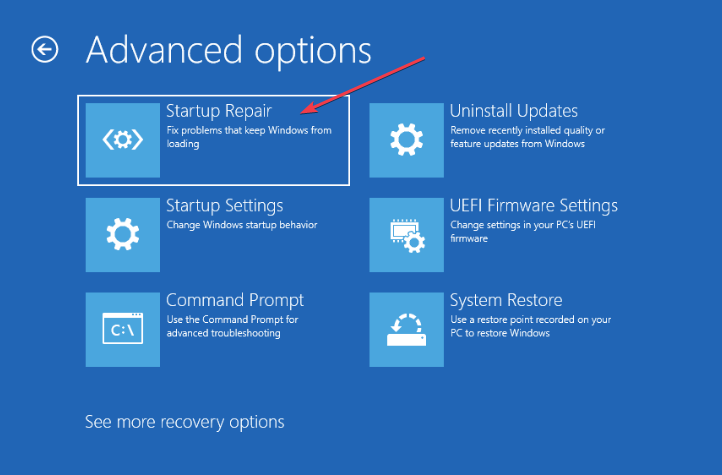
- Then, select Startup Repair among the available options.
- After completing the startup repair, Restart your system and check if you can log in to your PC normally.
You can read about ways to fix the UEFI Boot problems in Windows PCs.
2. Use Windows Recovery Environment
- Boot your computer using a Windows installation USB or DVD to open the Windows Recovery Environment (WinRE).
- Select your language preferences and click Next.
- On the next screen, click Repair your computer.
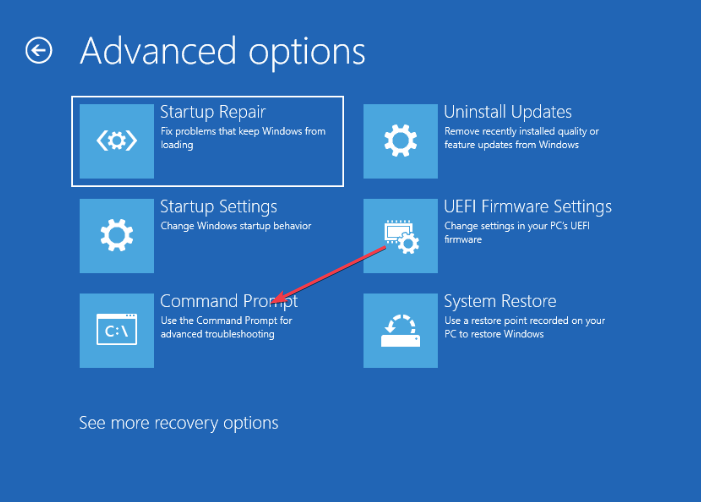
- Choose Troubleshoot and then select Advanced options.
- From the advanced options, select Command Prompt.
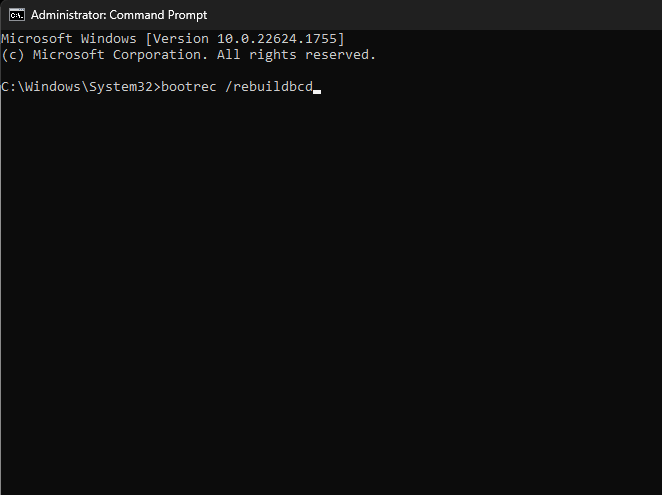
- In the Command Prompt, type the following command and press Enter:
bootrec /rebuildbcd - Follow the on-screen instructions if any is provided.
- Try restarting your PC and checking if the Oxc0000242 boot configuration error persists.
The above command will scan for Windows installations and rebuild the BCD store.
3. Manually rebuild the BCD
- Access the Windows Recovery Environment as mentioned in the previous step and repeat 2-5 to open the Command Prompt.
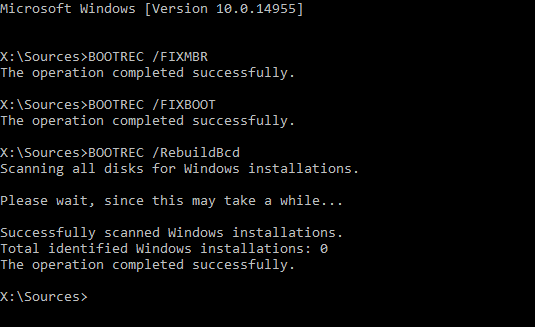
- Run the following commands one by one, pressing Enter after each command:
bootrec /fixmbrbootrec /fixbootbootrec /scanosbootrec /rebuildbcd
These commands will repair the Master Boot Record (MBR), fix the boot sector, scan for Windows installations, and rebuild the BCD store.
4. Clean install Windows
- Insert a bootable USB drive or DVD into your computer.
- Restart your computer and repeatedly press the Del or F12 key to access the BIOS/UEFI settings, then choose Boot Device.
- Select your USB drive and press Enter; the computer will boot from the USB drive.
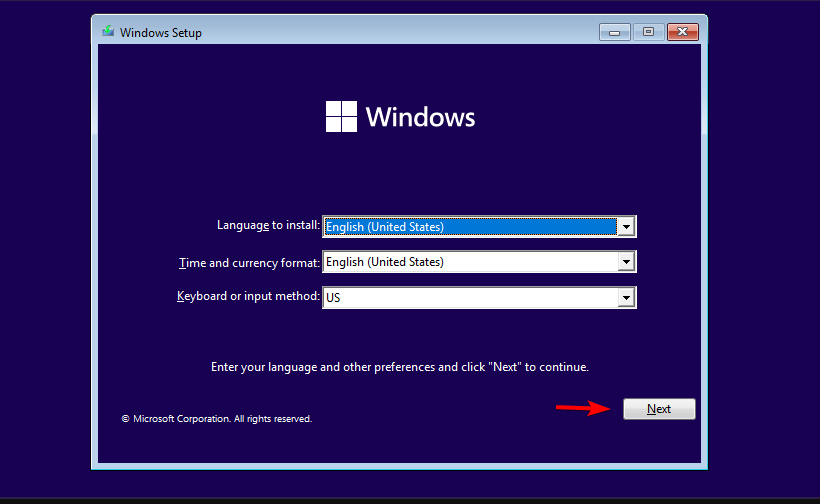
- Select your language preferences, time, and keyboard layout, and click Next.
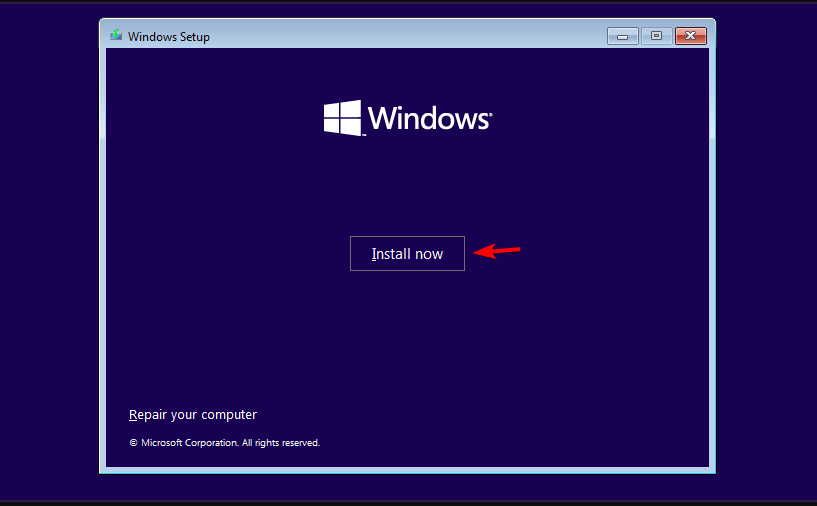
- Click Install Now to start the installation process.
- Enter your valid Windows product key when prompted.
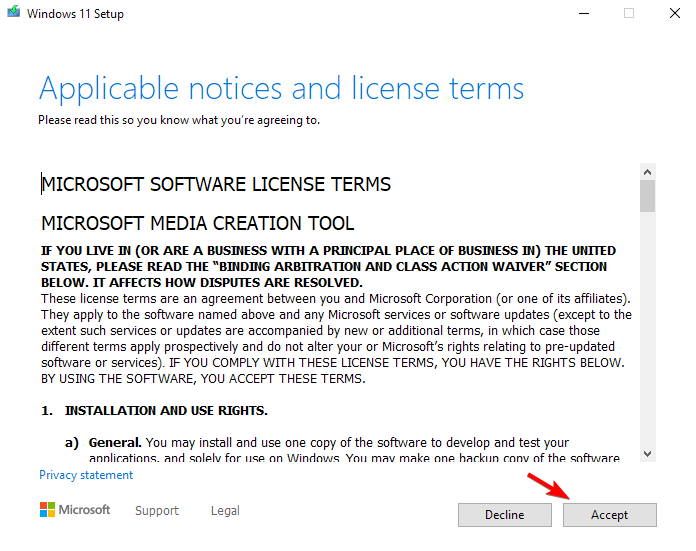
- Accept the license terms and follow the on-screen instructions to proceed.
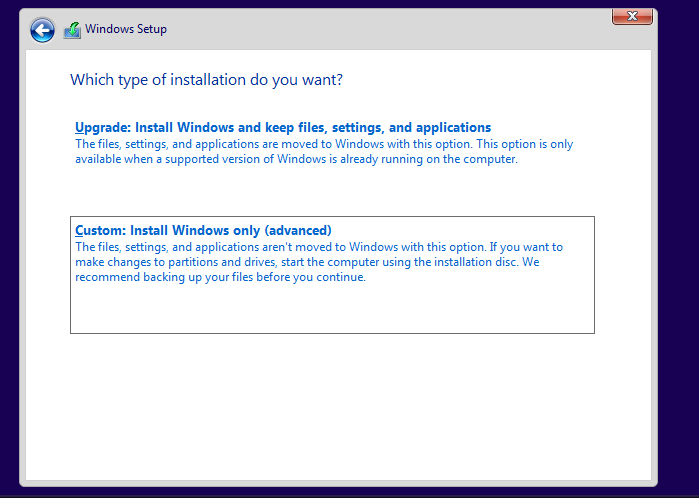
- Select the Custom installation option to perform a clean install.
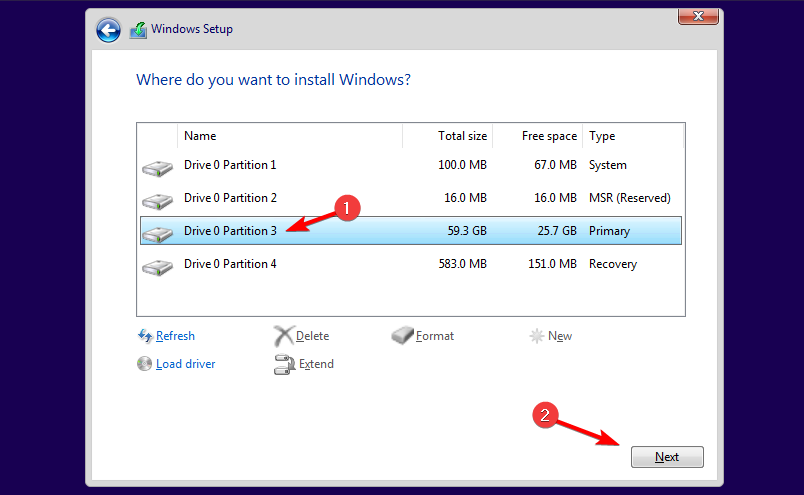
- Choose the partition where you want to install Windows or create new partitions if needed, then click Next.
- Windows will start the installation process, which may take some time.
- Follow the on-screen prompts to complete the installation.
Conclusively, you may be interested in our guide on fixing PC stuck on choosing an operating system window.
Kindly leave your questions and suggestions in the comments section if you have any.


User forum
0 messages