5 Ways to Fix Error 0x80070522: Required Privilege Is Not Held
Without proper permission, the error may be prompted on your PC
4 min. read
Updated on
Read our disclosure page to find out how can you help Windows Report sustain the editorial team. Read more
Key notes
- Error code 0x80070522 appears during a Windows update process.
- One of the major causes that prompt this error is corrupt or missing system files.
- You can resolve the error by resetting the SoftwareDistribution folder and running an SFC scan.
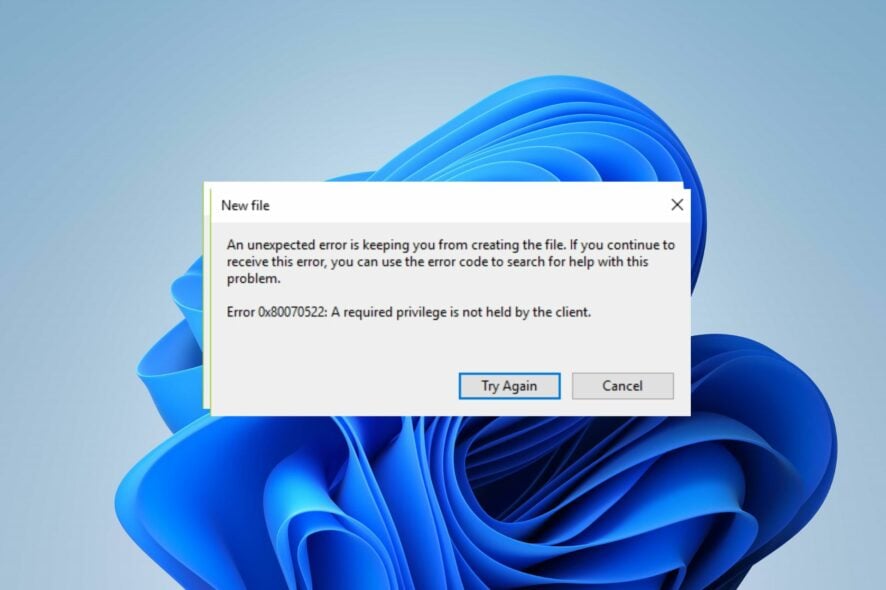
Some of our readers have reported that the error 0x80070522 Required privilege is not held appears on their PCs. It indicates the Update process lacks permission to access the needed components. So, you need to resolve the privileges issue to install, download or apply updates.
Hence, we will proffer possible solutions to fix this. Likewise, we have a similar guide on fixing the Windows Update error 0x8007045b.
What causes the error 0x80070522?
Many factors may trigger Error 0x80070522: A required privilege is not held by the client on your PC during a Windows update. Also, it can occur when trying to alter the location of a file. Other causes are:
- Insufficient permission – Every user account has a specific amount of privileges assigned to them. So, the error may occur if your account lacks enough permissions to alter system properties.
- Corrupt or faulty update files – Since the error also appears during Windows Update processes, it may be that the update files you’ve downloaded are corrupt.
- Viruses and malware infections – Malware and viruses may infect system files or disguise them as legitimate files, interrupting the Windows update process. It can cause corrupted system files on your computer.
Though the error is critical and can be hard to deal with, there are some fixes you can follow to resolve it.
What can I do to fix the error code 0x80070522?
Before attempting any advanced troubleshooting steps, go through the following:
- Turn off background apps running on your PC.
- Disconnect external devices plugged into the computer.
- Restart Windows in Safe Mode and check if the error persists.
If you can’t resolve the error, try the steps below:
1. Disable User Account Control (UAC)
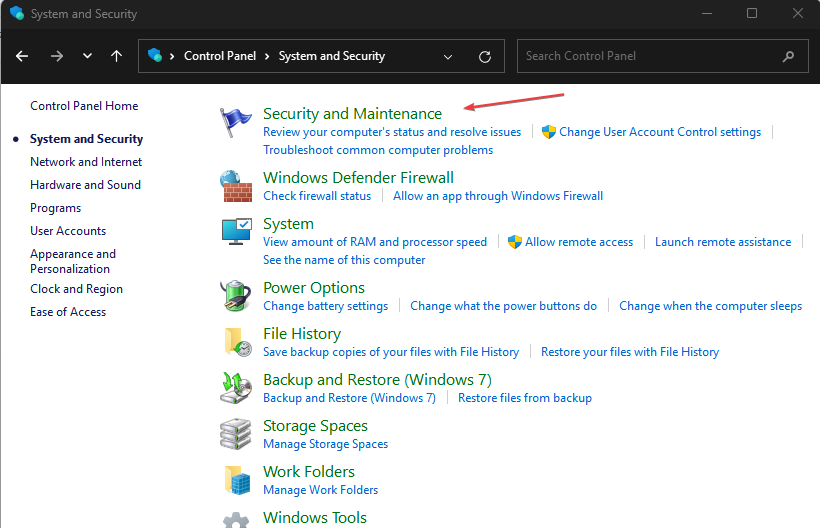
- Press Windows + R key to open the Run dialog box, type control, then press Enter to open the Control Panel.
- Click on Security and Maintenance.
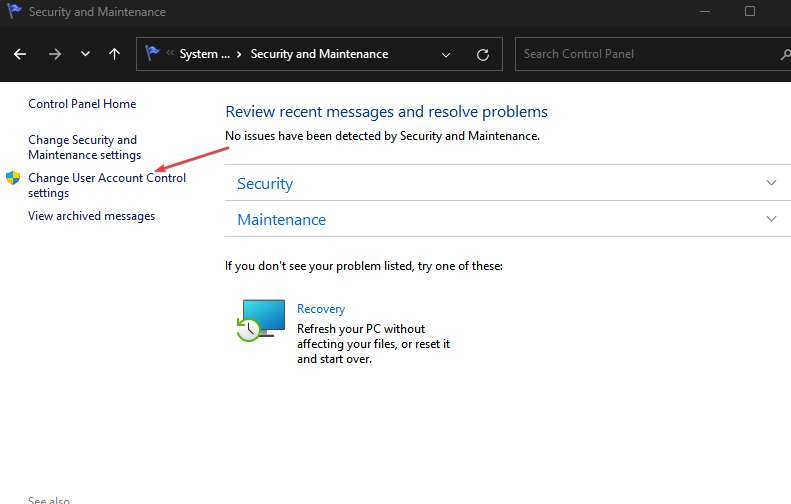
- Click Change User Account Control Settings from the left pane.
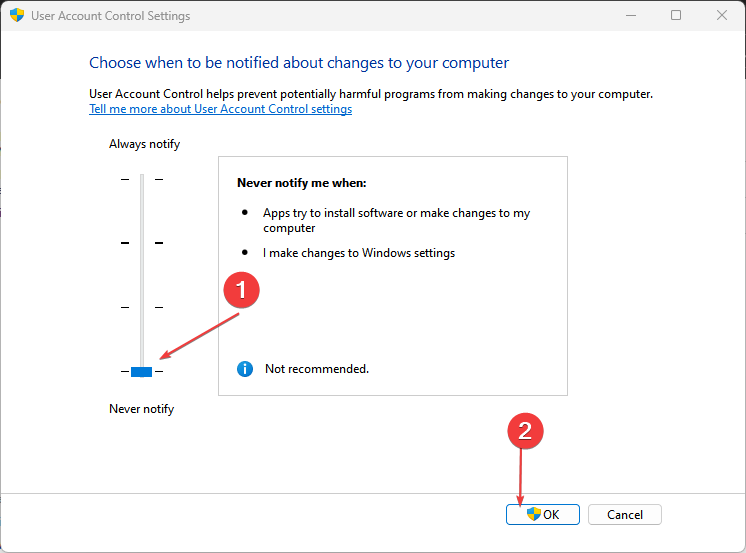
- Drag the slider control from Always notify to Never notify and click OK to save the changes.
- Try restarting your PC to see if the error persists.
Disabling the User Account Control allows the system services to run in administrative mode without permission.
2. Run an SFC scan
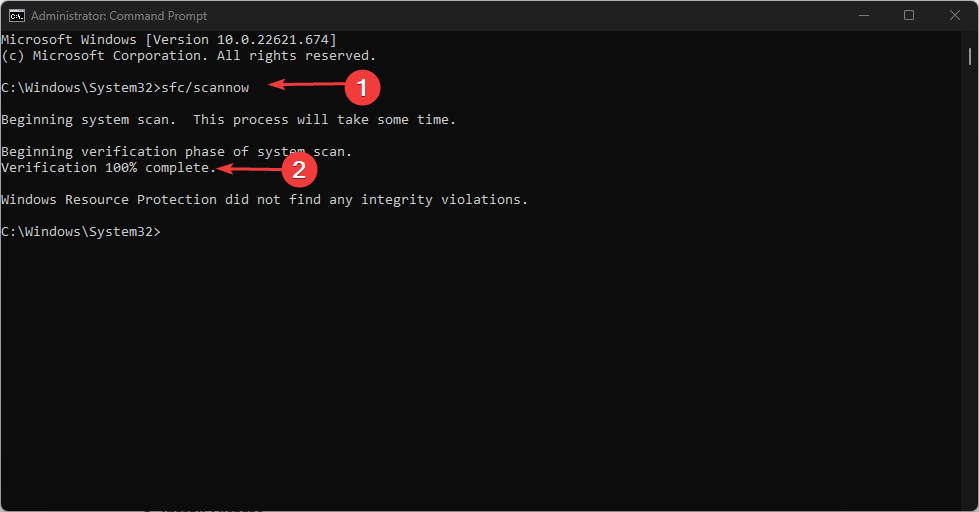
- Left-click the Start button, type Command Prompt, and click the Run as administrator option.
- Click Yes on the User Account Control prompt.
- Type the following and press Enter:
sfc /scannow - Restart your PC and check if the error persists.
Running an SFC scan will detect and repair corrupt system files causing the insufficient permissions error. You can check how to fix the run as administrator option if it’s not working on your PC.
3. Run Windows Update Troubleshooter
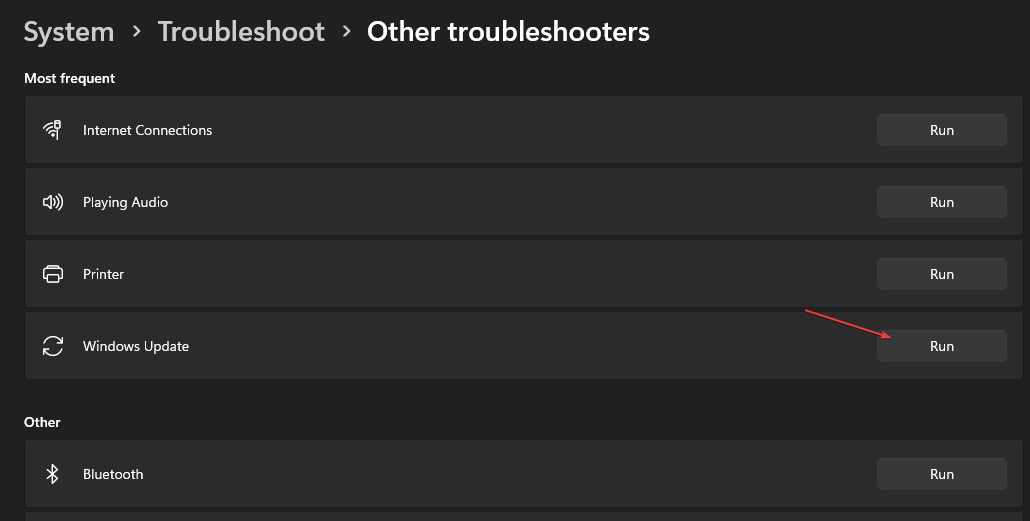
- Press Windows + I key to open Windows Settings app.
- Click System and select Troubleshoot.
- Then click on the Run button beside Windows Update.
- Follow the on-screen instructions and restart your PC afterward.
The troubleshooter will repair issues causing the Windows Update not to work on your PC. You can also check other ways to run the Windows Update troubleshooter in Windows 10 if you can’t get around the steps above.
4. Modify a Registry Key
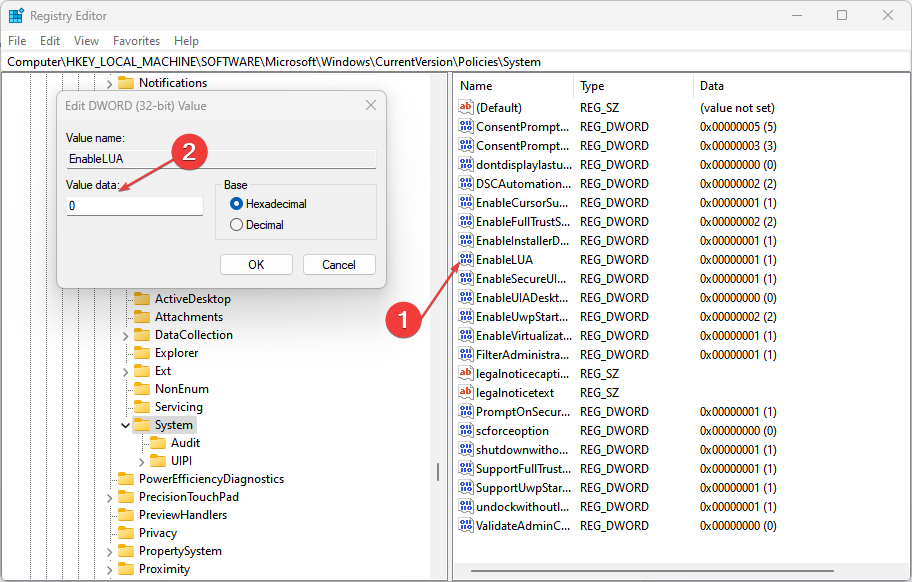
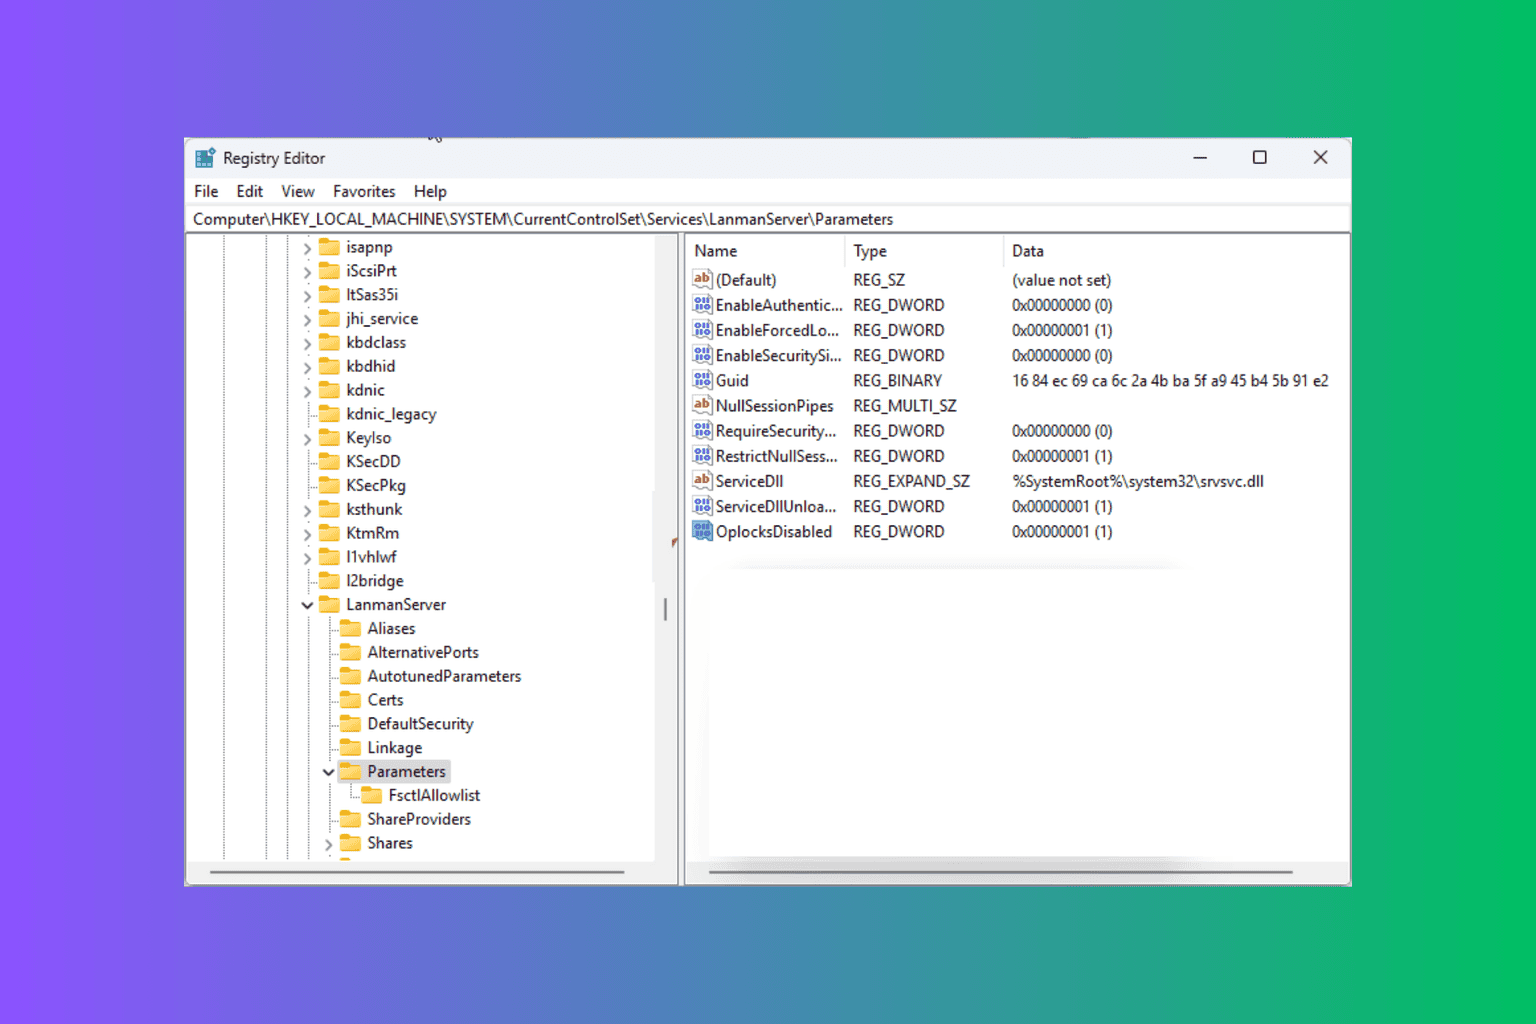
- Press Windows + R key to open the Run dialog box, type Regedit, and press OK to open the Registry Editor.
- Click Yes if prompted by UAC.
- Navigate to the following path:
HKEY_LOCAL_MACHINE\SOFTWARE\Microsoft\Windows\CurrentVersion\Policies\System - Select EnableLUA key, double-click on DWORD, go to the Edit DWORD Value section, set its Value Data to 0, then click OK.
- Exit the Registry Editor and restart your computer.
Tweaking the Registry Editor can fix the Registry key causing the error.
5. Clear the SoftwareDistribution folder
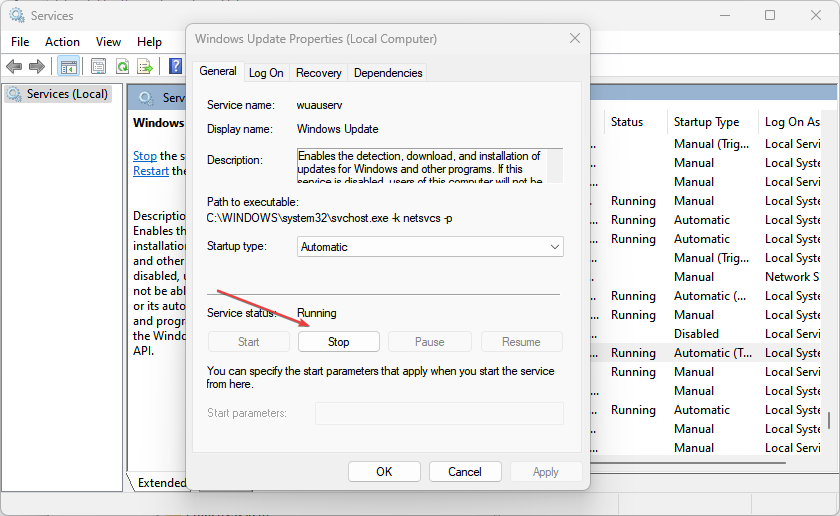
- Press Windows + R key to open the Run dialogue box, type services.msc, then click OK to open the Services app.
- Double-click Windows Update and select Stop.
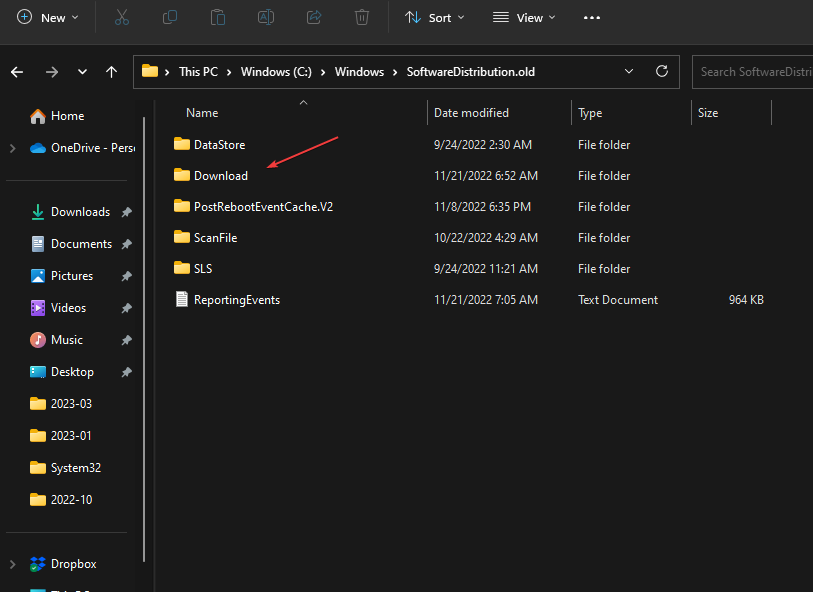
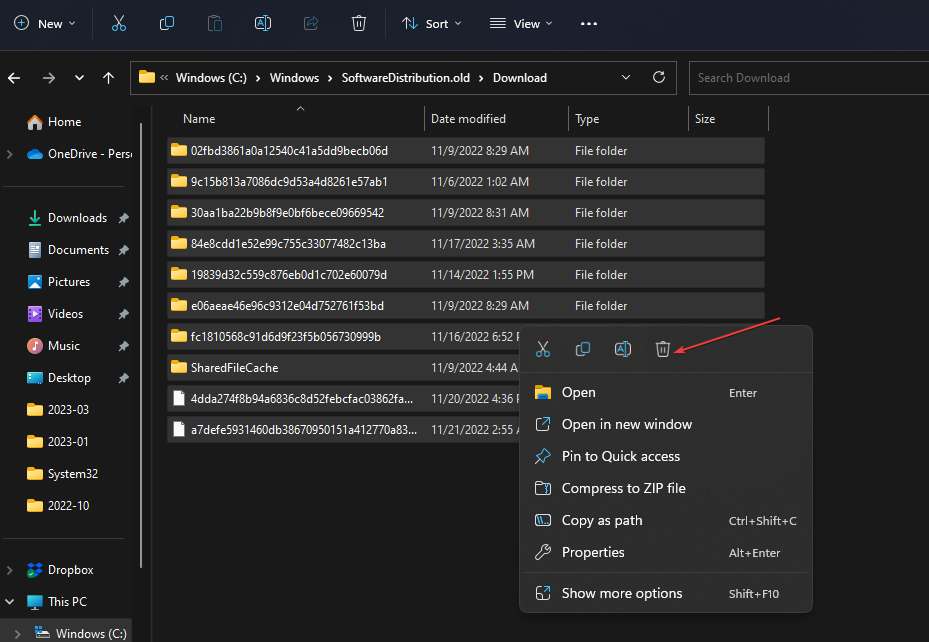
- Open the File Explorer, and go to the:
C:\Windows\SoftwareDistribution\Download folder - Press Ctrl + A to highlight all files, then press the Delete button.
- Find and double-click on Windows Update, then click Start.
- Restart your computer.
Clearing the SoftwareDistribution folder deletes Windows Update cache files and lets the system rebuild a usable distribution folder.
If your Windows Update services not running on your PC, read our guide to getting solutions.
Alternatively, you may be interested in fixing slow Windows updates on your PC. Likewise, check our guide on Windows Update stuck at 100% and some fixes.
Should you have further questions or suggestions, kindly drop them in the comments section.



User forum
0 messages