Sppextcomobj.exe: What Is It & How to Fix Its Errors
Keep your network drivers updated to avoid this error
5 min. read
Updated on
Read our disclosure page to find out how can you help Windows Report sustain the editorial team. Read more
Key notes
- Sometimes, it can be hard to point out legitimate Windows files as viruses and trojans also camouflage as real files with similar names.
- To differentiate between the two, always check the system file directory path and run a comprehensive malware scan to fish out the viruses.

Running your antivirus regularly can help you isolate any problematic files early before they get a chance to compromise your system. Sppextcomobj.exe seems to be quarantined by most antivirus programs as a malicious file.
Note that there is also a legitimate sppextcomobj.exe file with network service privileges. If it becomes obsolete, you may experience connection issues. So how do you resolve such errors? Here’s how.
What is sppextcomobj.exe?
The sppextcomobj.exe is a legitimate Windows file found in the following location: C:\Windows\System32
It is part of the Software Protection Platform, a suite of services that allows you to activate and manage the licenses for your Windows.
The sppextcomobj.exe file provides functionality for application developers to implement licensing and activation features for their applications. It is a critical Windows operating system component and should not be terminated or disabled.
Still, you should pay attention to this process because it may be a virus, trojan, or malware hiding in your system and causing many problems.
A classic tell-tale sign of whether you’re dealing with a malicious file is its location. It could be a virus masquerading as the real thing if it’s in an unfamiliar location.
Also, as most users reported, if your antivirus quarantines it, it is probably a virus and should be removed from your system. Other signs include your Wi-Fi keeps disconnecting, so be on the lookout for subtle but recurrent hints.
How do I fix sppextcomobj.exe errors?
A few workarounds that may salvage the situation include:
- Check your internet speeds and ensure they are optimal.
- If you’re using a wireless connection, ensure there are no interferences.
- Switch to an Ethernet cable if possible.
- Restart your router.
- Run the SFC scan to check for system file errors.
1. Run the network adapter troubleshooter
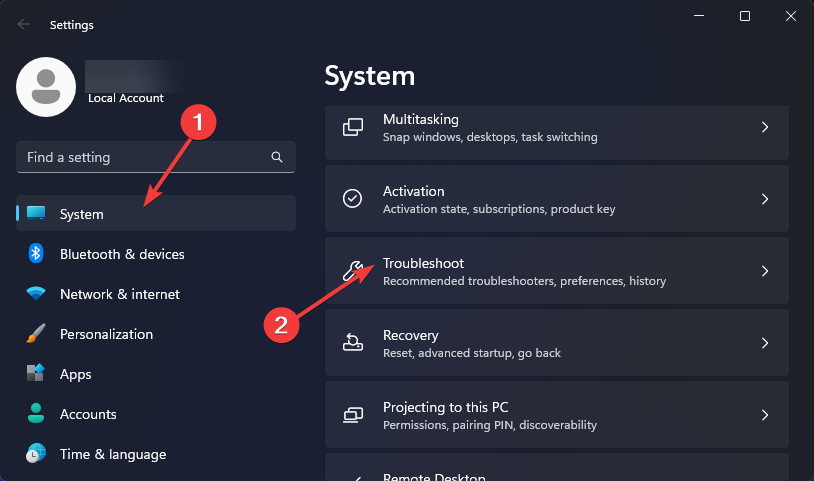
- Press Windows + I to launch Settings.
- Click on Troubleshoot on the right in the System tab.
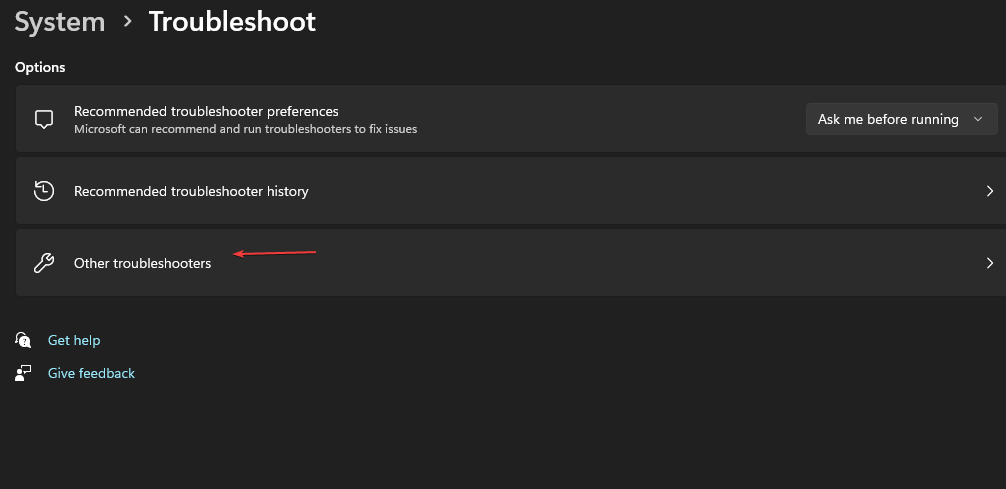
- Select Other troubleshooters.
- Locate the Network Adapter troubleshooter and click the Run button next to it.
2. Update your Network drivers
- Hit the Windows + I keys to open Settings.
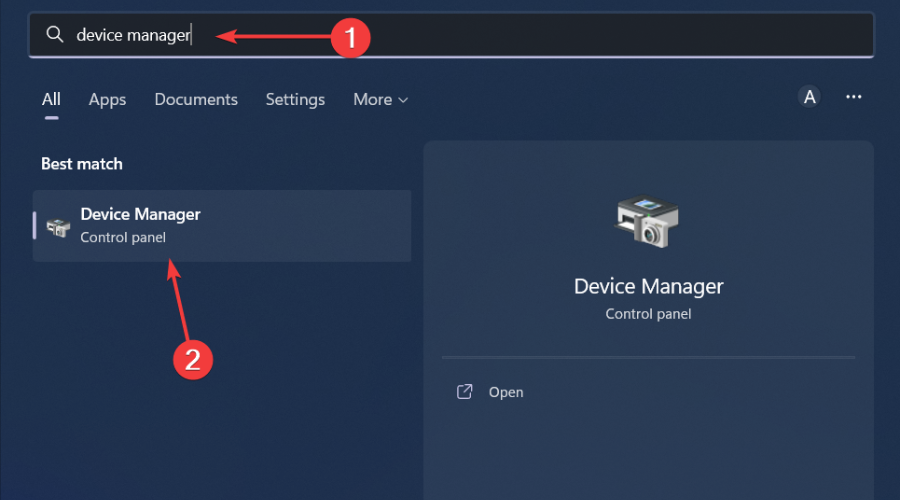
- Type Device Manager in the search bar and click Open.
- Navigate to your Network adapter, right-click, and select Update driver.
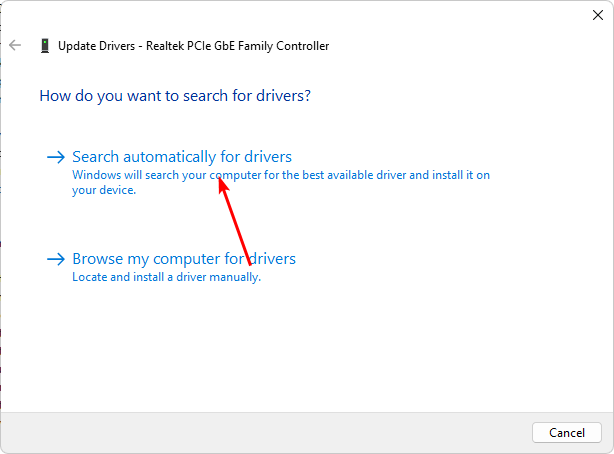
- Select Search automatically for updated drivers.
Windows is sometimes known to match you with the wrong drivers, so as an alternative, you’re better off using a driver updater tool.
Namely, Outbyte Driver Updater will scan your system for missing, corrupt, and outdated drivers and automatically download and install the correct versions.
It can also identify faulty drivers and remove them from your computer to ensure your hardware works perfectly.

Outbyte Driver Updater
Get rid of various system errors by updating PC drivers efficiently with this tool.3. Disable your firewall/antivirus temporarily
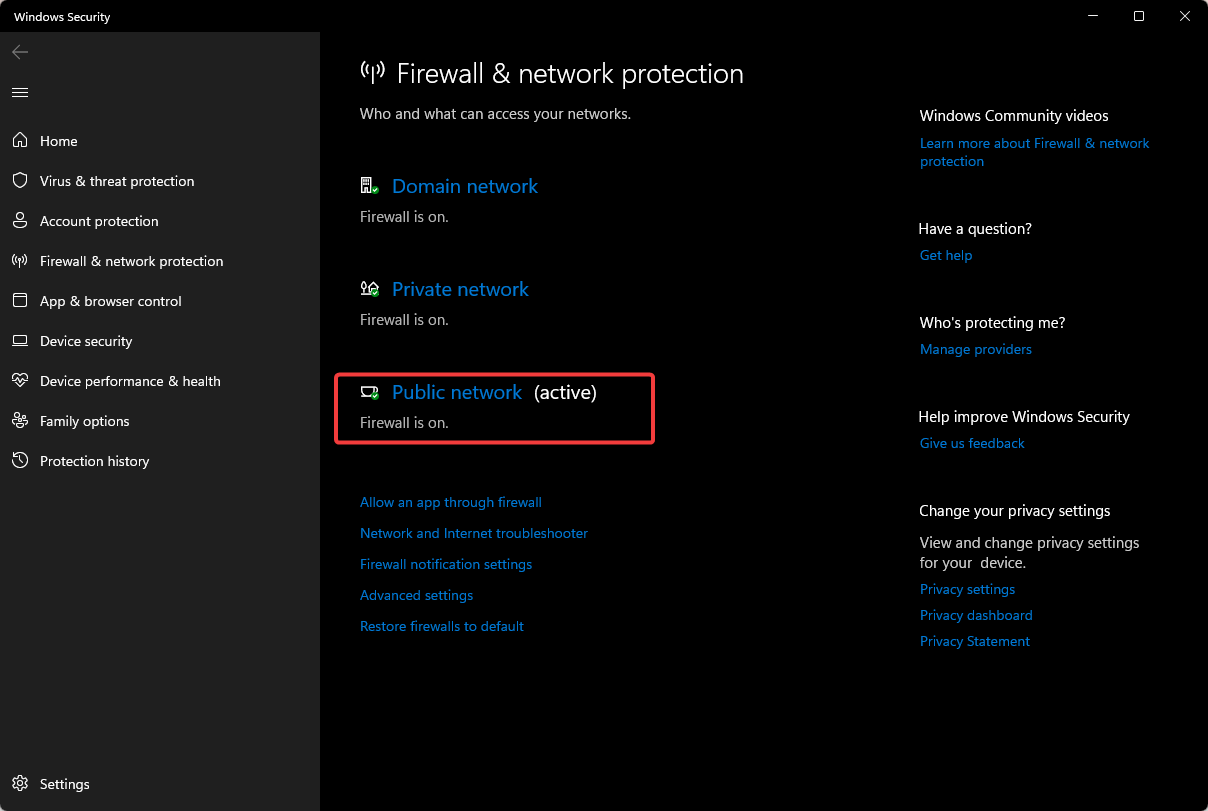
- Hit the Start menu icon, type Windows Security in the search bar and click Open.
- Click on Firewall & network protection, then select Public network.
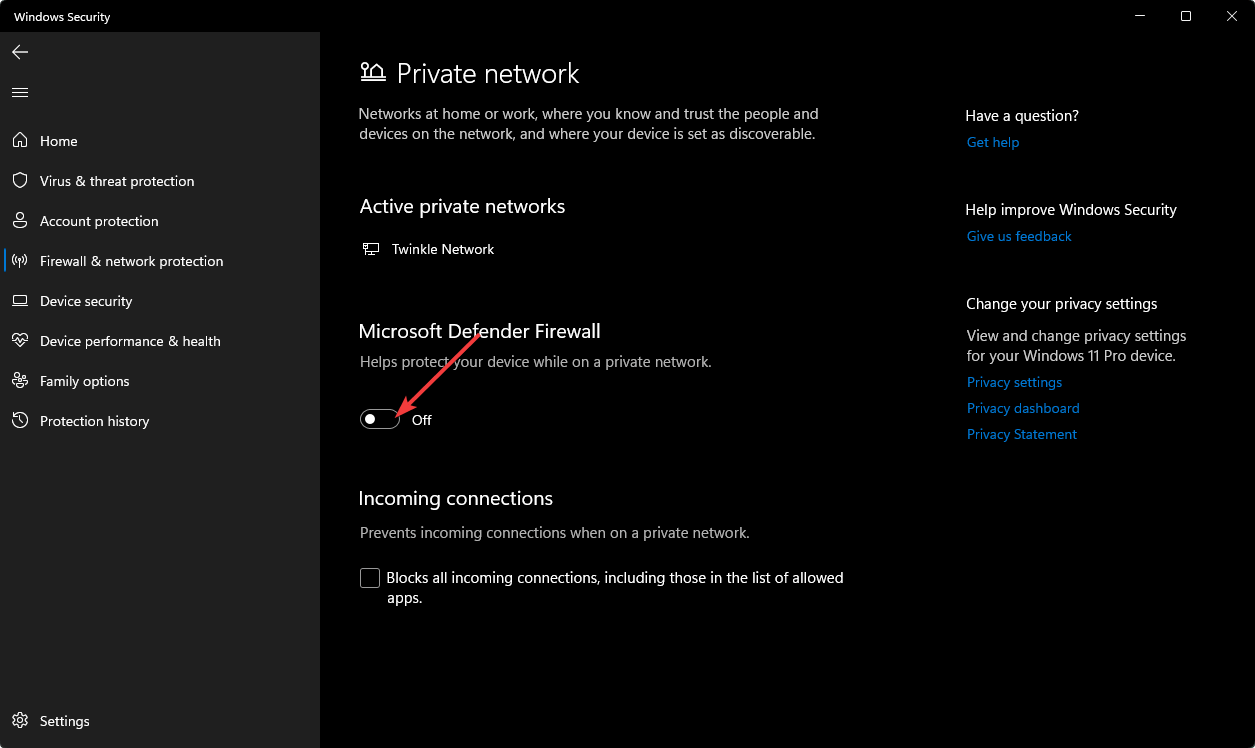
- Locate Microsoft Defender Firewall and toggle the off button.
4. Scan for viruses
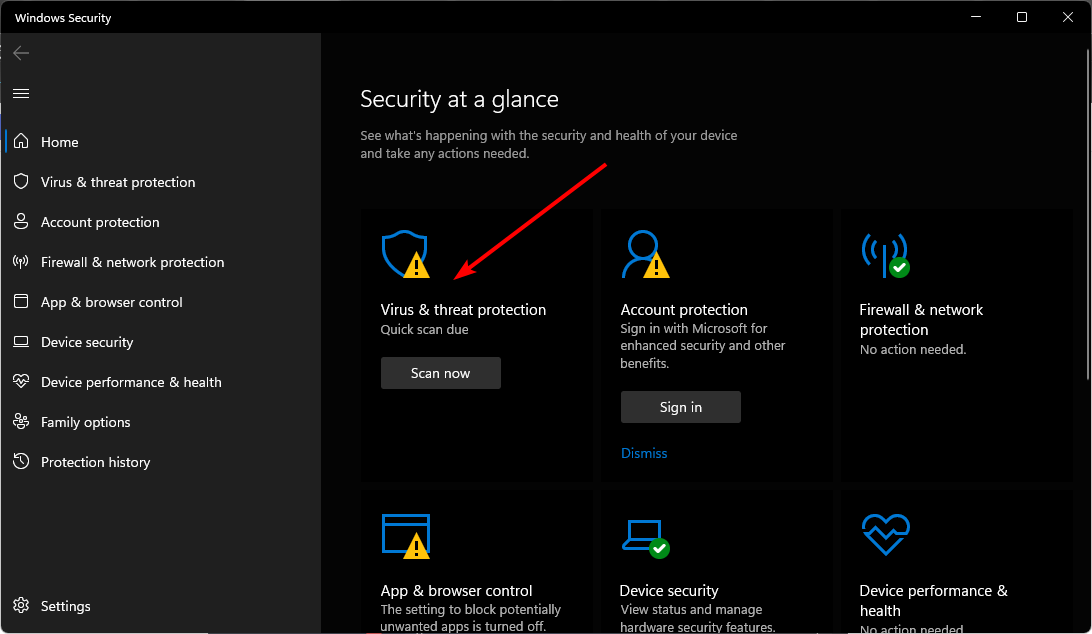
- Press the Windows key, search Windows Security, and click Open.
- Select Virus & threat protection.
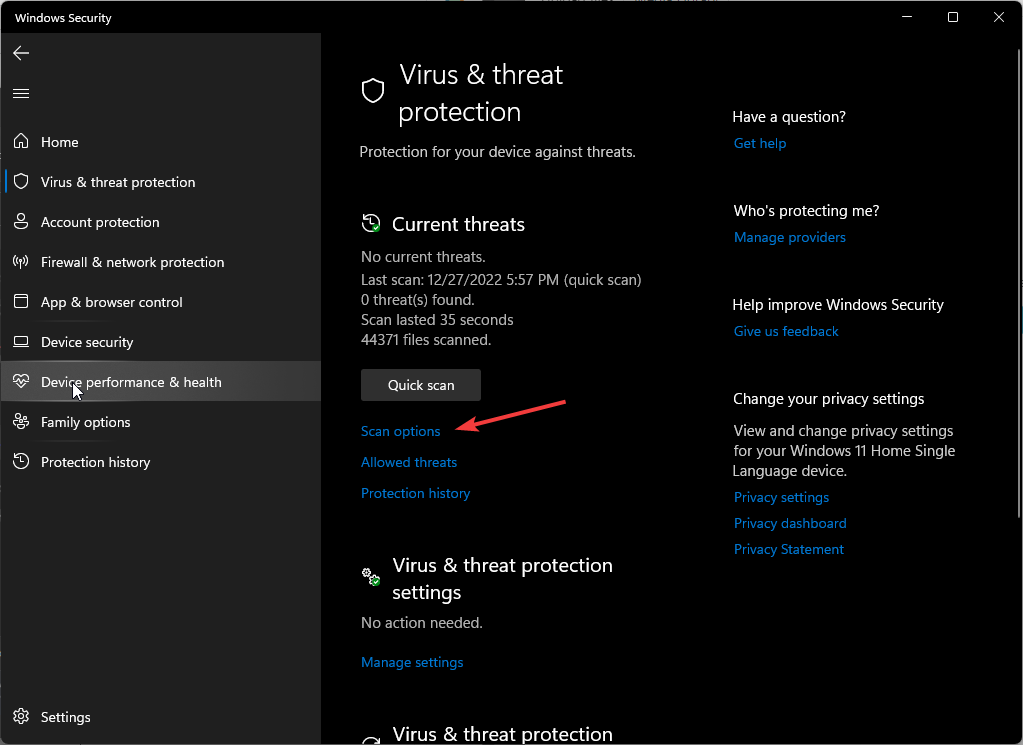
- Next, press Quick scan under Current threats.
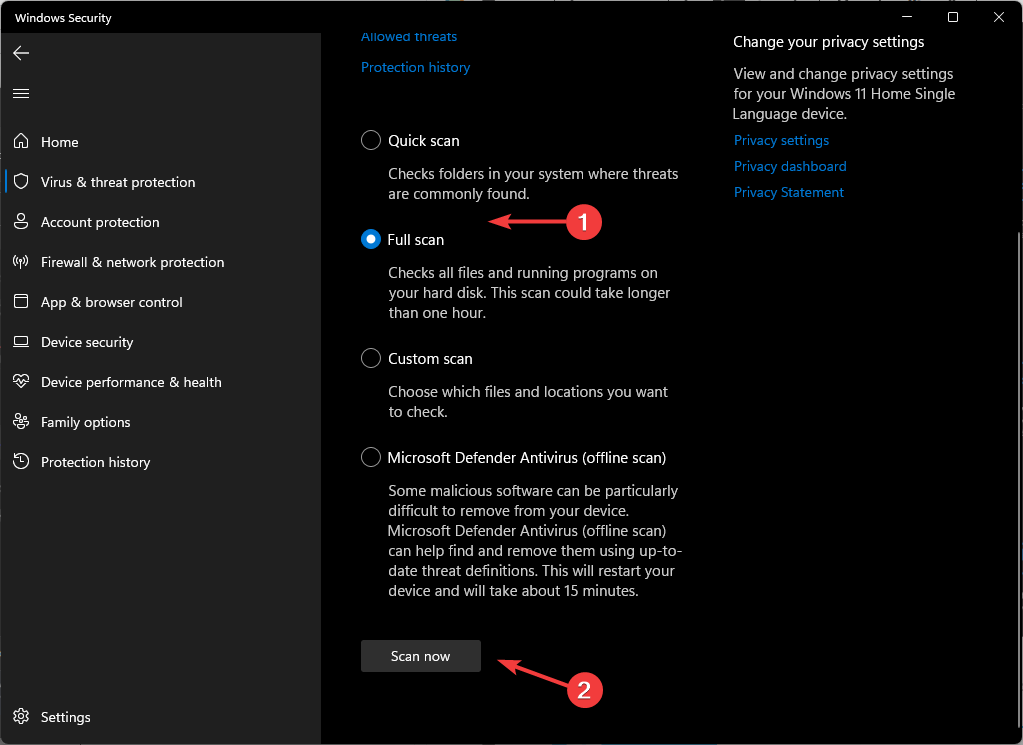
- If you don’t find any threats, proceed to perform a full scan by clicking on Scan options just below Quick scan.
- Click on Full scan, then Scan now to perform a deep scan of your PC.
- Wait for the process to finish and restart your system.
5. Reset your internet connection
- Hit the Windows Search icon, type cmd in the search bar, and click Run as administrator.
- Type the following commands, then press Enter after each:
netsh int ip reset resettcpip.txtnetsh winhttp reset proxynetsh int ip resetipconfig /releaseipconfig /renewipconfig /flushdnsnetsh winsock reset
6. Reset TCP/IP
- Press the Windows key, type cmd in the search bar, and click Open.
- Type in the following commands and press Enter after each one:
netsh winsock reset catalognetsh int ipv4 reset reset.lognetsh int ipv6 reset reset.log - Now restart your PC and see if the error is still there.
7. Edit the Registry
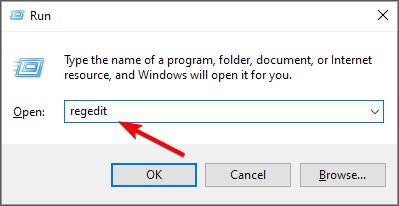
- Hit the Windows + R keys to open the Run command.
- Type regedit in the dialog box and hit Enter to open the Registry Editor.
- Navigate to the following location:
HKEY_LOCAL_MACHINE\SOFTWARE\Microsoft\Windows NT\CurrentVersion\SoftwareProtectionPlatform - Right-click on an empty space on the right pane, select New DWORD 32 bit, and rename it as DisableDnsPublishing.
- Under Value data, set it to 0.
As a disclaimer, editing the Registry should only be done where necessary to avoid irreparable damage to your system. If there’s no other option, ensure you backup your Registry or create a restore point before any changes.
In other news, we have an exciting article on how to open exe file content without installing, so ensure you check that out.
Elsewhere in our detailed guide, we also answer everything about the itibiti.exe file and whether it’s safe for your PC.
Share with us any other additional thoughts on this article down below.









User forum
0 messages