Not All of The Updates Were Successfully Uninstalled [Fix]
Check for the security threats first
4 min. read
Updated on
Read our disclosure page to find out how can you help Windows Report sustain the editorial team. Read more
Key notes
- This error could occur due to corrupted update files, conflicting software or system instability.
- To fix it, you can use DISM commands, Command Prompt or Registry Editor to uninstall the updates.
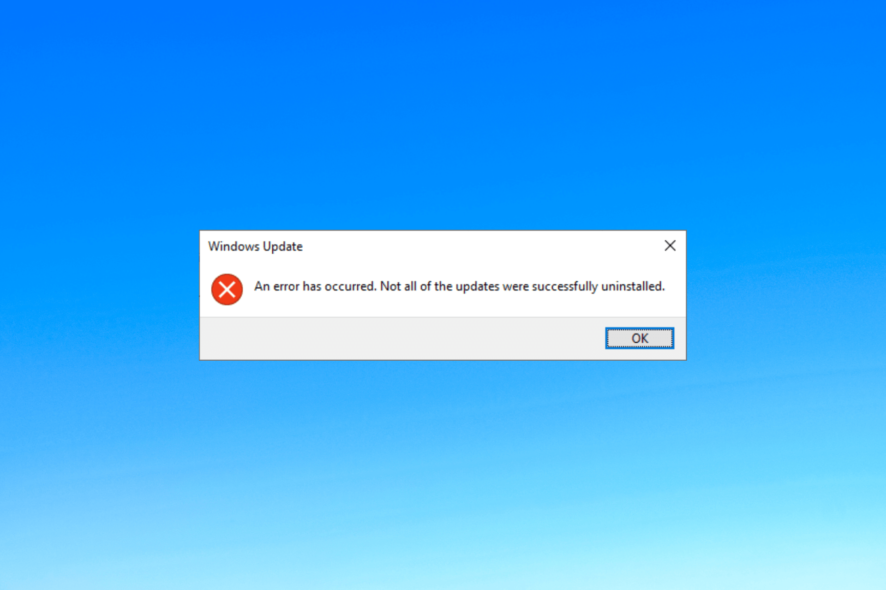
If you encountered the error has occurred, not all of the updates were successfully uninstalled while trying to uninstall Windows updates, then this guide can help.
This guide will cover some expert-recommended methods to fix it right after discussing the causes.
Why didn’t the system uninstall all the updates?
There could be various reasons for this error; some of the common ones are mentioned here:
- Insufficient permissions – If the user account you use to uninstall an update doesn’t have admin privileges, you may face this issue. Try logging in from an administrator user account.
- Software or process interference – Some software or process may conflict with the uninstallation process, causing the termination of it. Remove unwanted apps & processes and try again.
- System instability – If the system experiences unexpected errors during the uninstallation process, it can lead to incomplete removal of the updates. Check for disk errors and run memory tests.
- Corrupted update files – This uninstallation process may not be successful and come up with this error message if the update files are incomplete or corrupted.
Now that you know the causes, let us jump into the solutions to resolve the problem.
How do I uninstall an update that won’t uninstall?
Before engaging in advanced troubleshooting steps, you should consider performing the following checks:
- Restart your computer.
- Make sure you have logged in using an administrator account.
- Try deleting unwanted apps and ending unnecessary processes.
If these minor tweaks didn’t work for you, check out the solutions mentioned below.
1. Use Command Prompt
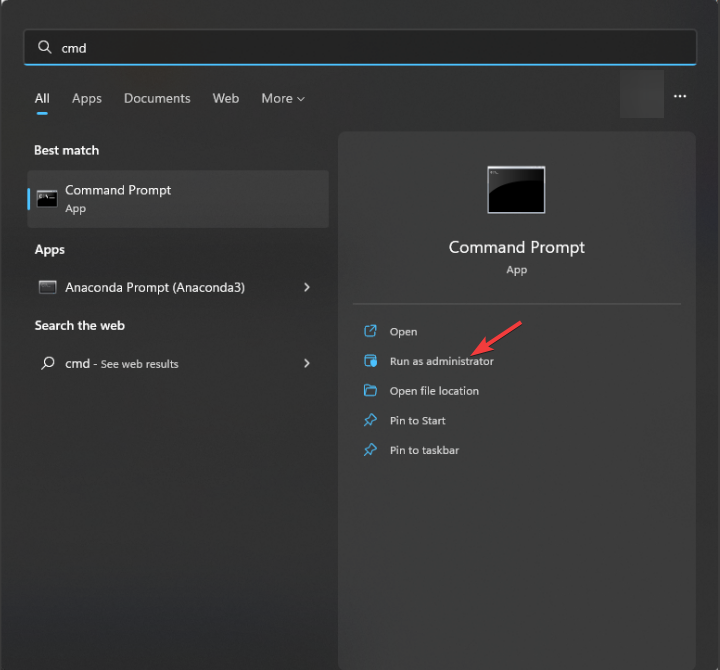
- Press the Windows key, type cmd, and Run as administrator.
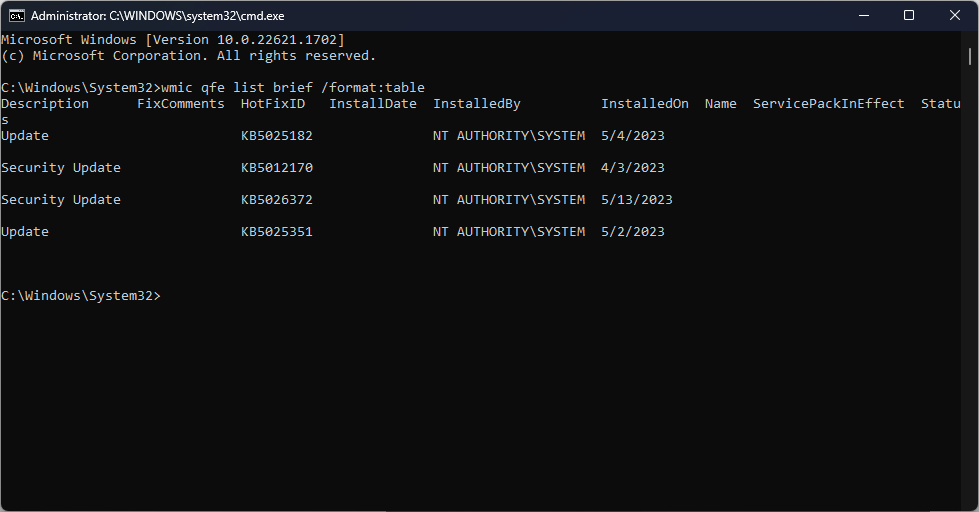
- Type the following command to find the update you want to uninstall and press Enter:
wmic qfe list brief /format:table - A list of updates available for uninstallation will be listed, copy and paste the following command after replacing NUMBER with update number and hit Enter:
WUSA /UNINSTALL /KB:NUMBER - Click Yes when prompted, then restart your computer to complete the task.
2. Use the DISM tool
- Press the Windows key, type cmd and Run as administrator.
- Type the following command and press Enter:
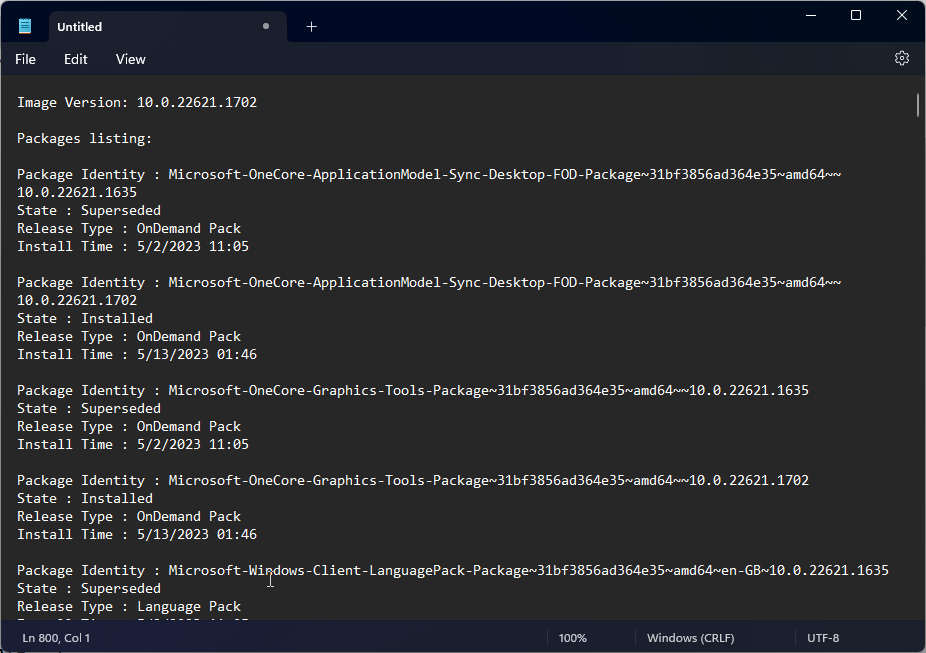
dism /online /get-packages | clip - You can see the output of the command copied into a clipboard. Open a Notepad and paste it.
- Now locate the update you want to delete, and copy its package identity.
- Copy and paste the following command after replacing PACKAGE_ID with the package identity you copied and hit Enter:
dism /Online /Remove-Package /PackageName:PACKAGE_ID - Once done, exit the command prompt and reboot your PC to confirm the changes. Now run Windows updates.
Additionally, if you want to execute an in-depth process of your system and repair all the stability issues, including the current error, you can try a specialized repair program.
3. Edit the Registry & uninstall the update
3.1 Modify the RPCAuthnLevelPrivacyEnabled Value
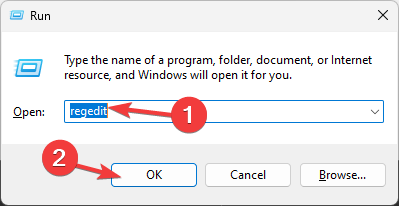
- Press Windows + R to open the Run console.
- Type regedit and click OK to open the Registry Editor.
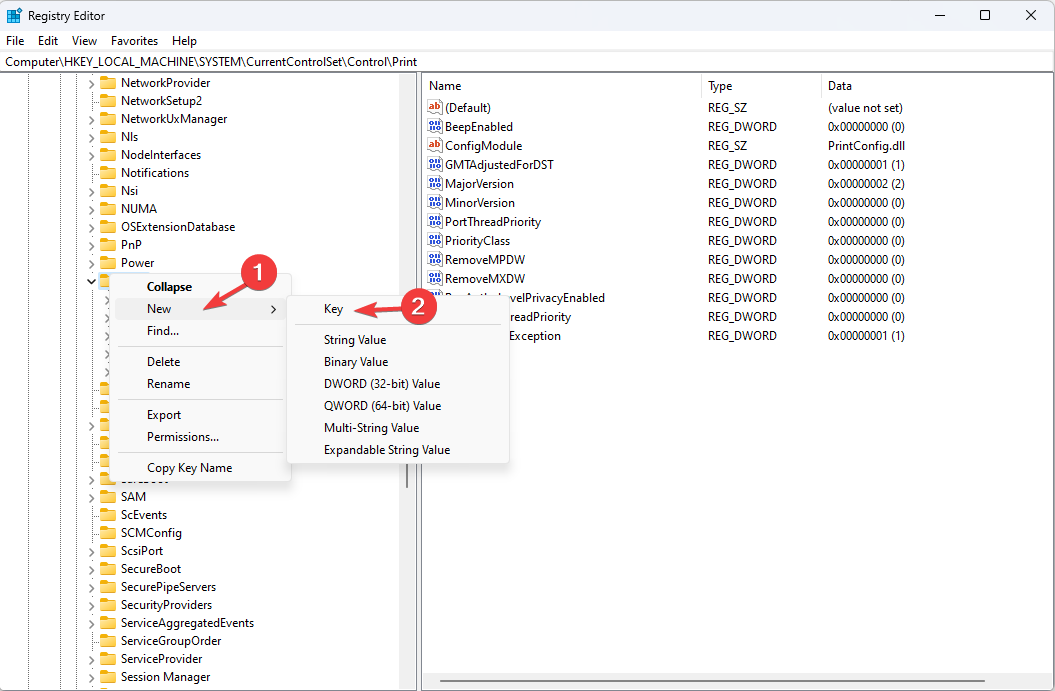
- Navigate to this path:
Computer\HKEY_LOCAL_MACHINE\System\CurrentControlSet\Control\Print - Right-click Print, select New, then DWORD (32-bit) Value.
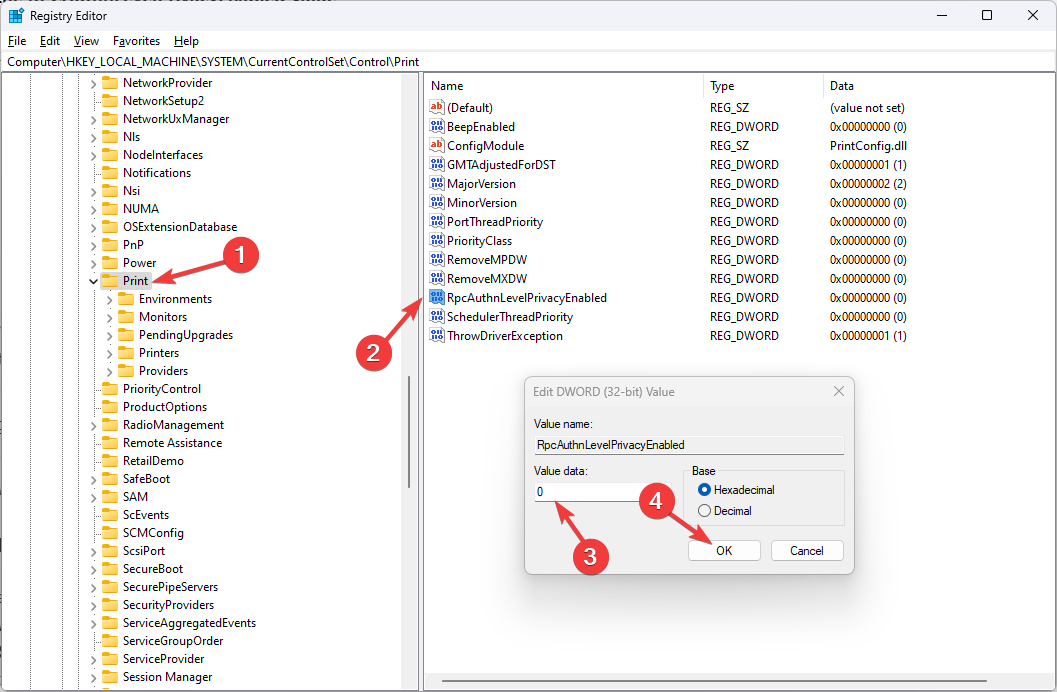
- Now right-click the DWORD and select Rename and name it RPCAuthnLevelPrivacyEnabled.
- Double-click this DWORD, and set the Value data to 0.
- Click OK to save the changes.
3.2 Uninstall updates
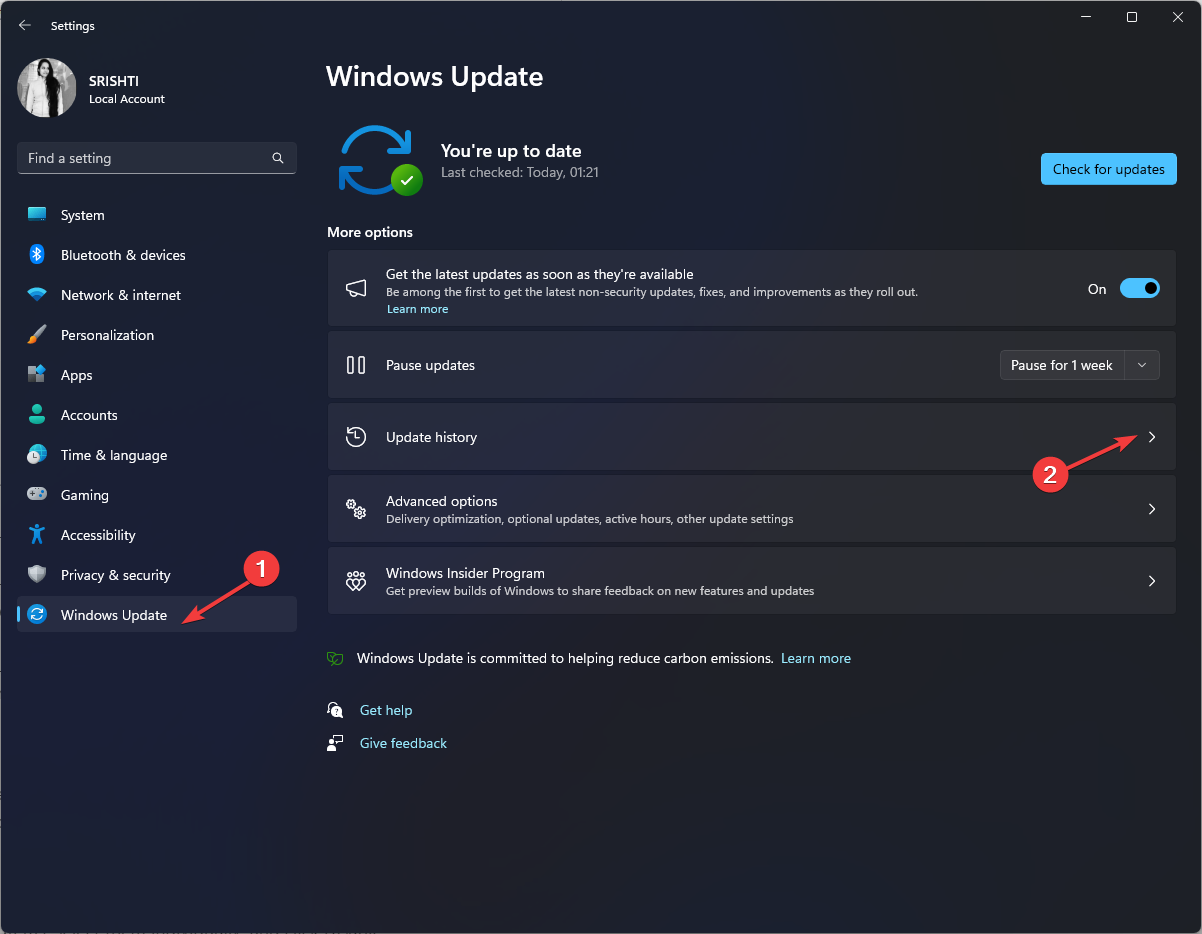
- Now press Windows + I to open the Settings app.
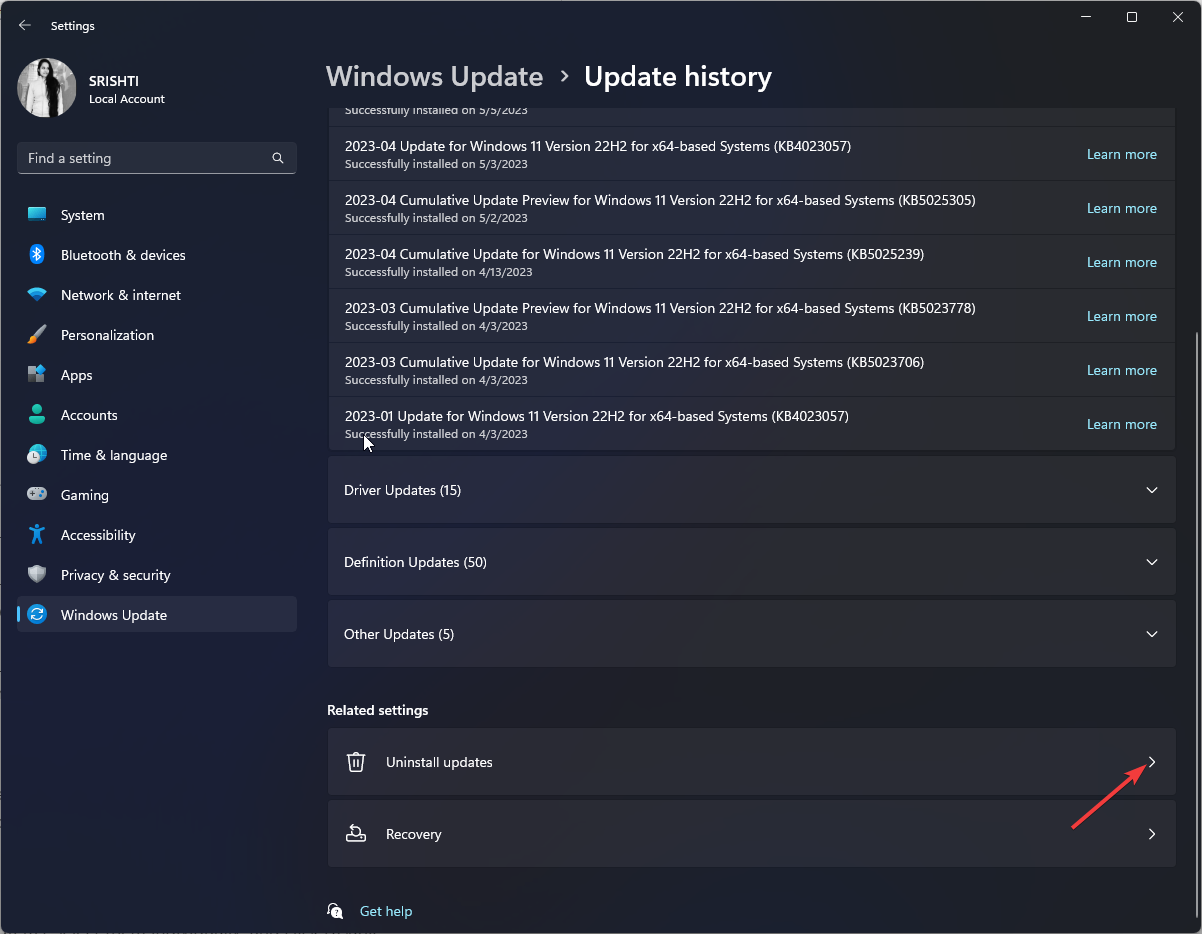
- Go to Windows Update, then click Update history.
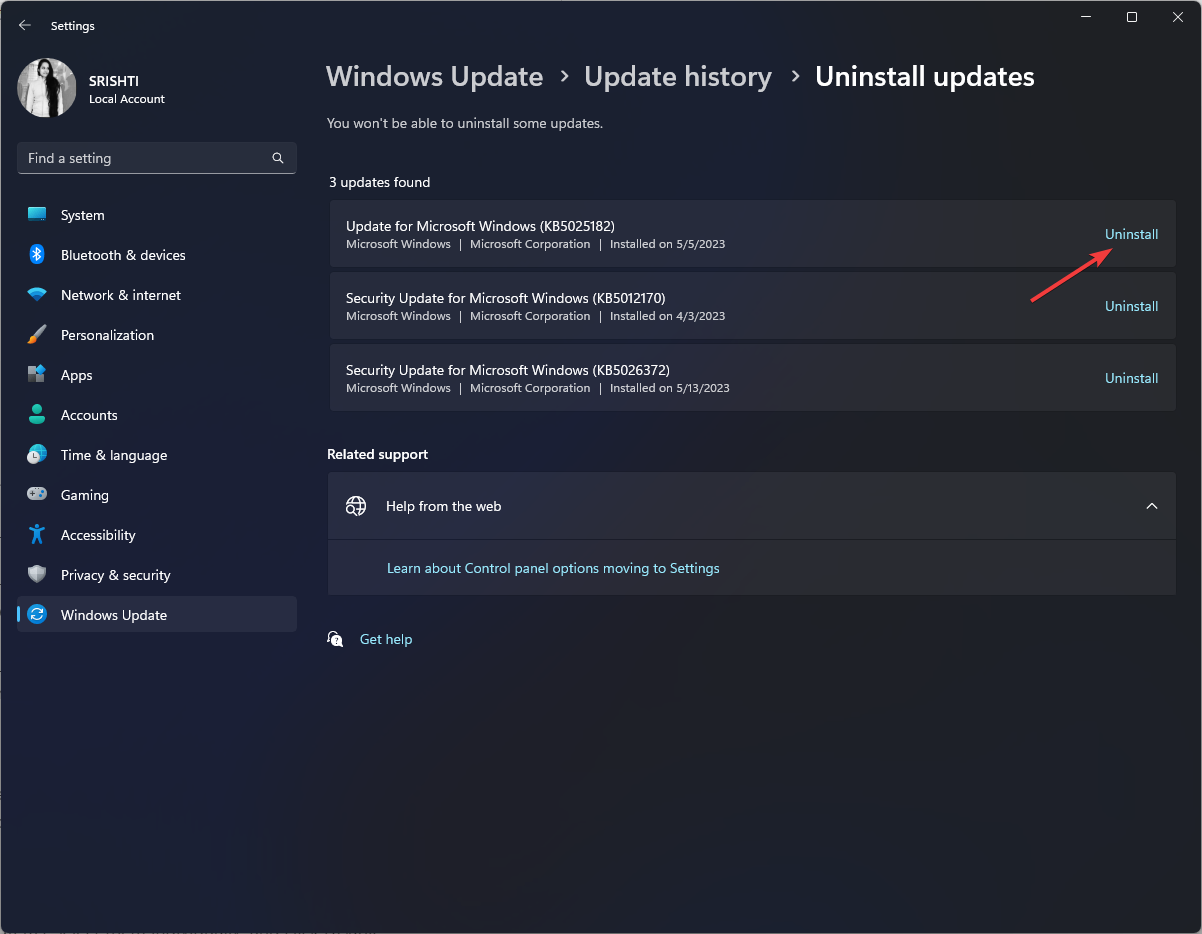
- Under Related settings, click Uninstall updates.
- Locate the update and click Uninstall.
4. Run your computer in a clean boot environment
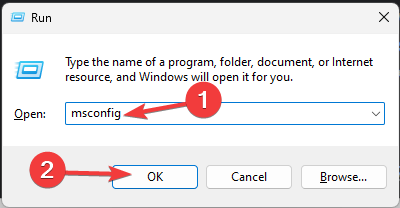
- Press Windows + R to open the Run console.
- Type msconfig and click OK to open System Configuration.
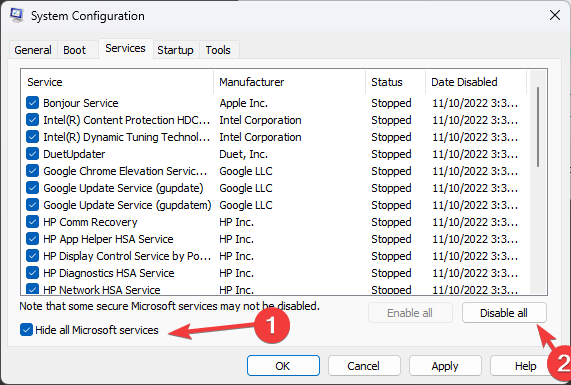
- Go to the Services tab, place a checkmark next to Hide all Microsoft services, and then click Disable all.
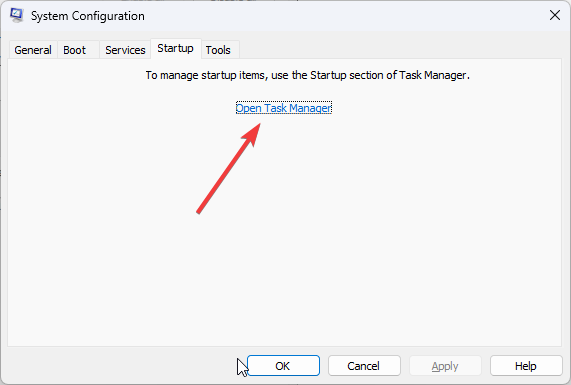
- Switch to the Startup tab, and click Open Task Manager.
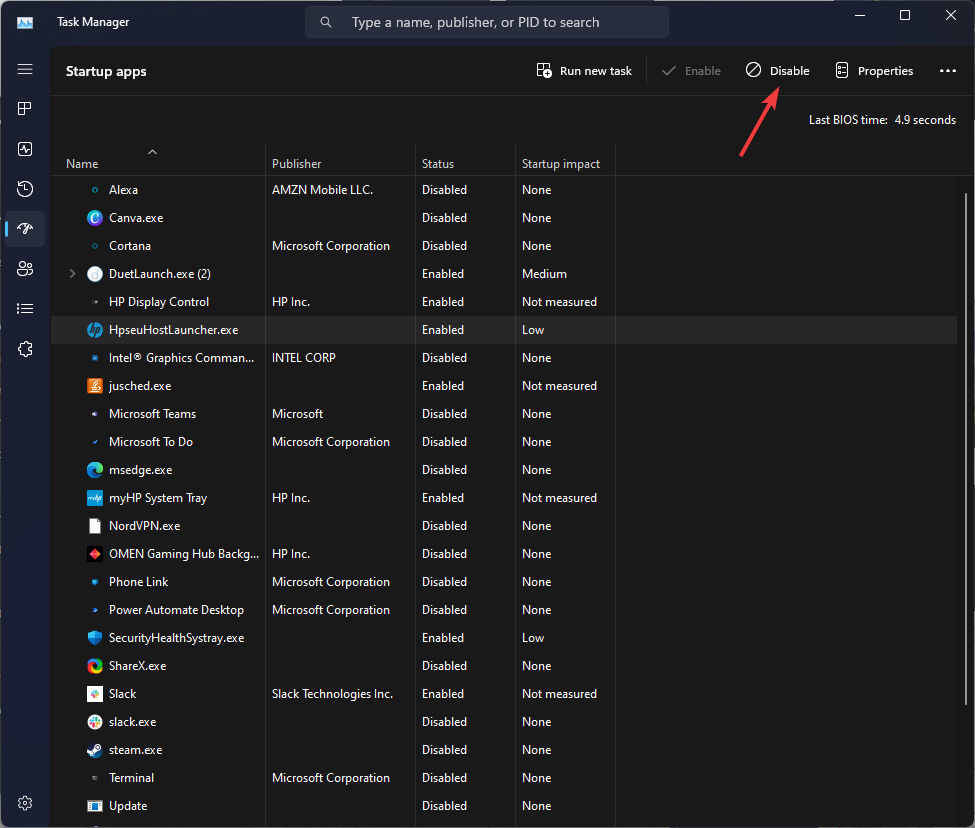
- Locate all the enabled Startup items, select them individually, and click Disable.
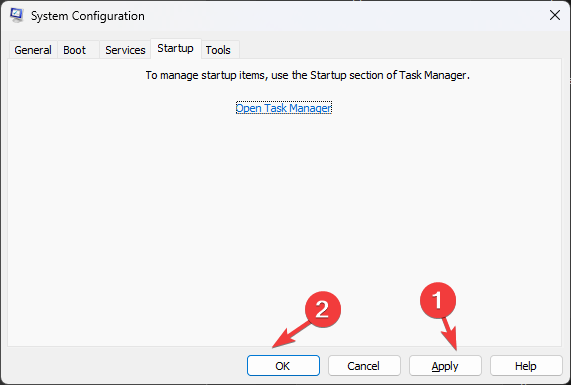
- Close the Task Manager. Go back to the System Configuration window and click Apply, then OK.
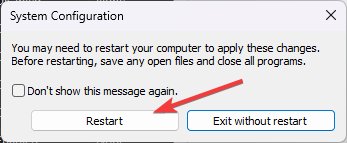
- Click Restart when prompted.
Windows will reboot with minimum services and processes running; try to uninstall the updates now by the indications from Solution 3.2.
So, this is how you can fix the Not all of the updates were successfully uninstalled error.
For more information, you can read our guide on how to uninstall updates on Windows 11.
If you have any questions or suggestions, feel free to mention them in the comments section below.




User forum
0 messages