Fix: Lenovo Docking Station is Not Detecting My Monitor
First, power off your laptop, docking station, and monitor
5 min. read
Updated on
Read our disclosure page to find out how can you help Windows Report sustain the editorial team. Read more
Key notes
- The Lenovo docking station is not detecting my monitor error could occur due to loose connections, incompatible hardware, or outdated drivers.
- To fix it, you can check the connections, restart your computer, update the graphics driver, or check the display settings.
If you’re facing the frustrating issue of your Lenovo docking station not detecting your monitor, it can disrupt your workflow and hinder productivity.
In this guide, we will explore various troubleshooting steps to help you fix the issue and get your monitor recognized by the docking station.
Why is my Lenovo docking station not recognizing my monitor?
Several factors can contribute to the issue; here are some common causes to consider:
- Connection issues – Loose or faulty cables, adapters, or connectors can prevent the docking station from properly detecting the monitor. Ensure that all cables are securely connected.
- Incompatible hardware – Some monitors may not be compatible with certain docking stations or require specific adapters. Verify that your monitor is compatible with it.
- Outdated drivers – Outdated or incompatible graphics drivers can cause communication issues between the docking station and the monitor. Update the graphics drivers.
- Display settings – Incorrect display settings on your laptop or computer can prevent the monitor from being detected. Verify that the monitor is enabled in the display settings and configured.
- Faulty ports or damaged cables – The faulty ports, damaged cables, or malfunctioning components could also cause this problem. Ensure there are no signs of damage.
So, now that you know the reasons for the problem, move to the troubleshooting steps.
How do I get my monitor to work with my docking station?
Before engaging in advanced methods, you should consider performing the following checks:
- Ensure that all cables connecting the docking station, monitor, and laptop are securely plugged in and there is no visible damage to any of them.
- Confirm that your monitor is compatible with the docking station. You may also try connecting your monitor directly to exclude any problems with the monitor and/or cable.
- Power off your laptop, docking station, and monitor.
- Disconnect & reconnect the power adapters from both the docking station and the monitor.
- Connect your docking station to a different monitor to determine with which device the issue lies.
- Ensure Windows has no pending updates.
Once done, check out the detailed solutions mentioned below.
1. Update the driver
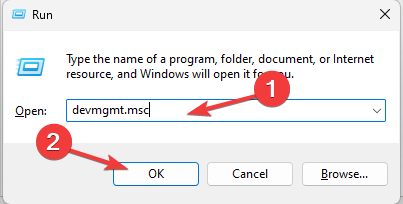
- Press Windows + R to open the Run dialog box.
- Type devmgmt.msc and click OK to open Device Manager.
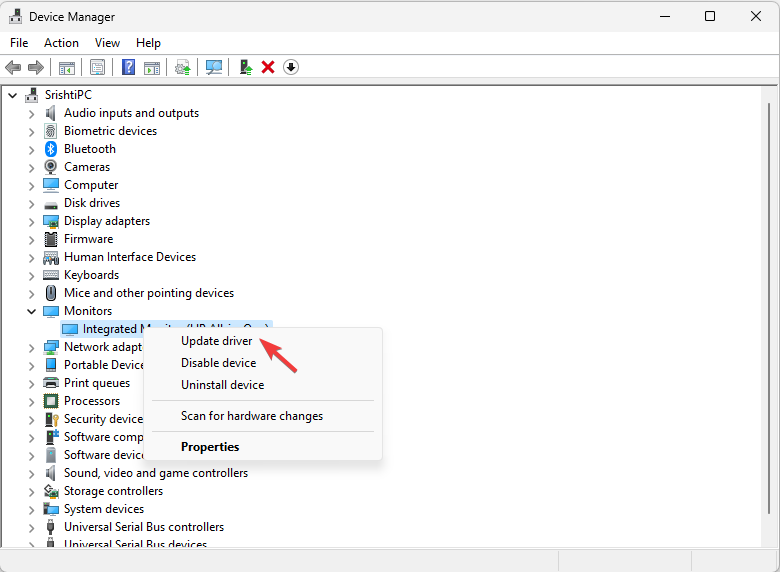
- Locate, and click Monitors to expand it.
- Right-click the monitor from the list and select Update driver.
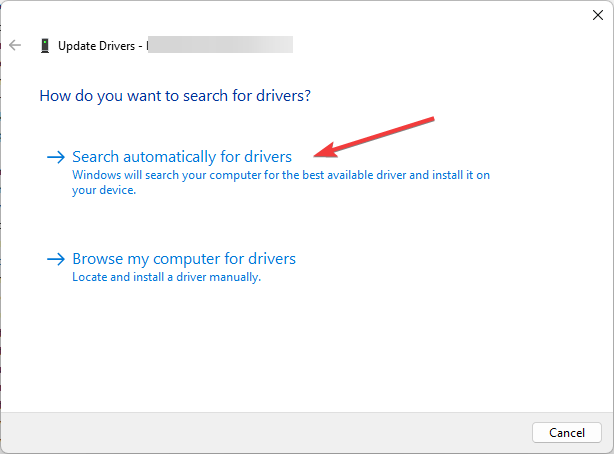
- Click Search automatically for drivers.
- Follow the on-screen instructions to complete the process.
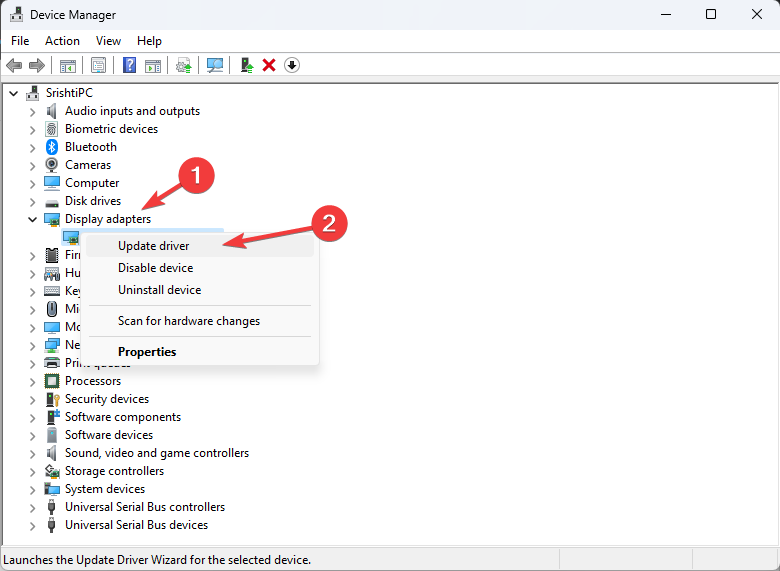
- Now go to Display adapters, and click it to expand it.
- Right-click the graphics driver and select Update driver.
- Click Search automatically for drivers.
- Follow the on-screen instructions to complete the process.
In some cases, you won’t be able to update the graphics driver manually if your OS doesn’t detect it. So, you can either search for it on the web or use a life-saving driver updating solution.
We advise you to consider the professional driver manager as it will automatically locate any outdated drivers and update them properly in a few moments.
2. Restart the graphics driver
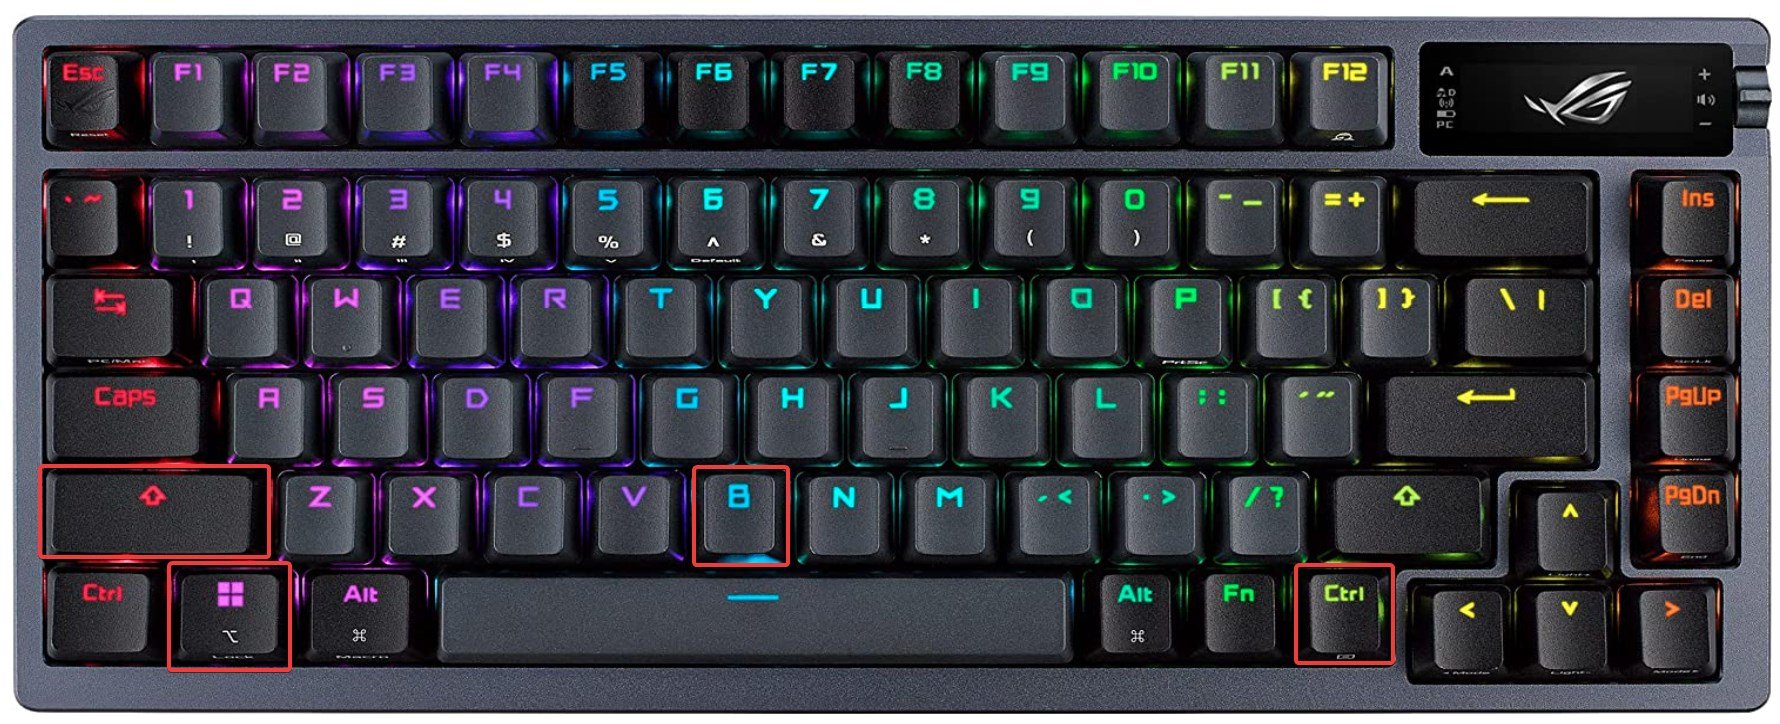
- Press the Windows + Ctrl + Shift + B on your keyboard.
- The screen will go black for seconds, and it triggers a signal to the operating system to reset the graphics driver.
It addresses issues related to a frozen or unresponsive display. By restarting the graphics driver, it attempts to recover the display and bring it back to a responsive state without requiring a system reboot.
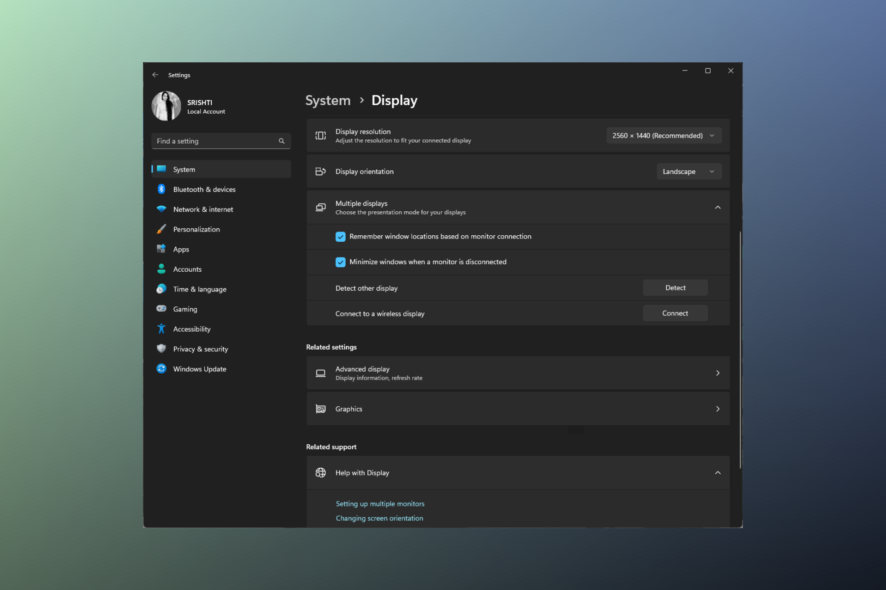
3. Adjust the display settings
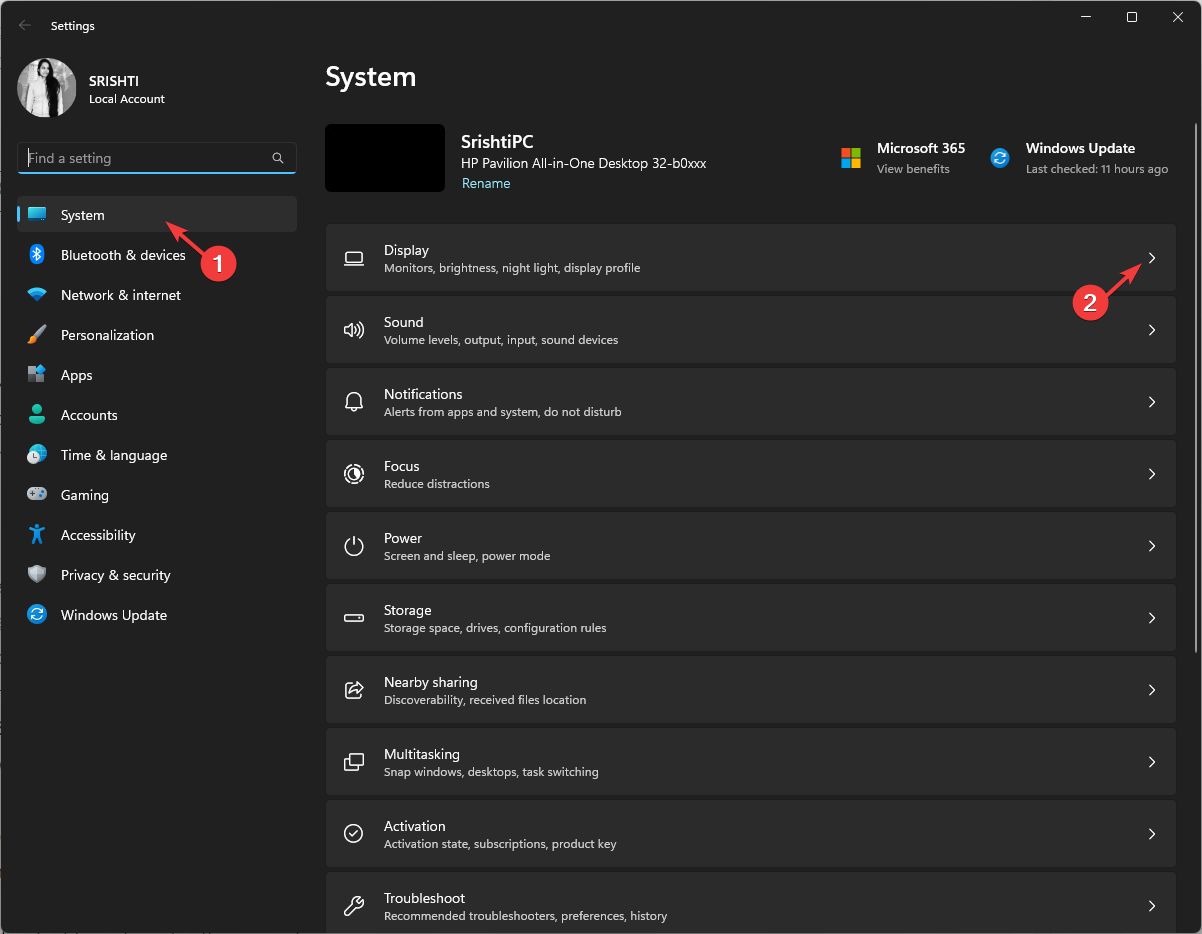
- Press Windows + I to open the Settings app.
- Go to System, then click Display.
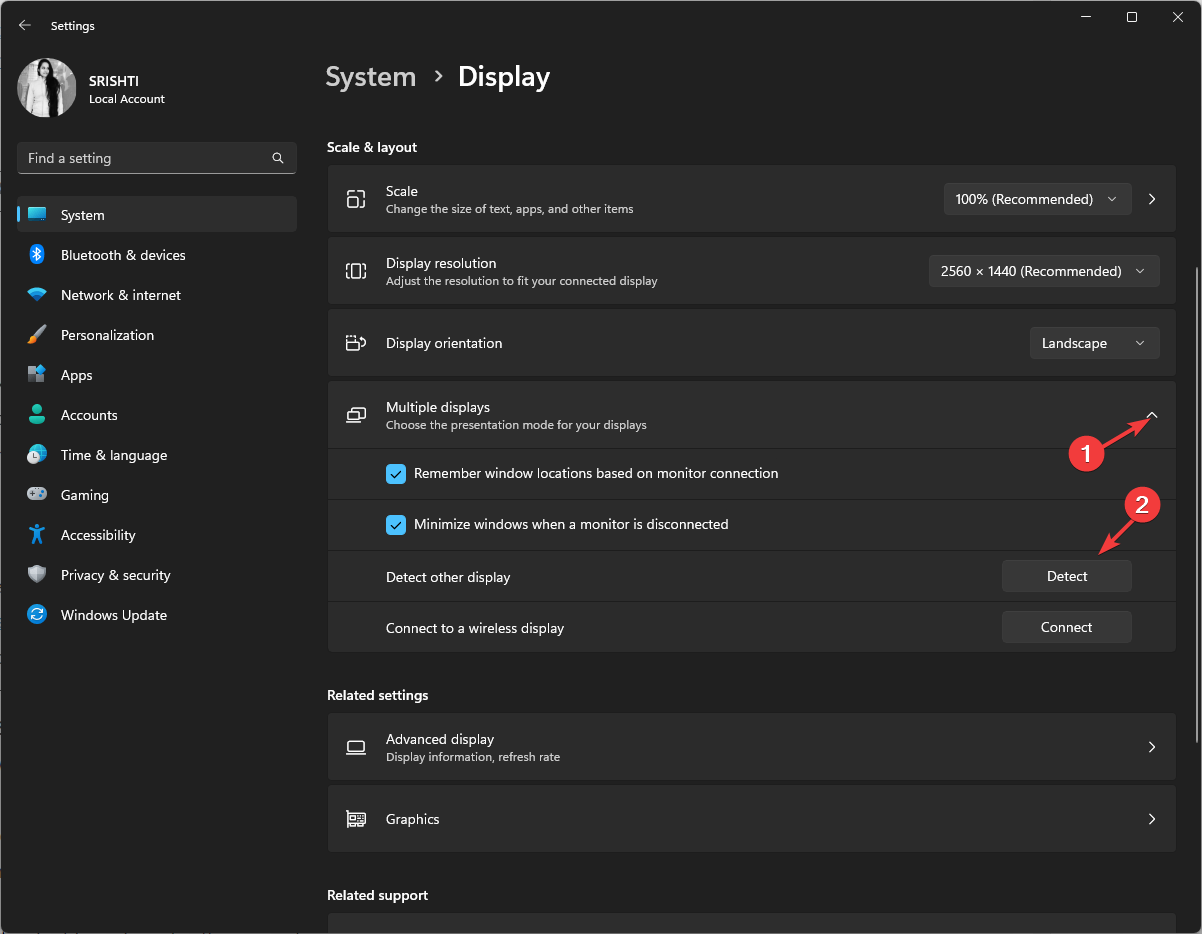
- Click Multiple displays to expand it.
- Locate Detect other display and click the Detect button.
- From the drop-down menu, select either Duplicate or Extend.
- Once your monitor lights up, locate Identify displays, and click the Identify button. Numbers will pop up on your monitors; note down the number and line the devices in the same order.
4. Update the Lenovo docking station’s firmware
- Check the docking station or user manual to identify the specific model. Open a web browser of your choice and go to the official Lenovo support website.
- On the Lenovo support website, enter the model name or number of your docking station in the search bar. Select the appropriate product from the search results to access the support page.
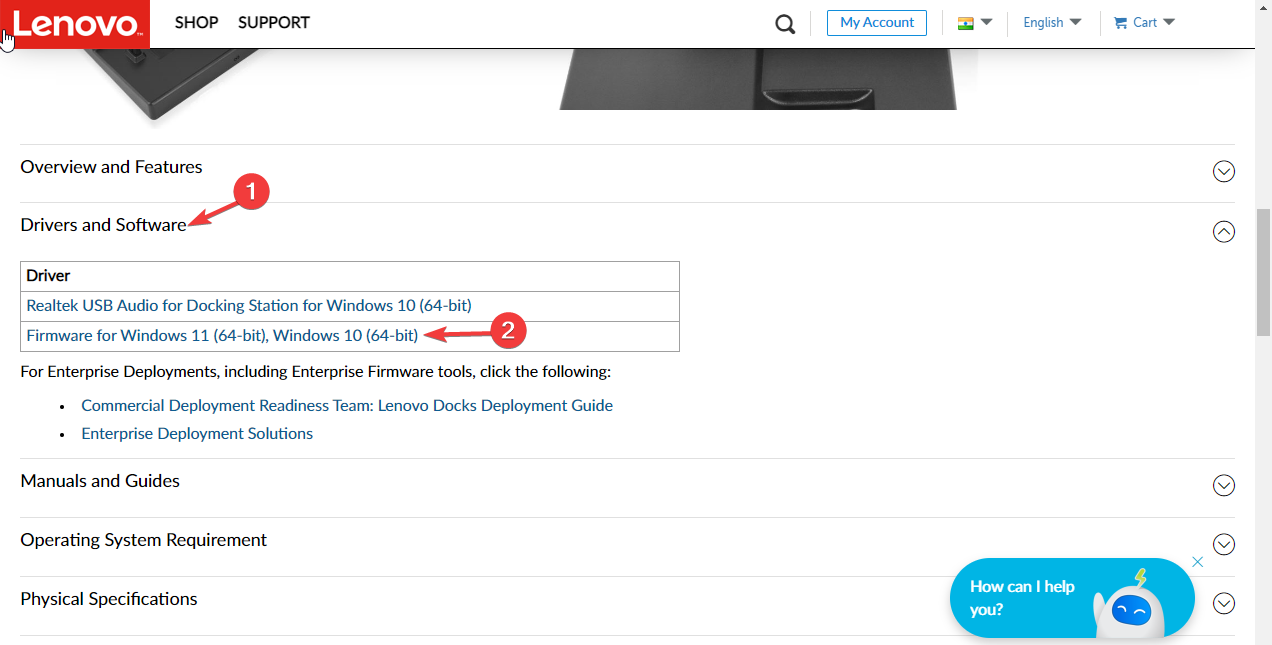
- Look for a section on the support page titled Drivers & Software.
- Within the Drivers & Software section, look for any firmware updates specifically mentioned for your docking station model.
- If a firmware update is available, click on the associated download link to get it. Now double-click the downloaded file, and follow the provided instructions carefully to update the firmware.
By following these troubleshooting steps, you should be able to identify and resolve the issue of your Lenovo docking station not detecting your monitor.
If you are facing issues like Docking Station Not Working / Not Detected on another laptop, we recommend you check out this guide to find the solutions.
Please feel free to give us any information, tips, and your experience with the subject in the comments section below.

User forum
0 messages