How to Send an Outlook Invite With Multiple Times
You can do this by sending multiple invites or with specialized tools
4 min. read
Updated on
Read our disclosure page to find out how can you help Windows Report sustain the editorial team. Read more
Key notes
- While Outlook supports events, it doesn't allow you to send an invite with multiple time options.
- Using ICS files or specialized add-ins might be the best way to send these types of invites.
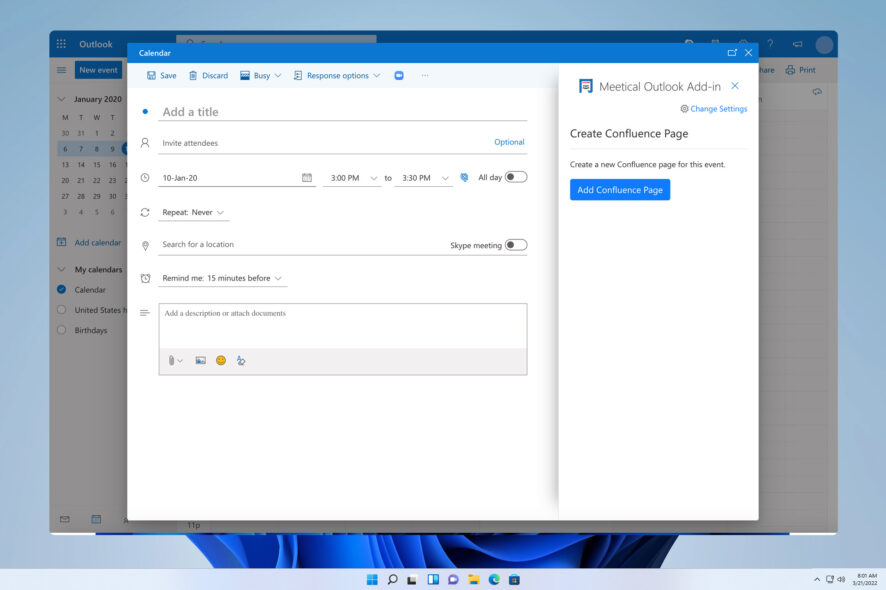
Outlook fully supports events and invites, but by default, it’s not possible to send an Outlook invite with multiple times.
This can be a problem and make scheduling events even more complicated. We decided to address this limitation and show you how to circumvent it.
Can I send one Outlook invite for multiple dates?
By default, Outlook doesn’t support sending a meeting invitation with multiple time slots. This is a major flaw, but there are ways to work around this limitation by doing the following:
- You can send multiple individual invites.
- Alternatively, you can use third-party tools to bypass this limitation.
How do I send an Outlook invite with multiple times?
1. Create an appointment in Outlook
- Open Outlook and click the Calendar icon in the bottom left corner.
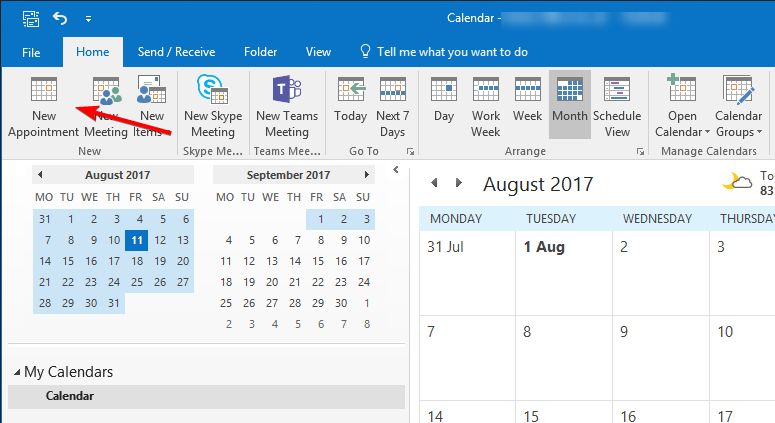
- Click the New Appointment icon.
- Go to the Scheduling Assistant in Outlook.
- You’ll now see all your available time slots. Drag and drop available time slots to the invitation.
- Click the Attendees tab and invite the desired attendees.
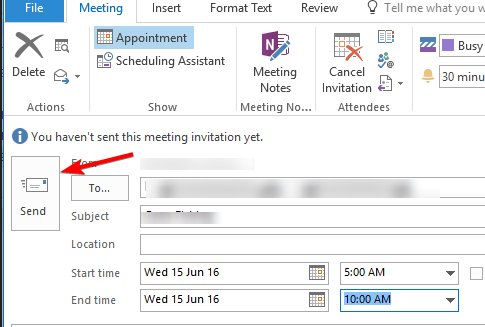
- Lastly, click on Send to send the invite.
2. Create individual invites for each slot
- Open Outlook, and go to your Calendar.
- Select New Appointment and add the attendees.
- Set the desired time and click on Send.
- Repeat the steps from above for every time slot.
This is a quick and helpful workaround, but it can be impractical since you’ll have to send multiple meeting requests in Outlook. In addition, your recipients might have difficulty managing multiple event invite emails. But one can always mark meetings as tentative when not sure of participation.
If you need to share meeting information you can always forward invite meeting. Speaking of meeting information, you can always check meeting attendees for additional details.
3. Attach ICS files in an email
- In Outlook, open the Calendar.
- Click all New Items and choose Appointment.
- Enter the desired time and other information.
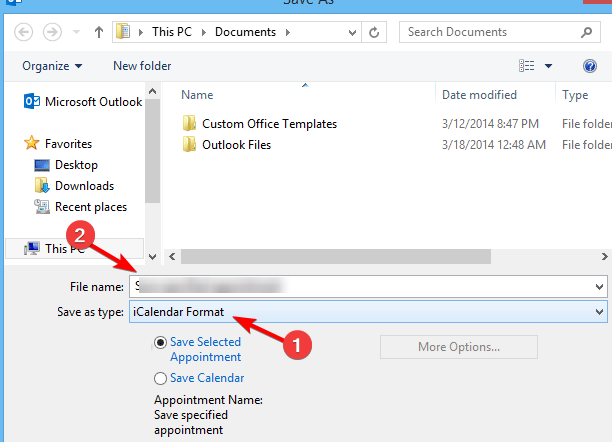
- Now go to File and choose Save as.
- Enter the desired name for the file and make sure to select iCalendar format in Save as type field.
- Repeat the steps from above to create multiple ICS files each with a different time slot.
- Create a new email message and add all your ICS files as attachments.
- Now send the email to all your attendees.
For this method to work, you need to explain to your attendees to open a single ICS file that meets their desired time slot and add it to their Outlook Calendar to select it.
This method is great since it allows you to create an Outlook calendar invite with multiple dates without using third-party tools. If needed you can also add BCC to meeting invite, in just a couple of steps.
4. Use the FindTime add-in
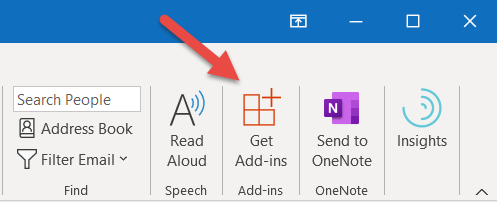
- Open Outlook. Go to Home and select Get Add-ins.
- Look for FindTime, select it, and choose Add.
- After adding FindTime, go and set up the new meeting.
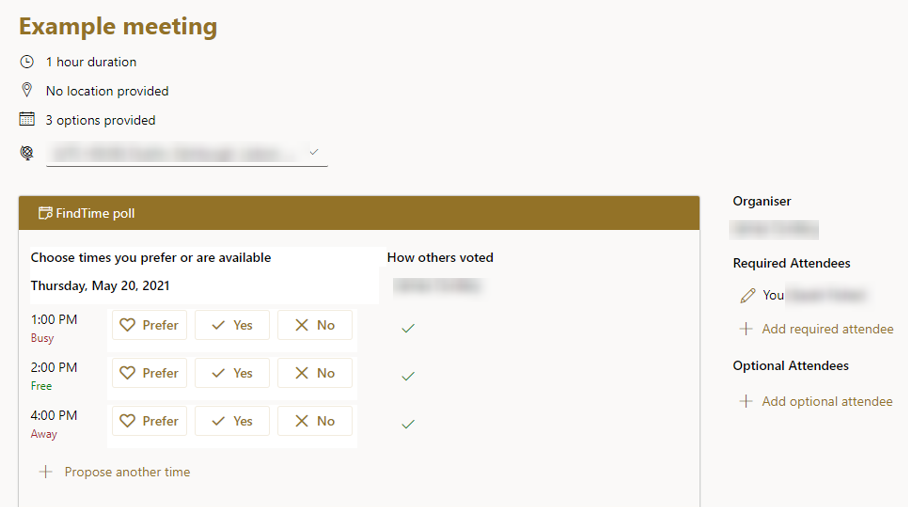
- Click on New Meeting Poll and select the available time slots.
- After you send a meeting invite, the attendees will have the option to choose a meeting time on their own.
By using this add-in, you’ll be able to easily create an Outlook invite with multiple time slots, so we encourage you to try it.
Outlook is one of the most versatile email clients that lets you manage events and see when a calendar event was created, so it comes as a surprise that it doesn’t allow you to send an invite with multiple times.
Speaking of Outlook features, we have a great guide on how to open multiple Outlook windows, so be sure not to miss it.
If you’ve found another way to do that, please share it with us in the comments section below.





User forum
0 messages