How to Create a PST File in Outlook
The easiest way to backup your emails is with PST files!
5 min. read
Updated on
Read our disclosure page to find out how can you help Windows Report sustain the editorial team. Read more
Key notes
- The PST file is used to store emails and other Outlook-related data to keep a safe backup.
- If you're running low on storage space, you can create PST files in Outlook to reclaim this space and we show you how to in this guide.
- Keep reading to find out the quickest ways of doing it.
If you use Microsoft Outlook on a daily basis and you’ve run out of space, want a backup, or just to create a portable archive of your information, then creating and saving a PST file is the quickest solution.
The process of doing that isn’t too complicated, and it involves some basic steps you can follow directly in Outlook.
What’s a PST file in Outlook?
PST stands for Personal Storage Table. It is a file format used to store data in Microsoft Outlook. It can be used to store emails, address book contacts, and calendar entries.
This file is created automatically when you add an email account and makes it easier to back up your data. If you have multiple accounts set up in Outlook, each one will have its own personal folder on your computer, provided it’s an IMAP or POP3 account.
Data files are stored on the server for server-based accounts like Microsoft 365, Exchange, and Outlook.com. Their offline files are stored on your PC in the OST format.
The default location for this file varies depending on your Windows version so for newer versions on Windows 11, you’ll probably find it in the following path unless you manually changed it: C:\Users\UserName\AppData\Local\Microsoft\Outlook
The main reason why people use these types of files is to keep their emails safe from any loss or corruption. Unexpected events like data theft or hardware failure can cause issues with Outlook hence why they become a safety net.
However, the bad outweighs the good. Since this file type is uncommon, you can’t simply access its content in another email client without first converting it. You may also encounter compatibility issues when you cannot open a PST file created in older versions of Outlook.
Another disadvantage is that they aren’t searchable unless you index or convert them into another format. You’ll keep getting the PST cannot be found error message even though you had created it.
The best way to ensure that your Outlook data files are stored in a format that can be read by future versions of Microsoft Office Outlook is to save them in a more convenient file format, such as an EML file instead of a PST.
How do I create a PST File in Outlook?
1. Use Outlook’s built-in settings
- Launch your Outlook app.
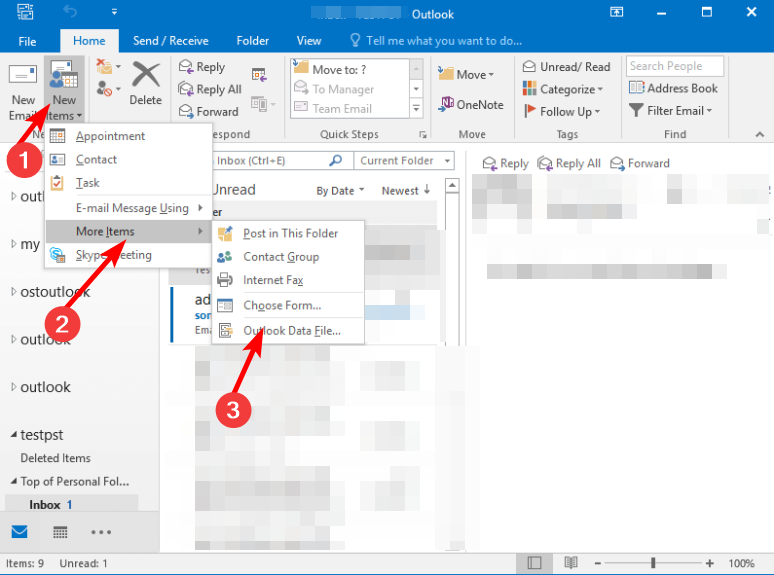
- Click on the New Items option, select More Items from the drop-down menu, and Outlook Data File from the pop-out menu.
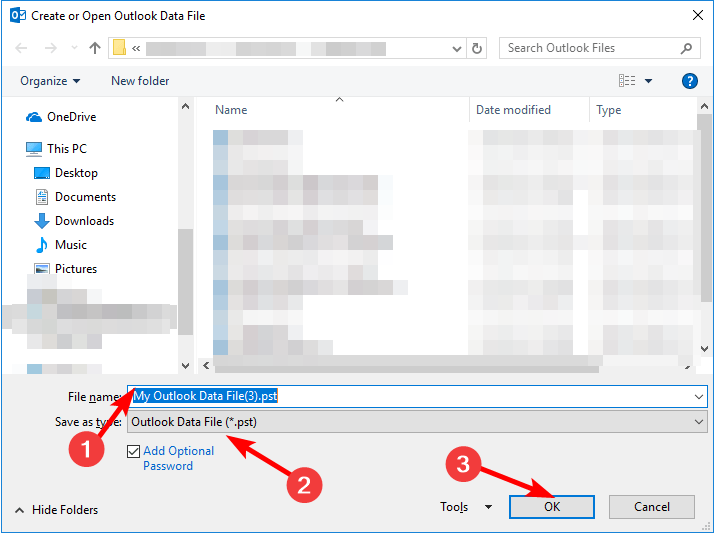
- Type a name in the file name box. Check the Add Optional Password box if you want to password-protect the file, then hit OK.
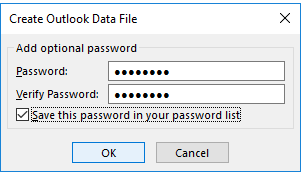
- Follow the prompts to create the security credentials in the next prompt and hit Enter.
2. Use the Import and Export feature
- Launch your Outlook app.
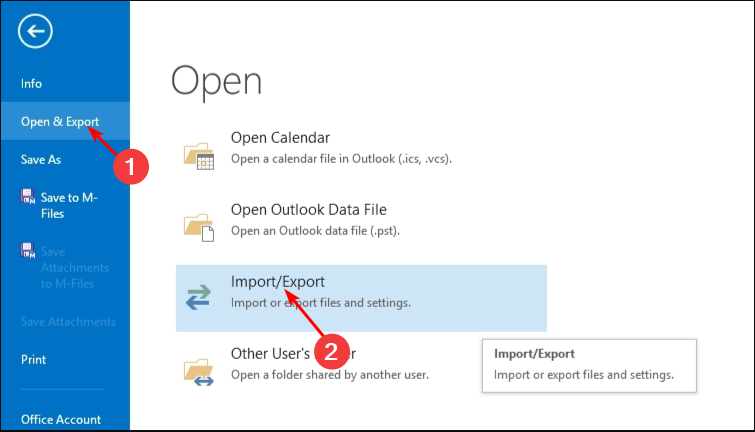
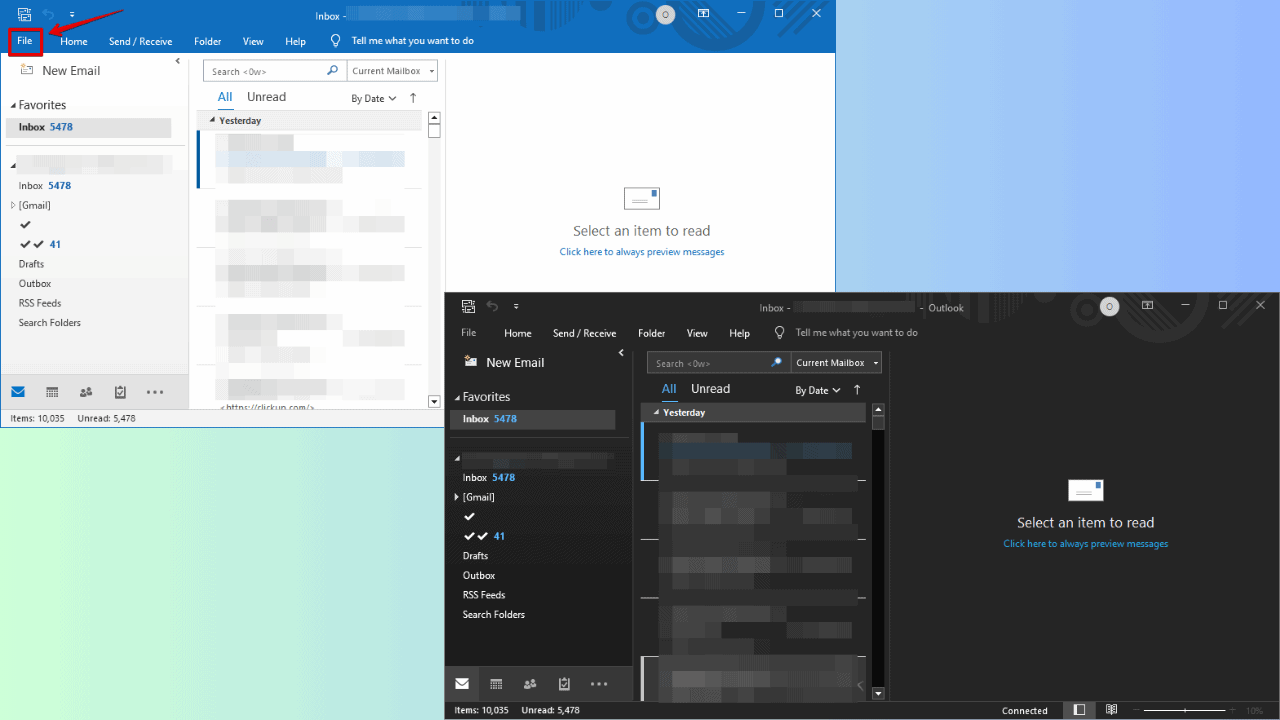
- Click on the File menu at the top left pane, select Open & Export, and click on Import/Export.
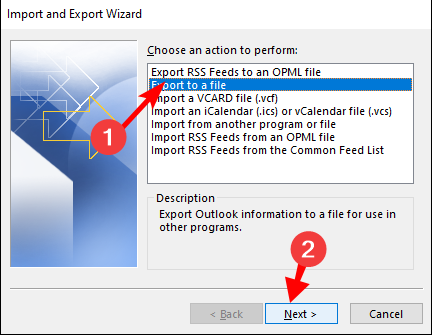
- Hit Export to a file and click Next.
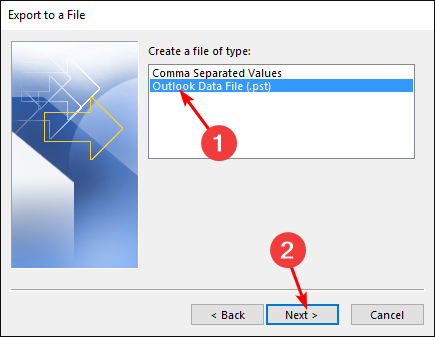
- Click on Outlook Data File (.pst) and hit Next.
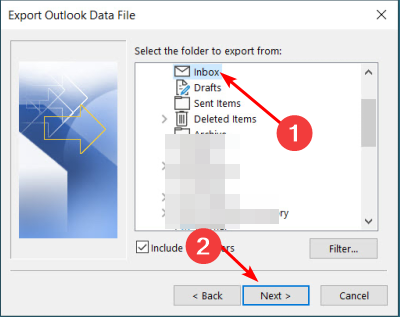
- Select all folders you wish to create PST files from and click Next.
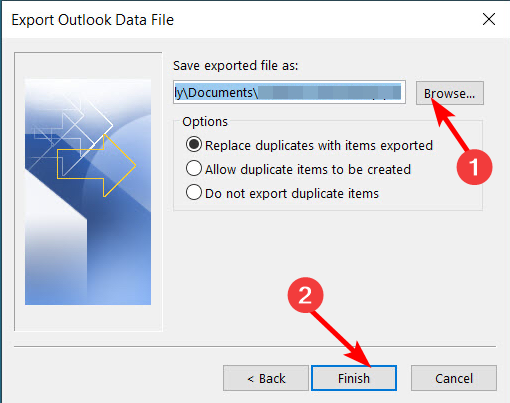
- Next, click on Browse to select a folder location to save, then hit Finish.
It is important to note that newer Outlook accounts such as IMAP, Microsoft Exchange Server, and Outlook.com use the OST format. However, this does not mean you cannot create PST files. You’ll have to use the export method to achieve this.
3. Use the Cleanup tool
- Launch your Outlook app.
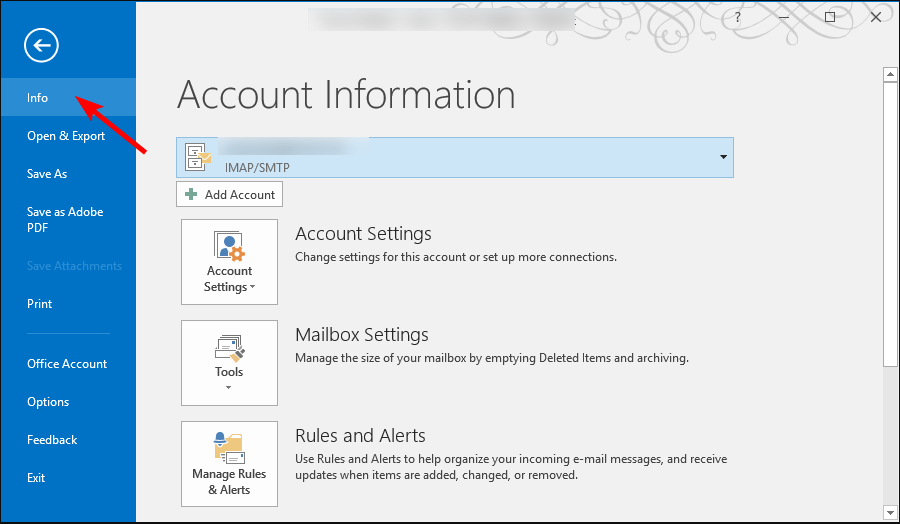
- Click on the File tab, then select Info.
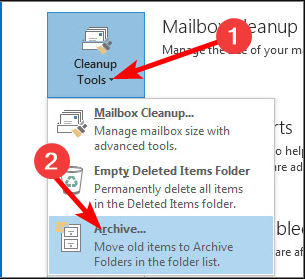
- Navigate to Cleanup tools, and in the drop-down menu, select Archive.
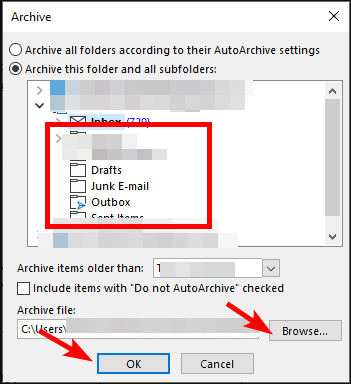
- Check all folders you wish to export from the folder list, then hit Browse to set up the Outlook PST file location and hit OK.
4. Use Account settings
- Launch your Outlook app.
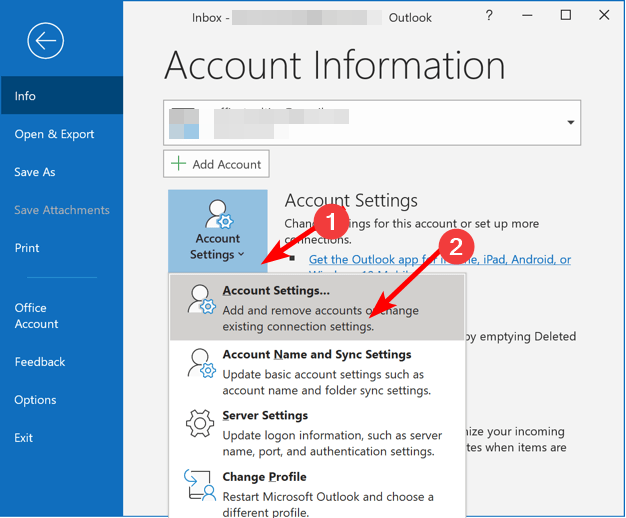
- Navigate to the File menu at the top left pane, and click on Info.
- Click on Account settings and select Account settings.
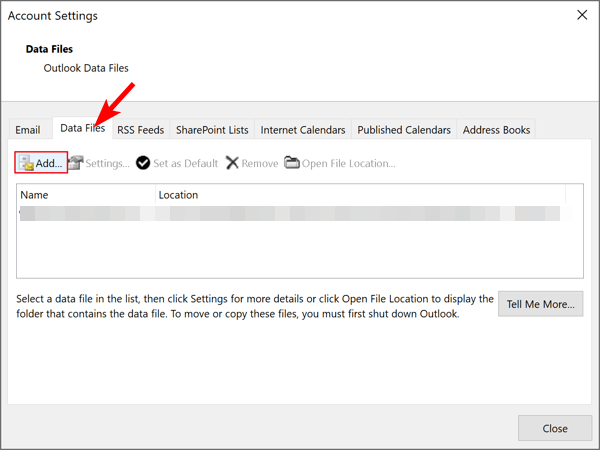
- In the Account settings dialog box, navigate to the Data Files tab and click on the Add button.
- Choose a name for this file, and under the file type, select .pst, then hit OK.
When you encrypt PST files, they can only be opened with a password. This helps keep sensitive information safe from prying eyes, especially when using shared computers.
How do I save an Outlook email as a PST file?
- Launch your Outlook app.
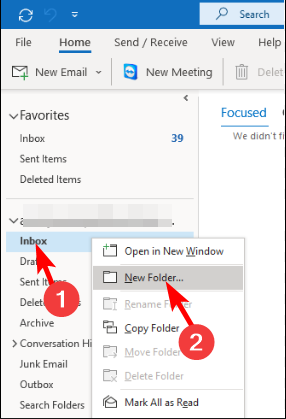
- Right-click on your Inbox folder or any other and select New Folder.
- Enter a name for the newly created folder.
- Go back to your Inbox, open the email message, and drag it to the folder you created in 3 above.
- Click on the File tab at the top left pane, select Open & Export, and in the drop-down menu, select Import/Export.
- Hit Export to a file and click Next.
- Click on Outlook Data File and hit Next.
- Select the folder created in 3 above and click Next.
- Click on Browse to select a folder location to save the PST file, then hit Finish.
With time, as you accumulate lots of emails, calendar events, and other data, your PST file can become too large and lead to performance degradation. The risks of ending up with a corrupt PST file are also higher with such a voluminous file.
This necessitates you to reduce the PST file size to take charge of your storage and minimize any app crashes.
Users with old versions of Microsoft Office may find that the app doesn’t support PST files. In this case, you won’t see any options to import PST files into Outlook. If this is the case, we recommend upgrading to a version that does.
With the options discussed above, you should have no problems with PST file creation in Outlook mail. Just remember to back up your Outlook data before creating a PST file.
Do let us know which method you found easy to follow in the comment section below.


User forum
0 messages