Fix: Wi-Fi Stops Working When Connecting an External Monitor
Adjusting your power management settings is the key!
4 min. read
Updated on
Read our disclosure page to find out how can you help Windows Report sustain the editorial team. Read more
Key notes
- If your Wi-Fi stops working when connecting to an external monitor, it is a sign that the Wi-Fi card driver has failed to install.
- It could also mean you're using older hardware with separate Wi-Fi adapters.
- We found ways to bypass this issue so stay tuned for more.
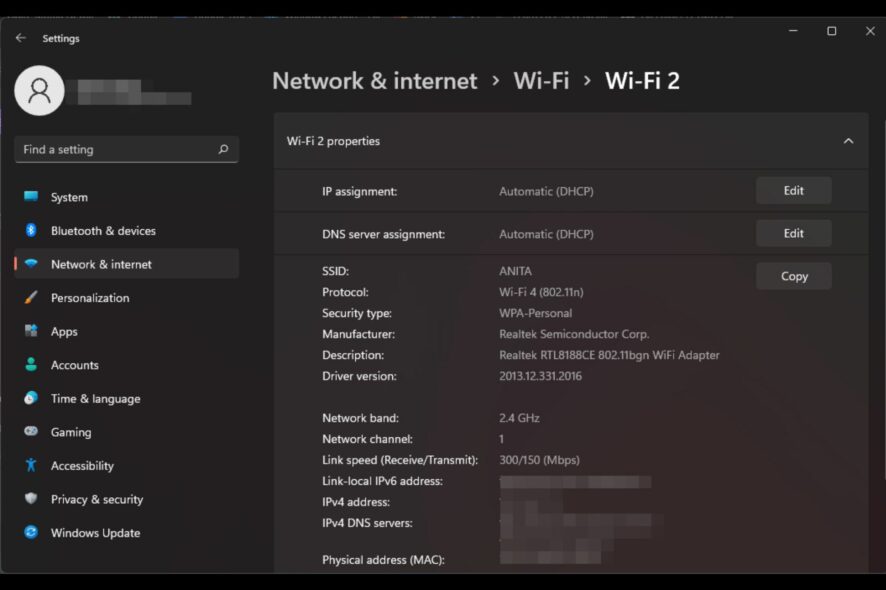
Connecting a second monitor to your computer can be a great way to boost productivity, but it can also cause problems. Your Wi-Fi was probably working fine, but now it disconnects when using an external monitor.
Usually, it’s because you’re using an older PC that doesn’t support using both Wi-Fi and the monitor simultaneously. If you’re lucky enough, you won’t need to upgrade your hardware.
So, can an external monitor affect Wi-Fi? Yes, because most wireless adapters are not designed to handle the power requirements of a monitor. When you plug in an external monitor, your Wi-Fi signal is likely going to drop significantly.
You’ll also notice that your Wi-Fi keeps disconnecting if you’re using a newer laptop with a newer operating system that just doesn’t play nicely with their monitor’s settings. Fortunately, modern laptops have built-in Wi-Fi adapters, so this should no longer be an issue.
How do I stop Wi-Fi from dropping whenever I connect an external monitor on Windows 11?
Attempt the following basic workarounds before any technical troubleshooting:
- Ensure you’re using the latest version of Windows 11 by running Windows Update and installing any available updates.
- Shut down any other apps that might be interfering with your Wi-Fi connection and disconnect non-essential hardware.
- Try connecting directly to your router with an Ethernet cable, and if that doesn’t work, switch to a different network connection if available.
1. Run connection troubleshooters
1.0 Run the Network adapter troubleshooter
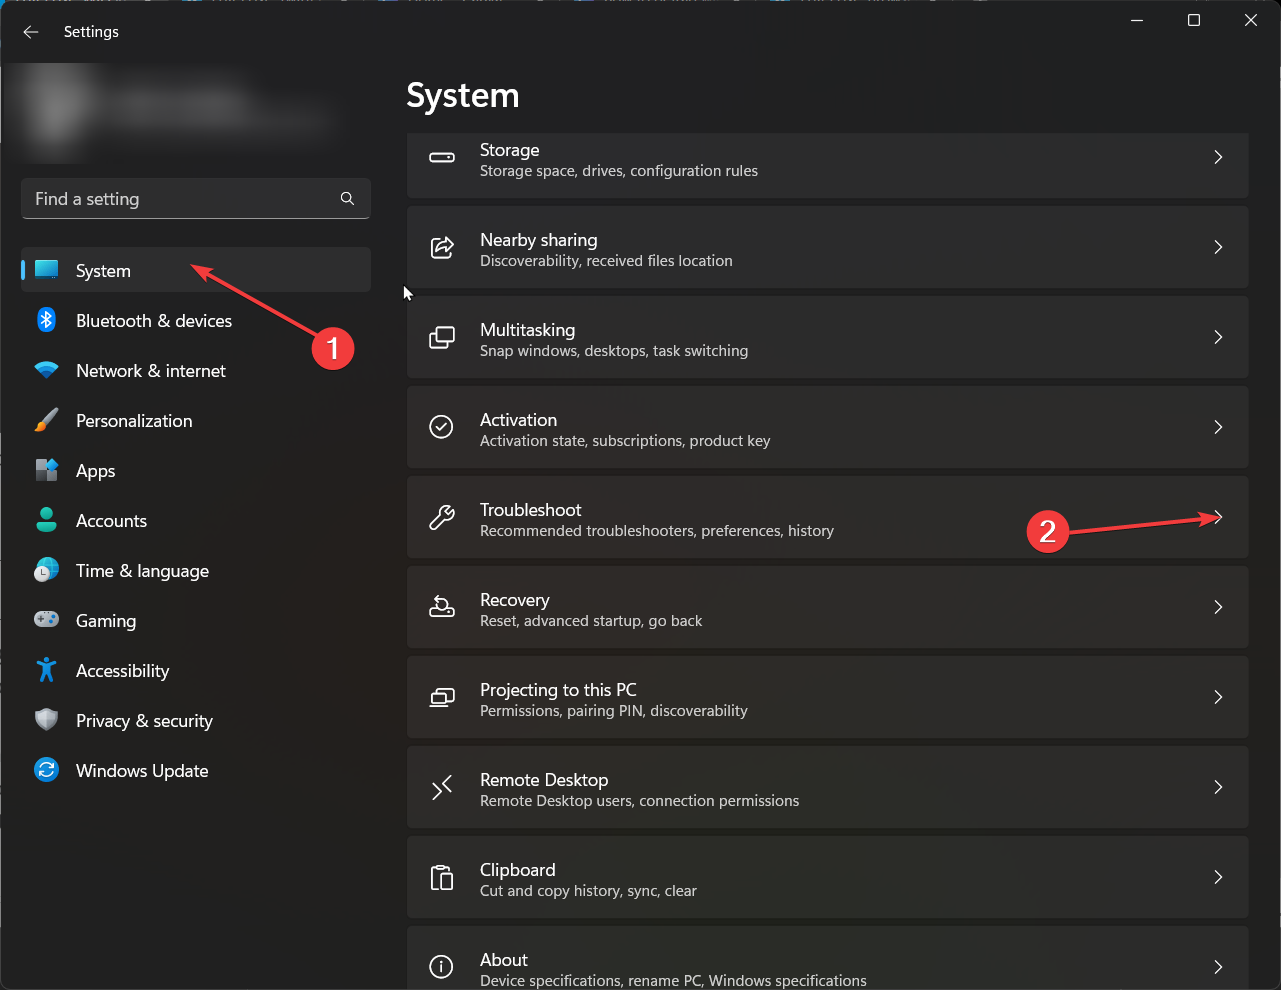
- Hit the Windows key and click on Settings.
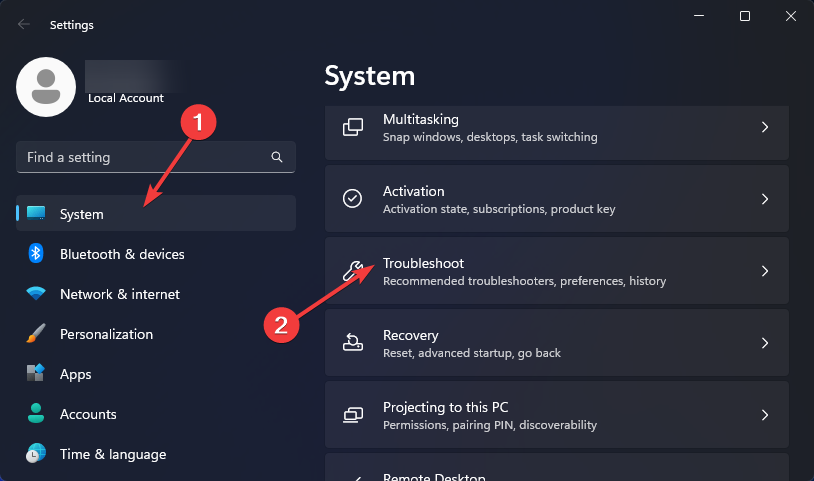
- Click on System, then select Troubleshoot.
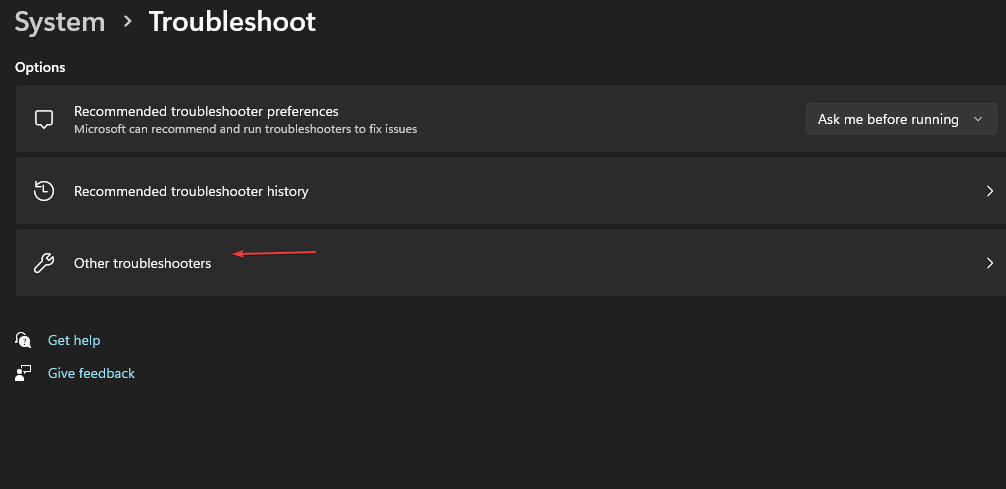
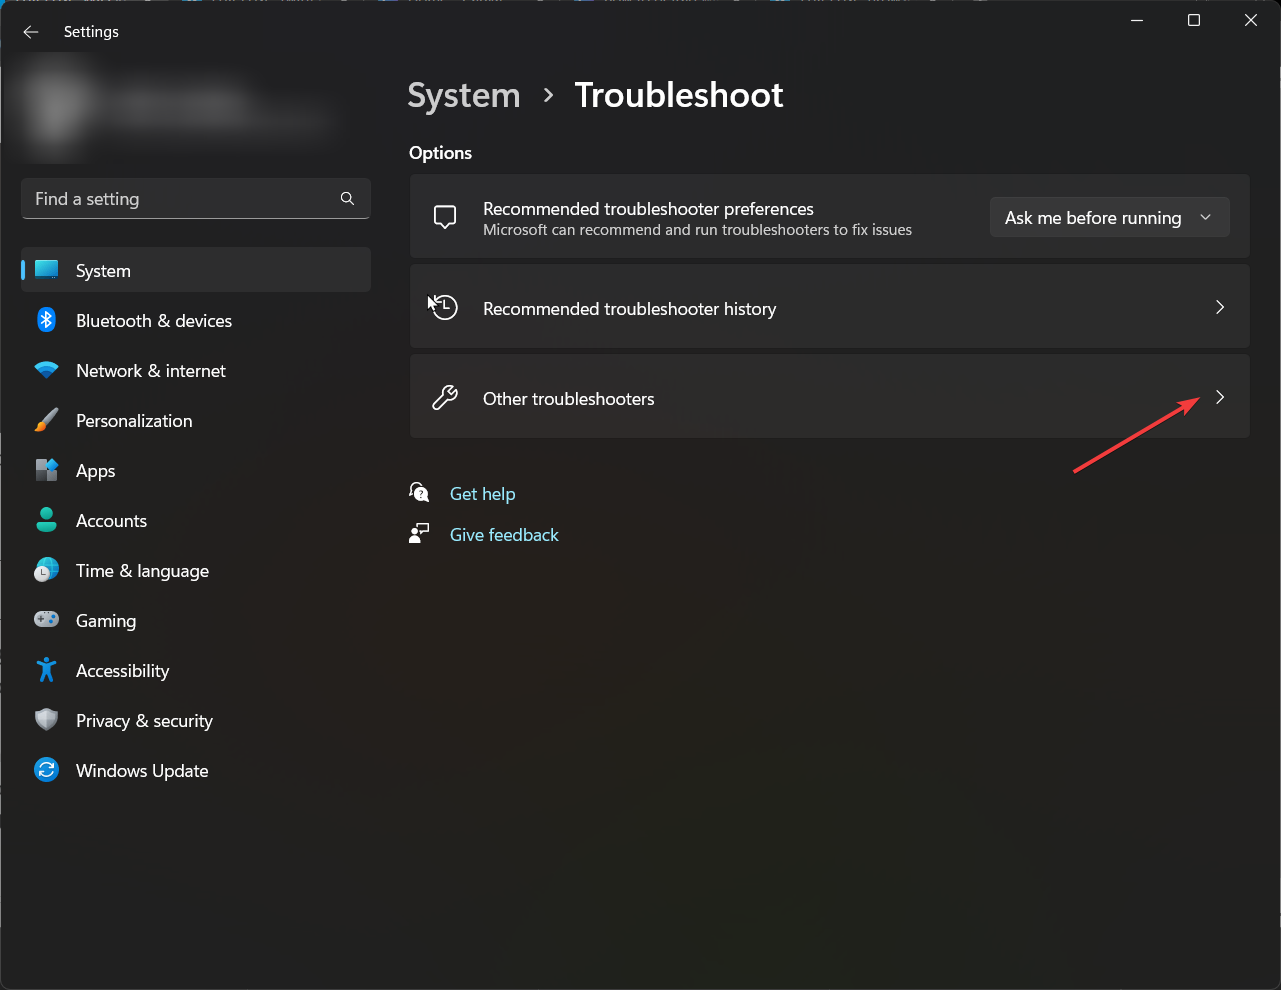
- Select Other troubleshooters.
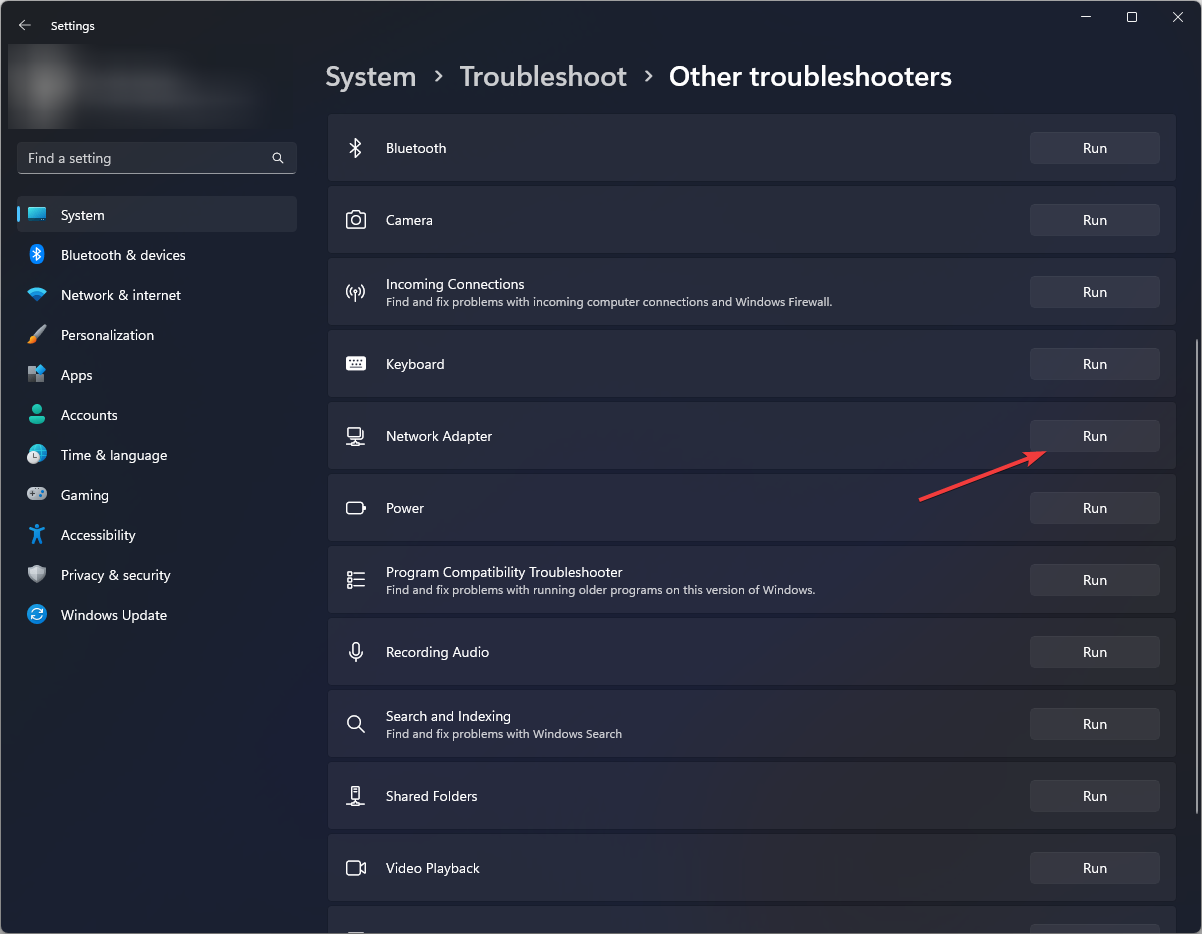
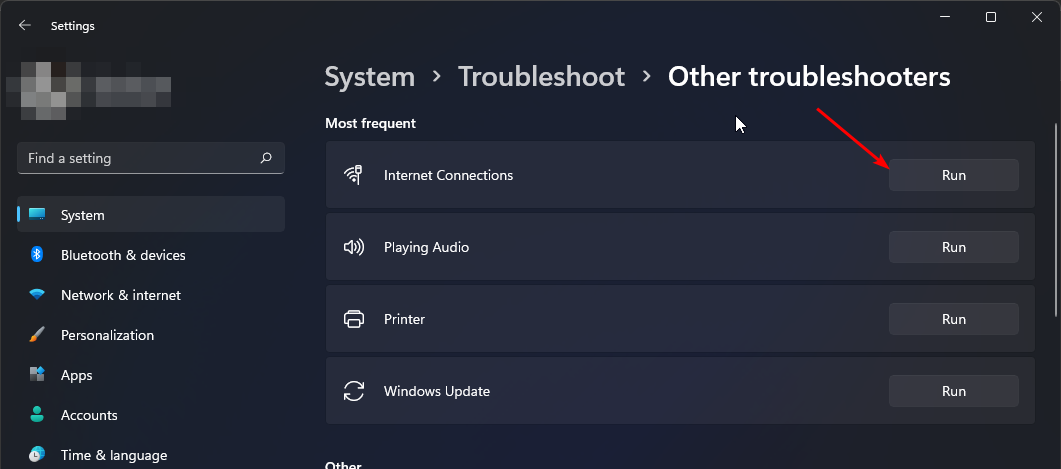
- Locate the Network Adapter troubleshooter and click on the Run button next to it.
1.1 Run the Internet Connections troubleshooter
- Hit the Windows key and click on Settings.
- Go to System, and click Troubleshoot.
- Now click Other troubleshooters.
- Locate Internet connections, and click Run.
- Follow the onscreen prompts to complete the process.
2. Update your Network driver
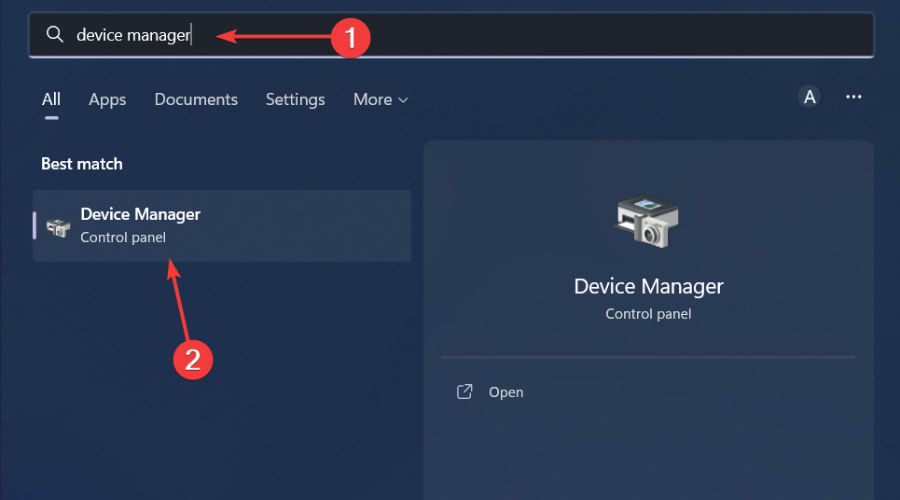
- Hit the Windows key, type Device Manager in the search bar, and click Open.
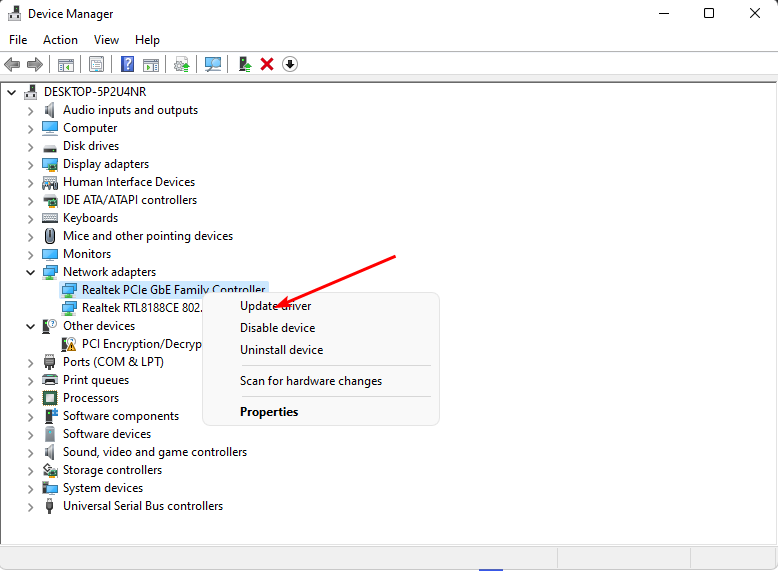
- Navigate to your Network adapter, right-click on it, and select Update driver.
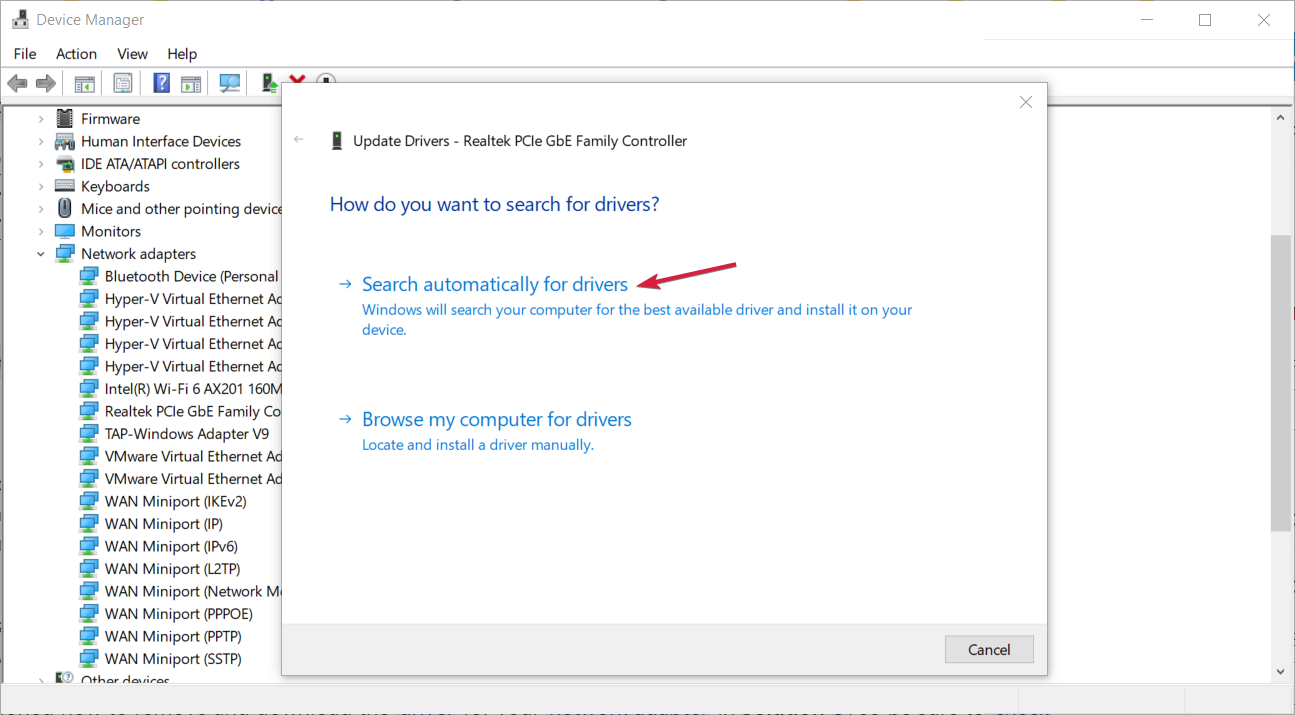
- Select Search automatically for updated drivers.
Since Windows is a bit finicky sometimes and may not match you with the correct drivers, you’ll need a sure way of getting the correct ones. Outbyte Driver Updater is the tool you need for the job.
It will find new drivers compatible with your computer and download and install them automatically. This way, you will be able to enjoy a better experience while using the internet.
- Download and install the Outbyte Driver Updater app.
- Launch the software and wait for the app to detect all incompatible drivers.
- Now, it will show you a list of all outdated drivers to select the ones to Update or Ignore.
- Click on Update & Apply Selected to download and install the latest versions.
- Restart your PC to ensure the applied changes.

Outbyte Driver Updater
Maintain your device healthy by letting OutByte Driver Updater find the latest driver options.3. Reinstall your Network drivers
- Click on the Start Menu icon, type Device Manager in the search bar, and click Open.
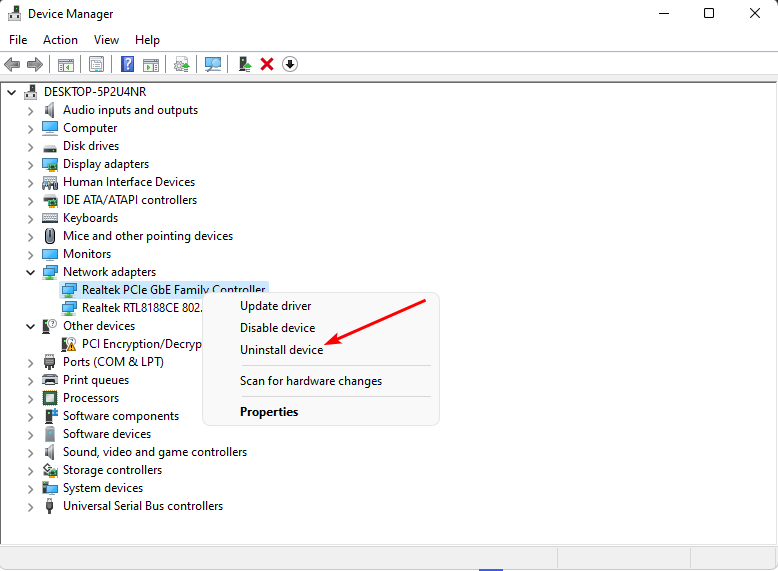
- Navigate to your Network adapter, right-click on it, and select Uninstall device.
- Confirm Uninstall in the next confirmation dialog.
- Restart your PC, and your drivers will be automatically reinstalled.
4. Adjust your Network adapter power management settings
- Hit the Windows key, type Device Manager in the search bar, and click Open.
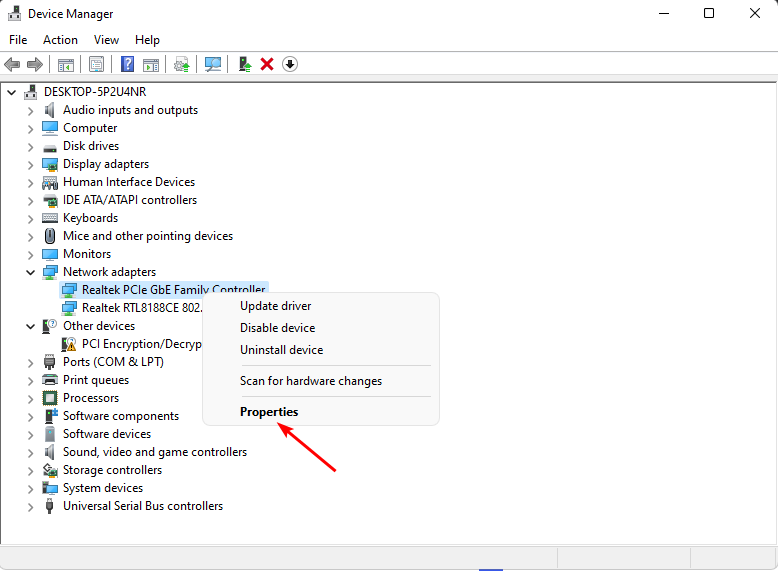
- Navigate to your Network adapter, right-click on it, and select Properties.
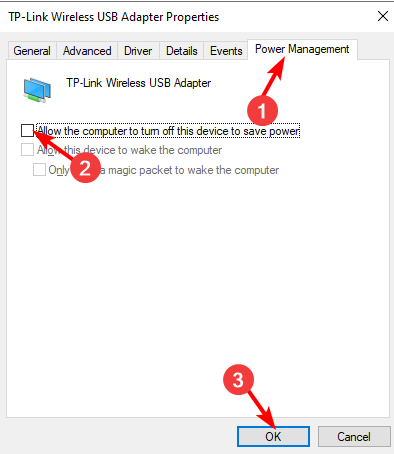
- Switch to the Power Management tab, uncheck the Allow the computer to turn off this device to save power option, and hit OK.
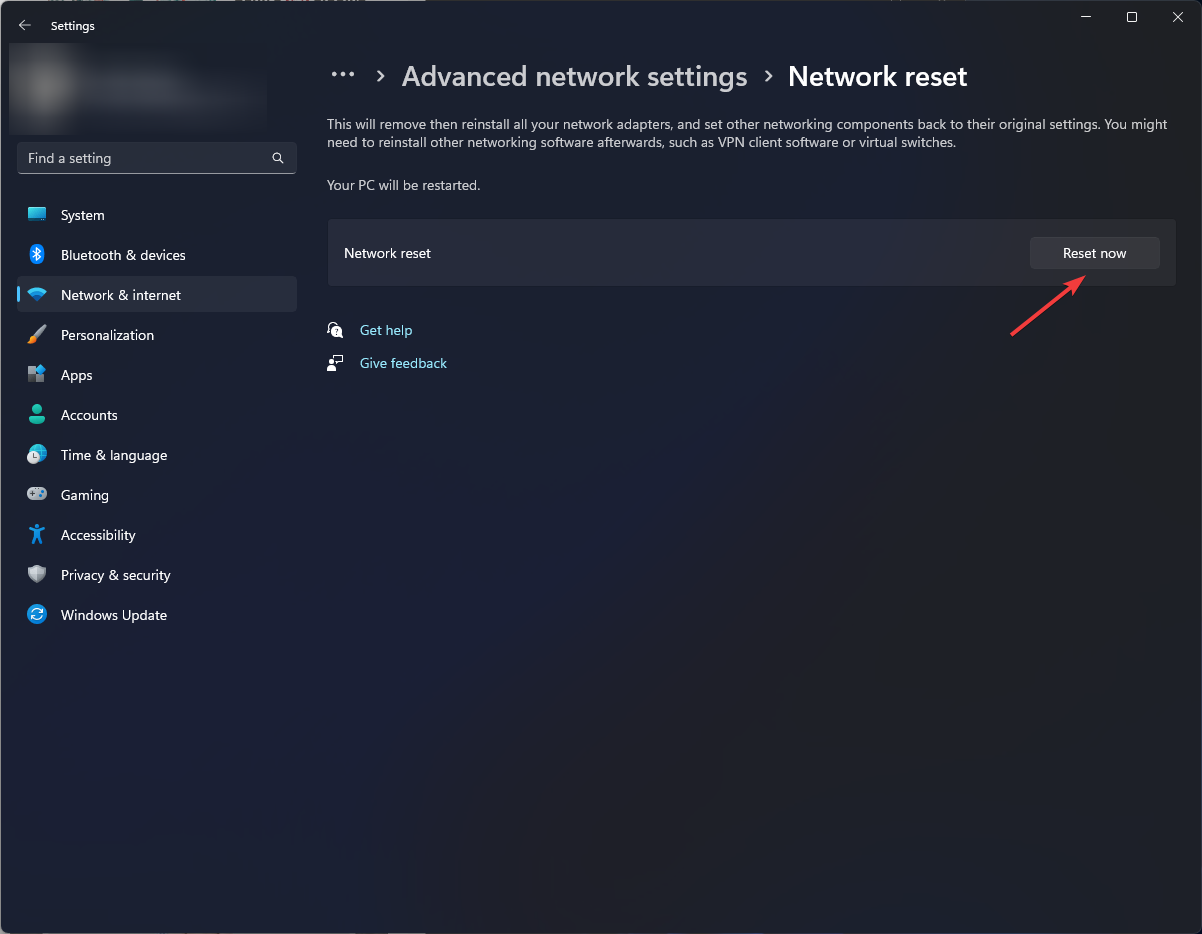
5. Perform a Network reset
- Hit the Windows key and click on Settings.
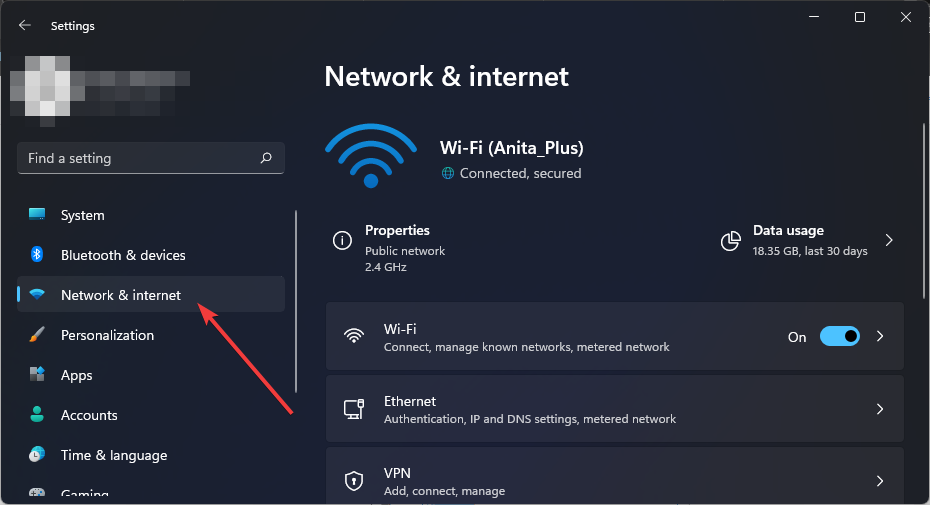
- Navigate to Network & internet.
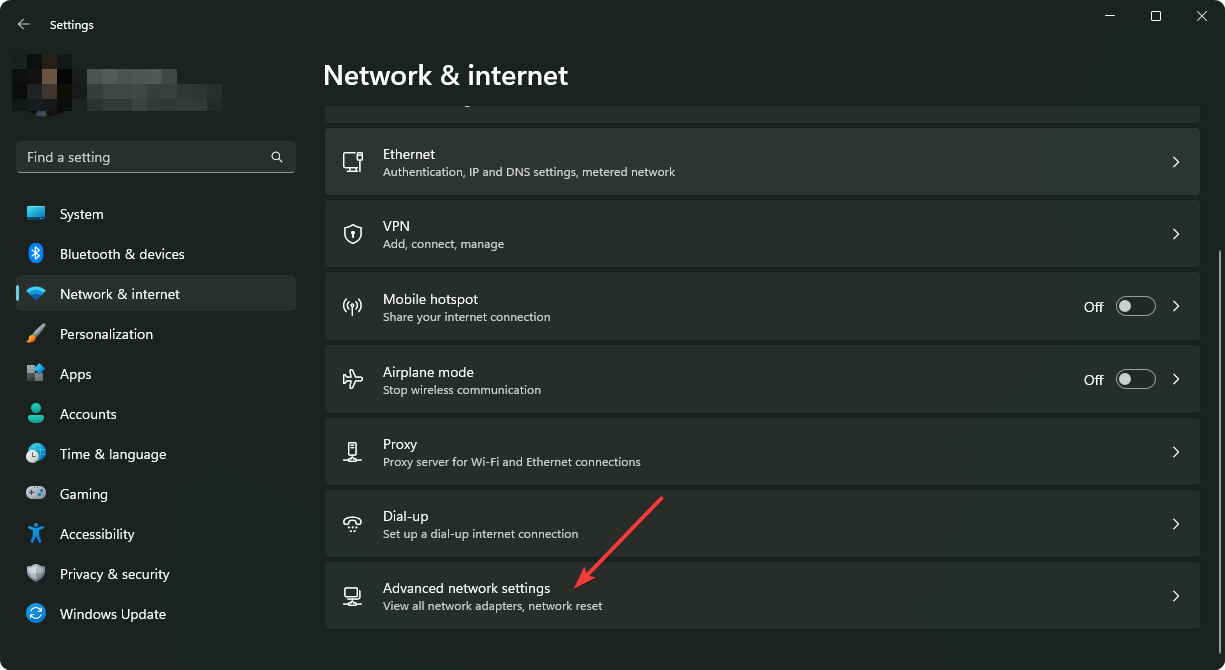
- Select Advanced network settings.
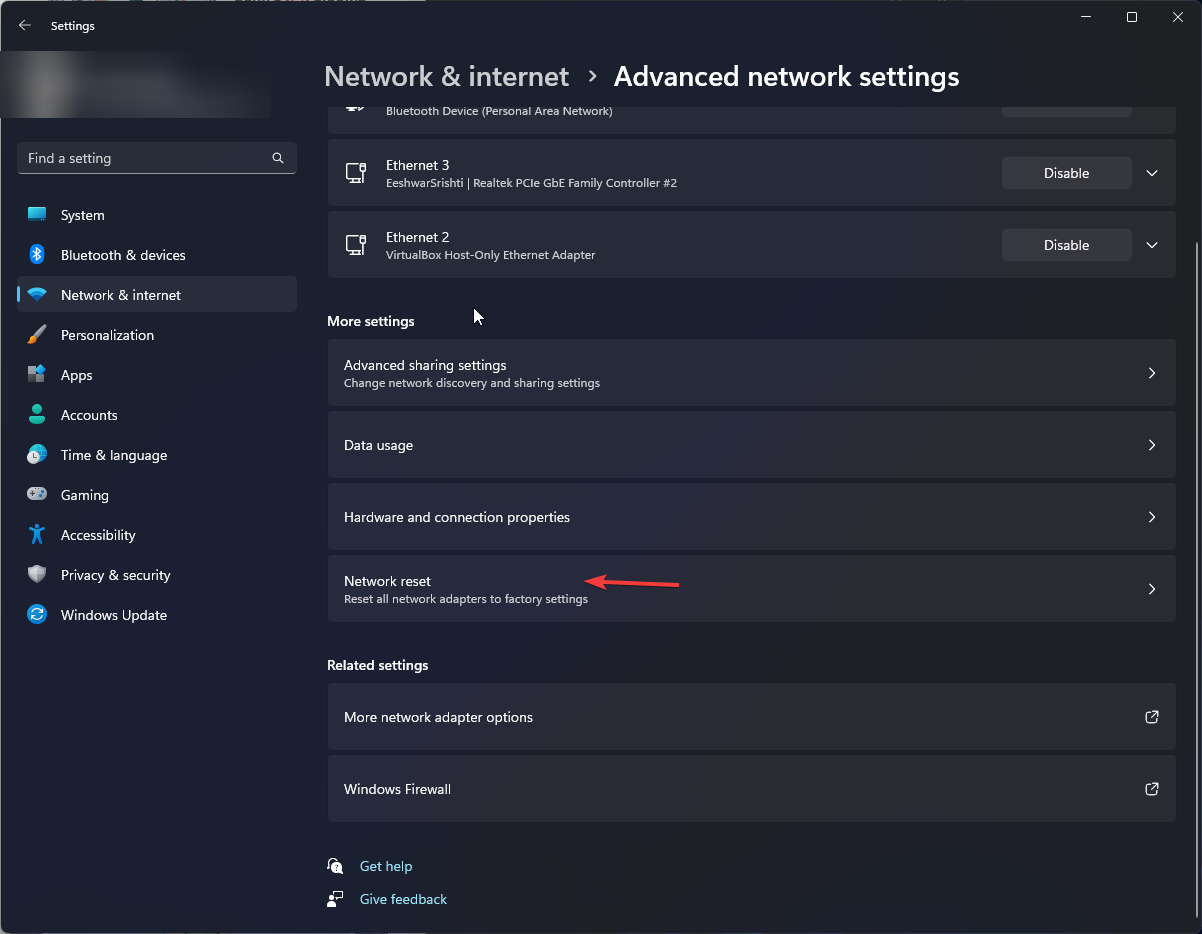
- Click on Network reset.
- Next, hit the Reset now button.
If a network reset does not yield the desired results, it could be a hardware issue. In such a case, you should consider upgrading to a reliable network adapter.
What are some tips for maintaining a stable Wi-Fi connection on Windows 11?
- Update your router’s firmware from time to time.
- Keep connected devices to a minimum by disconnecting non-essential ones.
- Ensure your OS and drivers are always up-to-date.
- Change the wireless adapter power mode to high performance.
- Run your antivirus software regularly and ensure it is up-to-date.
If you’ve observed all these maintenance checks but still, your Wi-Fi is frequently disconnected, it could be your VPN causing the interference. Sometimes, turning on your VPN turns off your Wi-Fi.
Worst case scenario, you’ll have to upgrade to a modern PC with a built-in network adapter, but on the bright side, it will serve you for years.
Hopefully, we’ve shed some light on the problem and given you a few potential fixes. And while this article is specifically for Windows users, the solutions also apply to other OSes.
As always, we’d like to hear any feedback you have on this article. Let us know whether the solutions worked for you or I you have any other not mentioned here.




User forum
0 messages