Ticketmaster Error Code U521: How to Fix it
Don't miss out on a concert because of your VPN
5 min. read
Updated on
Read our disclosure page to find out how can you help Windows Report sustain the editorial team. Read more
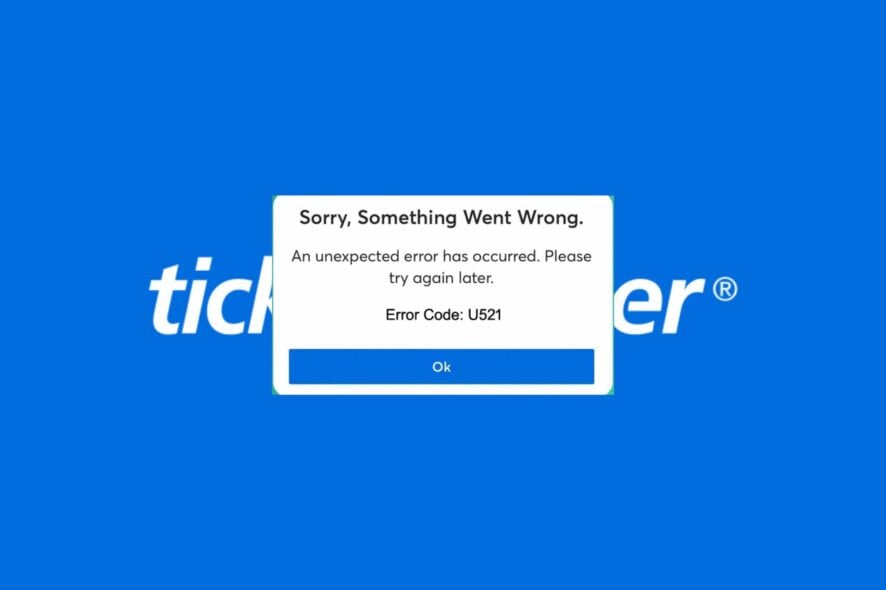
Getting tickets from Ticketmaster to see your favorite artist perform should be a breeze, but not if error code U521 appears and stalls the checkout process.
The most common reasons why you keep getting U521 error codes include:
- There may be server issues such as outages, overloading, or the website is being updated.
- Your payment method (service) was not accepted due to insufficient funds.
- You may have entered incorrect login details while trying to purchase tickets.
- You may have an unstable Internet connection, which, in turn, keeps interrupting the payment process.
Today, we’ll address all of these causes so you can fix the problem once and for all. Just follow the step-by-step instructions below.
How do I get rid of Ticketmaster Error Code U521?
1. Change your payment method
Make sure you use an accepted payment method. Ticketmaster typically accepts big names issued in the US. If your bank isn’t on the accepted list, you can also use PayPal.
Here’s a quick view of the accepted vs unaccepted Ticket master payment methods:
| Accepted Cards | Unaccepted Cards |
|---|---|
| PayPal | Banamex Visa |
| Visa | Banamex Mastercard |
| MasterCard | Banamex Debito |
| Discover | Banamex Debito Visa |
| American Express | Banamex Debito Mastercard |
| Ticketmaster Gift Card | Santander Visa |
| Venmo | Santander Mastercard |
| Visa Emitida en Mexico | |
| Mastercard Emitida en Mexico | |
| Santander American Express |
2. Clear browser cache
- For this step, we shall be using the Chrome browser.
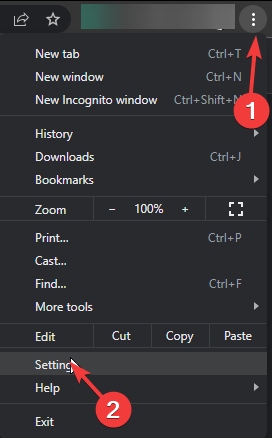
- Launch your Chrome browser and click the three vertical ellipses in the top right corner.
- Select Settings.
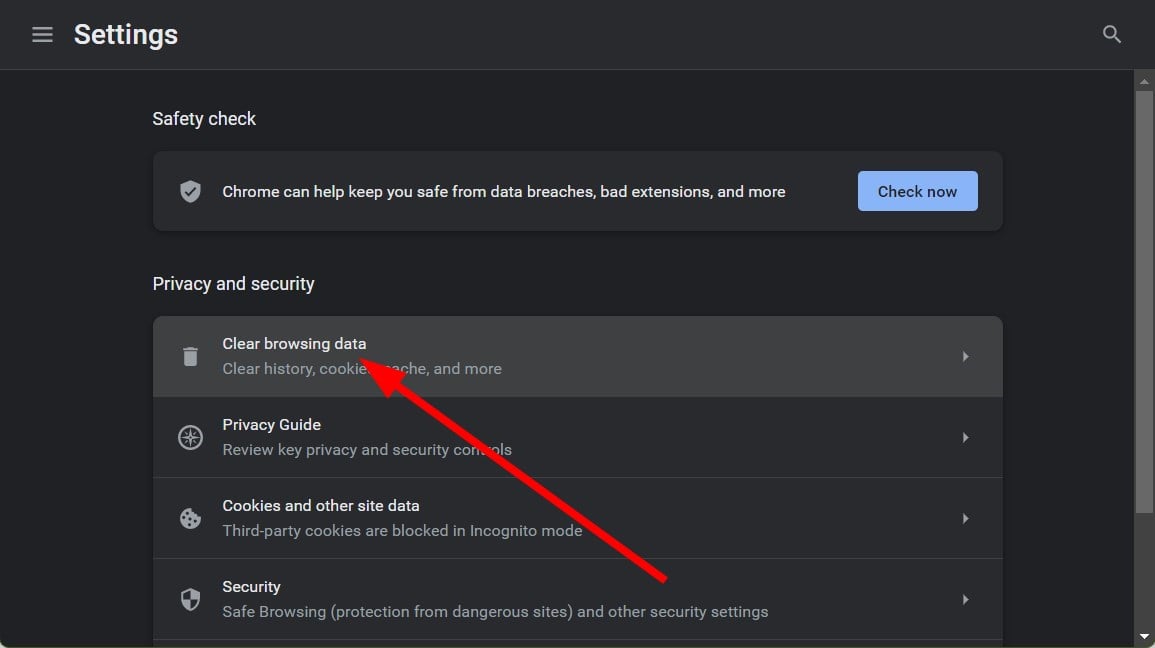
- Click on Privacy and security, then select Clear browsing data.
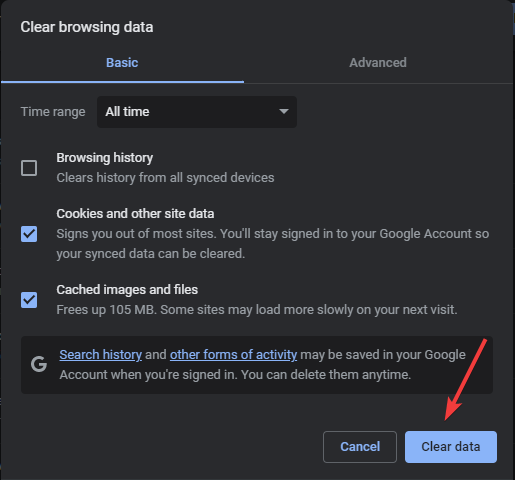
- Check Cookies and other site data and Cached images and files, then hit Clear data.
3. Scan for malware
3.1 Browser scan
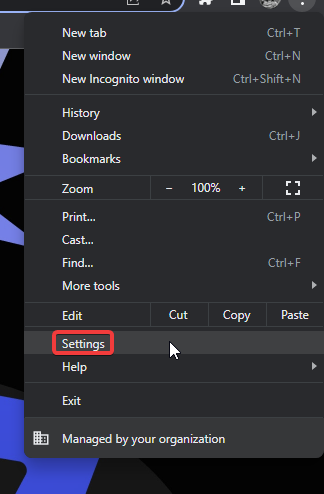
- Open your Chrome browser and click on the three vertical ellipses at the top right corner.
- Select Settings.
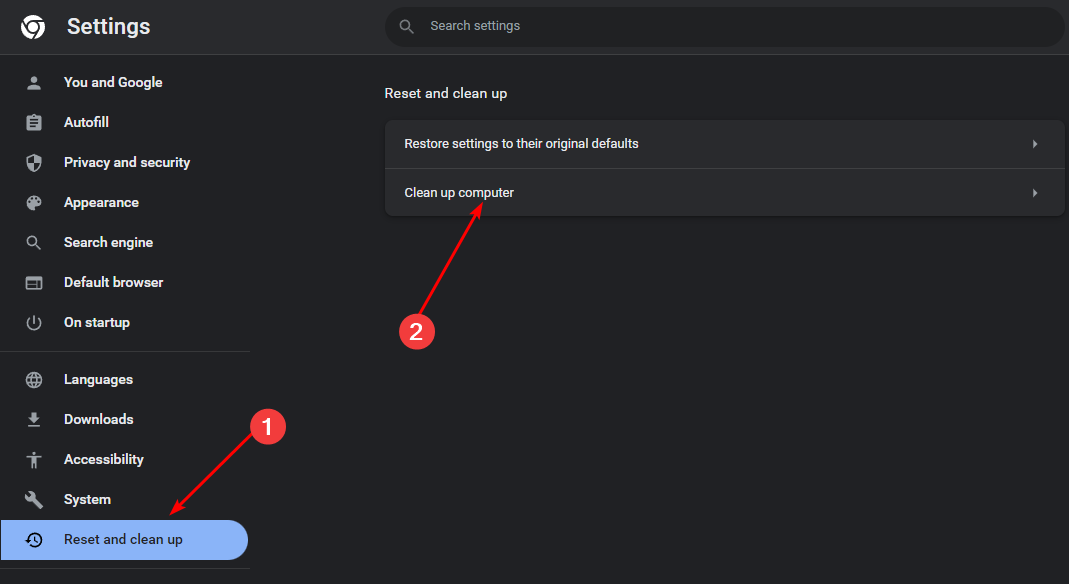
- Next, click on Reset and cleanup, then select Cleanup computer on the right.
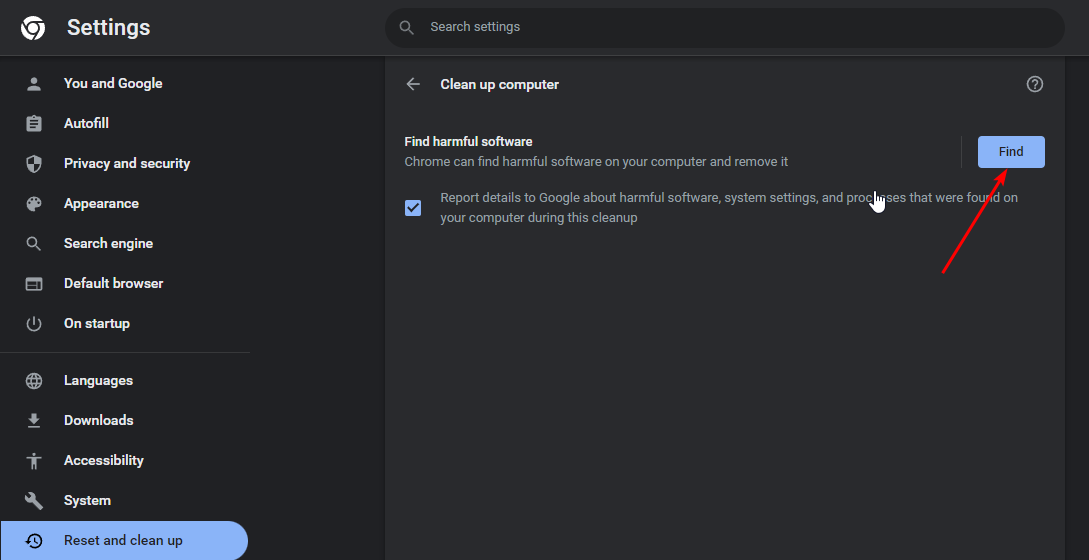
- Hit the Find button next to Find harmful software.
- Wait for the scan to finish and remove any recommended software.
Since not all browsers have a built-in malware scanner, ensure also a comprehensive system scan.
3.2 System scan
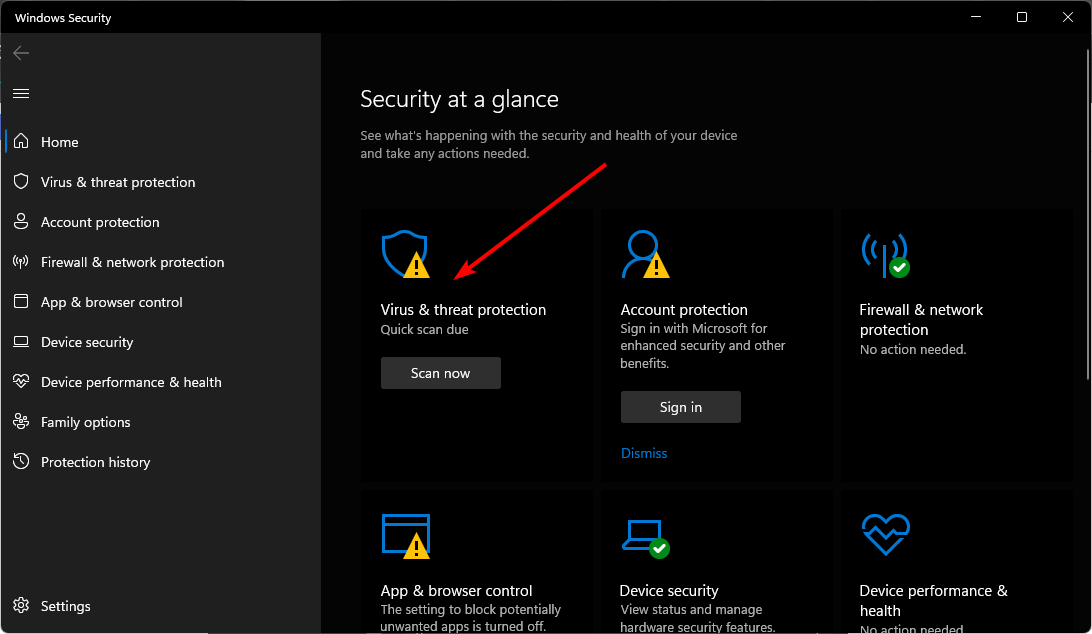
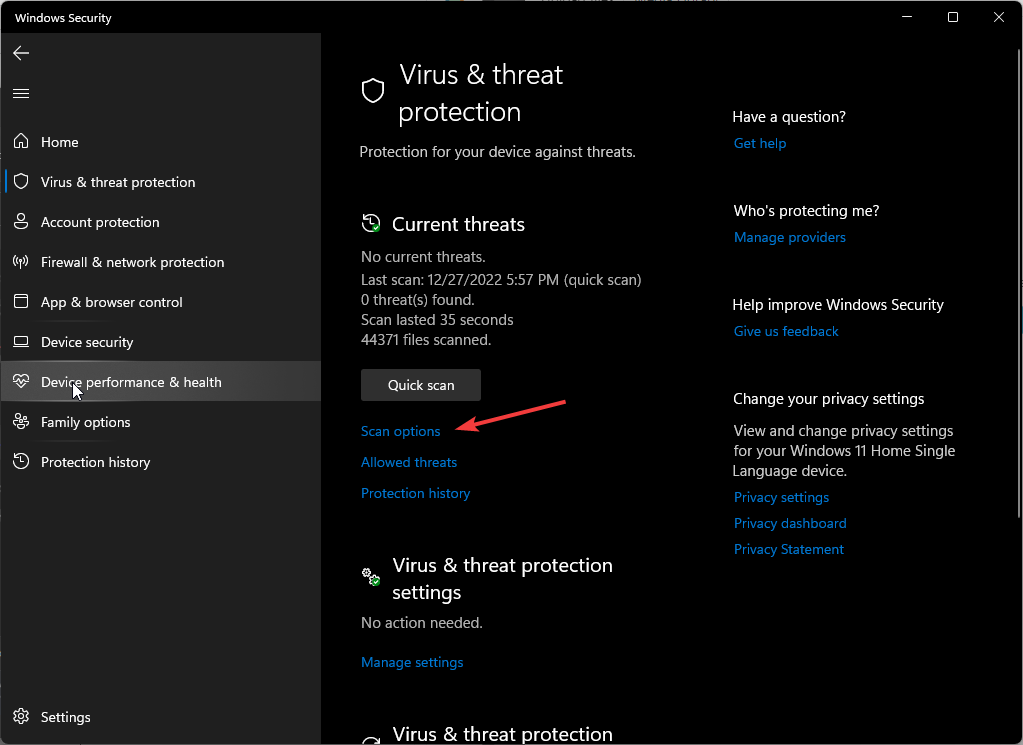
- Click on the Start Menu icon, search Windows Security, and click Open.
- Select Virus & threat protection.
- Next, press Quick scan under Current threats.
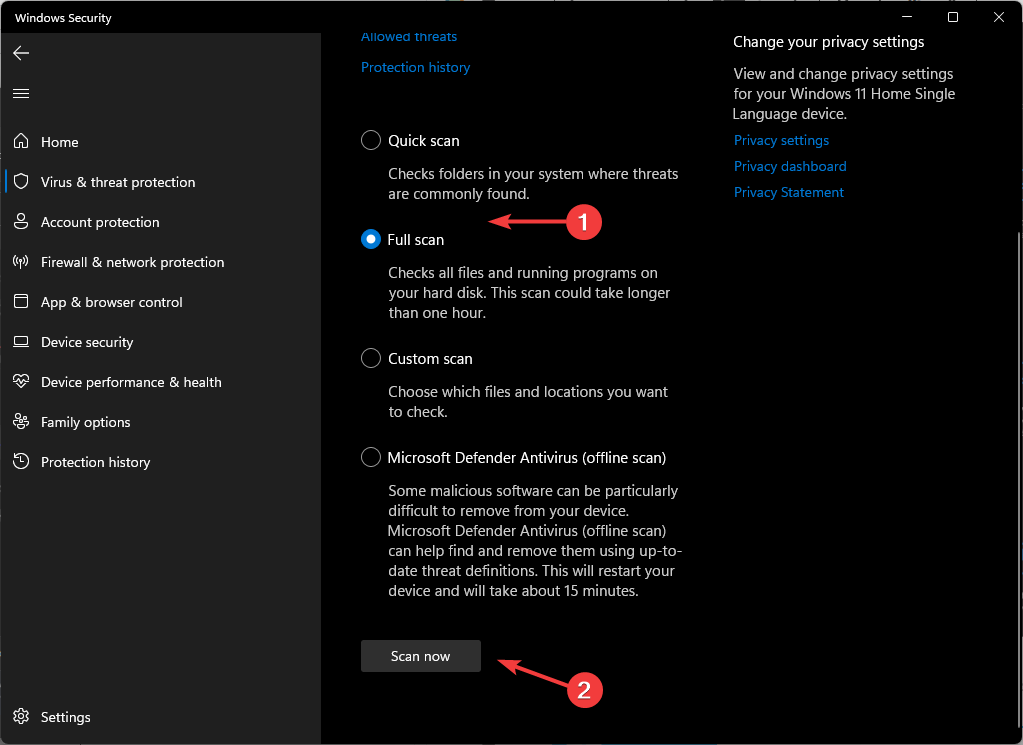
- If you don’t find any threats, proceed to perform a full scan by clicking on Scan options just below Quick scan.
- Click on Full scan, then Scan now to perform a deep scan of your PC.
- Wait for the process to finish and restart your system.
For more powerful scans it is always best to use a dedicated security software, such as ESET HOME Security Essential. This tool provides you with real-time protection against most threats while navigating the web and it also comes with a powerful antivirus and in-depth scan that will allow you to quickly identify any issues within your system.
⇒ Get ESET HOME Security Essential
4. Disable your VPN
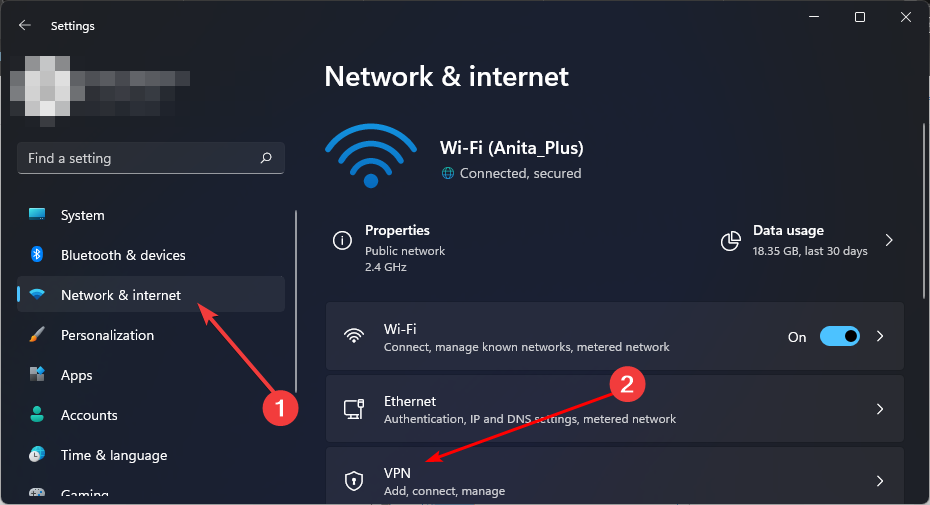
- Press the Windows key and select Settings.
- Next, select Network & internet and click on VPN in the right-side menu.
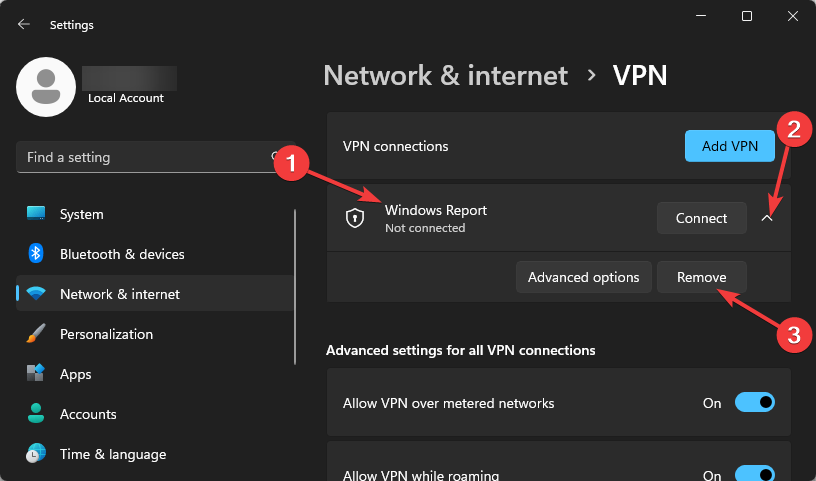
- Select the VPN connection you want to disable, click on the drop-down and select Remove.
5. Disable your Proxy
- Press the Start Menu icon and select Settings.
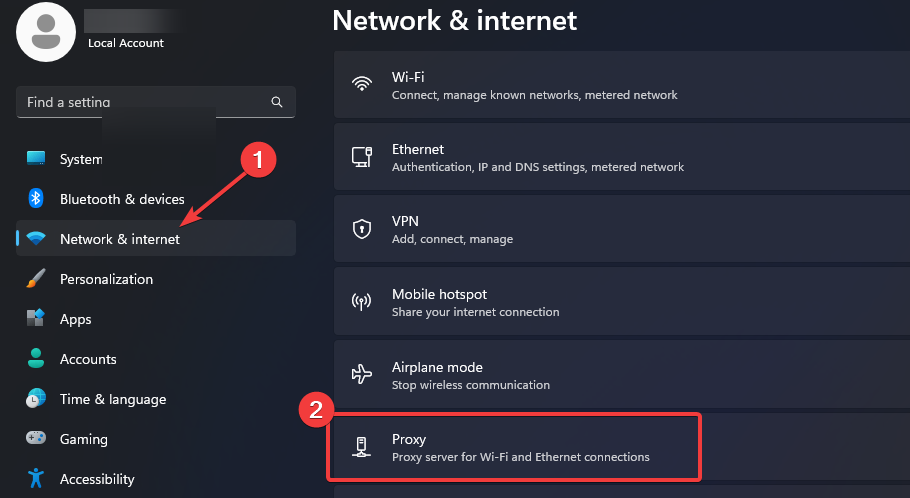
- Click on Network & Internet on the left pane, then scroll down and click Proxy on the right pane.
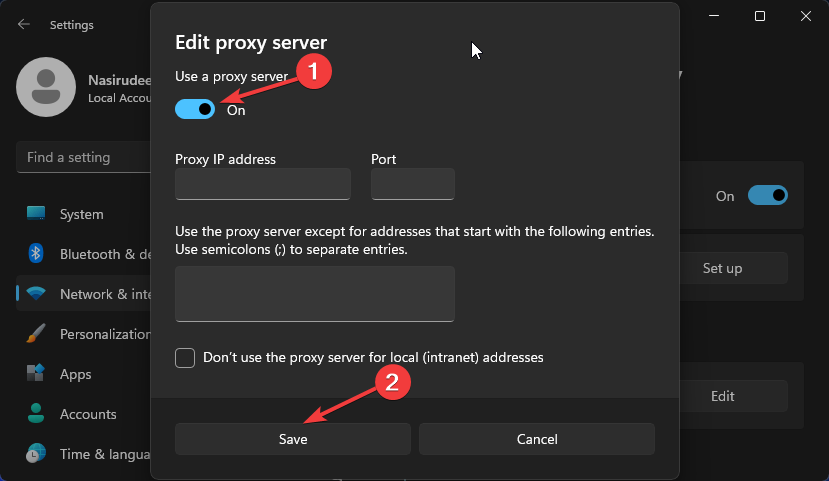
- Select Edit next to Use a proxy server option in the Manual proxy setup section, toggle off Use a proxy server and click on Save.
6. Reset your browser
- Open your browser (in this case, Chrome) and click on the three vertical ellipses at the top right corner.
- Select Settings.
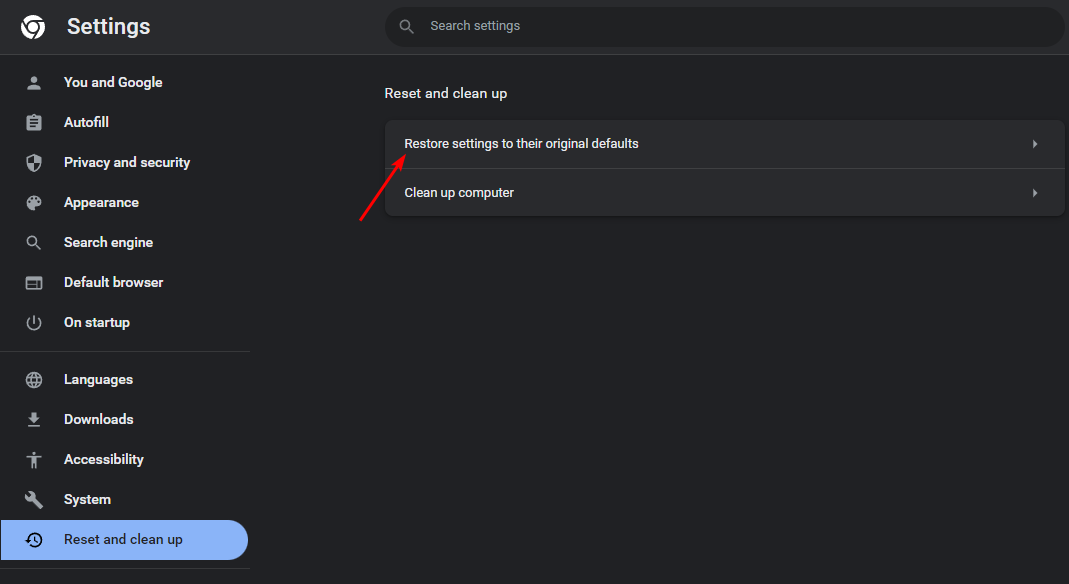
- Next, click on Reset and cleanup, then select Restore settings to their original defaults.
- Confirm Reset settings in the next dialog box.
7. Reinstall the Ticketmaster app
If you have the Ticketmaster app on your phone, try reinstalling it to see if this fixes the issue. Otherwise, contact the Ticketmaster support team and see if they have any additional answers to your query. Be sure to provide a detailed account of the error for prompt assistance.
What are other tips for avoiding Ticketmaster errors?
- Try to purchase tickets within a specific time range – There’s no better time than the present. Instead of waiting for last-minute ticket scrambling, book tickets early enough before the site is bombarded with too much traffic.
- Ensure you’re buying tickets from a legitimate online platform – There are a lot of sites masquerading as the real thing, so always double-check the URL to ensure you’re not being catfished.
- Double-check payment method before submitting transaction – Before checkout, check whether you have sufficient funds to make the purchase and your credentials match your debit/credit card.
- Disable third-party extensions – Extensions, especially adblockers, prevent sites like Ticketmaster from loading properly and may keep popping up the Pardon for the interruption error message.
If you’re also encountering error code U533, you can learn how to fix error code U533 on Ticketmaster in our dedicated guide.
Other payment-related issues on Ticketmaster include the error code 5005 and error code 0011, which can also be fixed in a similar manner.
Another common issue is Ticketmaster error code 0002, but we have covered it in our latest guide, so don’t miss it.
There you go. Now, you should be able to eliminate error code U521 quickly. Do you have any other tips? Share them with us in the comments section below.







User forum
0 messages