ERROR_CANT_TERMINATE_SELF: How to Fix It Fast
3 min. read
Updated on
Read our disclosure page to find out how can you help Windows Report sustain the editorial team. Read more

ERROR_CAN’T_TERMINATE_SELF is a Windows error that’s mainly caused by faulty drivers, corrupt system files, software bugs or malware.
It can prevent you from using your PC as usual, so it’s essential you fix it quickly. Follow the steps below to address underlying problems and get back to your usual tasks.
How to fix ERROR_CAN’T_TERMINATE_SELF
1. Remove recently installed apps
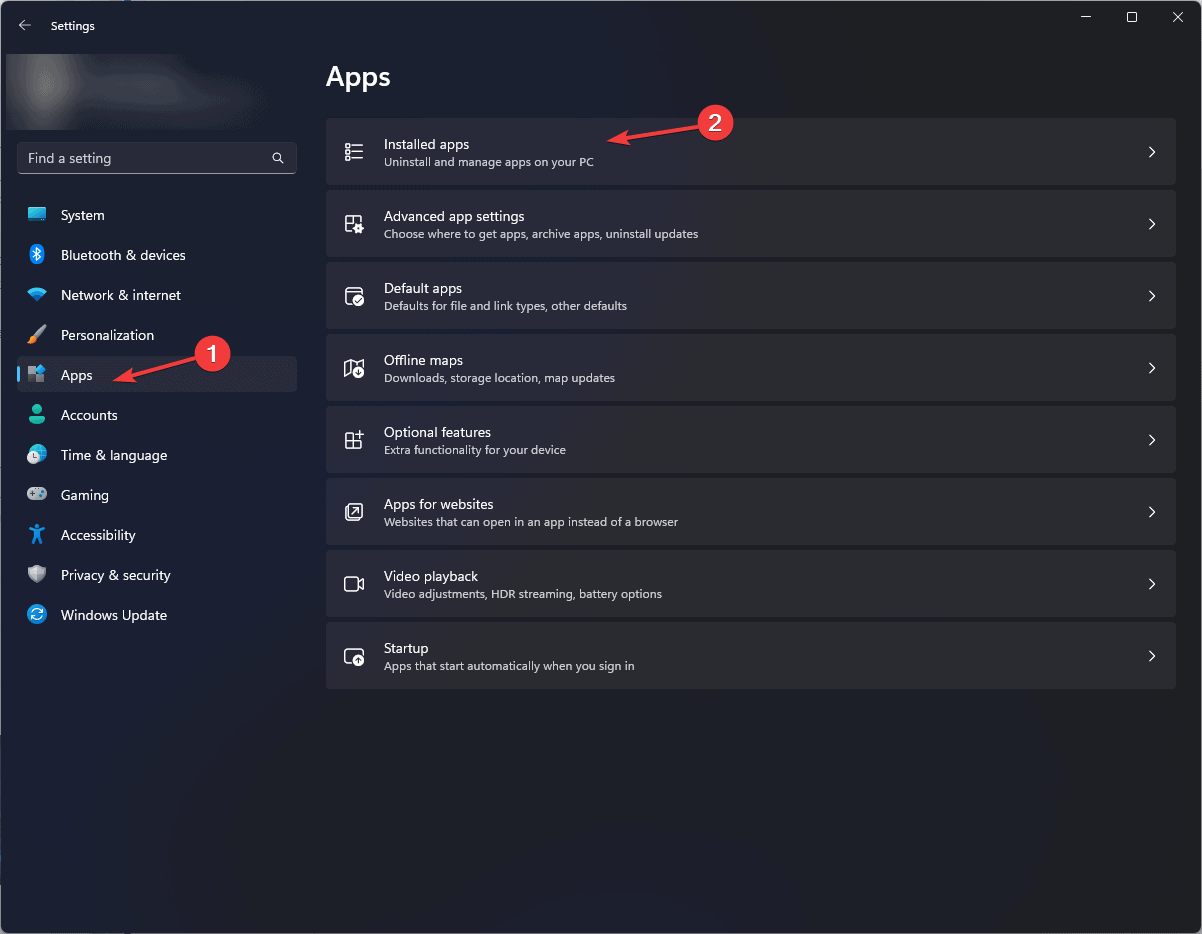
- Go to Settings.
- Select Apps> Installed apps.
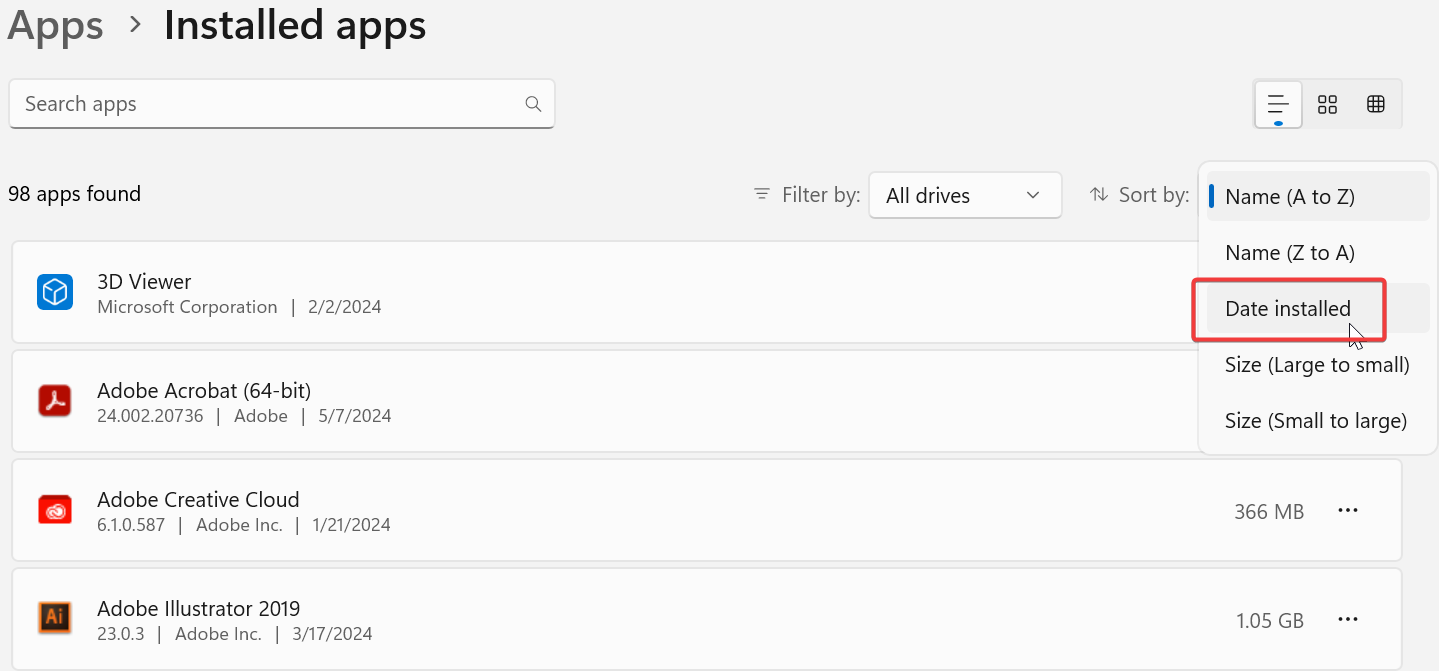
- Select Sort by Date Installed.
- Locate the app or apps that you installed right before you started getting the ERROR_CANT_TERMINATE_SELF.
- Click the three dots and select Uninstall.
- Confirm and restart your PC when the process is done.
2. Check for corrupt system files
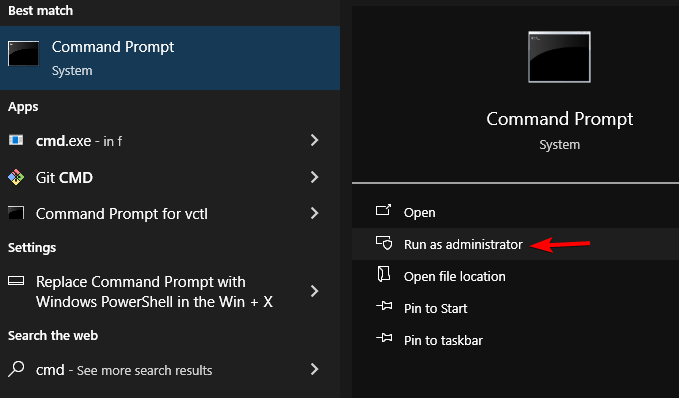
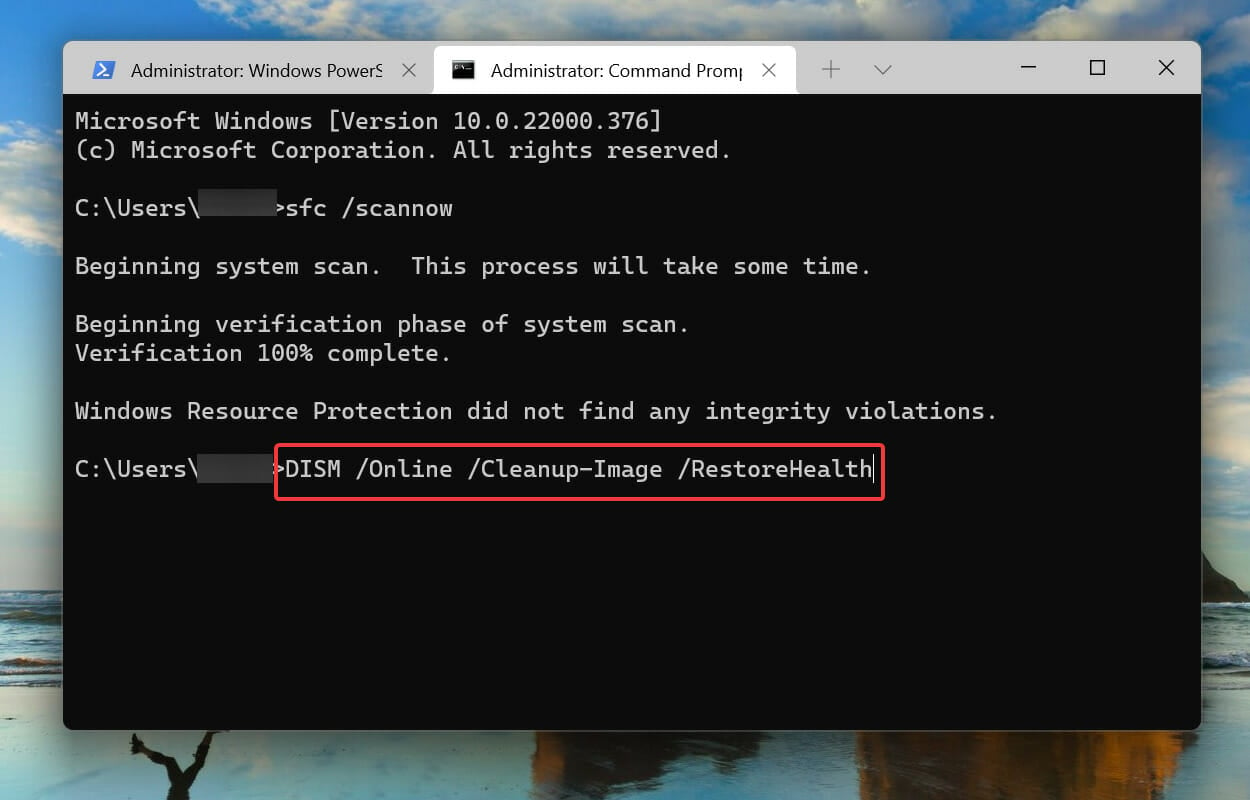
- Press Windows key + S, type cmd, and select Run as administrator.
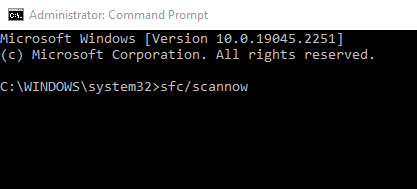
- Type the following command and press Enter: sfc/scannow.
- Once the process is done, enter the following command and press Enter again: dism /online /cleanup-image /restorehealth.
- Wait for this to complete as well and restart your PC.
- Continue your usual tasks and see if you get the ERROR_CANT_TERMINATE_SELF message again.
These commend check for and fix system file corruption. Running them might fix underlying causes of the can’t terminate self error.
3. Check for driver issues
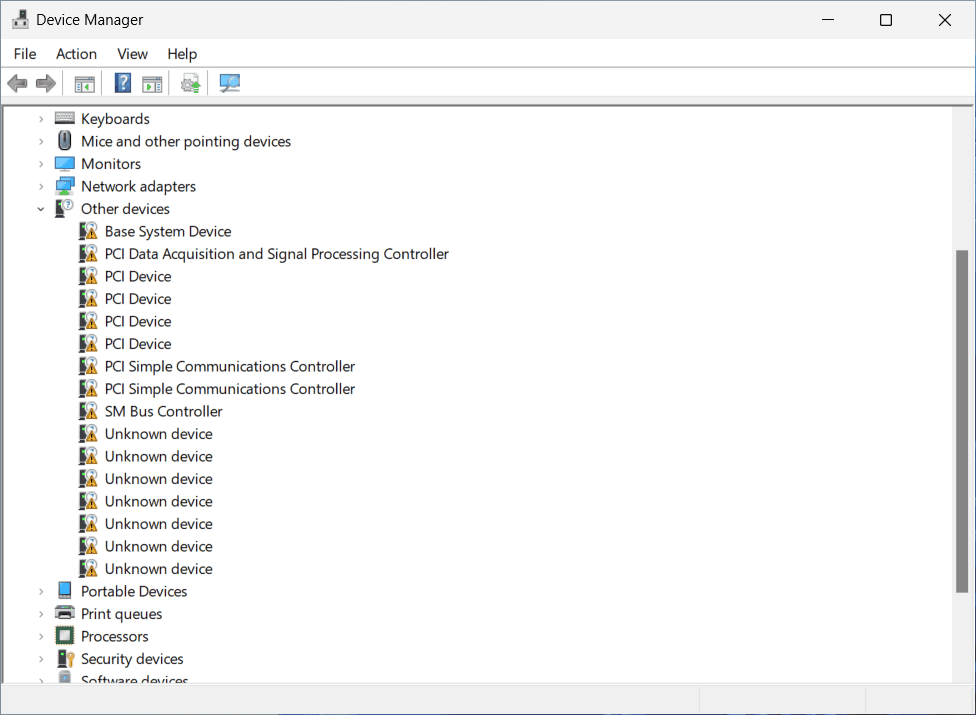
- Right-click on the start menu and choose Device Manager.
- Click on the downward arrows to expand all sections.
- Check if there are warning signs (⚠️) nex to certain device drivers.
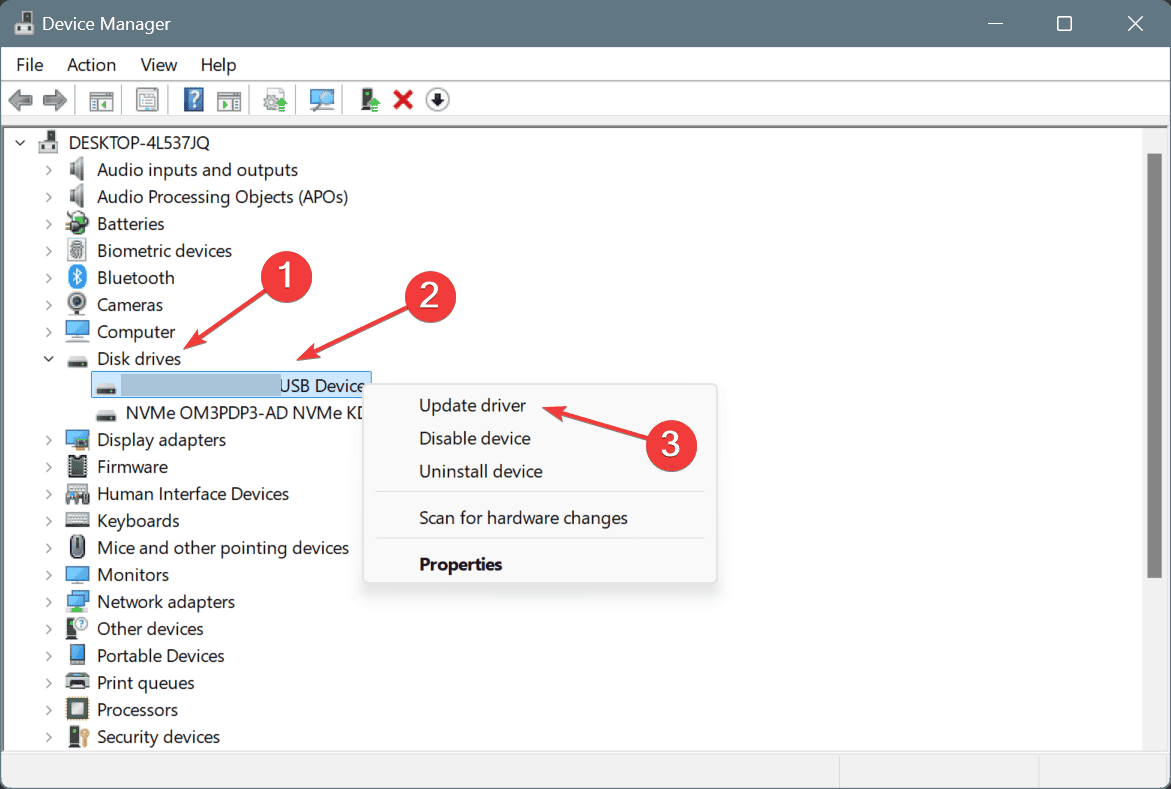
- For each device that has those signs, right-click and select Update driver.
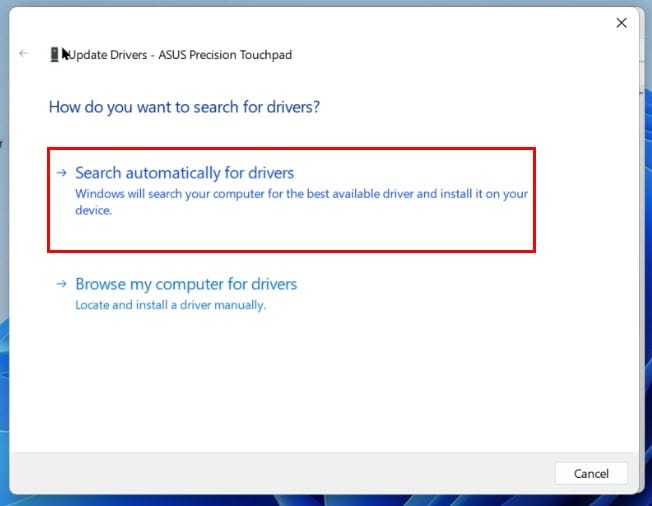
- Select Search automatically for drivers and wait for the process to complete.
4. Scan for malware
- Open Windows Settings and select Privacy & Security.
- Select Windows Security.
- Go to Virus & Threat Protection.
- Click Full Scan.
- Wait for the process to complete and quarantine any identified threats.
- Restart your PC to check if ERROR_CANT_TERMINATE_SELF persists.
5. Go back to a previous state of your Windows
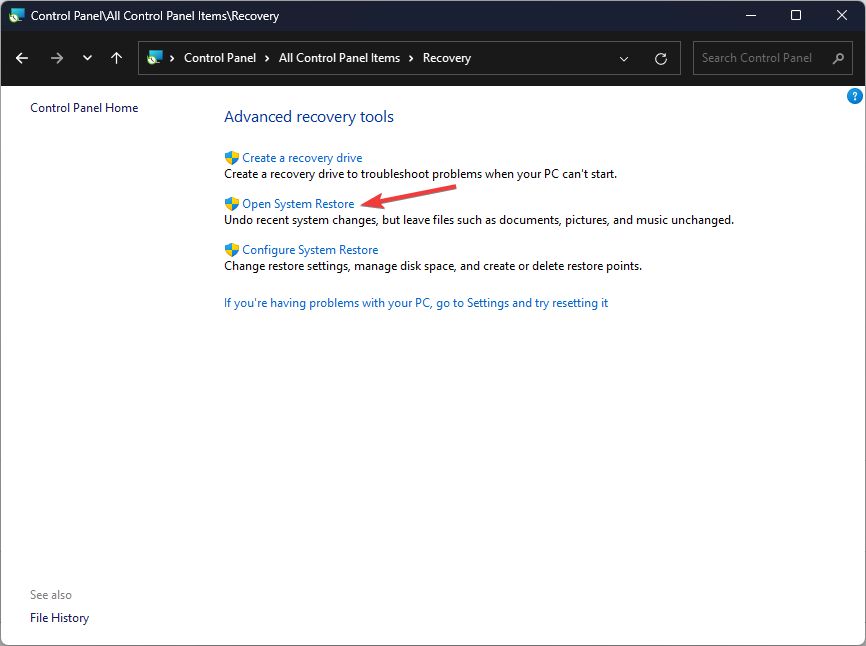
- Open Control Panel, search for Recovery, and open the result named Recovery.
- Click the Open System Restore link.
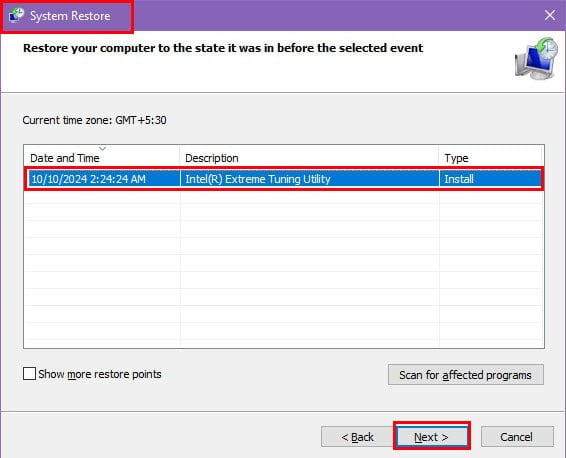
- Select a restore point by clicking on it and hit Next.
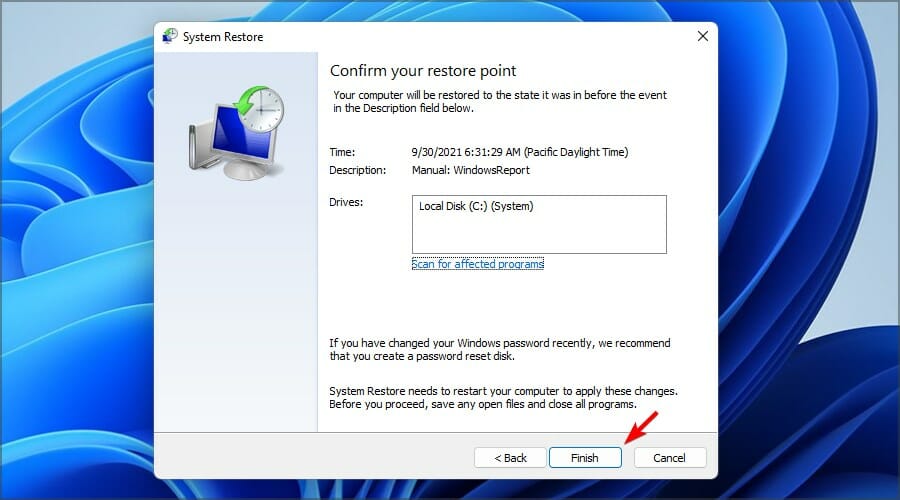
- You’ll get details regarding the affected drive, cand hanges made. Click Finish to confirm.
That’s about all you need to know to fix ERROR_CANT_TERMINATE_SELF. As you can see, corrupt system files and faulty apps are not that hard to defeat it.
Keeping your system up to date and running regular virus scans are recommended maintenance tasks to prevent this and similar errors like exception on invalid stack and the bad image error from reoccurring.
We also have a guide on ERROR_PROCESS_IN_JOB, and if you want to know more, don’t miss its dedicated article.





User forum
0 messages