Scan and repair hard drive stuck on Windows 10/11 [Quick Fix]
2 min. read
Updated on
Read our disclosure page to find out how can you help Windows Report sustain the editorial team. Read more
Key notes
- Some users reported that their drive scan stopped at a certain point and they didn’t know what to do.
- You should know that Windows offers some built-in tools to help you with this; plus there are also external tools that you can use.
- To be prepared for anything, you can check out more common errors with hard drives in our separate Hard Drive Troubleshooting page.
- And, in our Windows 10 Troubleshooting Hub, you can find complete guides about almost all possible OS errors.

Defragmenting and checking your hard drives for errors on a regular basis is recommended since it’s good for the health of your device. But even these useful operations have their bugs and bad sides.
Some users have reported that their drive scan stopped at a certain point, and they didn’t know what to do. And if you’re one of them, here’s a solution to your problem.
What do I do if my hard drive scan freezes?
1. Run a disk cleanup
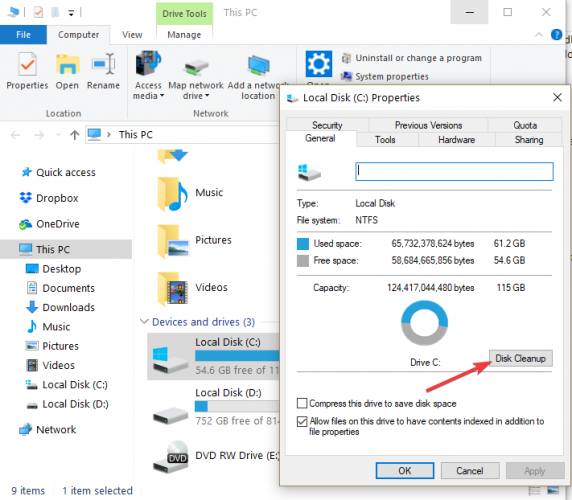
Temporary files and junk files may cause your PC to freeze or crash during hard drive scan. Make sure to eliminate this possible cause off your list by using the Disk Cleanup feature.
To do this, you need to right-click the problematic hard drive and go to Properties. Click on the General tab and select Disk Cleanup. Follow the on-screen instructions to complete the process.
2. Use System Configuration
- Go to Search
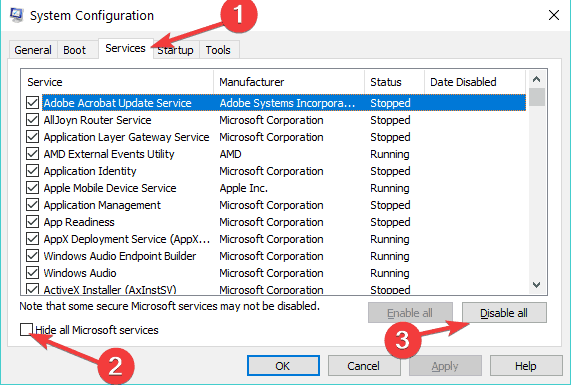
- Type msconfig in the search box, and then click on msconfig.
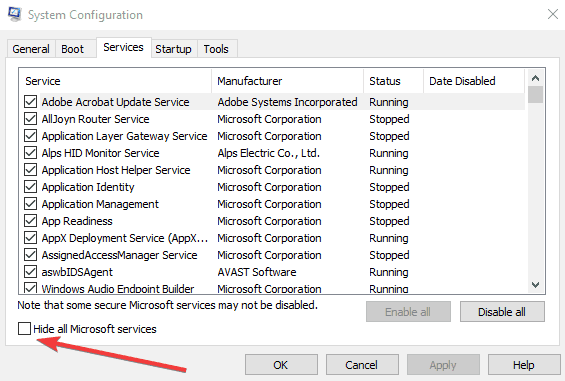
- On the Services tab of the System Configuration dialog box, click on Hide all Microsoft services checkbox, and then choose Disable all.
- On the Startup tab of the System Configuration dialog box, click on Open Task Manager.
- On the Startup tab in Task Manager, for each startup item, select the item and then click Disable.
- Close Task Manager.
- On the Startup tab of the System Configuration dialog box, tap or click OK, and then restart the computer.
3. Use chkdsk command in Command Prompt
Restart the computer, and let Windows perform the complete disk check. Windows will repair all possible file system errors automatically. After that, manually run the Chkdsk command from Command Prompt to check the drive for any further errors.
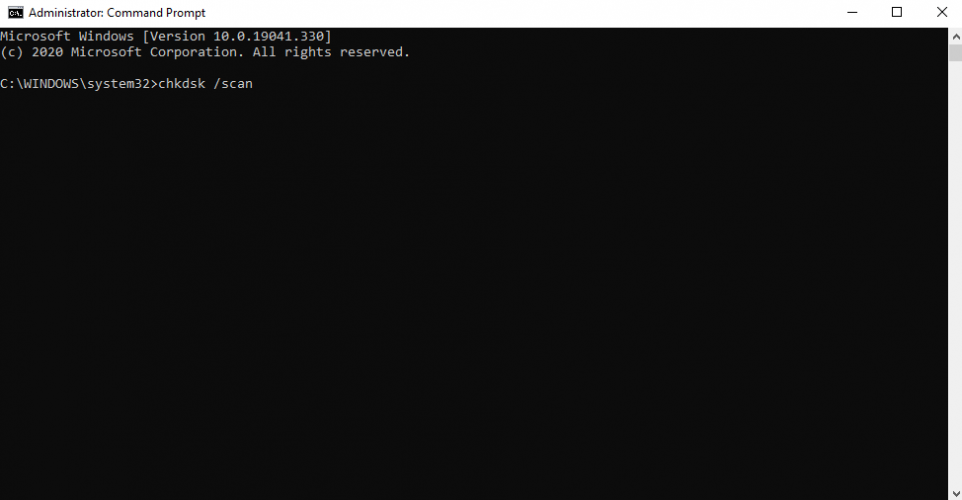
- Type Command Prompt in the search bard and open as administrator.
- Type the following command, and then press Enter:
chkdsk /scan - After cmd completes the scan, you’ll be notified about the found errors. If any errors are found, run the following command in the next line to fix the errors:
chkdsk /spotfix
Make sure you save all your work before performing this action in Command Prompt because the chkdsk command sometimes requires you to restart your computer, or even restarts it automatically.
We hope that these three solutions helped you fix the problem. If so, tell us in the comments section below.
.


User forum
0 messages