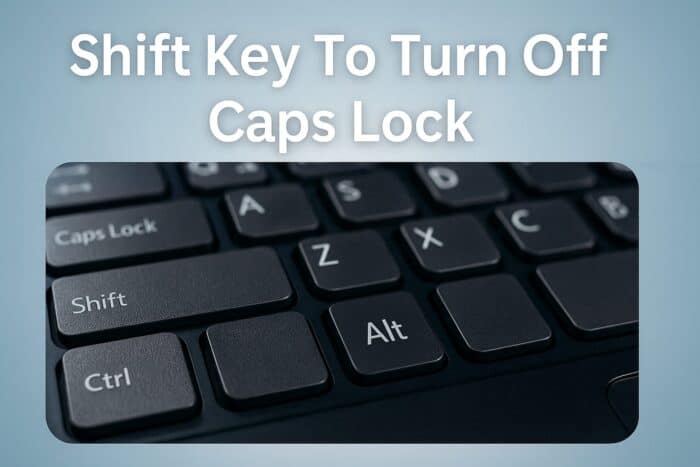
Simple Way to Turn Off Caps Lock Using Shift Key in Windows 11
If you often find yourself accidentally typing in all caps, there’s a quick way to fix it by using the Shift key to turn off Caps Lock in Windows. This guide will show you exactly how to enable and use this feature.
Table of contents
How to Enable the Shift Key to Turn Off Caps Lock?
1. Open Control Panel
To start, open the main system settings window.
- Press Windows + R to open the Run dialog box.
- Type control and press Enter.
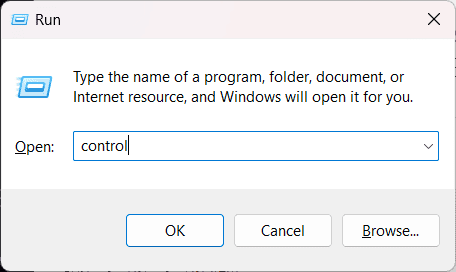
- The Control Panel window will open.
For a detailed visual walkthrough, check out this guide on using the Shift key to turn off Caps Lock.
2. Access Language and Input Settings
Next, go to the input and keyboard configuration area.
- Click on Clock and Region.

- Select Language or Region and Language, depending on your Windows version.

- Choose Advanced keyboard settings or Change input methods.
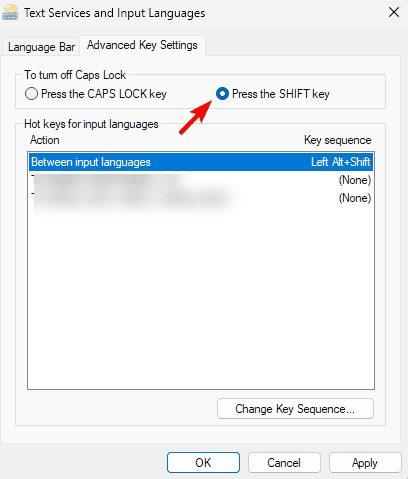
3. Open Advanced Keyboard Settings
Now, adjust how Caps Lock turns off.
- Click Input language hot keys on the left side.
- In the Text Services and Input Languages window, select Advanced Key Settings.
- Click To turn off Caps Lock, then select Press the SHIFT key.
4. Apply and Save the Changes
Finally, confirm and save your preference.
- Click Apply, then OK to confirm your selection.
- Close all windows.
Now, whenever Caps Lock is on, pressing Shift will turn it off instantly.
Why Use the Shift Key to Turn Off Caps Lock
Many users prefer pressing Shift instead of Caps Lock again because it’s faster and more intuitive, especially while typing quickly. It also helps avoid typing mistakes, particularly when switching between uppercase and lowercase frequently.
If you want an on-screen alert when Caps Lock is active, see this helpful guide on how to show Caps Lock display on screen in Windows 10.
How to Test If It Works
You can quickly check if the new setting is active.
- Open Notepad or any text editor.
- Turn on Caps Lock and type a few words in uppercase.
- Press Shift and continue typing. The text should now appear in lowercase.
FAQs
Yes. You can remap the Caps Lock key using tools like PowerToys or SharpKeys.
It works on Windows 10 and Windows 11, but the exact menu names may vary slightly.
You might be using a Windows edition or language pack that hides this option. Try changing your keyboard layout or updating system settings.
Yes, you can use third-party remapping tools or the built-in PowerToys Keyboard Manager to assign a different key to toggle or disable Caps Lock.
Conclusion
Using the Shift key to turn off Caps Lock is a simple trick that saves time and prevents typing errors. Once enabled, you can type more naturally without worrying about shouting in all caps.
If Caps Lock or Num Lock ever gets stuck, you can read this quick guide on how to fix Caps Lock or Num Lock stuck in Windows 10. This small tweak can greatly improve your typing comfort and overall Windows experience.
Read our disclosure page to find out how can you help Windows Report sustain the editorial team. Read more


Improve this guide


User forum
0 messages