Zoner Studio vs Adobe Lightroom: Powerful and Affordable Alternative for Windows
There are countless options for managing and retouching your photos on Windows, but Adobe Lightroom continues to set the bar high. However, one contender worth exploring is Zoner Studio, which boasts powerful AI tools, layer editing, and a user-friendly interface.
In this Zoner Studio vs Adobe Lightroom comparison, we take a closer look at their core features, so you can decide which is the best for you.
Zoner Studio vs Adobe Lightroom: Overview
Zoner Studio is an all-in-one photo suite for Windows, allowing you to organize and edit your photos non-destructively, without getting overwhelmed by unnecessary bloat.
Its AI tools are gimmick-free, providing genuine one-click results for upscaling and masking, instantly isolating the subject, background, sky, and objects in your photos.
It supports RAW processing, Photoshop like layering, and a wide range of adjustments, enhancements, and effects.
Zoner Studio is arguably the best value on the market, starting at just $5.99/mo or $59/yr. This makes it a great choice for beginners and hobbyists alike.
On the other hand, Adobe Lightroom is a bulkier and somewhat more advanced solution, aimed at professionals, available on Windows/Mac and with cross-platform support.
It benefits those already invested in the Adobe ecosystem, as a companion to Photoshop and Firefly, and is still widely considered the standard for those working in the industry.
On its own, Lightroom starts at $17.99/mo or $119.88/yr. The price soon shoots up when including Photoshop or a broader Creative Cloud subscription.
Key Takeaway: Zoner Studio represents the best value for Windows users. The free download for Windows provides a 7-day free trial.
Interface and Ease of Use
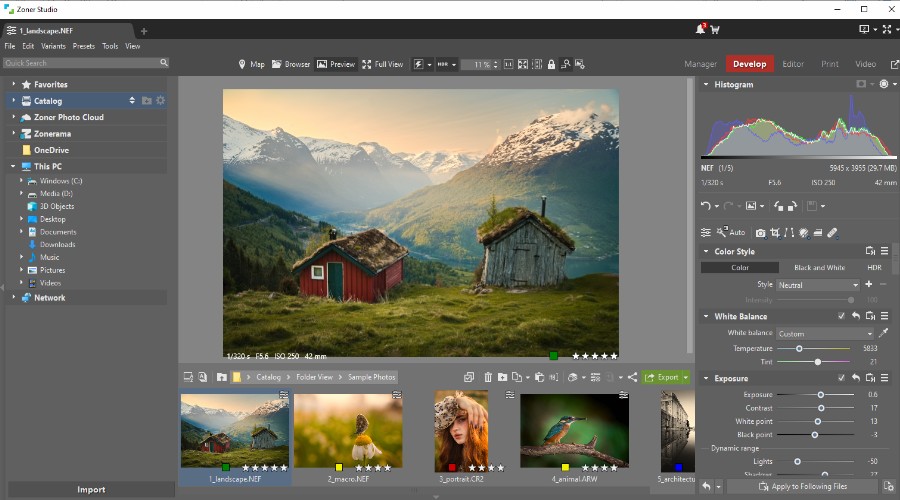
Like Lightroom, Zoner Studio acts as the central hub for managing all your photos. Unless you’re sourcing straight from your camera’s SD card, you don’t need to directly import them as it automatically recognizes image files via the navigator on the left. Simply browse through your PC folders and any photos will be displayed as thumbnails.
Double clicking a thumbnail automatically opens the photo in the flagship Develop module, which is where the bulk of RAW editing takes place. For special use cases, you can make further layered edits in the Editor module.
You can quickly switch between modules at the top of the toolbar on the right.

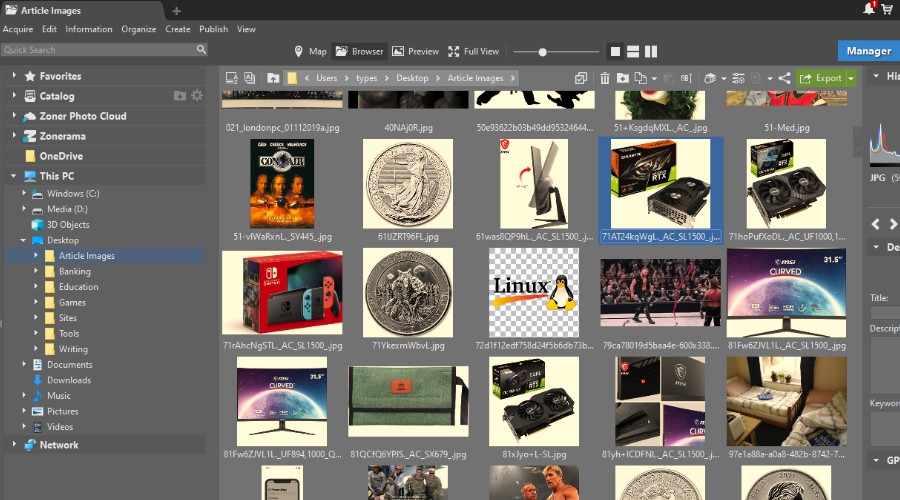
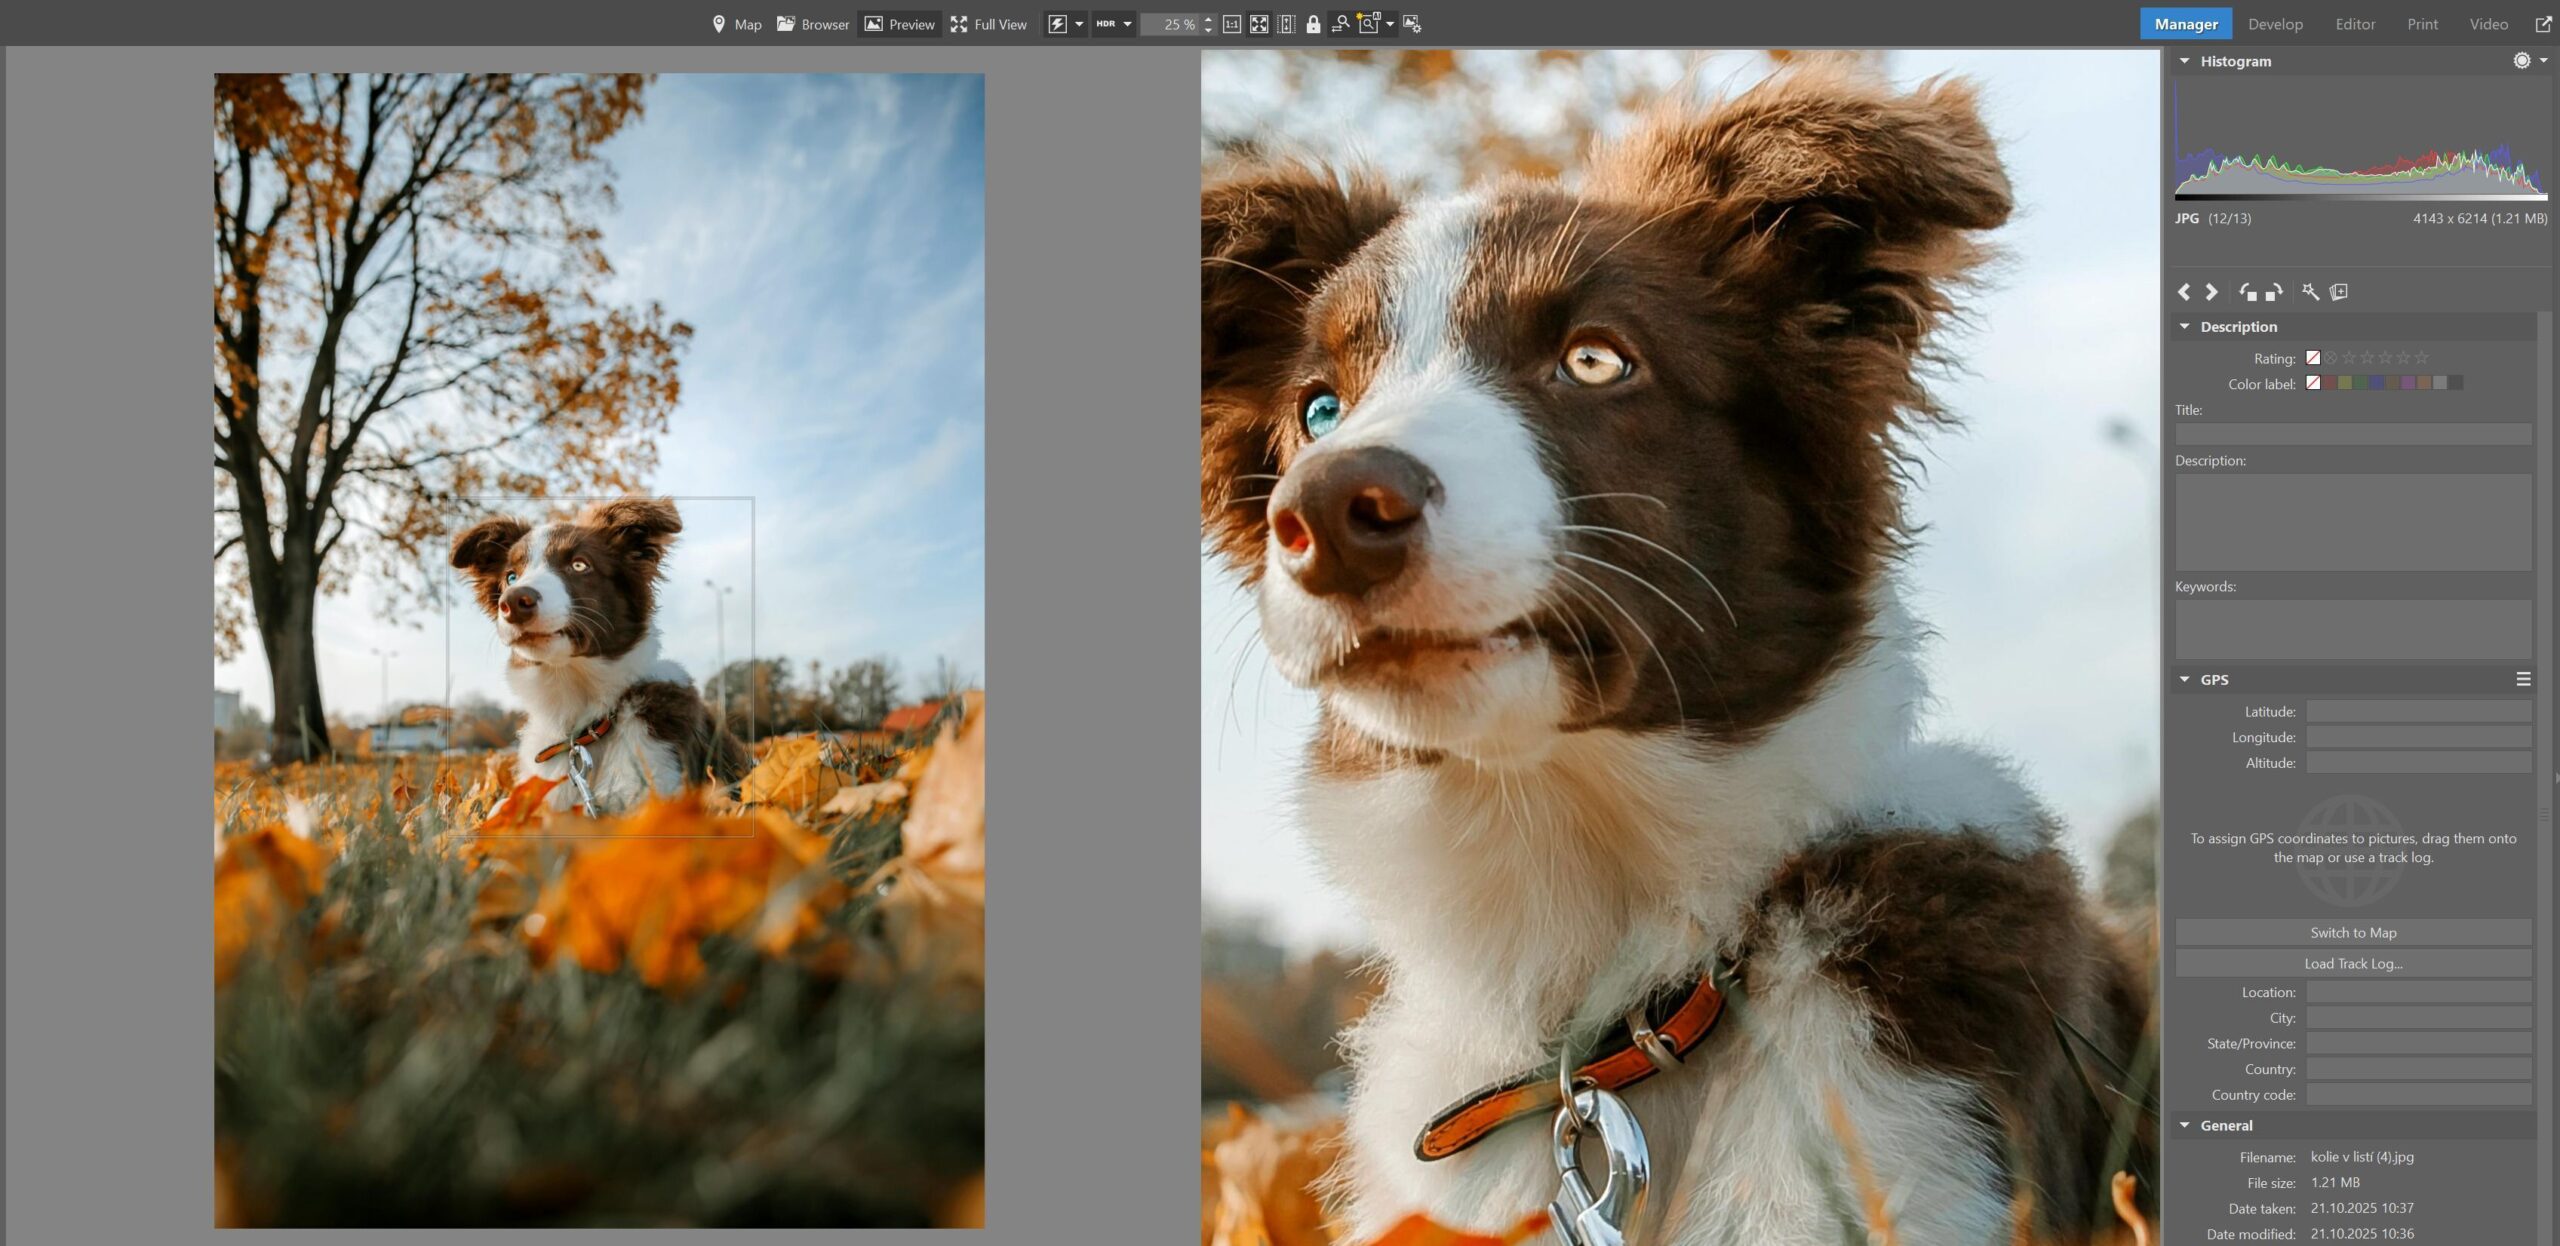
The Manager module is for Digital Asset Management, where you browse, tag, cull, and organize your photos. You’ll also see a search bar and the ability to filter by image format, text descriptions, keywords, rating, color label, location, and other parameters like GPS coordinates.
Its metadata filtering options will also allow you to filter by lens and camera model, which is commonly included in photo EXIF data.
You can check and manage metadata, like the camera model, using the File Information function (`Ctrl+Shift+Enter`).
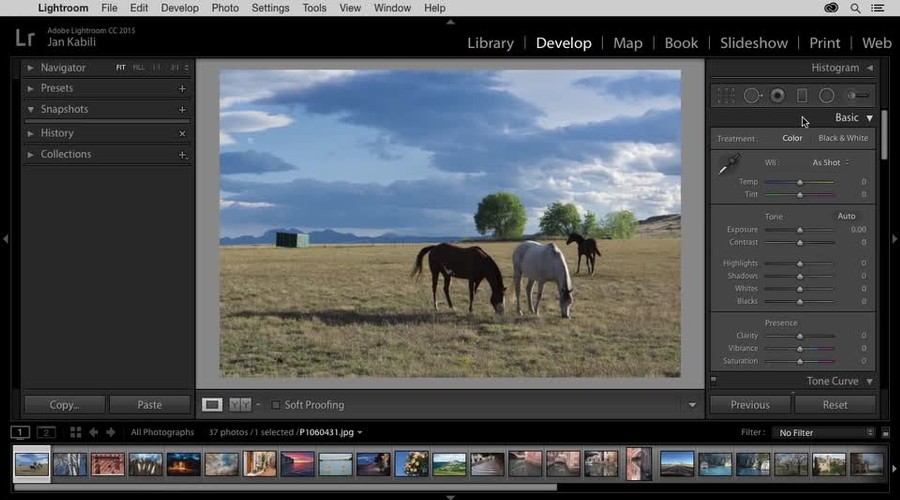
This is all very similar to Lightroom, which has its Develop module for RAW editing and Library module for organization. Its search is only slightly more advanced, with object filtering.
Overall, using Zoner Studio is a straightforward and intuitive experience. I like that you can work on multiple photos, switching between them like browser tabs. It also features multiple viewing modes, including full screen with fly-in editing panels, and a compare view for multiple images.
You get full control over the editing process, with an undo arrow and a dropdown history panel. Like lightroom, double clicking an adjustment slider will also reset the adjustment.
Even if you get stuck, you get robust support and there are lots of tutorials and help info on the site.
Both Lightroom and Zoner Studio support all common RAW formats (including DNG) and Bitmap formats (including HDR such as AVIF and JXL).
Key Takeaway: Comparable interfaces, ease of use, and image formats.
Develop
In Lightroom, the Develop module represents the main editing space for retouching photos. Here you can correct the exposure and white balance, reduce noise and sharpen the image, perform color grading, tone curve, and HSL, as well as cropping and rotating.
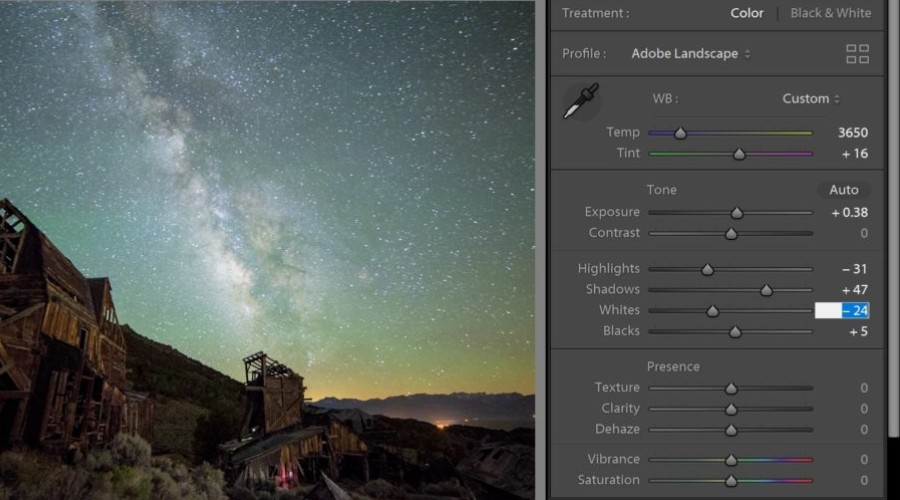
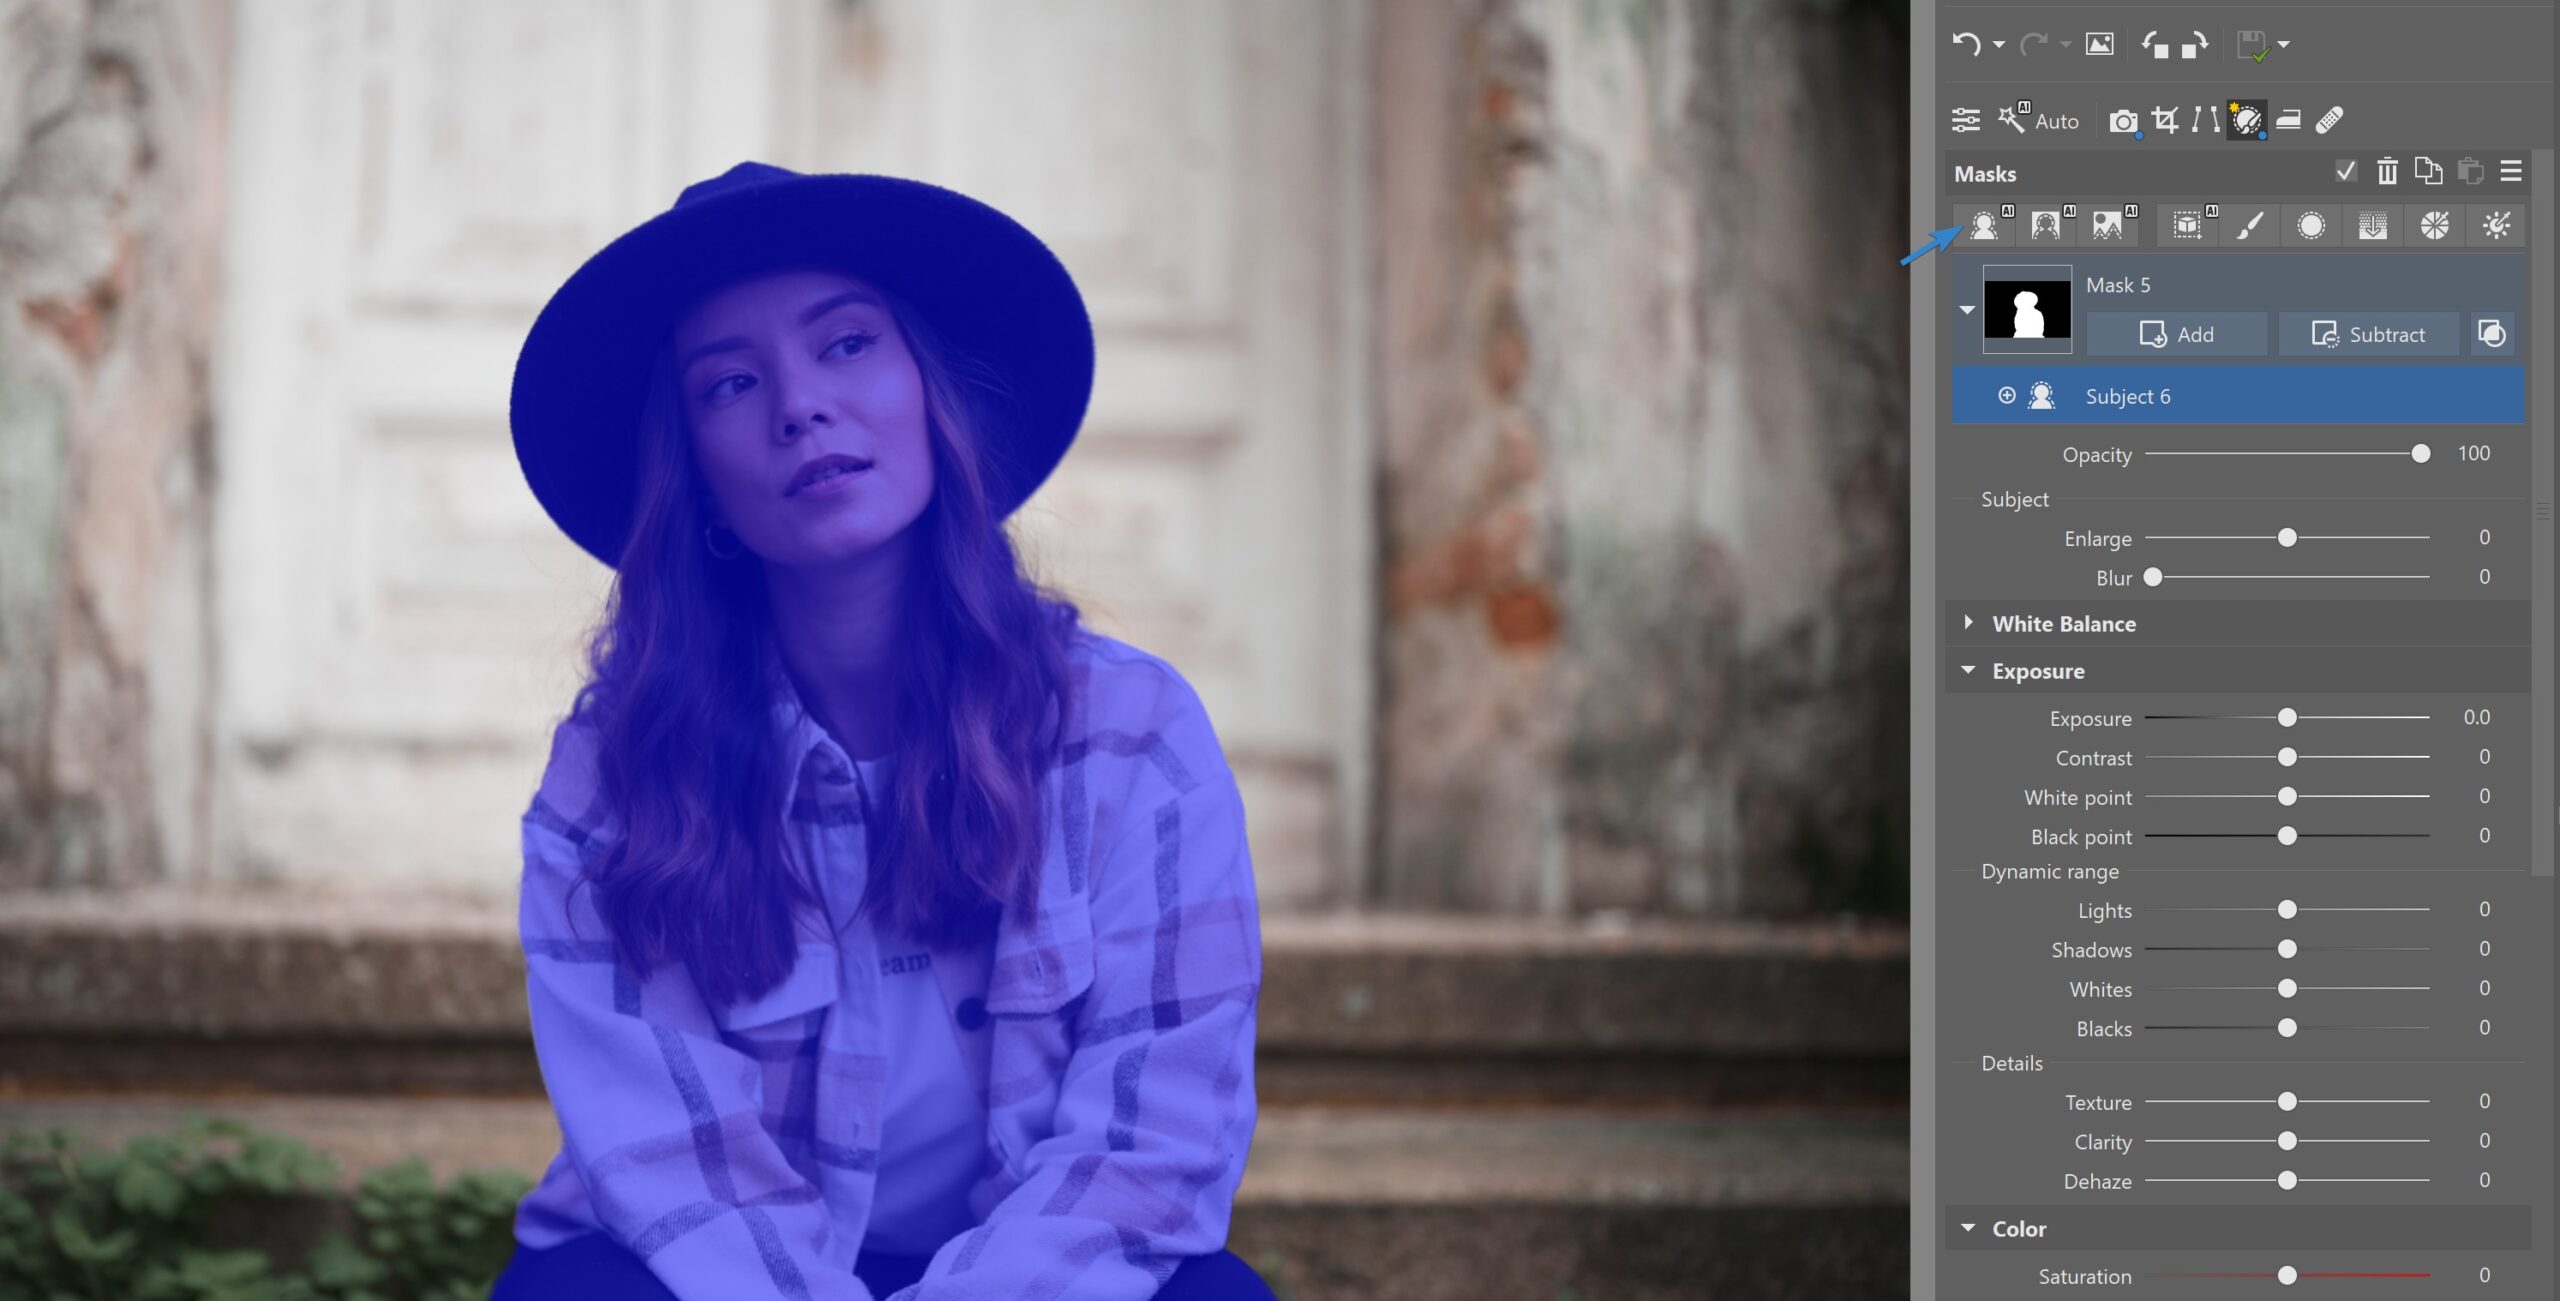
Its masking tools allow you to apply edits to specific areas. This can be done manually with brush, gradient, and radial tools, while its AI auto detects the subject, sky, and background.
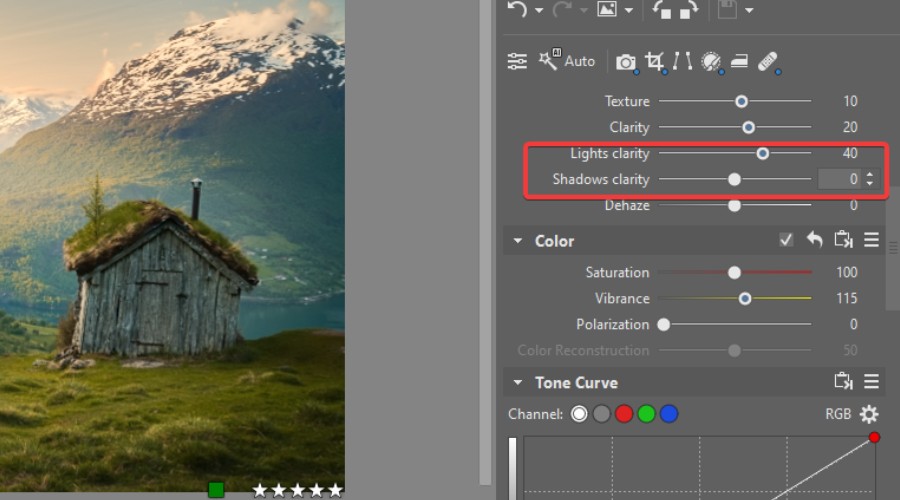
Zoner Studio offers a functionally similar set of Develop features, excelling at color shifting and effects like vignetting, halation, and glow. The clarity settings under Exposure stand out by allowing you to tweak the clarity of lights and shadows in a subtler way than Lightroom.
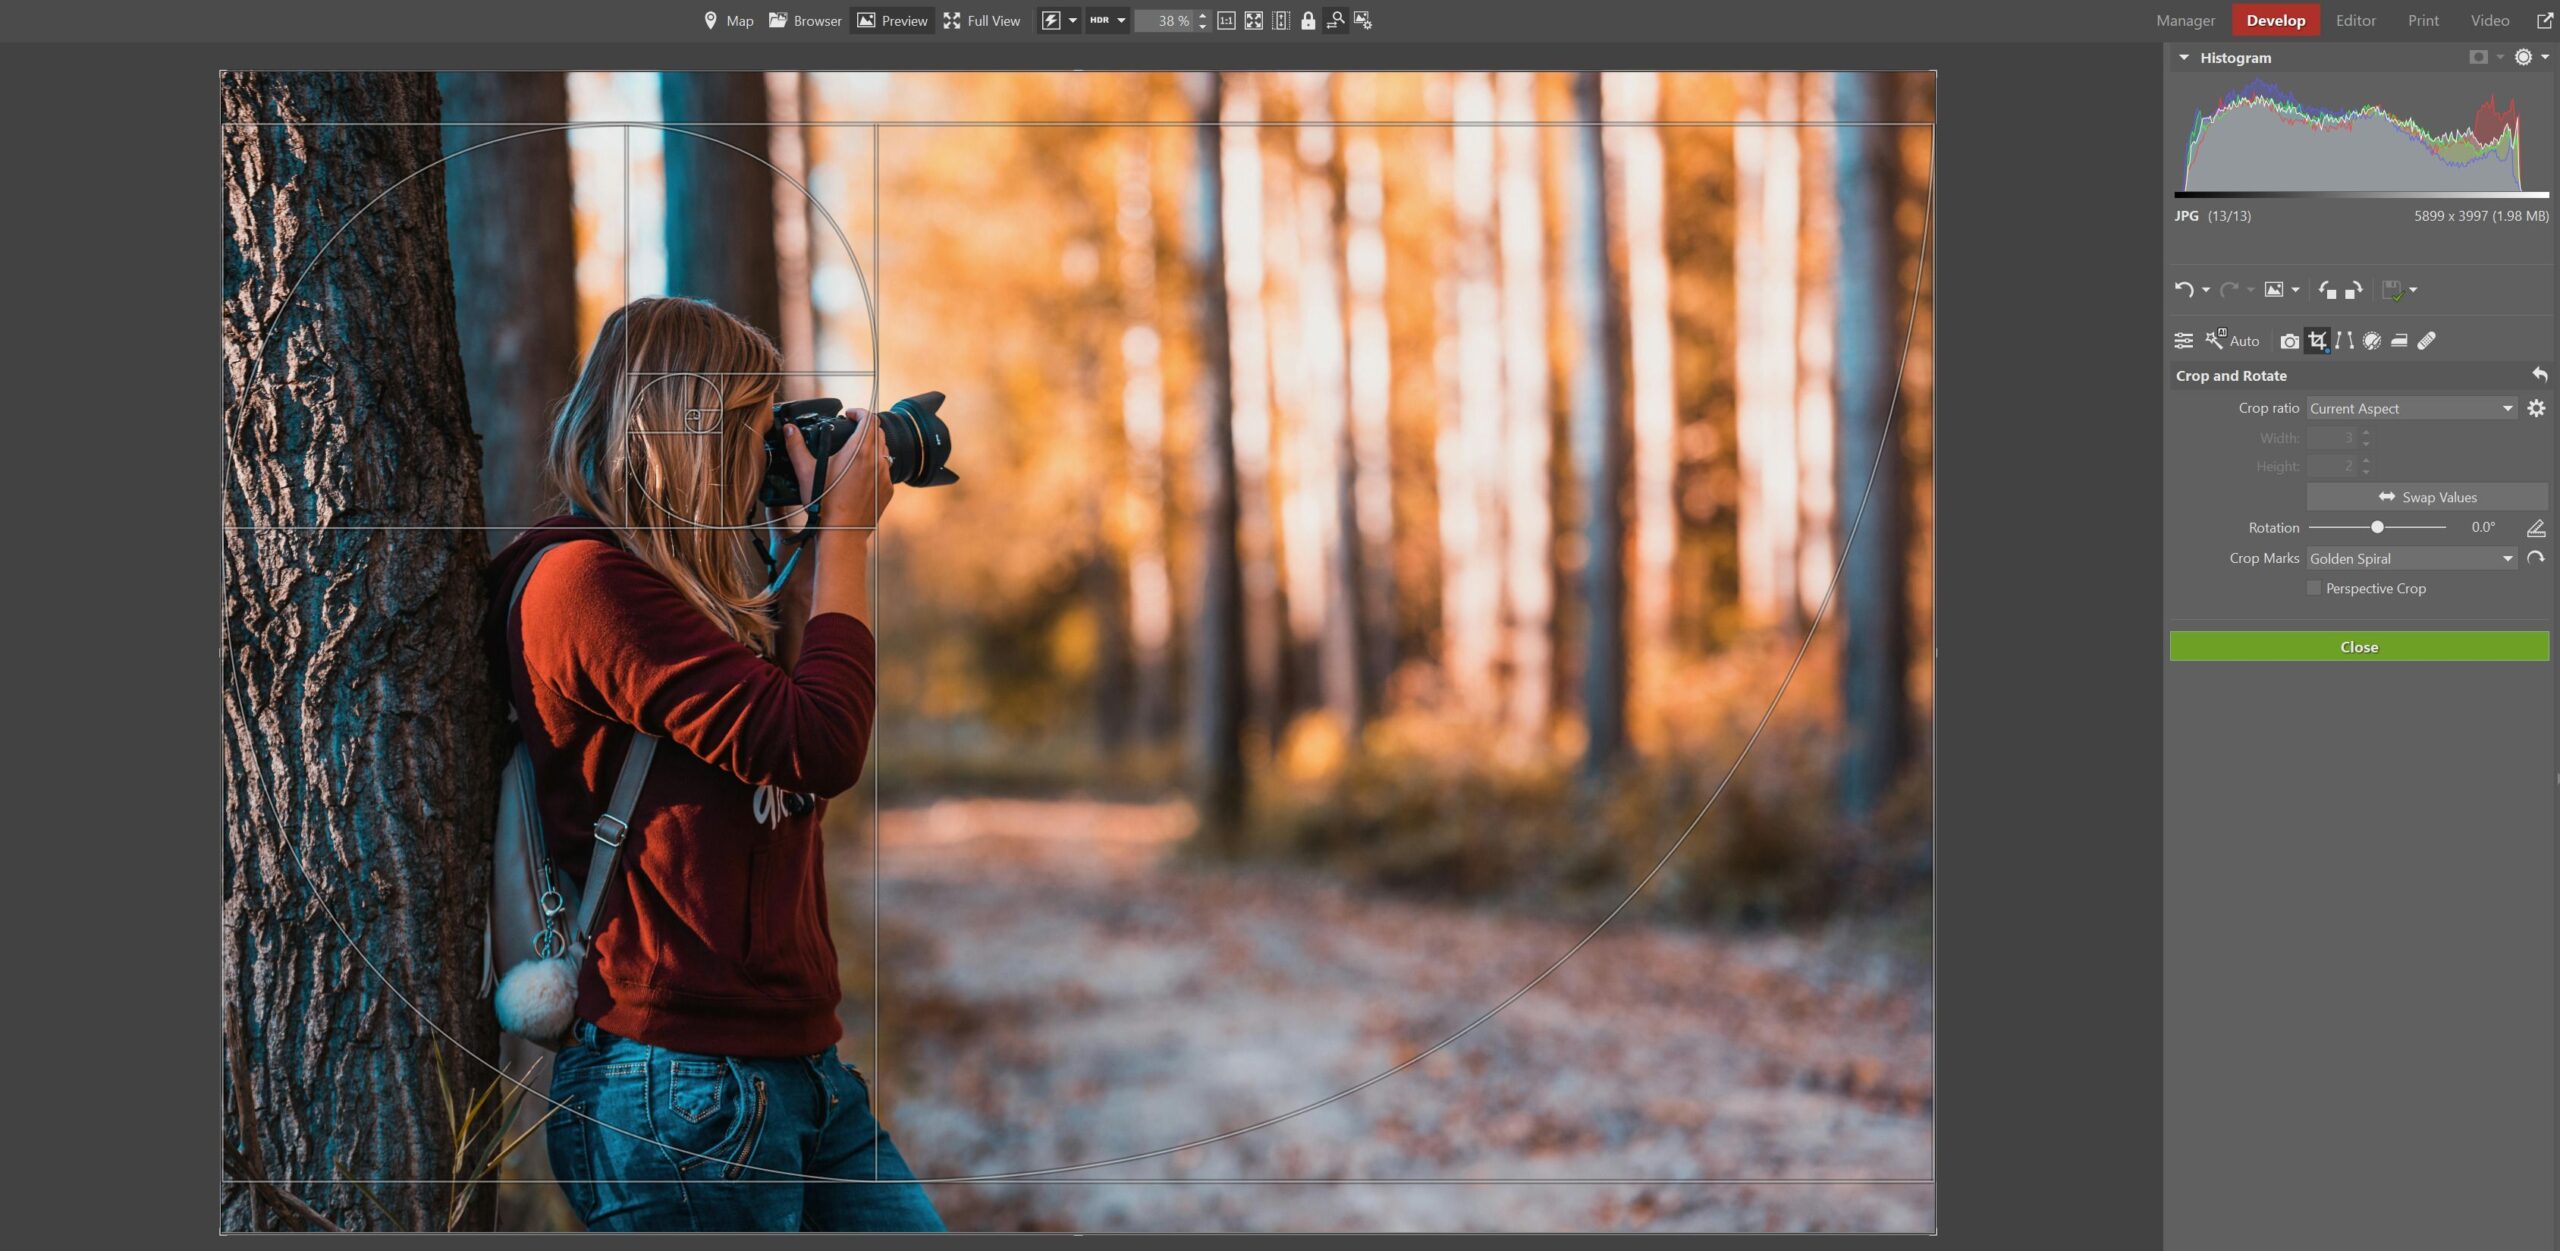
Its cropping and rotating are also good but lacks lightroom’s auto-horizon.
Both support auto-corrections based on lens profiles, though Lightroom seems to be a bit more effective in this area.
Zoner Studio is particularly useful for the ability to create local AI, brush, gradient, color and luminance mask layers, within the Develop module.
All things considered, Zoner Studio holds strong against Lightroom, and any differences are mostly superficial. What Zoner Studio lacks in preset variety or some advanced options is countered by ease of use and its own exclusive settings.
Key Takeaway: Zoner Studio is more refined for beginners and intermediates.
Layer Editing
Where Zoner Studio really shows its value is via its separate Editor module. This goes beyond RAW processing into the realm of layered pixel editing. You can stack image layers, add text and objects, use retouching and drawing tools, and masks for precise control.

Each layer can be edited independently with adjustments, blending modes, and effects. Unlike Lightroom, which requires Photoshop for this level of work, Zoner includes it all in one package.
Other standout editing tools include red eye reduction, line straightener, and liquify, which includes AI facial enhancements.
Key Takeaway: Zoner Studio includes full layer editing.
Note: Zoner Studio uses its own layered image format ZPS and cannot work with Photoshop’s PSD format.
AI Tools
Zoner Studio has now mostly caught up with Lightroom when it comes to AI-powered masking. You can use traditional lasso tools, but the AI has the ability to recognize the main subject of the photo or faces that may have blinked, any individual object such as birds, vehicles (even airplanes), the background, and the sky.
This lets you make quick adjustments to the different elements of your photo or remove them altogether. All it lacks is generative erase and replace, where Lightroom integrates with Firefly to generate entirely new objects and details for your selections.
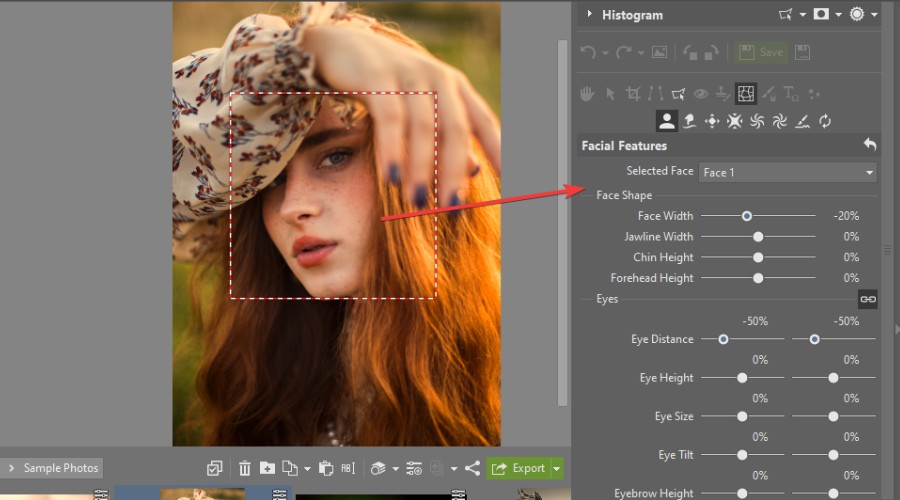
That said, I find Zoner Studio does a better job of recognizing faces, allowing independent retouching of face shape, eyes, nose, and mouth.
It also offers a powerful AI Resize tool, which essentially upscales the resolution without sacrificing sharpness and quality.
Key Takeaway: Choose Zoner Studio for faces or Lightroom for generative AI.
Performance and Storage
Lightroom CC offers seamless cross-platform functionality, allowing users to edit, organize, and sync photos across Windows, macOS, iOS, Android, and web browsers using Adobe Creative Cloud.
Zoner Studio is only compatible with Windows 10 and 11, but you can access cloud storage via the web.
It is surprisingly well optimized on Windows and I found it runs faster than Lightroom on my lower end system with 8GB of RAM (both recommend 16GB). Zoner Studio also takes up less disk space (2GB), while Lightroom requires 10GB to complete the installation process.
Registered users get 20GB of storage via the Zoner Photo Cloud. This is personal storage, whereas Zonerama is your free online gallery with unlimited space. Albums can be password protected or public and there are lots of sharing and engagement features.
You will also notice a Print module within the software for physical print projects like photo books and calendars. Zoner Studio itself offers 15 free photo prints per year.
Lightroom CC comes with personal cloud storage, which varies depending on the plan. While you can share photos and galleries with others, this is more restrictive than Zonerama.
Zoner Studio vs Adobe Lightroom – Final Verdict
In conclusion, Zoner Studio has everything you need for photography in one place. This includes most of the key capabilities of Lightroom, while also offering layering and basic pixel editing tools that Adobe users would have to switch to Photoshop for.
That coupled with a more affordable price, makes it a no-brainer for beginners and hobbyists that aren’t already entrenched in the Adobe ecosystem, and want an accessible solution on Windows.
- Get Zoner Studio with a full 7-day free trial, no strings attached!
Nonetheless, those that favor Mac, need cross-platform support, or want more advanced editing via Photoshop, should still strongly consider Lightroom.
Read our disclosure page to find out how can you help Windows Report sustain the editorial team. Read more


Improve this guide


User forum
0 messages