Solve PC issues prompt won't go away on Windows 10/11 [FIX]
5 min. read
Updated on
Read our disclosure page to find out how can you help Windows Report sustain the editorial team. Read more
The Action Center is one of the most important pieces of the User Interface in Windows 10. All notifications and most important quick actions toggles are there. Idea is to have a constant grasp of selected applications and system performance. However, after you’ve read those messages, you should be able to dismiss them. Except, some users weren’t able to do so.
There are more than a few solutions for this error, but we decided to stick with the essential ones. If you’re unable to dismiss system messages in Action Center, check out the solutions below.
How to remove important messages from the Action Center in Windows 10
- Restart Windows Explorer
- Disable individual app notifications
- Run SFC
- Clear Problem Reports
- Repair Windows 10
1: Restart Windows Explorer
This is one peculiar error, simply because there are layers of possible solutions. Most of the users resolved the error and successfully dismissed messages, by restarting Windows Explorer. And this must be the simplest solution but, seemingly, the best-suited for the job. This implies we’re dealing with a random bug plaguing Windows Explorer.
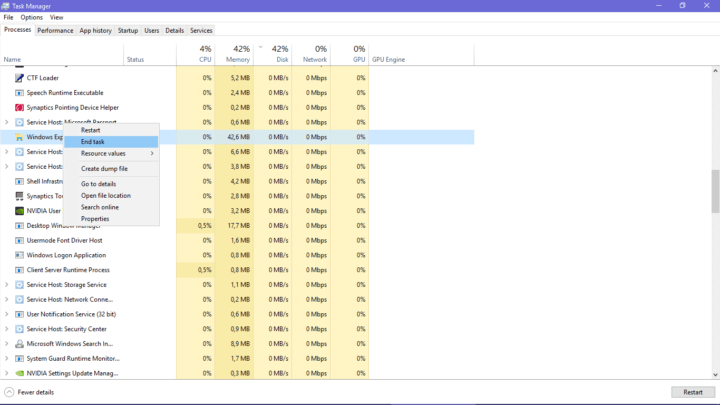
Follow these steps to restart Windows Explorer in Windows 10:
- Right-click Taskbar and open Task Manager.
- Under the ‘Processes‘ tab, locate Windows Explorer.
- Right-click on it and choose Restart from the contextual menu.
- If the ‘Restart’ is absent, End the task but don’t close Task Manager.
- Click on File and choose ‘Run new task‘.
- Type explorer.exe and press Enter.
In addition, we suggest updating the system as the bug might get resolved after an update. Here’s how to update Windows 10 manually:
- Right-click Start and open Settings.
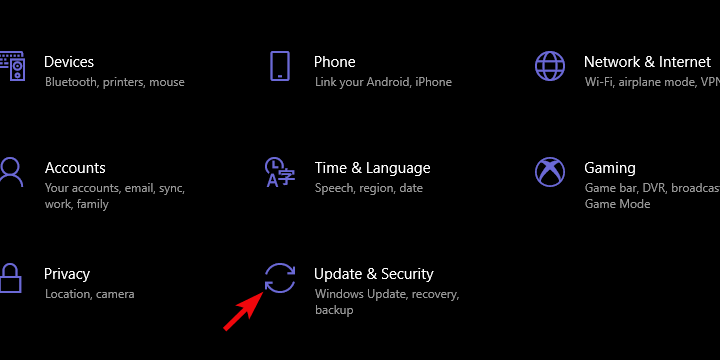
- Choose Update & Security.
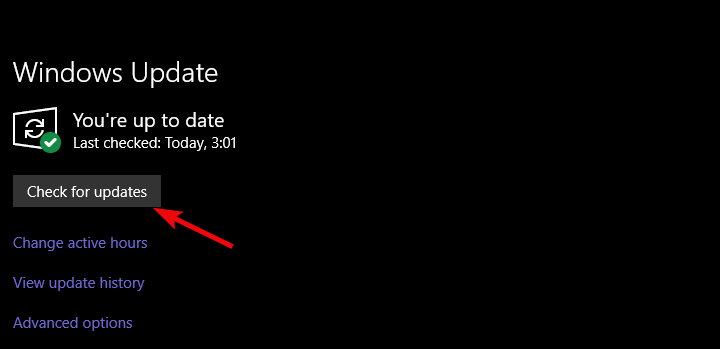
- Under Windows Update, click ‘Check for updates‘.
2: Disable individual app notifications
Even though this occurrence can include various apps, these stuck messages in the Action Center mostly concern Security and Maintainance. These are more times than not, quite important pieces of information. They inform you about the results of system scans concerning security (Security Center) and Automatic Maintainance. Ideally (as intended), they should be easily dismissed after in Action Center.
However, if they’re persistently attached in the Action Centar pane, you can disable them. At least, until some alternative solution address this for good. So, this is more of a workaround than the solution, but you won’t be bothered with piles of notifications in the Action Center. Here’s how to do it in a few simple steps:
- Right-click on the Start button and open Settings.
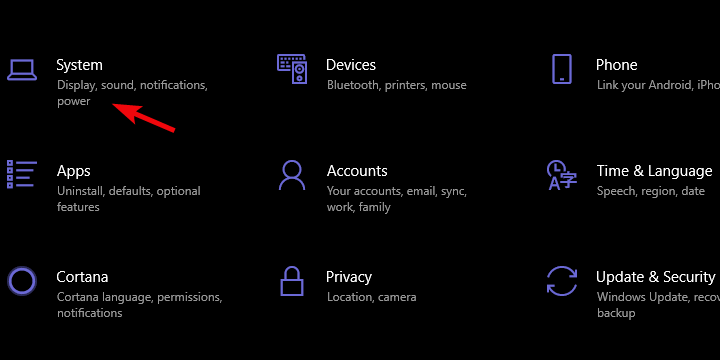
- Select System.
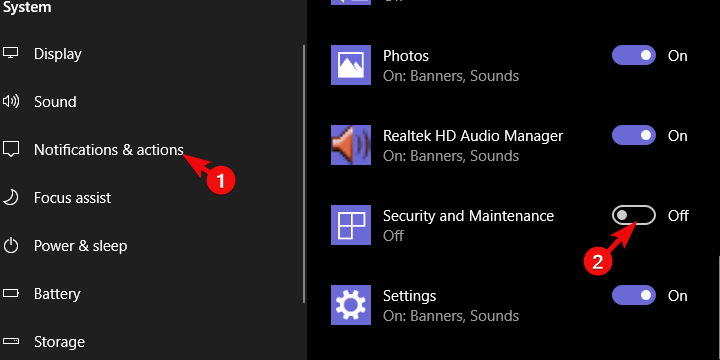
- Choose Notifications & actions.
- Under the ”Get notifications from these senders” section, disable Security and Maintenance.
If that can’t cut it, you can disable Action Center altogether. Here’s how:
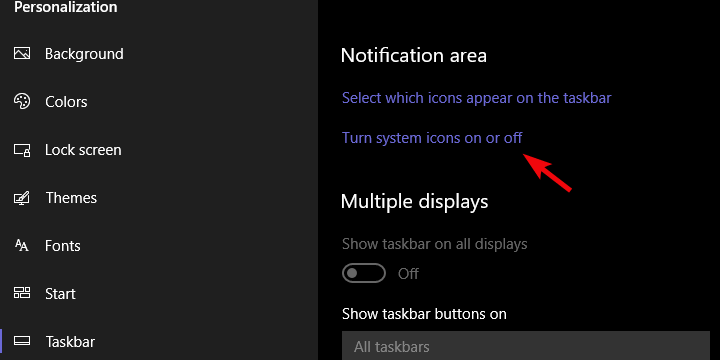
- Right-click on the Taskbar and open Taskbar settings.
- Click on the ”Turn system icons on or off” link.
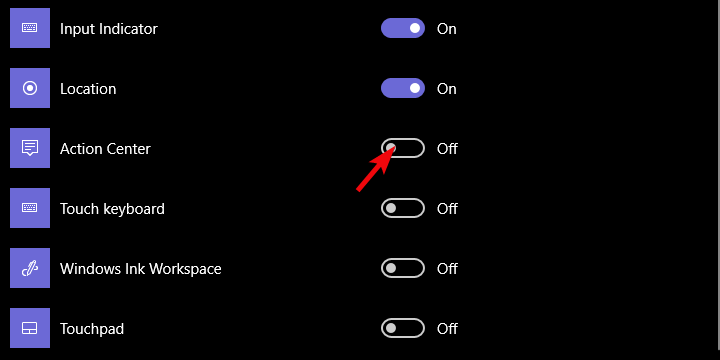
- Disable Action Center.
3: Run SFC
When the third-party software fails, you can reinstall it. When the built-in system services start misbehaving, you turn to SFC. System File Checker (shortened SFC) is the system utility designed for fixing system errors. Basically, if there are corrupted or incomplete system files, SFC will check their integrity and repair them accordingly.
Follow these steps to run SFC in Windows 10:
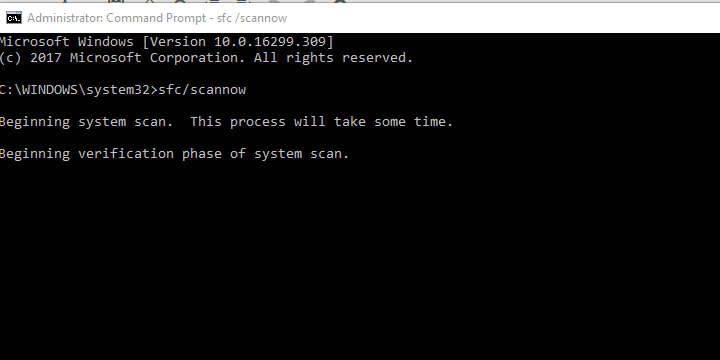
- In the Windows Search bar, type CMD. Right-click on Command Prompt and run it as admin.
- In the command-line, type sfc/scannow and press Enter.
- Wait until the scan ends and the tool fixes possible system issues.
- Restart PC and look for changes in Action Center.
4: Clear Problem Reports
Even though the Windows 10’s Action Center is, design-wise, different from Windows 7’s version, this error isn’t a Windows 10 exclusive. Windows 7 users have had the same issues with the same error. Important system messages just get stuck in the Action Center and the red-flag notifications follow.
- READ ALSO: SOLVED: Windows 10 Quick Access error
Now, some of them addressed this by simply deleting the error logs which kept reappearing. You can do the same on Windows 10 by following these steps:
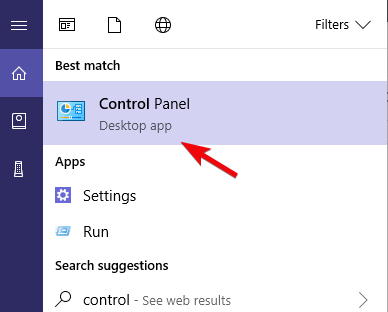
- Type ‘control’ and open Control Panel from the Windows Search bar.
- Select System and Security.
- Choose Security and Maintenance.
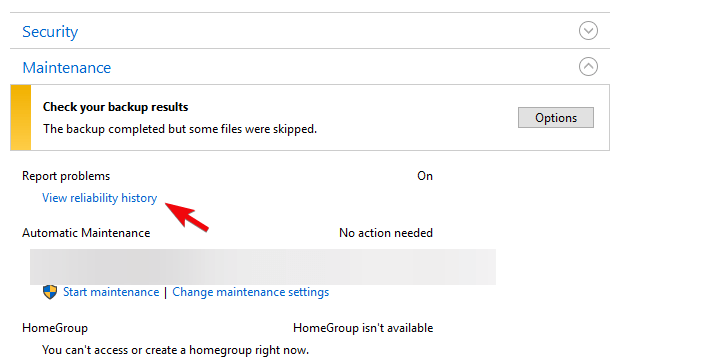
- Expand the Maintenance section.
- Click on ”View reliability history“.
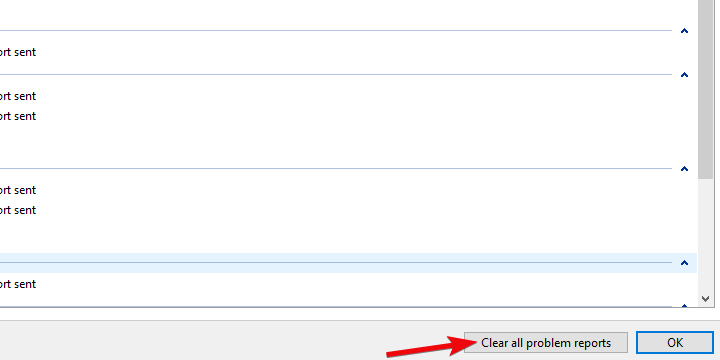
- Click on “View all problem reports“.
- Finally, click on the “Clear all problem reports“.
Hopefully, this allows you to dismiss the messages. On the other hand, if the issue is persistent, check the final step.
5: Repair Windows 10
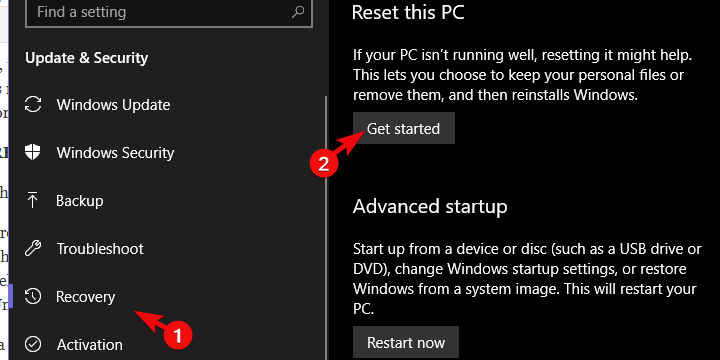
Finally, if you’re still unable to dismiss messages, even after seemingly solving PC issues, you can repair Windows 10. There are various recovery options at your disposal, but we prefer ‘Reset this PC’ over others. This recovery option allows you to restore your PC to factory values (refresh the system) without losing your data in the process. You can even keep all applications and settings.
Here’s how to run ‘Reset this PC’ on Windows 10:
- Press Windows key + I to open the Settings app.
- Choose Update & Security section.
- Select the Recovery from the left pane.
- Under the “Reset this PC” option, click Get started.
That’s a wrap-up. As a side note, don’t forget to share your questions and suggestions in the comments section. Also, we’ll be glad to hear whether these solutions were helpful or not. The comments section is just below.
RELATED STORIES YOU SHOULD CHECK OUT:


User forum
0 messages