Fix Critical Process Died in Windows 10 Stop Code in 5 Steps
Surefire solutions to fix the Critical process died error
7 min. read
Updated on
Read our disclosure page to find out how can you help Windows Report sustain the editorial team. Read more
Key notes
- The Critical process died issue appears when a critical component of Windows detects that data has been modified when it should not have been.
- A possible solution is to run an SFC scan using a command-line tool from your OS.
- Performing a clean install of Windows is another sure way to fix the issue quickly.

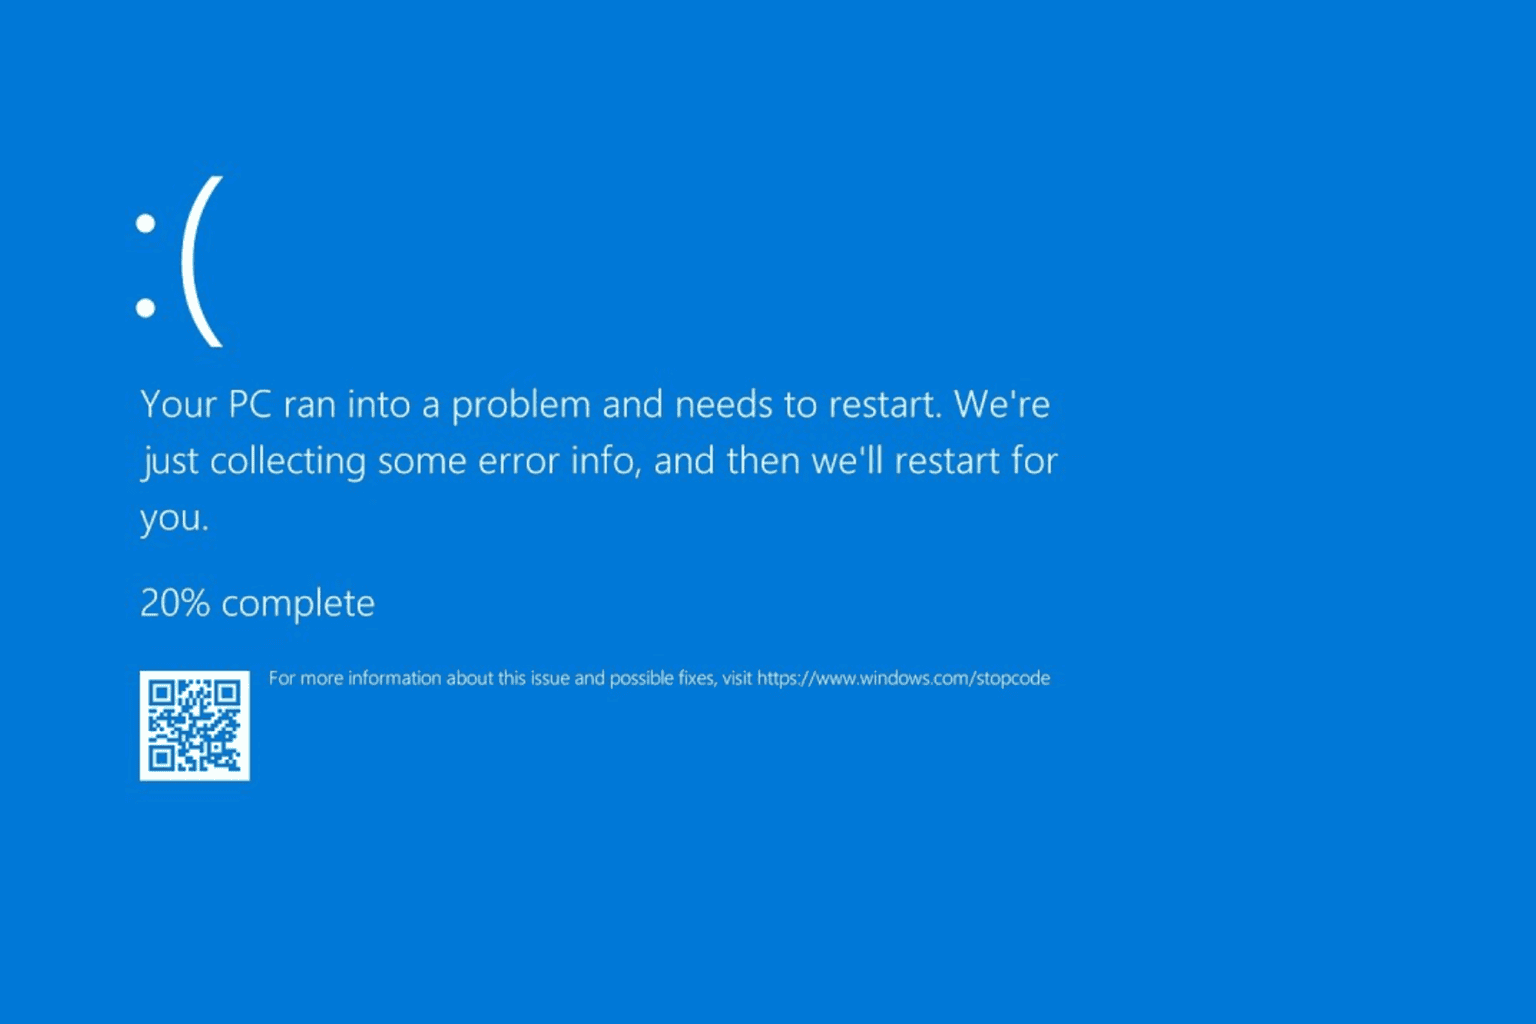
The Critical process died issue is basically caused when a critical component of Windows detects that data has been modified when it should not have been.
This element could be a bad driver, a memory error, etc. Most of the time, this error suddenly occurs when users are working on their PCs. Fortunately, there are a couple of ways to fix this issue so stick with us and check all the solutions below to fix the Critical process died BSoD.
What does Critical process died mean on my computer?
If you see the Critical process died error on your computer, it means that an important process that your PC needs to run ended abruptly.
This can be drivers, system files, or other important components.
What causes Critical process died?
This has a wide range of causes. Below are some of the notable ones:
- Broken or corrupt system files: – Top of the list of the potential causes of this issue are faulty system files. These files are crucial to the smooth running of your PC. To fix this, you need to repair and restore these files.
- Outdated or broken drivers – Also crucial to the successful running of your PC are drivers. They can cause a lot of problems when outdated or broken and can be the reason you are getting the critical process died BSOD error. Reinstalling or updating these drivers should do the trick here.
- Activities of third-party apps – If you started noticing this error after installing some apps, you might need to uninstall them. Also, if it just started suddenly, you can try performing a clean boot to pinpoint the faulty app or process.
There are many instances where this error may occur. This troubleshooting guide will show you how to fix this annoying issue in the following instances:
- Critical process died boot loop – If your PC keeps restarting due to the critical process died error, it might be due to faulty system files.
- Critical process died on startup – Should the error occur when you start up your PC, it might be down to an issue with one or more startup apps. Performing a clean boot should help here.
- Critical process died. Windows 10 cannot boot – If you cannot boot into Windows due to this issue, it means there is a problem with your installation. You need to clean install Windows to get back access to your PC.
- Critical process died in Windows 11 –
- Windows 10 critical process died no safe mode – Run the CHKDSK or DISM scan in order to fix this.
- Critical process died keeps restarting – Perform a clean install if the other solutions don’t seem to solve the issue.
- Asus, Lenovo, Dell, HP critical processes died your device ran into a problem and needs to restart critical process died – No matter what laptop you have, you can experience this issue since it can be driver related.
How do I fix Windows 10 critical process died?
1. Run SFC and DISM scans
1.1. If you can boot into your PC
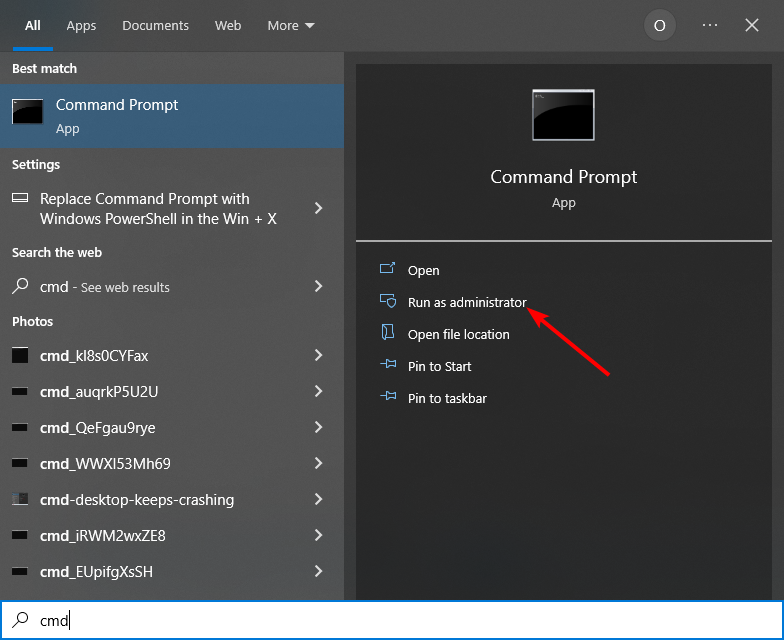
- Type cmd in the Windows search tab and click on Run as administrator under Command Prompt.
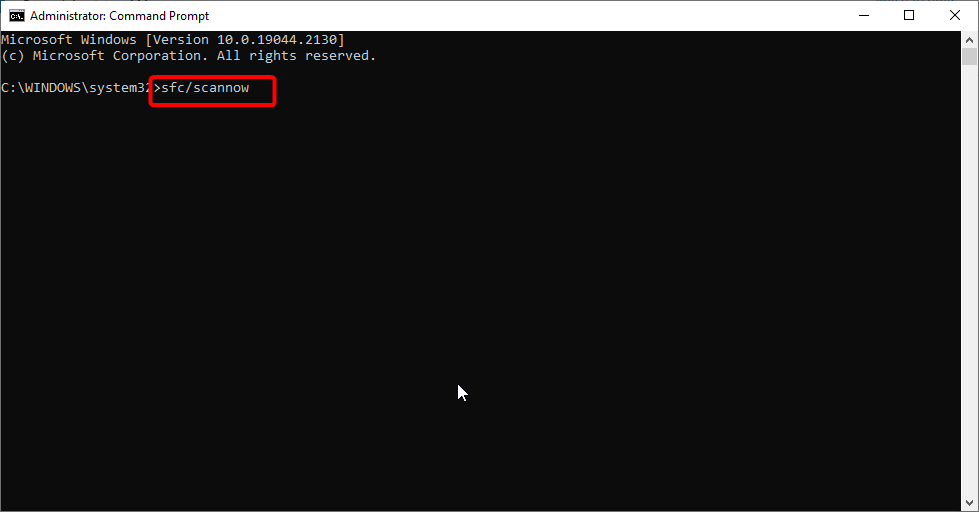
- Copy and paste the command below and press Enter:
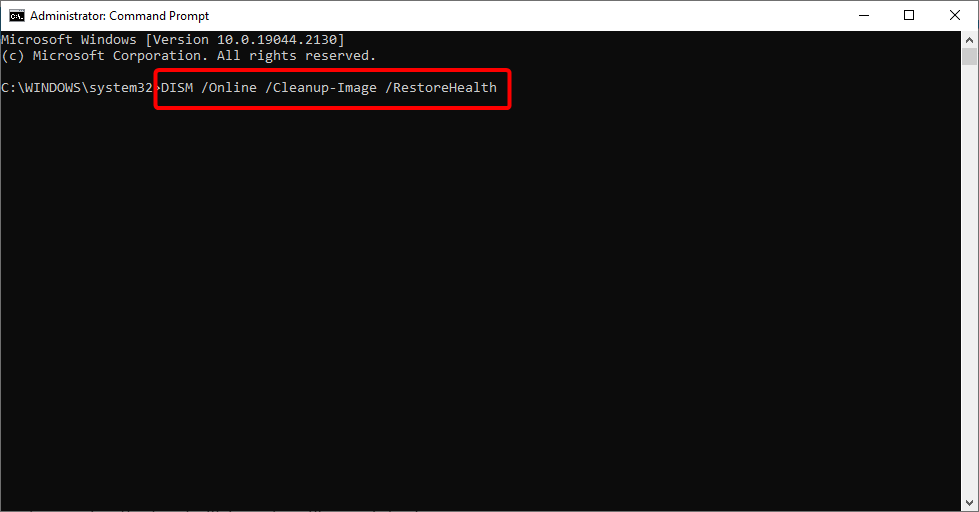
sfc/scannow - Wait for the process to finish, type the command below and hit Enter:
DISM /Online /Cleanup-Image /RestoreHealth - You can run another SFC scan after the DISM scan and restart your PC when it is done.
1.2. If you can’t boot into your PC
- Insert a Windows 10 installation media and restart your PC. If your PC does not boot automatically to the USD or DVD, press the required key (could be F2, Del, F12, or Esc) immediately after restarting your PC to get to the boot menu and select the external drive.
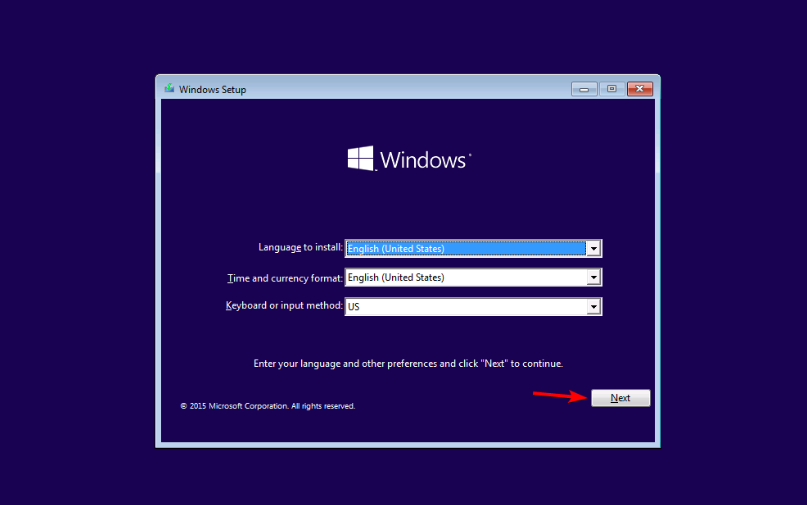
- Select your language and click the Next button once your PC boots from the installation media.
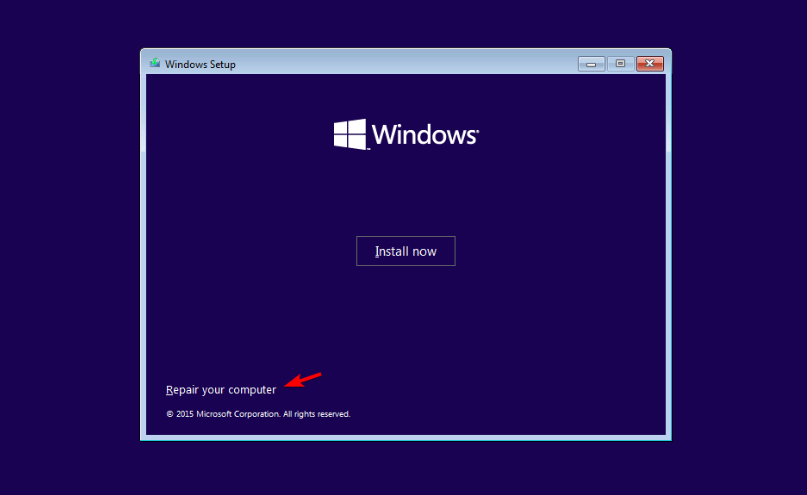
- Click Repair your computer in the bottom left corner.
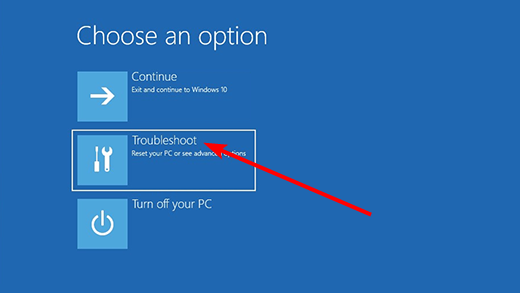
- Now, select Troubleshoot option.
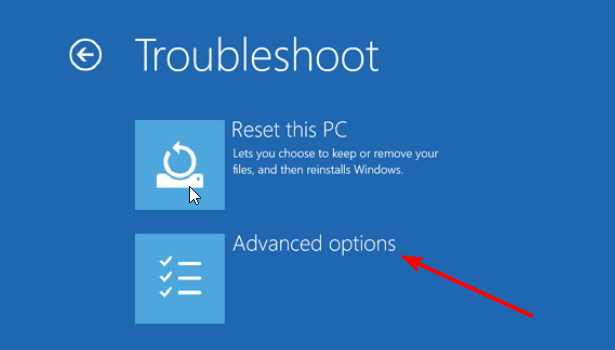
- Choose the Advanced option on the Troubleshoot page.
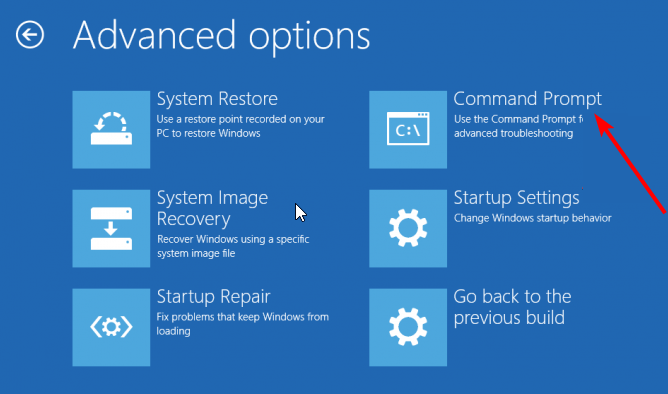
- Select Command Prompt.
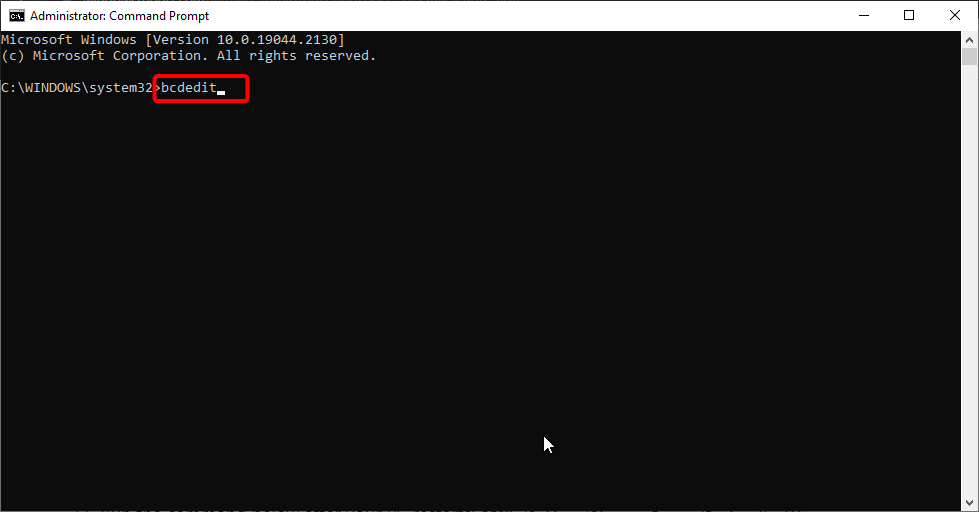
- From here, type the command below and hit Enter:
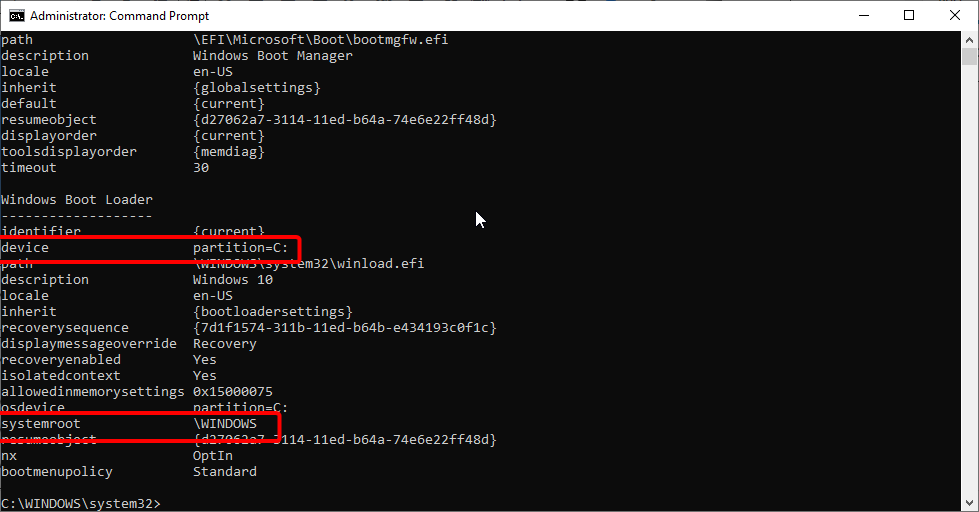
bcdedit - Note the drive letter before device under the Windows boot loader section, as well as the detail before systemroot.
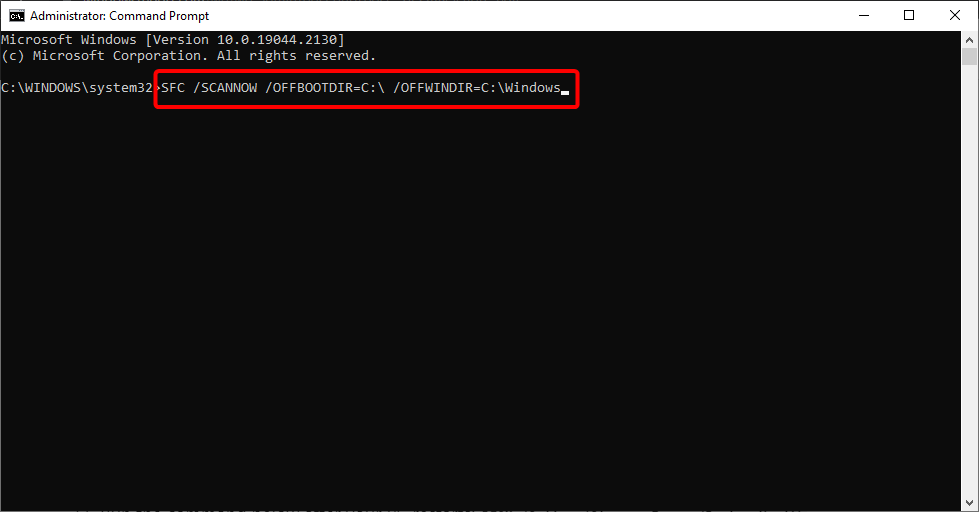
- Now type the command below and hit Enter. Note that you need to replace C in the command with the drive letter in Step 8 and \Windows with the detail before it:
SFC /SCANNOW /OFFBOOTDIR=C:\ /OFFWINDIR=C:\Windows - Wait for the scan to complete and restart your PC.
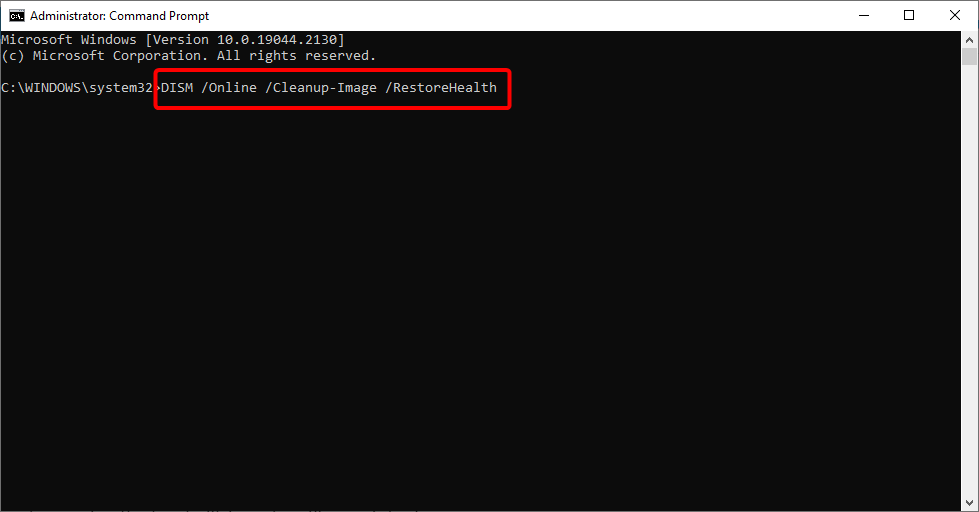
- Run the command below after your PC restarts:
DISM /Online /Cleanup-Image /RestoreHealth - Finally, you should run the usual SFC scan again to ensure everything is alright.
SFC and DISM are some of the built-in tools for repairing corrupt and broken system files on Windows PC. Alternatively, we will recommend using a dedicated tool to repair these files in case you can boot into your PC.
2. Run CHDKDSK
- Press the Windows key + S, type cmd, and choose Run as administrator under Command Prompt.
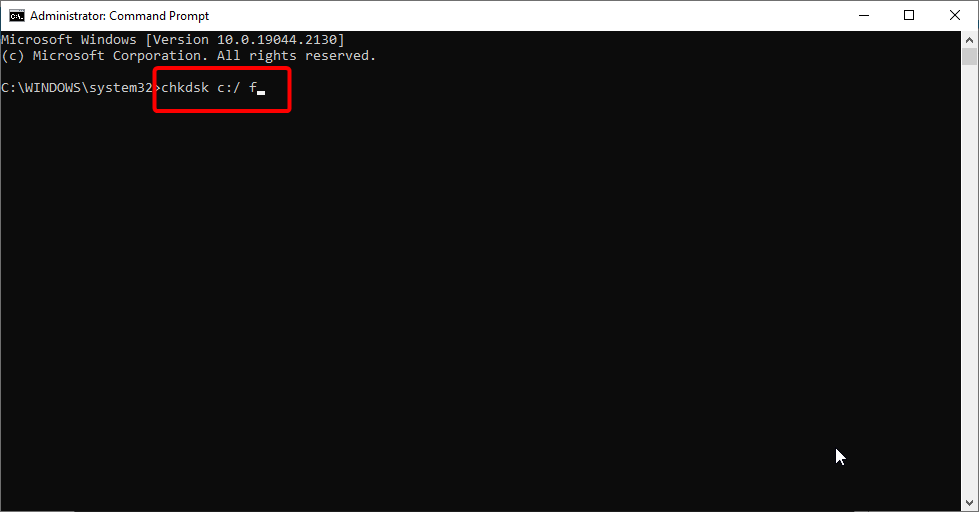
- Type the command below and hit Enter. Note that you need to replace C with the letter of your hard drive partition.
chkdsk C: /f - Wait for the check and fix to complete.
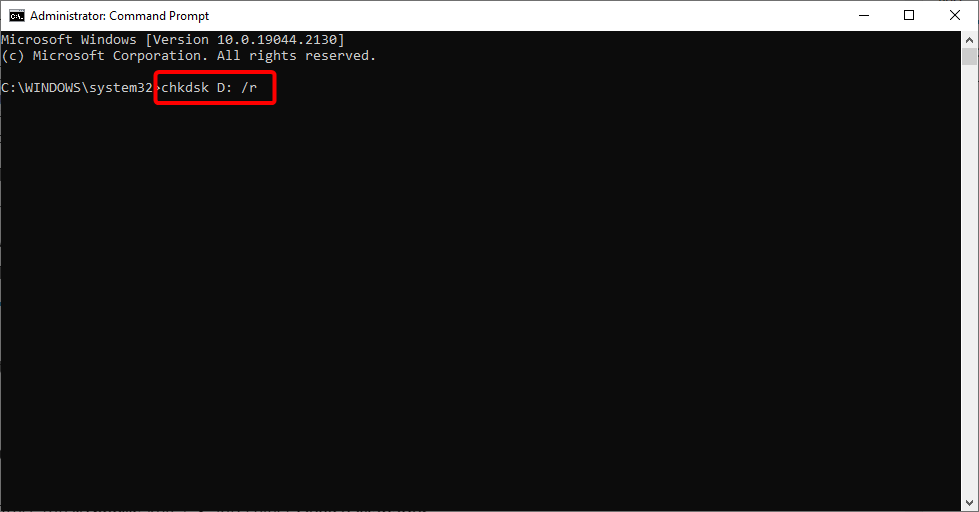
- To repair physical issues, type the command below and press Enter:
chkdsk D: /r
Faulty memory partitions can also lead to a critical process died error on your PC. The command above helps to check and fix errors on your hard drive. Remember to restart your PC after running the commands.
3. Update drivers
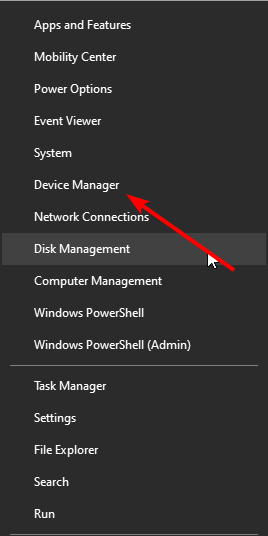
- Press the Windows key + X and select Device Manager.
- Double-click the option you want to download the driver for to expand it.
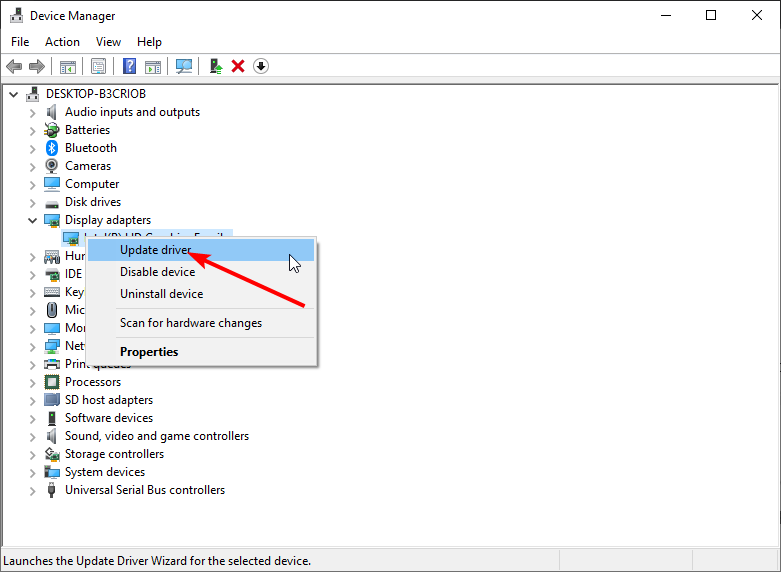
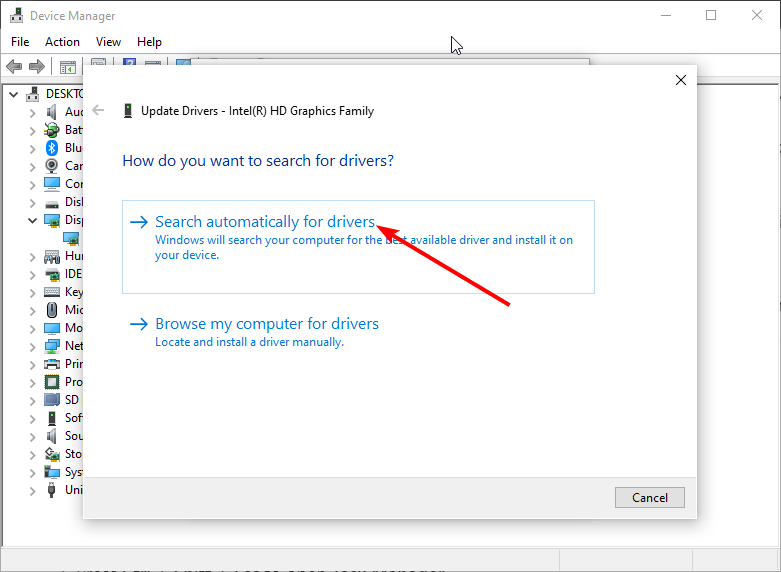
- Right-click each of the drivers there and select Update driver.
- Choose Search automatically for drivers and install any available updates when the scan is complete.
Bad drivers or drivers that wrongly use memory could also cause the Critical process died Windows 10 error.
It should be noted that updating all your drivers manually can be time-consuming. Hence, we suggest doing it automatically with a tailored solution.
Aside from the improved speed, an automated updating tool like Outbyte Driver Updater will help you to avoid permanent damage to your PC caused by downloading and installing the wrong driver versions.
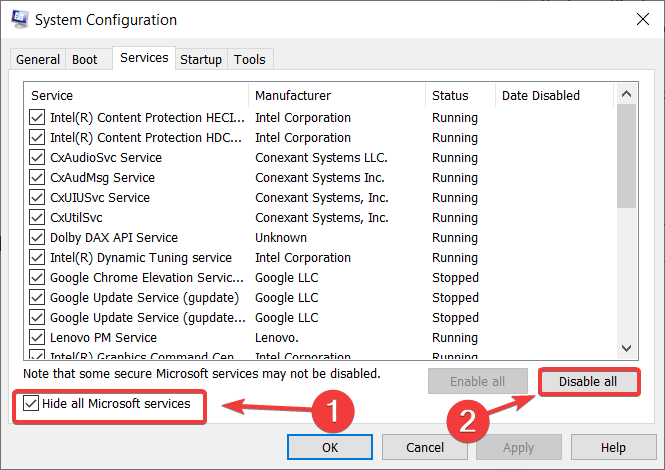
1. Type System Configuration in the search box and hit Enter.
2. On the Services tab select the Hide all Microsoft services check box and click Disable all.
3. Click on Open Task Manager.
4. On the Startup tab in Task Manager select all items and click Disable.
5. Close Task Manager.
6. On the Startup tab of the System Configuration dialog box, click OK and restart your computer.
4. Clean boot to fix Critical process died error
A clean boot starts Windows by using a minimal set of drivers and startup programs, thus making it perfect for troubleshooting this error.
5. Perform a clean install
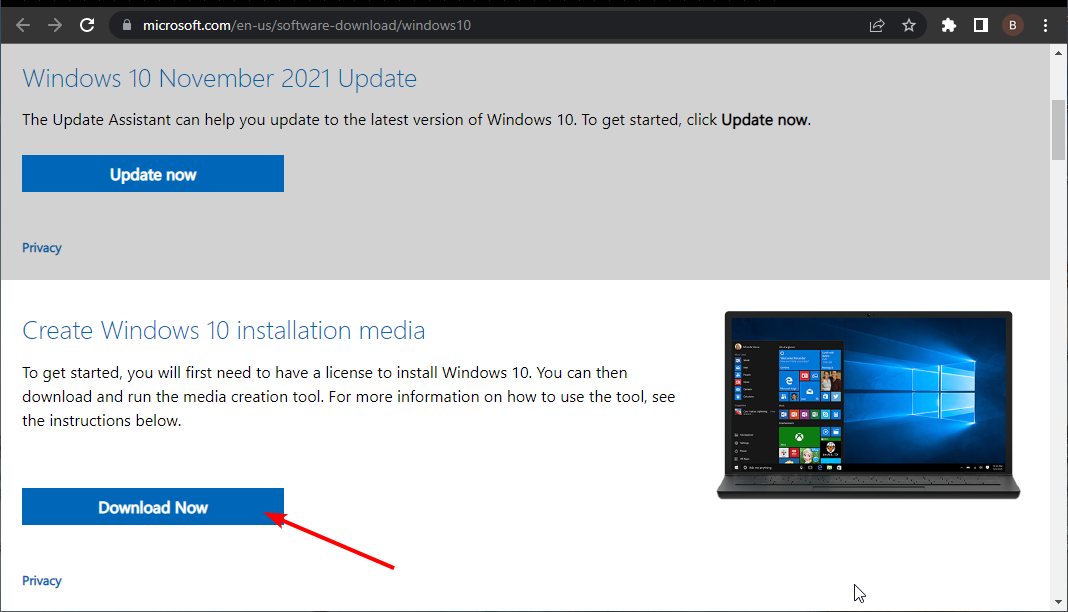
- Go to the Windows 10 download page on another PC to download the installation media.
- Click the Download Now button and double-click the program downloaded program to run it.
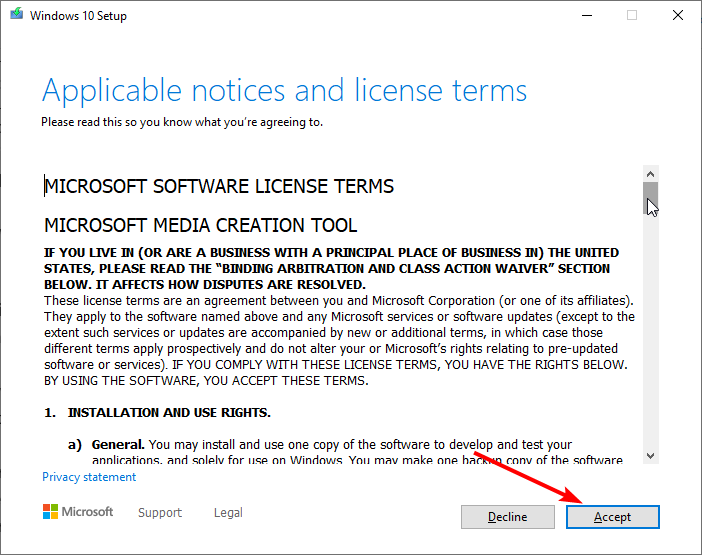
- Select Accept button on the license page.
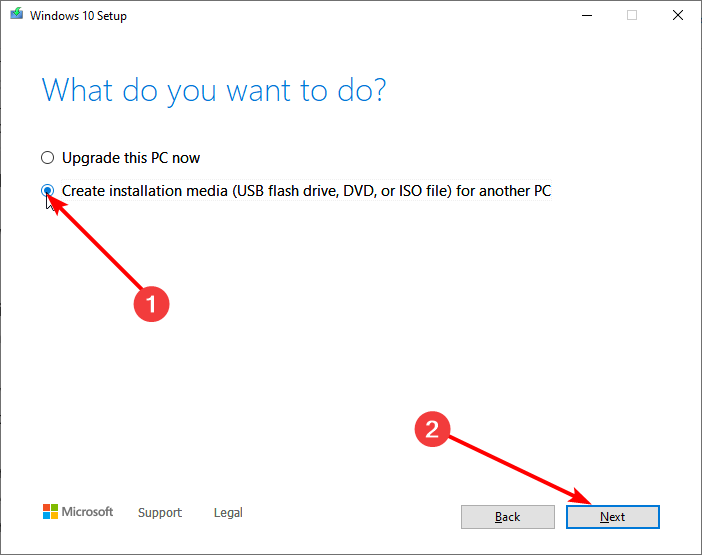
- Select the Create installation media for another PC option on the What do you want to do page and click the Next button.
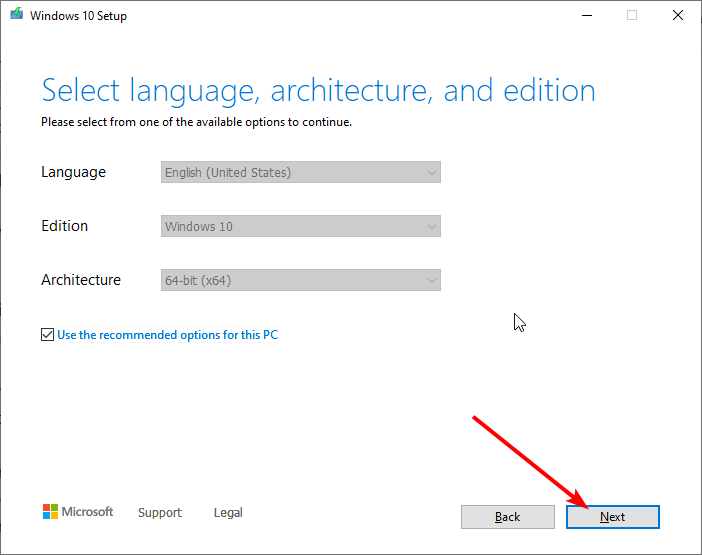
- Choose the appropriate language, system version, and architecture here and click Next.
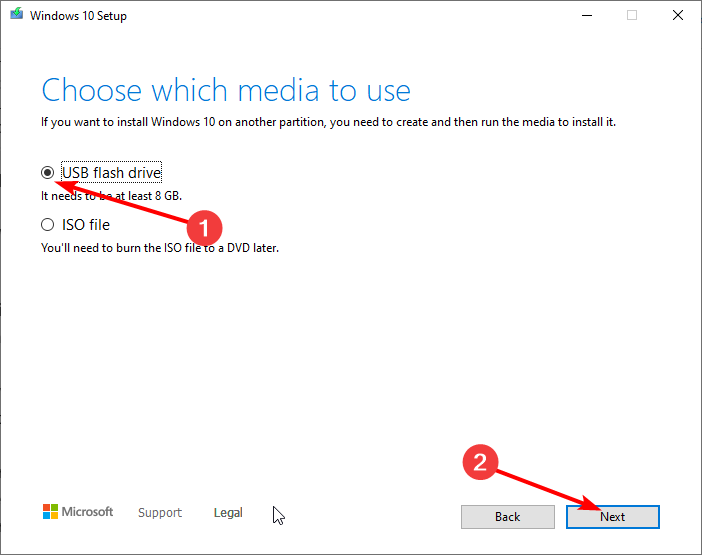
- Connect a flash drive and select the USB flash drive option. Note that it must be at least 8GB.
- After the installation media has been created successfully, remove the drive and connect it to your PC.
- Restart your system and it should automatically boot to the drive. If it does not, press a key (Esc, F12, F2, or Delete, depending on your PC) immediately after it turns on to open the boot menu.
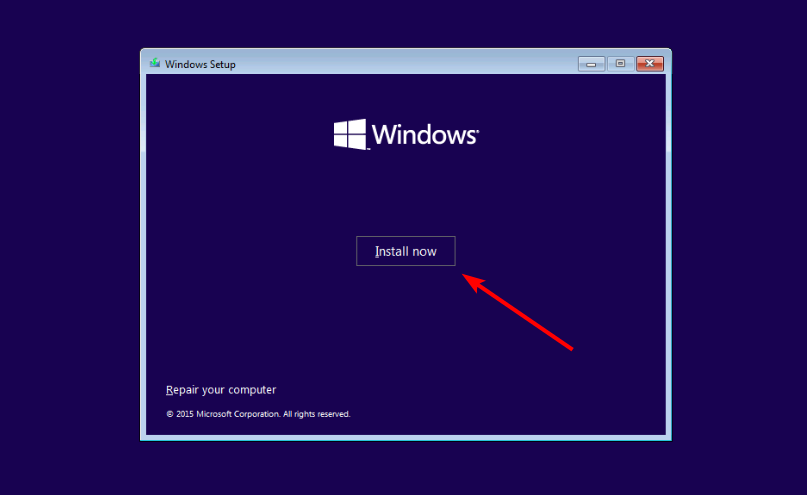
- Select your language and other preferred settings on the Install Windows page and click Next.
- Lastly, click Install Windows.
The critical process died error can be pretty annoying and it can sometimes have devastating effects. We hope that you were able to fix the issue with this guide.
You may also use our guide on how to create a restore point and use it to return Windows to a previous state in time.
If you have upgraded your PC and you encounter the Critical process died error on Windows 11, check our detailed guide on how to fix it easily.
Feel free to use the comments below to let us know which solution worked for you.


User forum
43 messages