How To Fix Critical Process Died in Windows 11
Stop code critical process died in Windows 11 needs to be fixed ASAP
6 min. read
Updated on
Read our disclosure page to find out how can you help Windows Report sustain the editorial team. Read more
Key notes
- The most likely cause for the Critical Process Died on Windows 11 is system corruption, so try to repair your system using SFC and DISM.
- Incompatible drivers are common culprits as well, therefore find and remove the problematic drivers or update them.
- If you’re getting a Critical Process Died error while using an SSD, be sure to check the drive for hardware failure.
The critical_process_died Windows 11 issue is a BSoD error that can occur randomly or appear when trying to boot to Windows. These errors will make your PC crash and reboot suddenly, so you’ll lose any unsaved data.
Fixing it may take time because finding the culprit is not always easy. The usual causes are related to your drivers or your hardware in some instances, but there are also exceptions.
Rest assured that there are ways to fix this problem, and we’re going to show you a couple of methods you can use to solve the Critical Process Died stop code in Windows 11 right away.
How do I fix the Critical Process Died BSoD in Windows 11?
1. Use the SFC and DISM scans
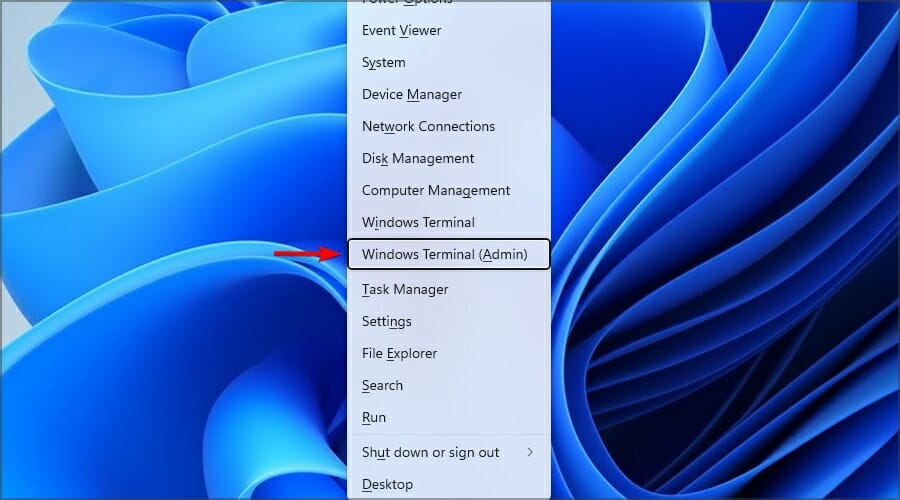
- Press Windows key + X and select Windows Terminal (Admin).
- Now run the following command:
sfc /scannow - Wait for the scan to finish, restart your PC, and check if the problem is still there.
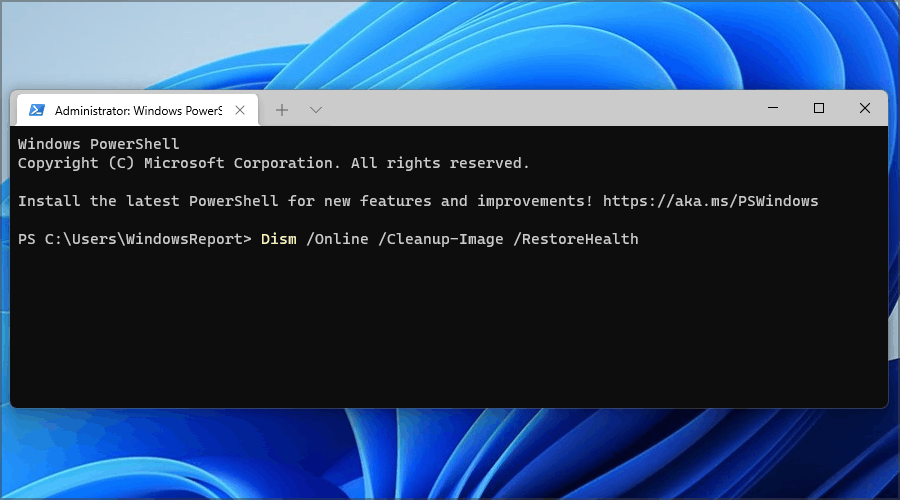
- If the issue still appears, start the Terminal again, and run the following commands:
Dism /Online /Cleanup-Image /CheckHealth
Dism /Online /Cleanup-Image /ScanHealth
Dism /Online /Cleanup-Image /RestoreHealth
You can also fix critical_process_died error on Windows 11 more effectively by using specialized BSoD fixers.
2. Reinstall/update your drivers
- Press Windows key + X and choose Device Manager from the list.
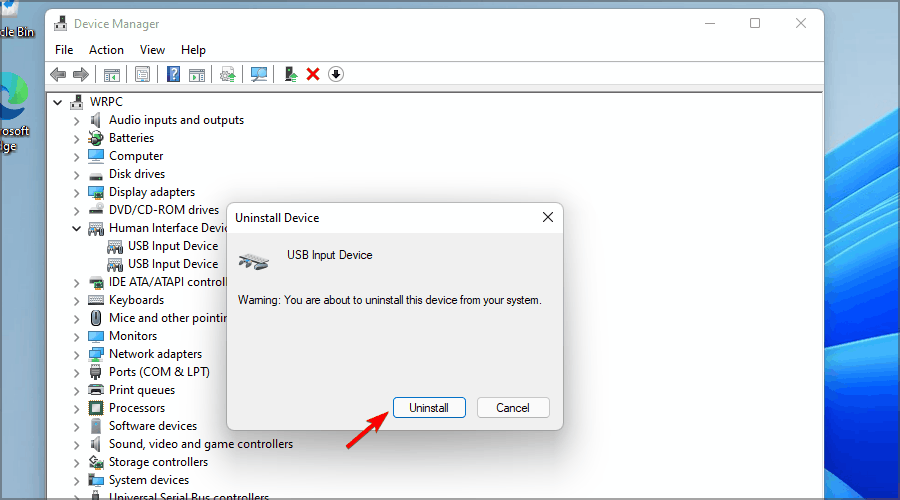
- Locate the driver that is causing you trouble and right-click it. Choose Uninstall device from the menu.
- Now select Uninstall to confirm.
- Once the driver is removed, restart your PC and check if the problem is resolved.
Keeping the drivers up to date can also help you prevent similar BSoD issues like Critical_structure_corruption on Windows 11.
To find out which driver is causing the issue, it’s advised to check the crash logs or to remove any drivers that might’ve been recently updated.
You can also try updating your drivers, and you can do that by downloading the drivers from the manufacturer’s website. Alternatively, feel free to use a dedicated tool such as Outbyte Driver Updater to automatically update all your drivers.
Outbyte Driver Updater is the easiest way to update all drivers. With a database of over 18 million driver files, it will find all outdated drivers on your computer and either update or repair them within a few clicks.
3. Access Safe Mode
 NOTE
NOTE
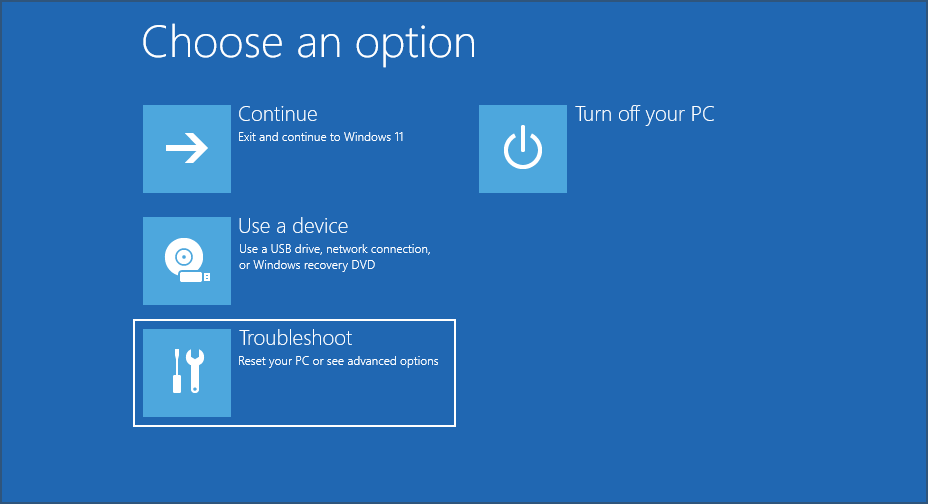
1. Let your PC restart a couple of times during the boot. Alternatively, click the Power icon on the login screen, hold Shift, and select Restart.
2. Select Troubleshoot from the list of options.
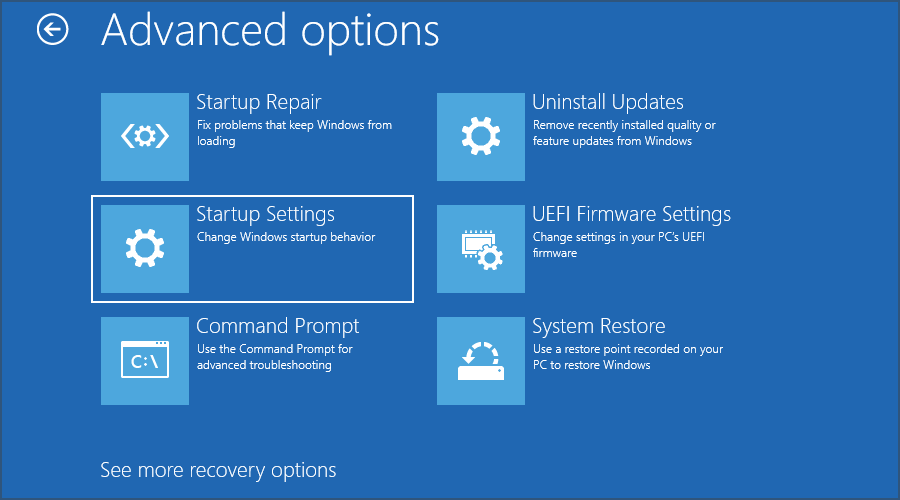
3. Now, navigate to Advanced options.
4. Go to Startup settings.
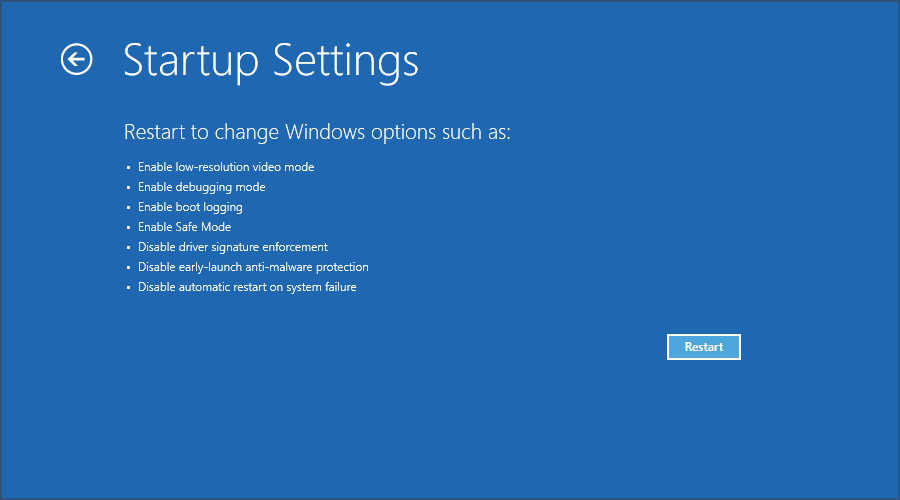
5. Then, click the Restart button.
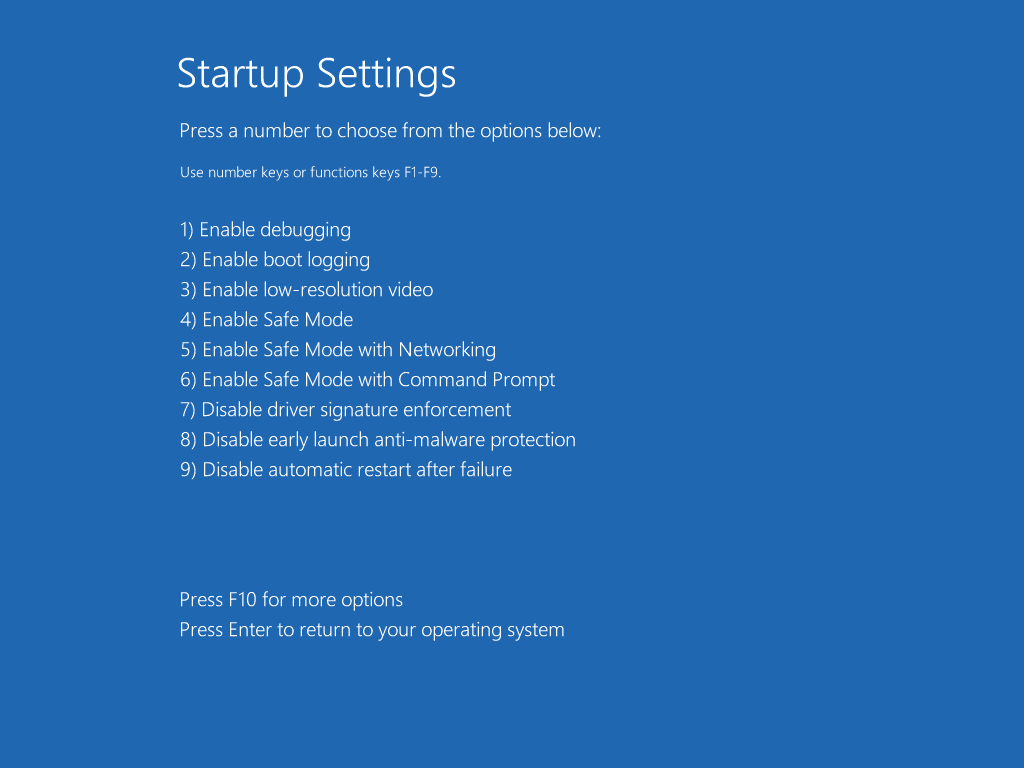
6. Press 5 on your keyboard to start Safe Mode with Networking.
In order to work out this kind of BSOD error on your Windows 11, you may need to use Safe Mode as displayed in the steps below.
Need more methods to access Safe Mode? In this case, check our guide for the best ways to start Windows 11 in Safe Mode.
4. Run the built-in troubleshooters
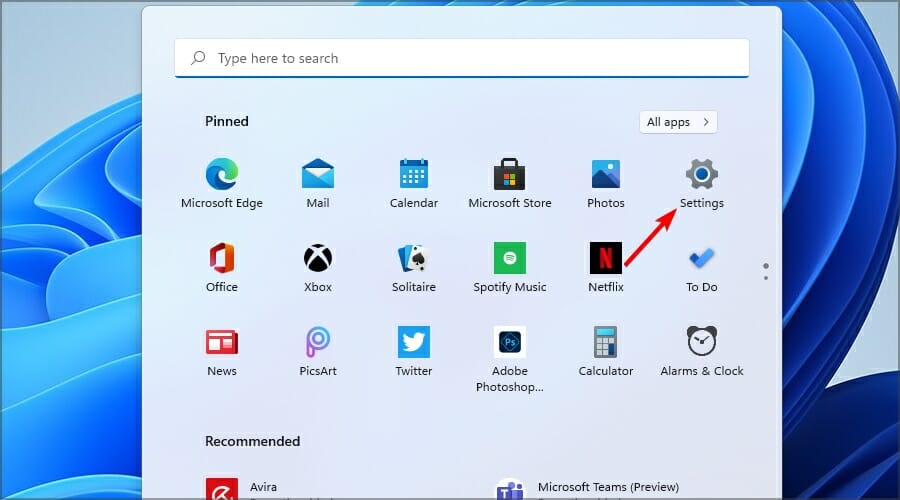
- Open the Start Menu and select Settings.
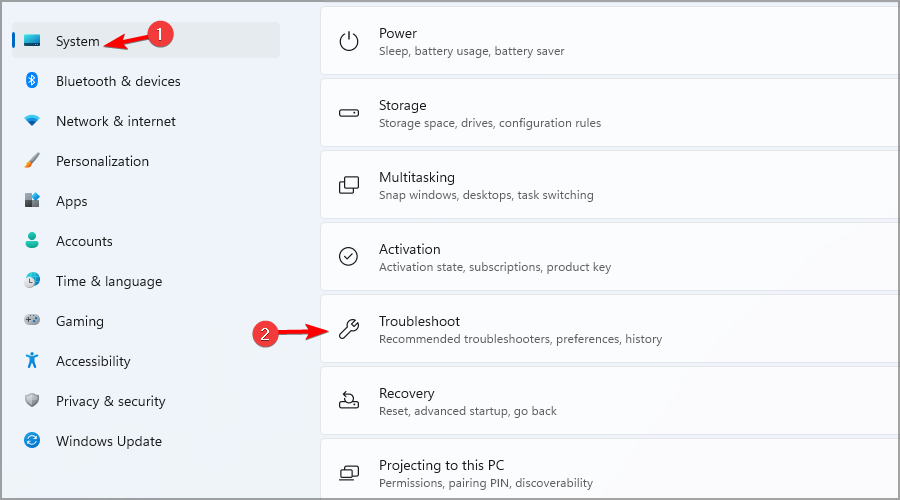
- Go to the Troubleshoot in the right pane.
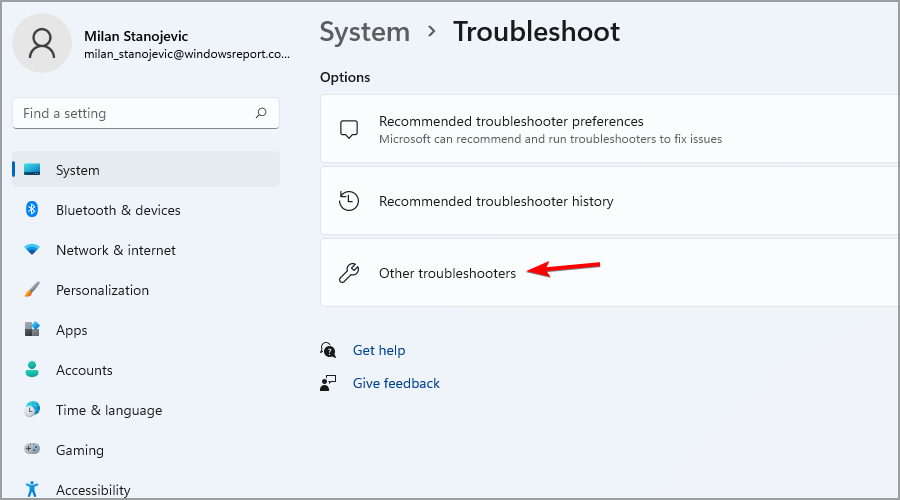
- Select Other troubleshooters.
- Run a couple of troubleshooters and check if they managed to fix the problem.
If your Windows 11 Start menu is not working, it can be related to some random, temporary bugs. In this case, we have a guide dedicated to solving the Windows 11 Start menu issues right away.
5. Remove problematic updates
 NOTE
NOTE
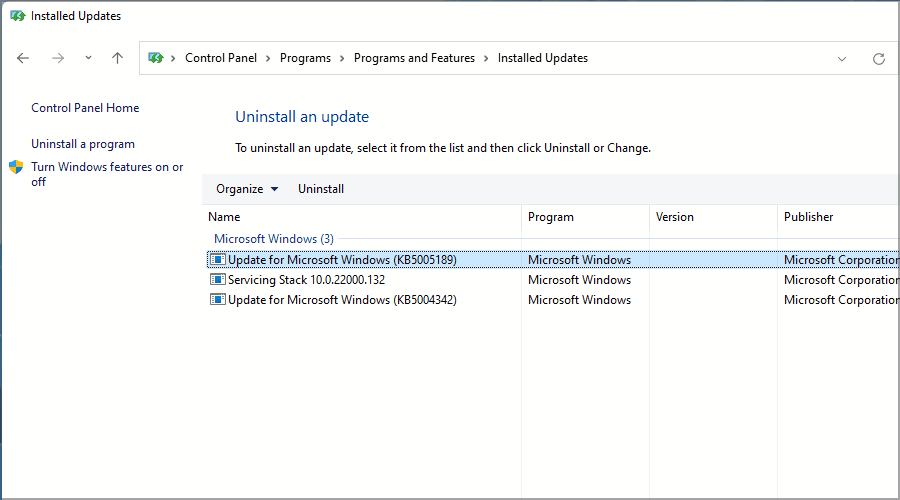
- Press Windows key + R and enter appwiz.cpl. Click OK.
- Go to View installed updates.
- Double-click the update you want to remove.
6. Reset Windows 11
 NOTE
NOTE
- Press Windows Key + I to open Settings.
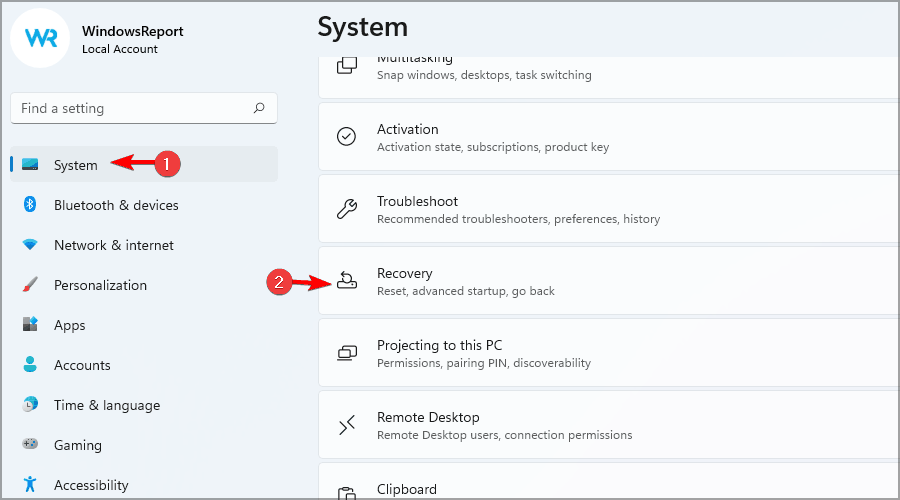
- Navigate to the System section and select Recovery.
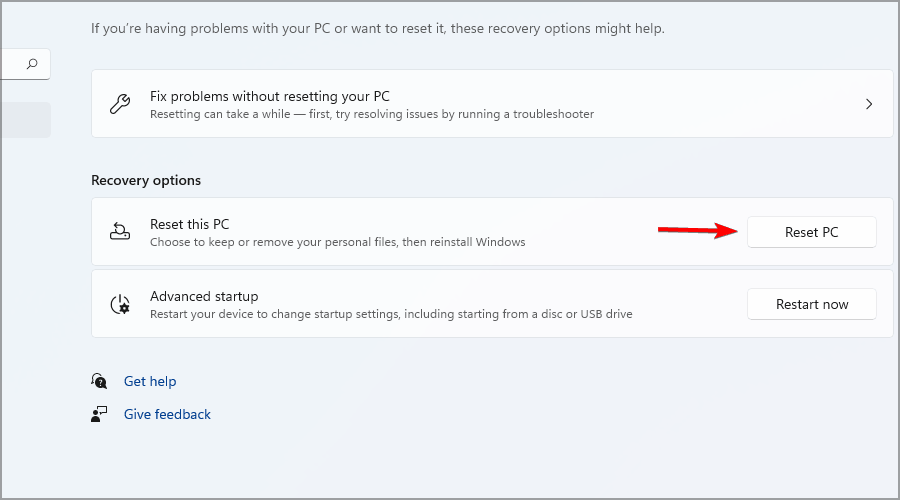
- Now click the Reset PC button.
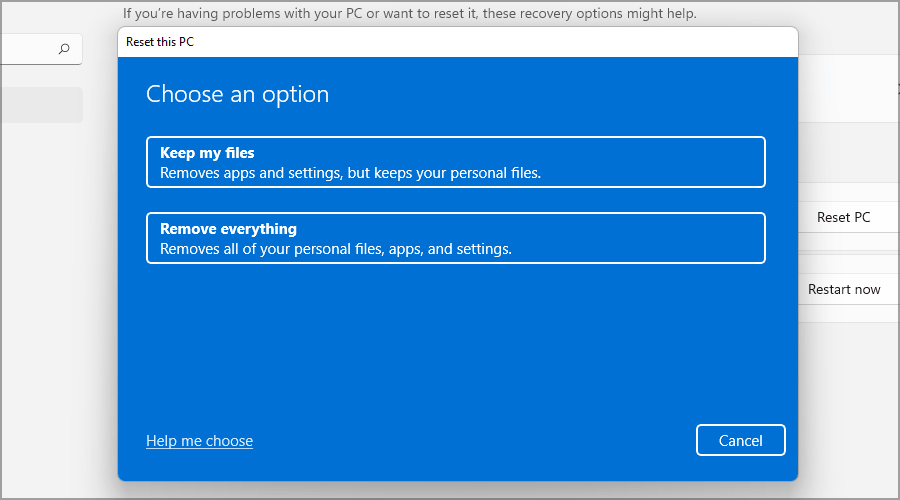
- Select the desired option. In most cases, it’s better to use Remove everything, but if you choose it, be sure to back up your files beforehand.
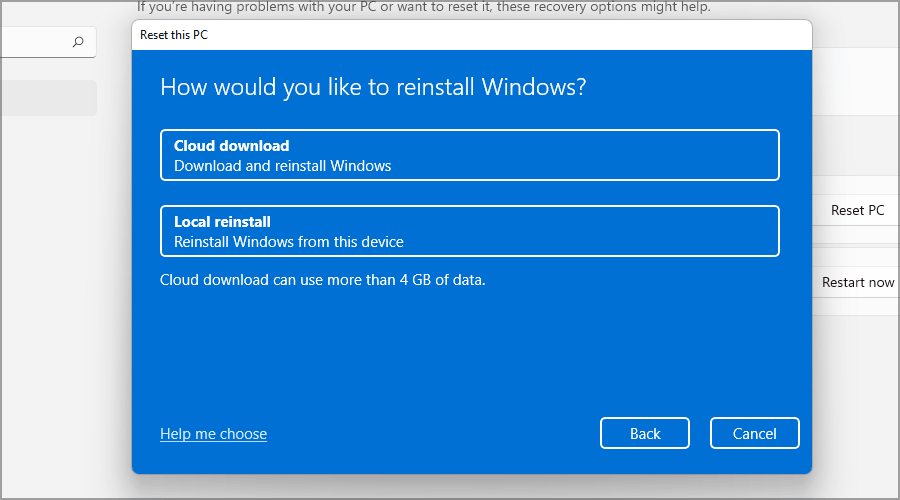
- Select the type of reinstall that you want. We used the Local reinstall.
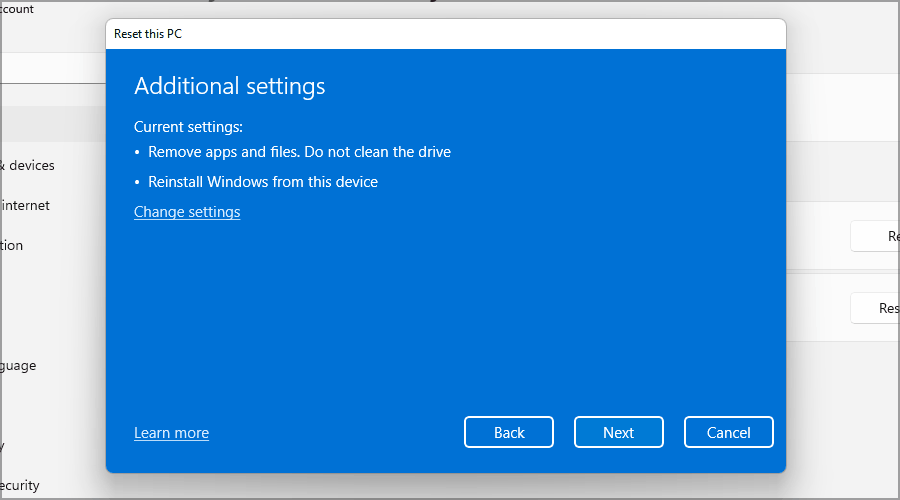
- Confirm your reinstall settings.
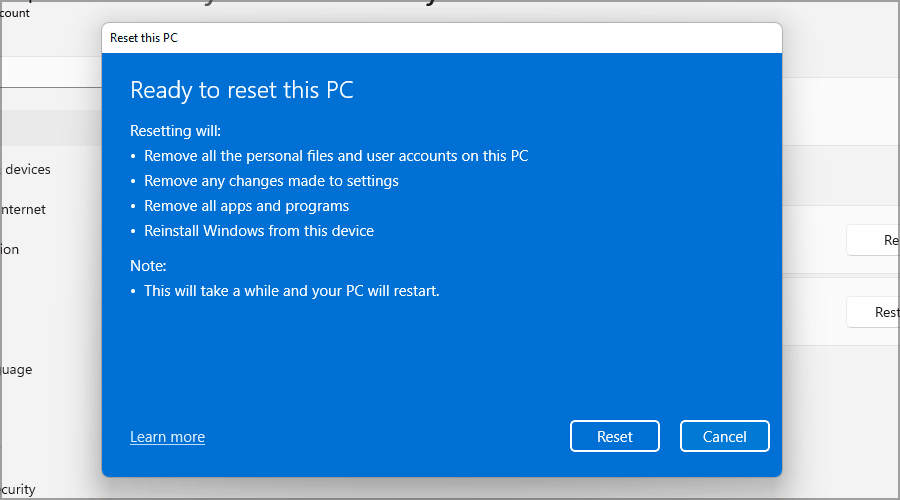
- Click Reset to start the process.
- Follow the instructions on the screen to finish it.
Resetting might be the only solution if you get stuck in Critical Process Died boot loop on Windows 11, so be sure to check our detailed article on how to reset Windows 11 for detailed instructions.
What causes the Critical process died error in Windows 11?
This Critical Process Died blue screen on Windows 11 appears when a critical component of the Windows operating system detects that data has been modified when it should not have been. Here are some of the causes behind it:
- Malfunctioning hardware – BSoD errors can appear due to hardware issues. As for software issues, consider them as well as potential culprits. We are most likely referring to compatibility issues with certain applications or drivers.
- Corrupt or missing system files – Missing system files can also cause this problem, which is the case with the Critical Process Died error on Windows.
- Malware and BIOS issues – In some instances, malware and bad BIOS updates can cause BSoD errors on your PC.
- Problematic drivers – Also, don’t forget to check and update your drivers if that’s the case. These tips also apply if you happen to encounter a Critical process died in Windows 10.
To learn more, be sure to check our in-depth guide on Blue Screen of Death causes.
What is the minidump file, and where can it be found?
Once a system crash occurs, your PC will memorize the events that caused it and write them down in a minidump, also known as DMP, file.
Minidump file works as a crash log, and it holds important information that might help you diagnose the problem and find the cause of the BSoD.
Regarding the location, you can find the minidump files in the following directory: C:\Windows\Minidump
You can also use the MEMORY.DMP file for diagnostics usually contains more information, much of which isn’t crucial.
How can I change my system crash settings?
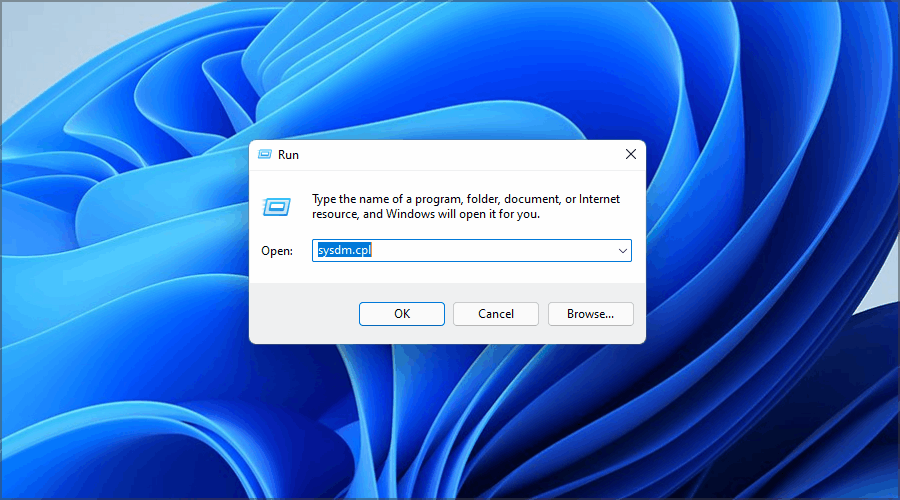
- Press Windows Key + R, type sysdm.cpl and press Enter.
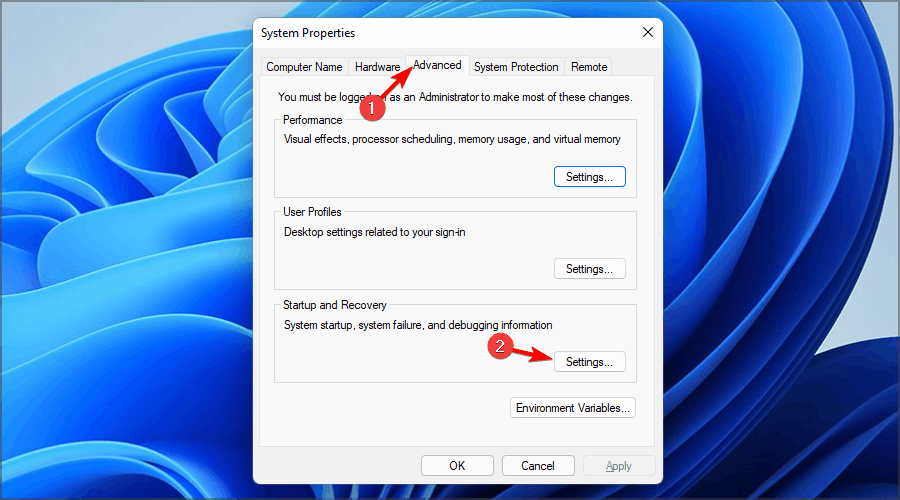
- Navigate to the Advanced tab and click on Settings in the Startup and Recovery section.
- Now you can change the settings as needed. By default, the settings should look like on the screenshot below:
- Optional: The only setting that you might want to disable is Automatically restart to see the name of the stop code better.
Fixing this error can be complicated, especially if the Critical Process Died appears on startup on Windows 11, but hopefully, you found our article informative and managed to fix the problem.
For more solutions, check out our guide on how to check the BSoD log file to see what went wrong and what you can do about it.
Did you find a solution on your own to one of the abovementioned situations? Share it with us in the comments section below.











User forum
0 messages