Your Device Ran Into a Problem And Needs to Restart [Fix]
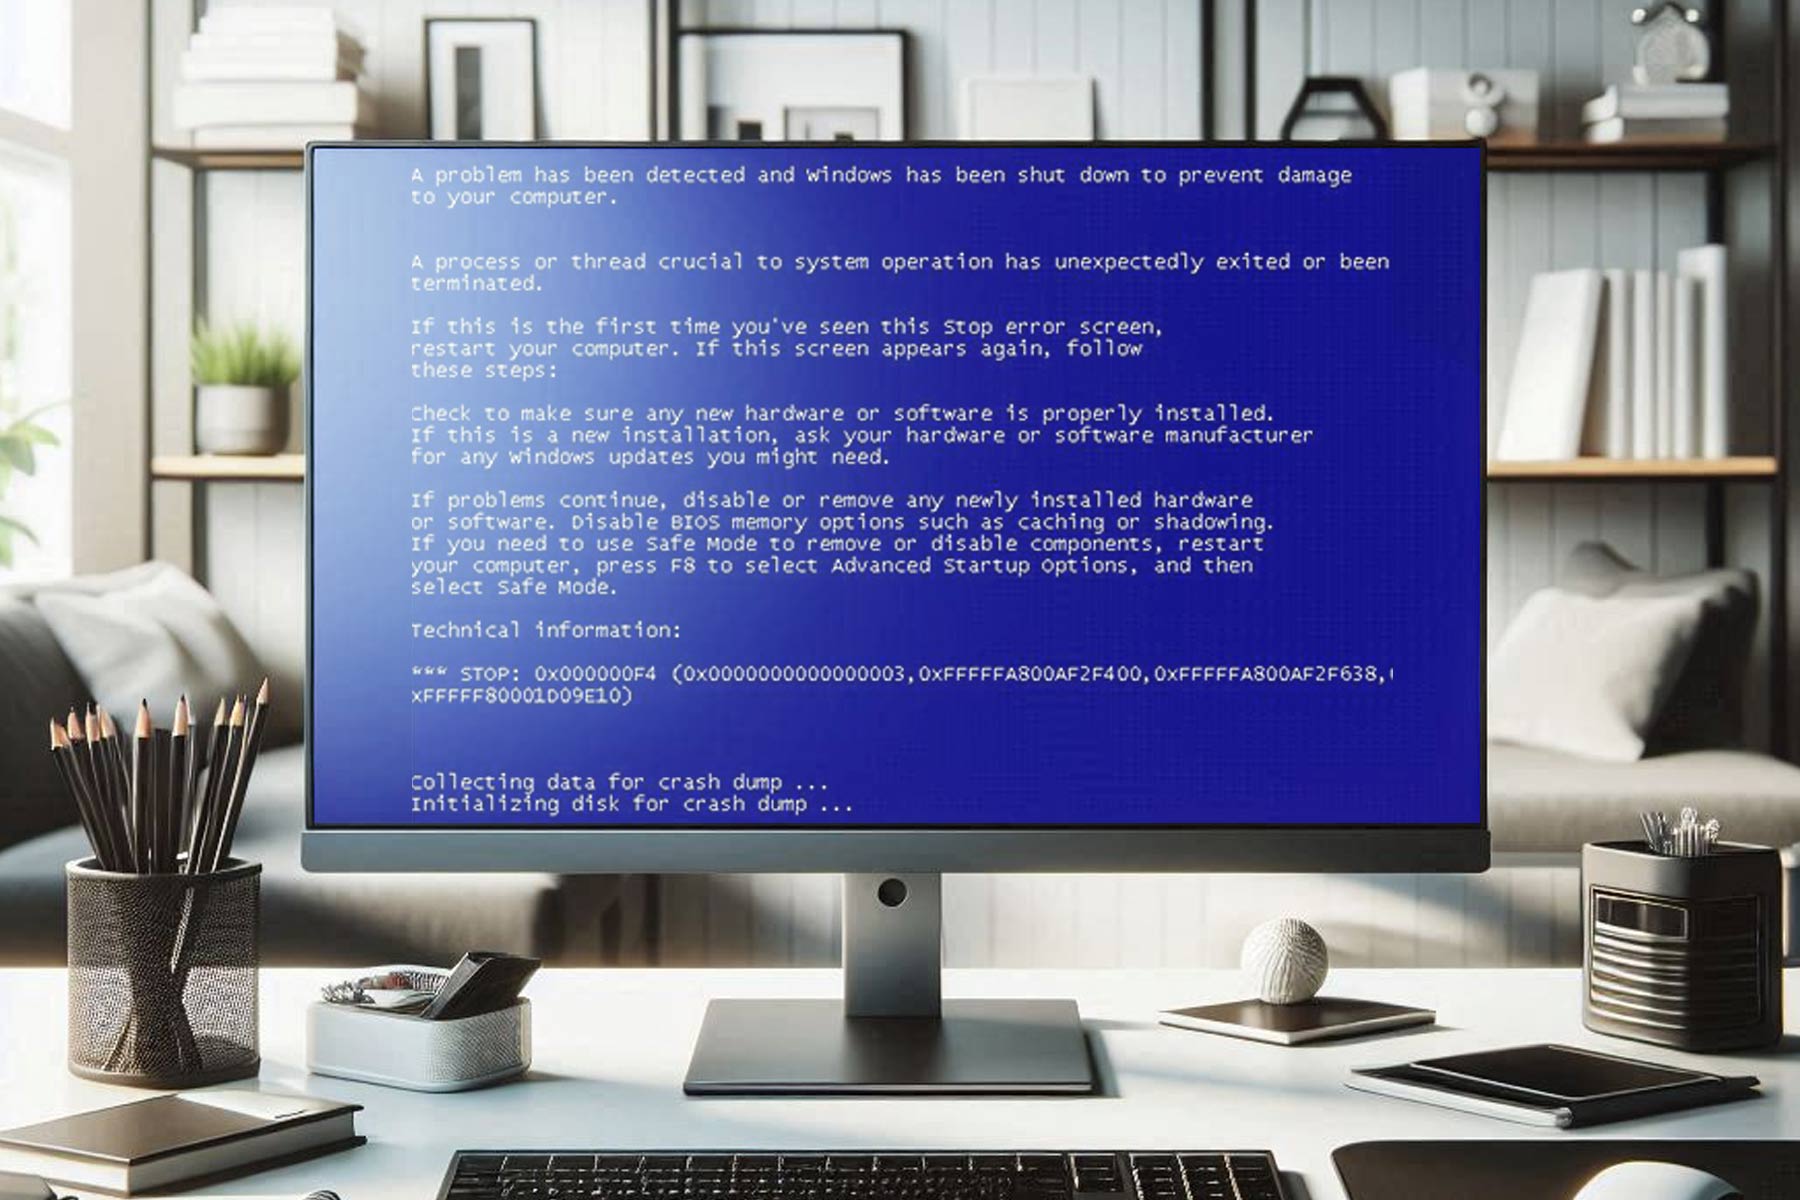
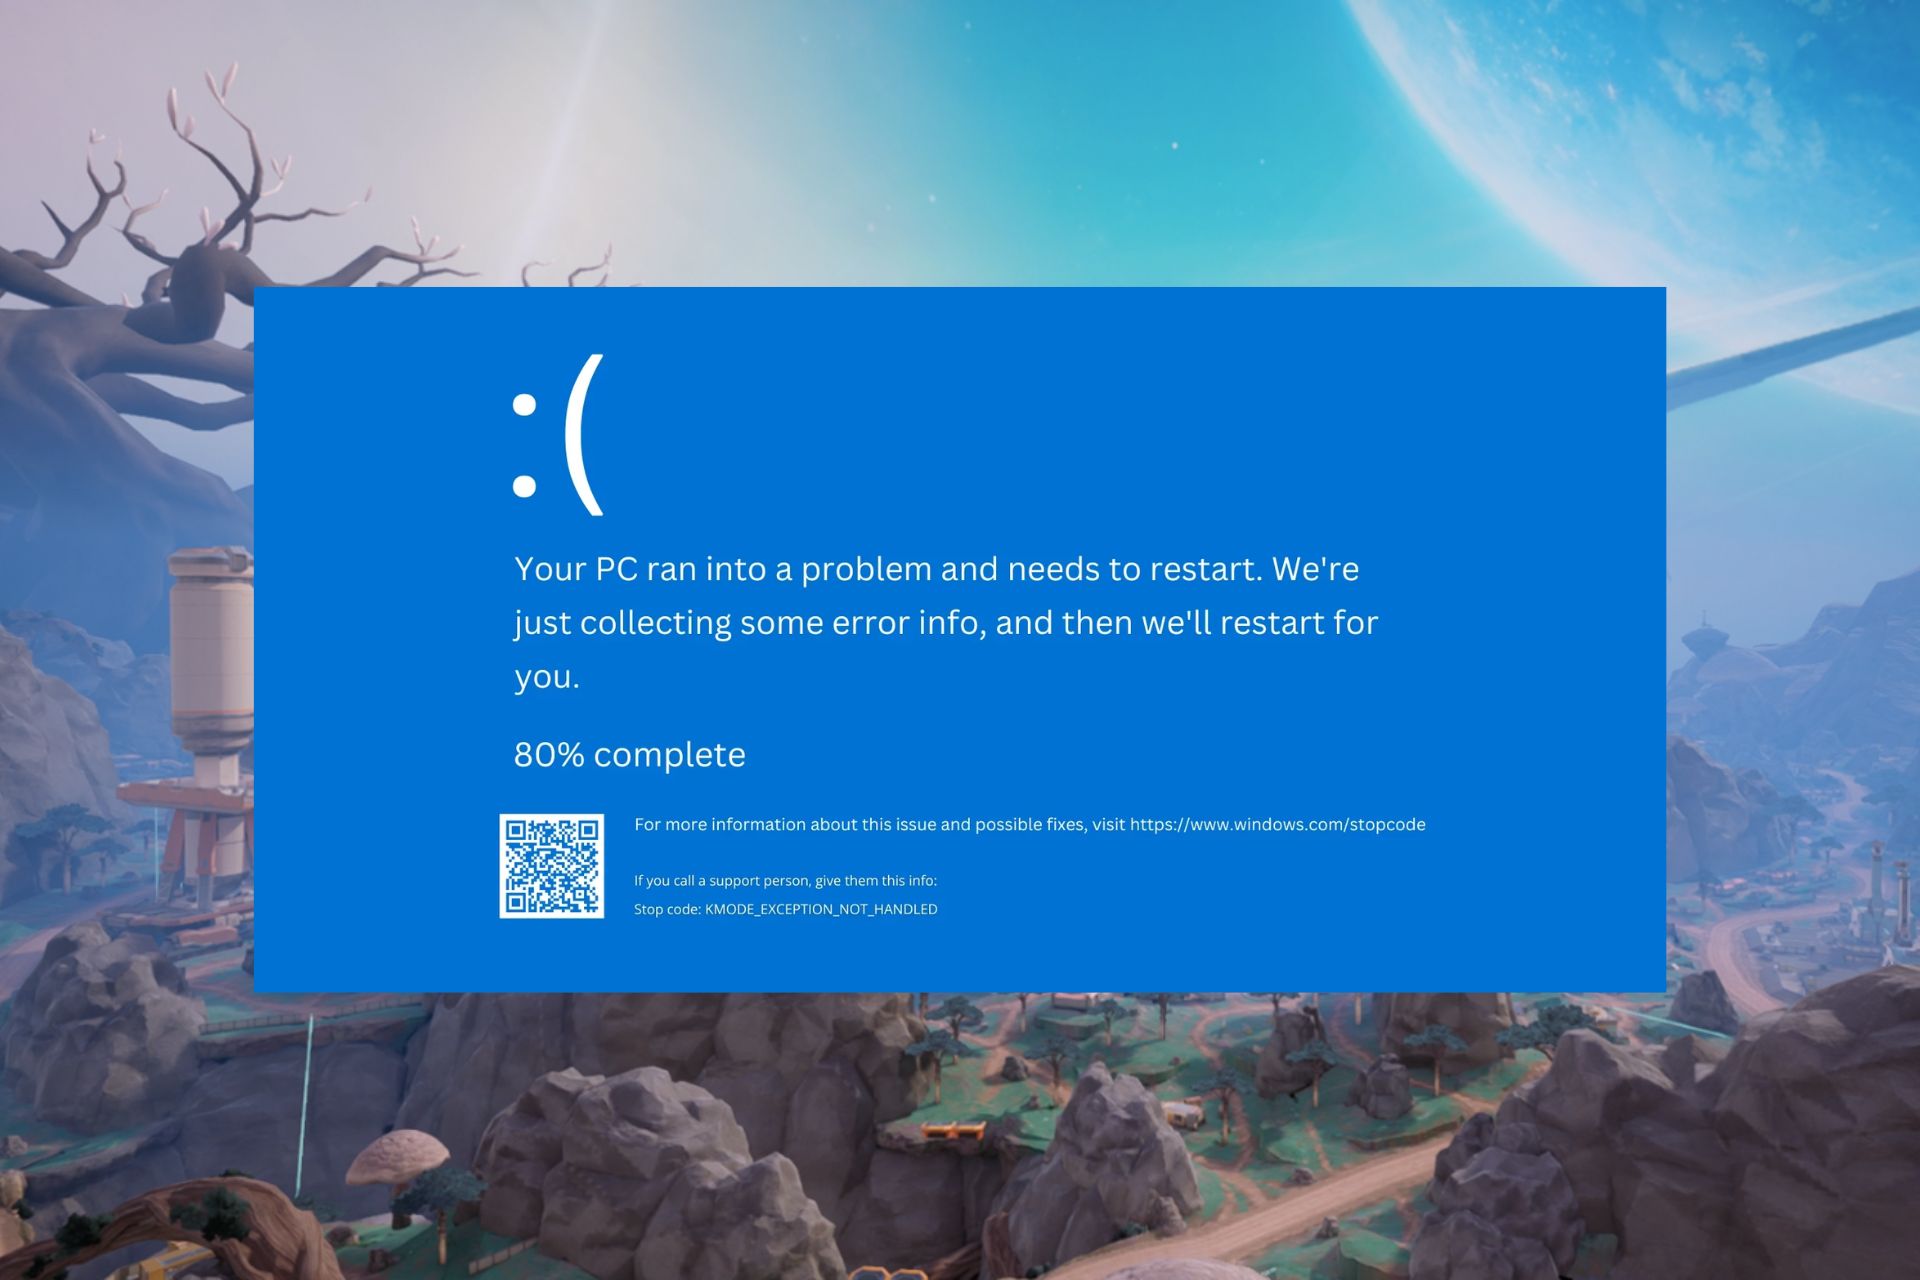
Your device ran into a problem and needs to restart is caused by BSoD errors.
8 min. read
Updated on
Read our disclosure page to find out how can you help Windows Report sustain the editorial team Read more
Key notes
- Your PC ran into a problem and needs to restart? is a loop caused by blue screen errors.
- This issue can also be caused by a corrupted registry, but its roots can be traced to hardware malfunctions as well.
- Sometimes, it can manifest itself as a boot loop with the message being displayed every time after startup.
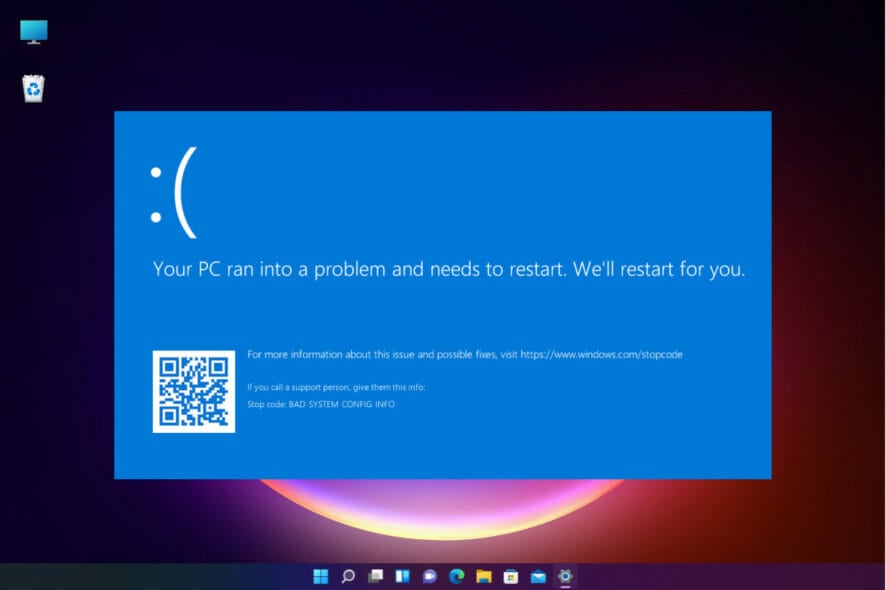
Was there a time when you were working or playing a video game on your new Windows 10 or Windows 11 operating system, and you got the Your device ran into a problem and needs to restart error message?
Sometimes, it goes even deeper, causing a restart boot loop, and some of our readers also reported the BSoD message, then faced a black screen.
Don’t be alarmed because! By the end of this article, you will have understood the reasons why Windows is acting like this and the steps you need to take in order to fix this issue.
What does it mean your PC ran into a problem and needs to restart?
This is usually caused by BSOD errors such as Internal Power Error, so the best course of action would be to wait it out.
If you notice a message saying Driver power state failure, be sure to check your drivers and update them to the latest version if necessary.
In some instances, you might even encounter a Critical process that died, and this indicates that specific software is causing the crash, so you’ll need to find it and remove it.
If you or a specific program deleted registry files from your System32 folder in the Windows partition, then you will most likely be notified that your device ran into a problem and needs to restart.
Furthermore, if RAM is running at a higher percentage than the operating system accepts, then you will also get this error message.
The high percentage of RAM usage can be caused by a specific application that you may have installed recently.
Also, you may run into this message associated with a lot of system errors like the BAD_SYSTEM_CONFIG_INFO or other BSoD.
How do I fix Windows ran into a problem and need to restart?
1. Select the Startup Repair option
This is a fix if you can’t boot into the Windows login screen or if the system goes into a frustrating boot loop.
Sometimes, you can get an OS incompatibility error when you’re trying to run Startup Repair. Don’t worry, we got you covered!
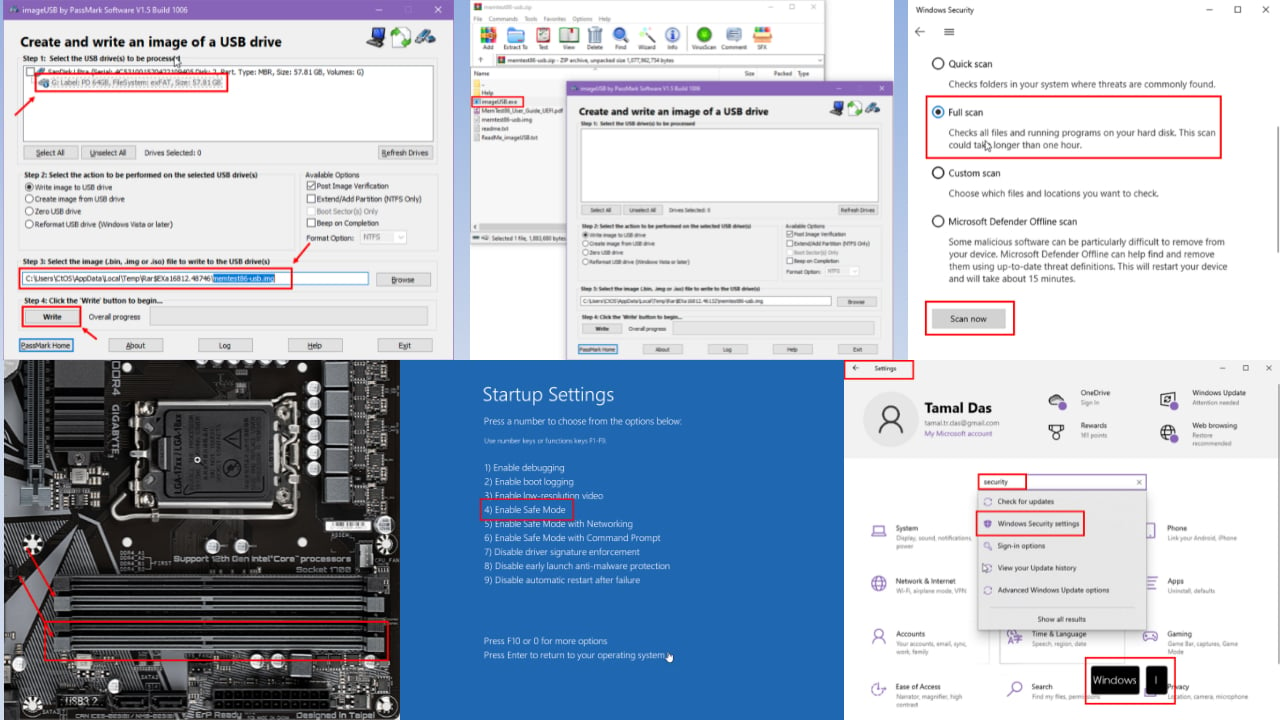
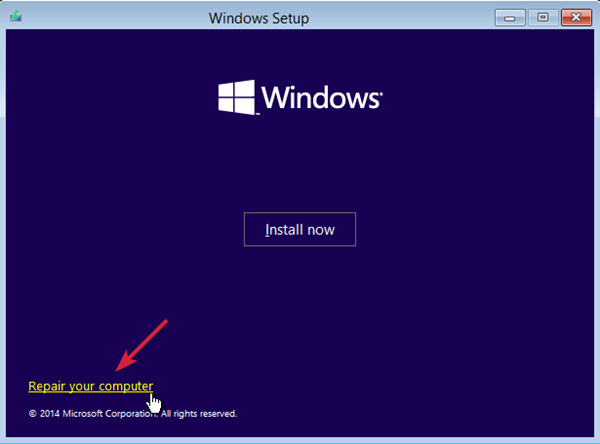
1. Insert your OS recovery disc, switch on the PC and then press any key to boot from the DVD or USB stick. If you don’t have media prepared, you can easily create a bootable Windows UEFI drive.
2. Press Next, then select the Repair your computer option.
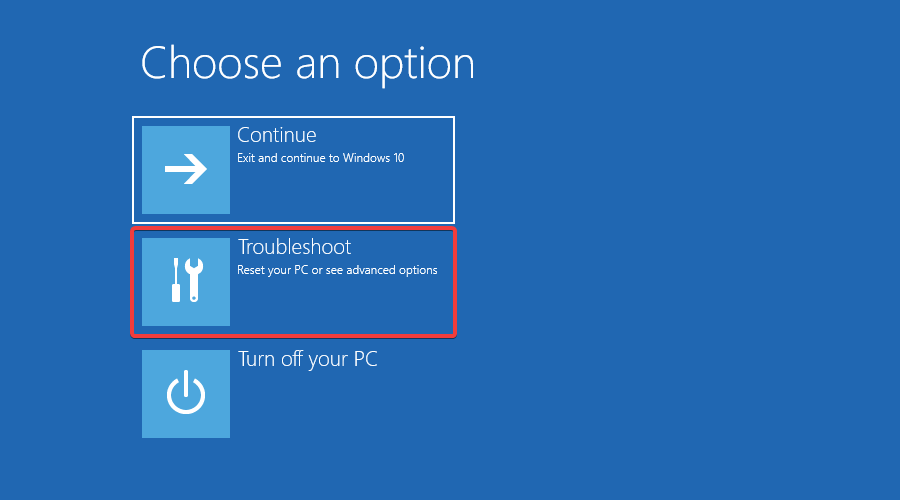
3. Press the Troubleshoot button.
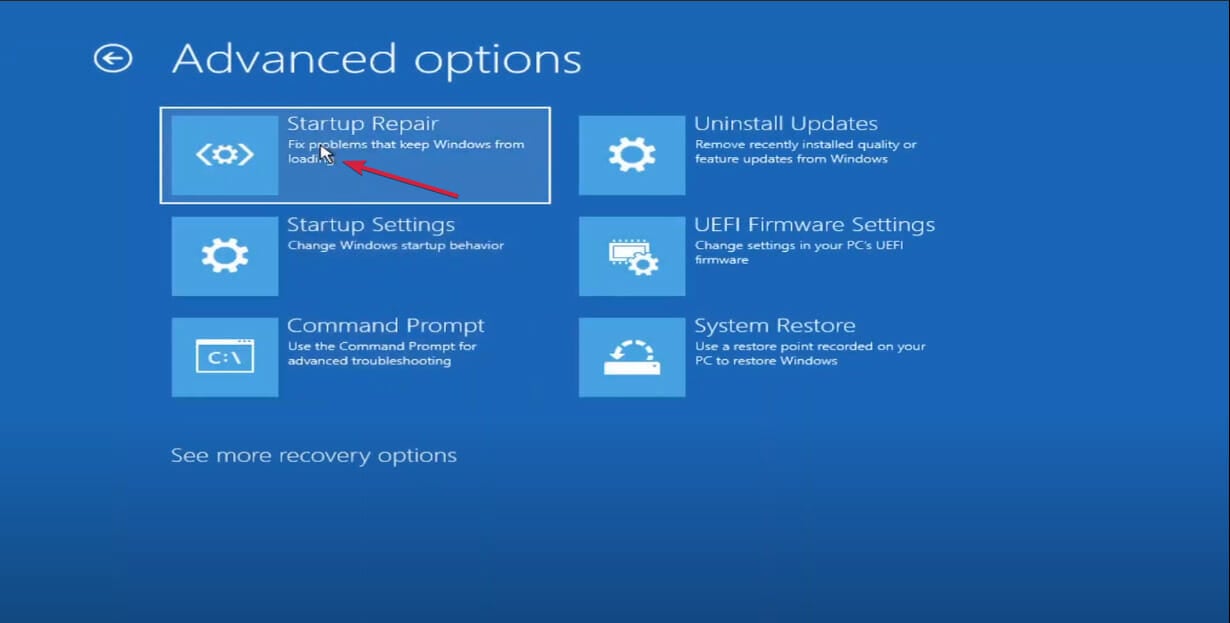
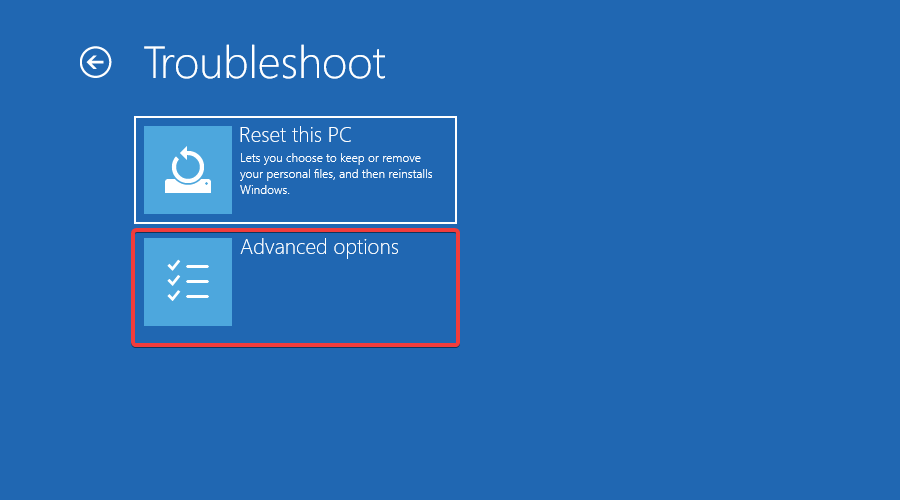
4. Now, click on Advanced options.
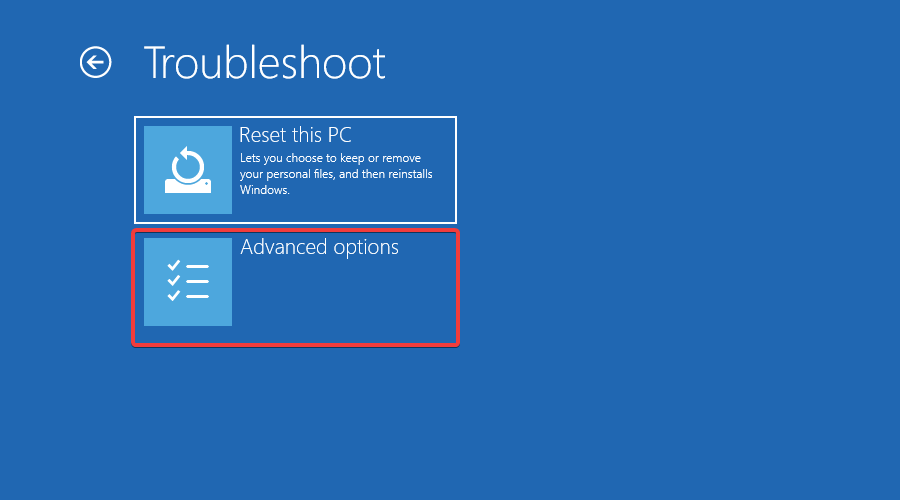
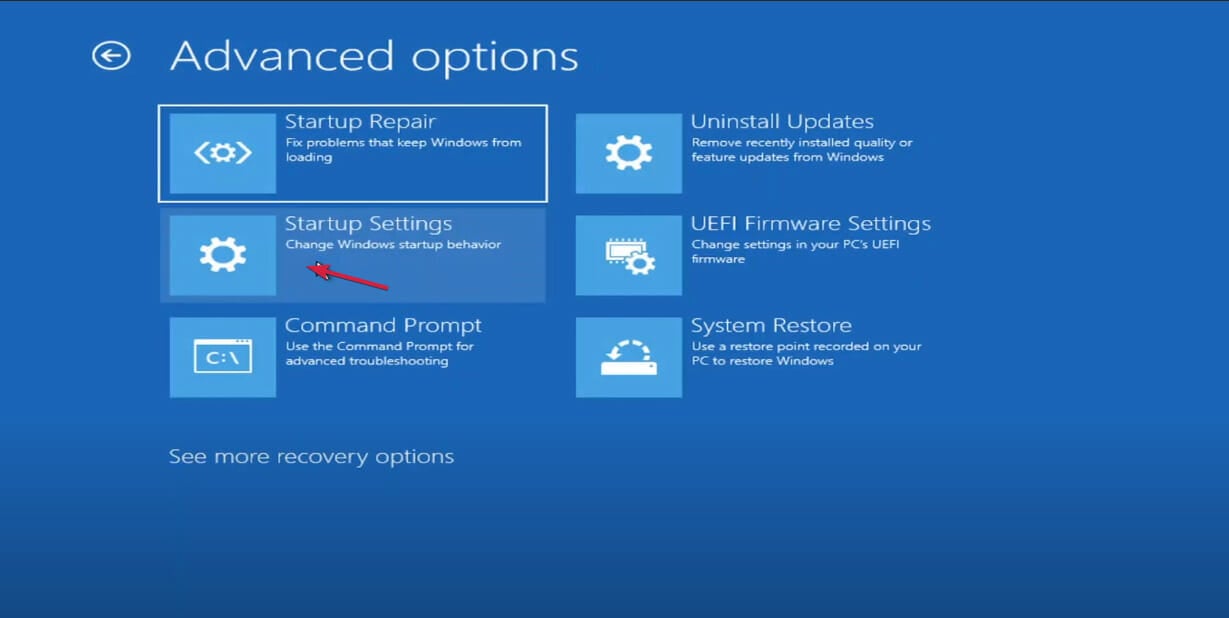
5. Select the Startup Repair option.
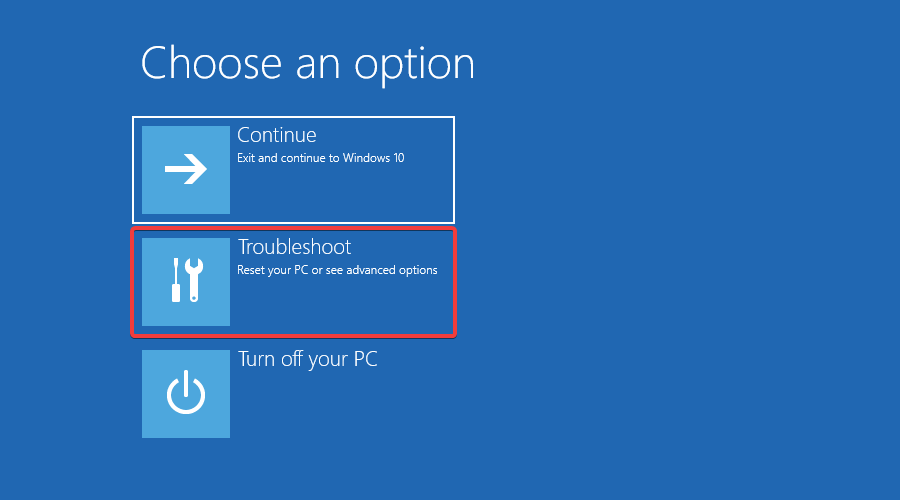
6. Next, select the target operating system to fix and Windows will initiate the repair, then restart.
2. Boot Into Safe Mode
- Use the bootable media (just like in Solution 1) or restart the PC three times to activate Startup Repair.
- You computer will reboot, then show the Advanced options screen, and select Troubleshoot.
- Click on Advanced options.
- Select Startup Settings.
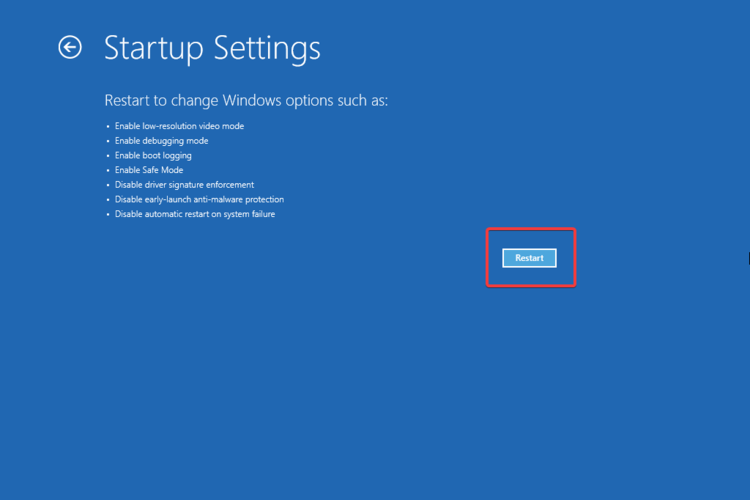
- Click on the Restart button.
- Press the F4 key to get into Safe Mode.
Once you enter Safe Mode, check if the problem is still there. It’s possible that you might be able to fix the issue from Safe Mode, so be sure to try this method.
If you can access the system, you can also do that from the Settings menu. However, problems are likely to occur in the startup phase.
If that is also your case, here are some useful methods to help you start Windows 11 in Safe Mode while booting.
3. Run the System File Checker (SFC) and DISM
3.1. Run an SFC scan
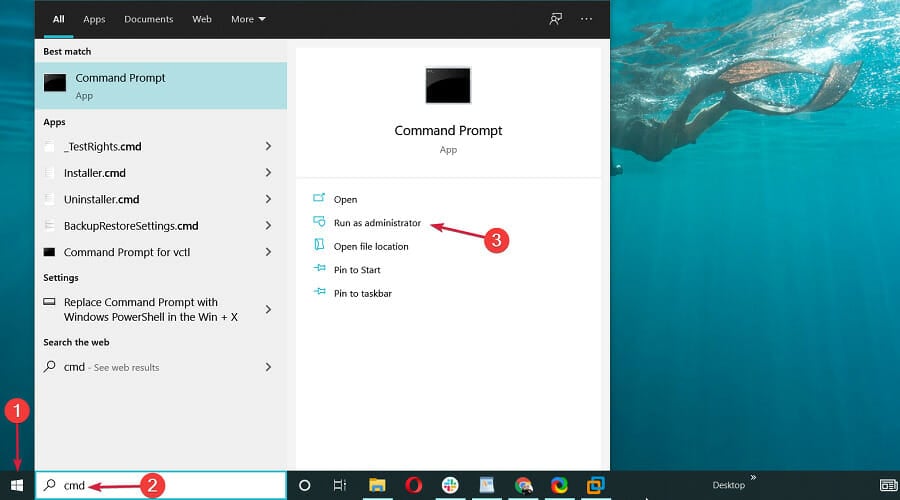
- Click the Start button, type cmd, and select Run as administrator to run Command Prompt with full privileges.
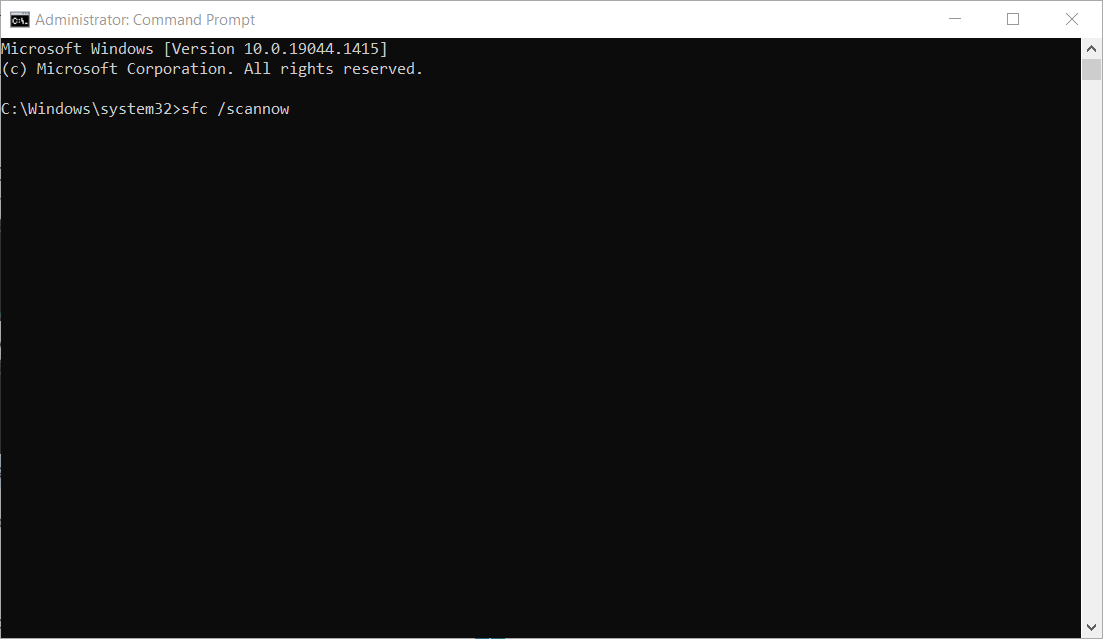
- When Command Prompt opens, type the following command and press Enter to run it:
sfc /scannow - The scanning process will take about 15 minutes, so it will require your patience.
Once the scan is finished, check if the issue is still there. If the problem is still there, or if you couldn’t run an SFC scan, it’s advised that you perform a DISM scan instead.
3.2. Run a DISM scan
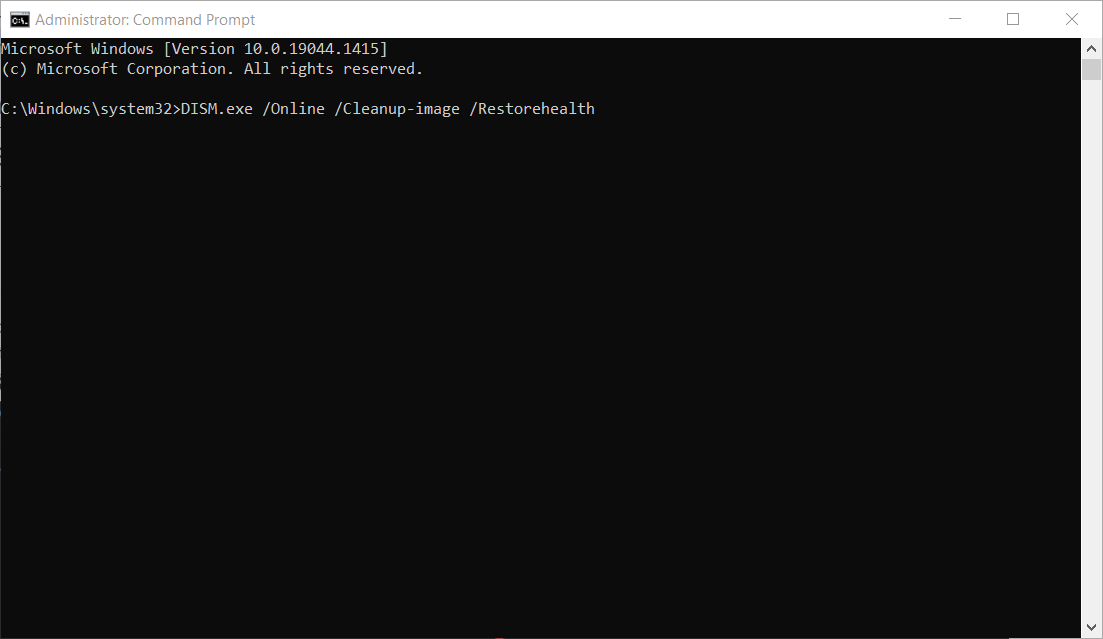
- In the same Command Prompt window, type the following command and press Enter:
DISM /Online /Cleanup-Image /RestoreHealth - Just like the System File Checker, the DISM scan will take a little bit of time, depending on the size of your disk and the PC capabilities so don’t interfere until it’s finished.
In some cases, file corruption can cause this and many other issues to occur, and in order to fix this problem, it’s advised that you perform both SFC and DISM scans.
Once the scan is finished, check if the problem is still there. If you weren’t able to run or complete the SFC scan, you might want to run it now.
If you run into trouble, don’t worry. Here’s how to quickly fix DISM when it fails on Windows 10 or 11.
4. Perform a System Restore
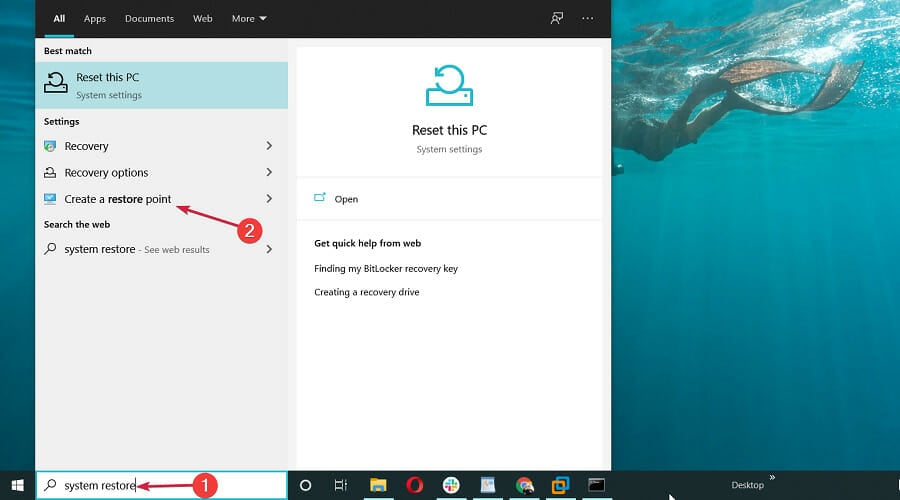
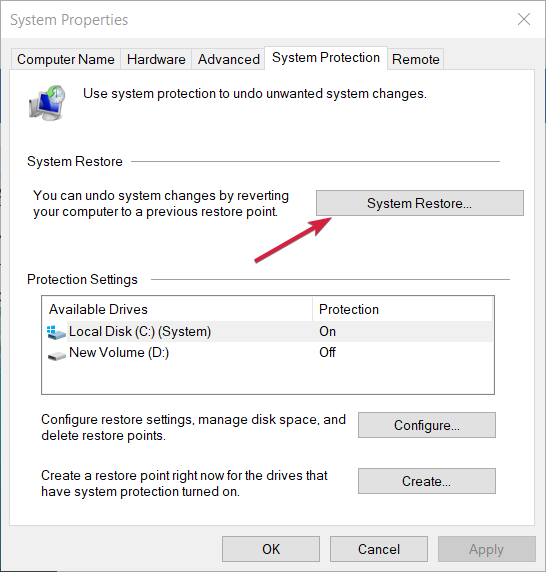
- Press the Windows Start button, type system restore, and select Create a restore point from the list of results.
- System Properties window will now open. Click the System Restore button.
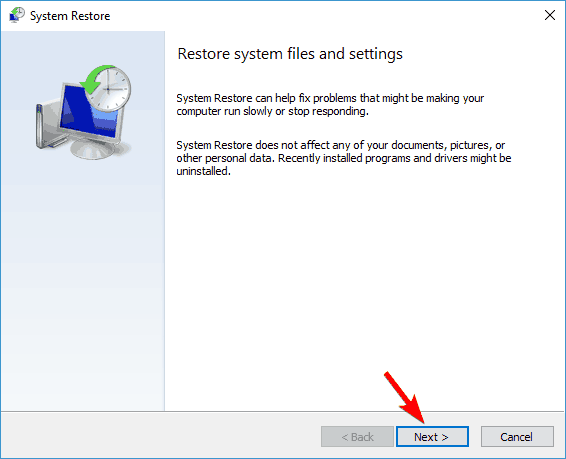
- Click the Next button.
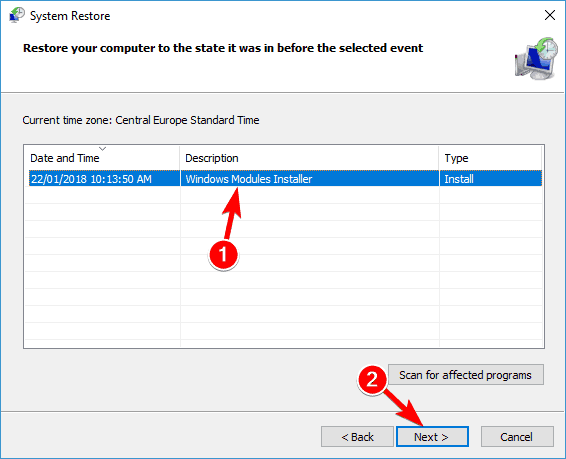
- If it’s available, check Show more restore points option. Now you just need to choose the desired restore point and click Next.
- Follow the steps to complete the restoration process.
If you’re not familiar, the System Restore tool allows you to restore your PC to an earlier state and fix various problems. Once you restore your system, check if the problem is still there.
We have a complete guide on how to create a System Restore point in Windows 10. Make sure you check it out to get all the information you might need in one go.
5. Update the drivers and Windows
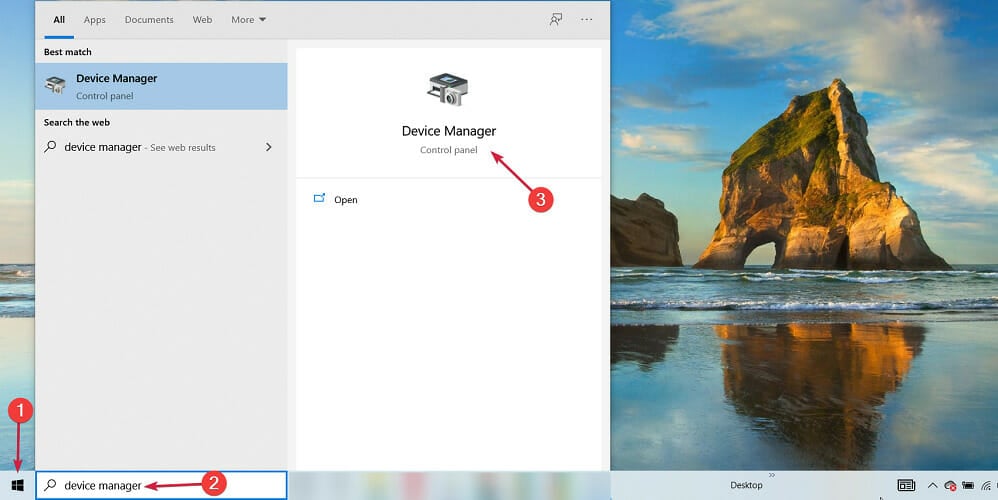
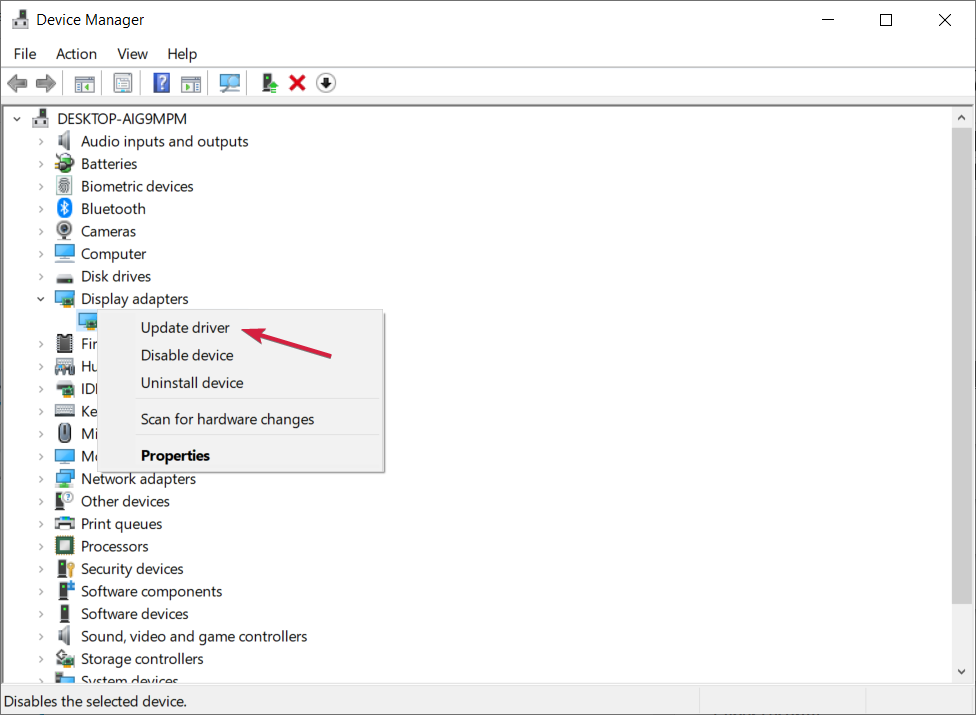
- Click on the Start button from Windows, type device manager, and select Device Manager from results.
- Try to locate any devices marked with an exclamation symbol in the list, right-click on them, and select Update driver.
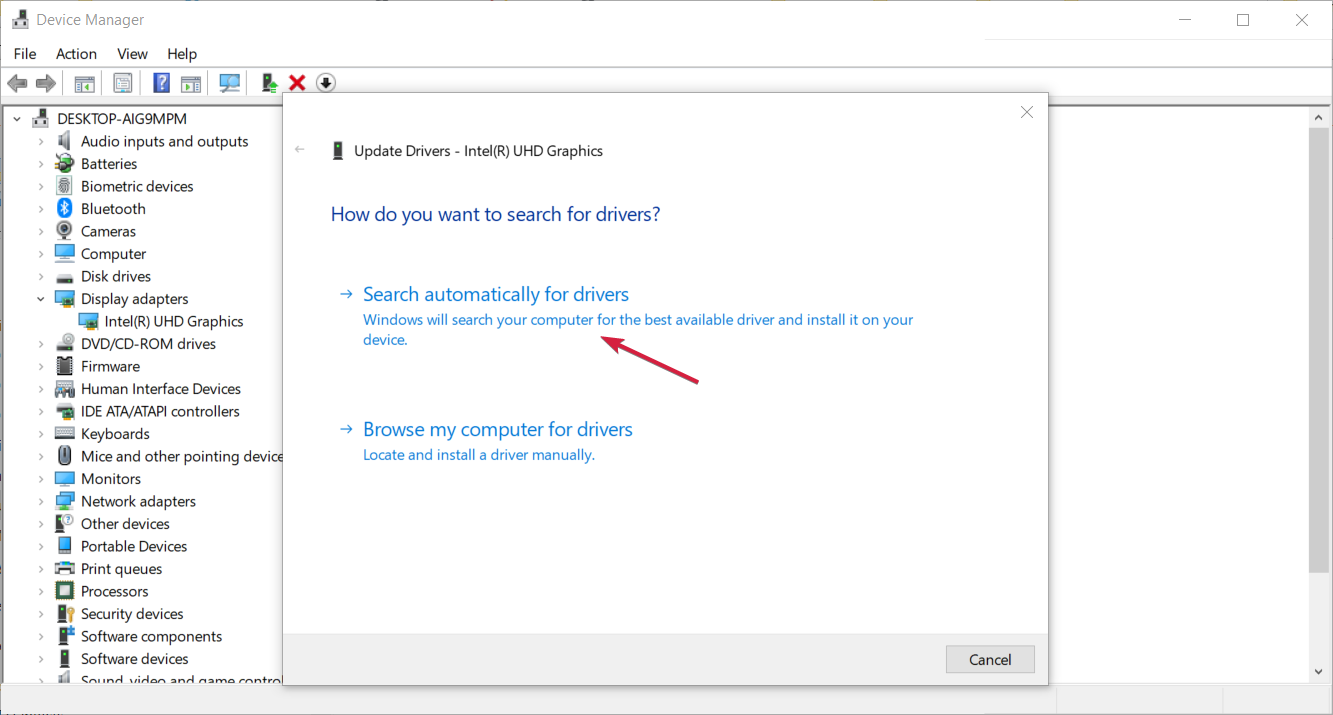
- Next, select the first option, Search automatically for drivers.
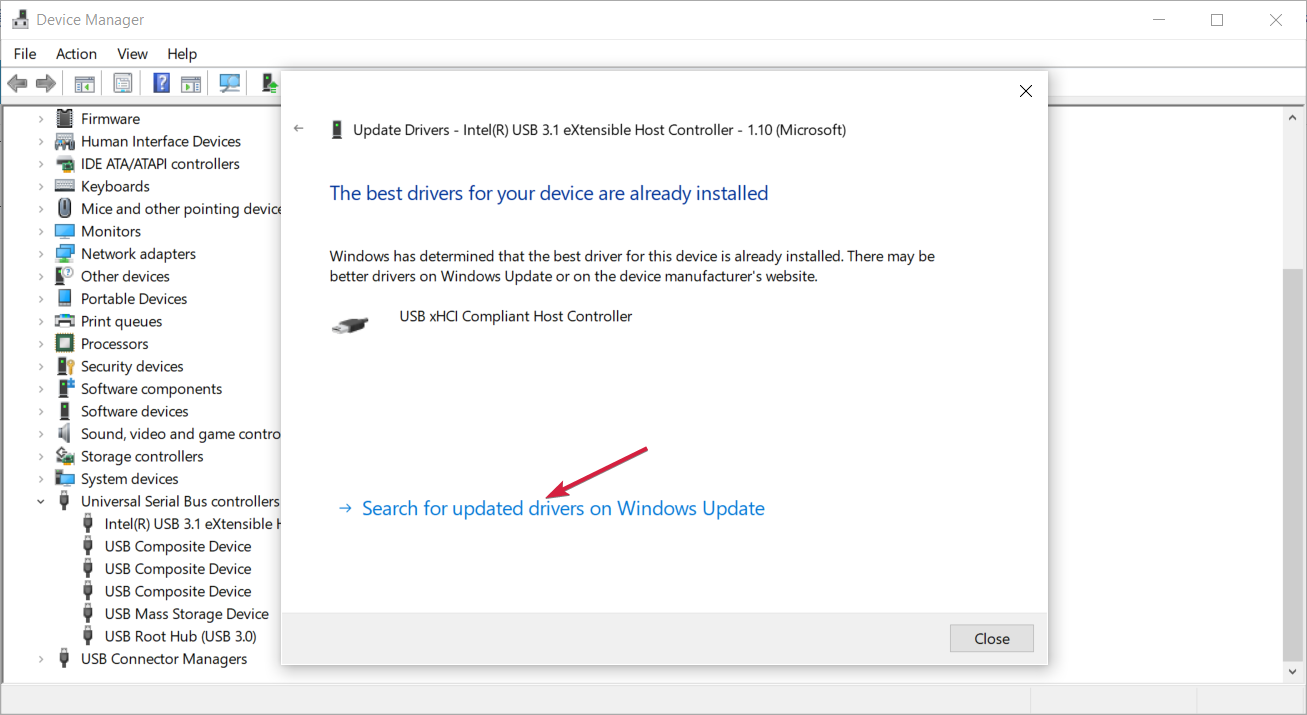
- The system will look for any updates and will install it. If it doesn’t, click on Search for updated drivers on Windows Update.
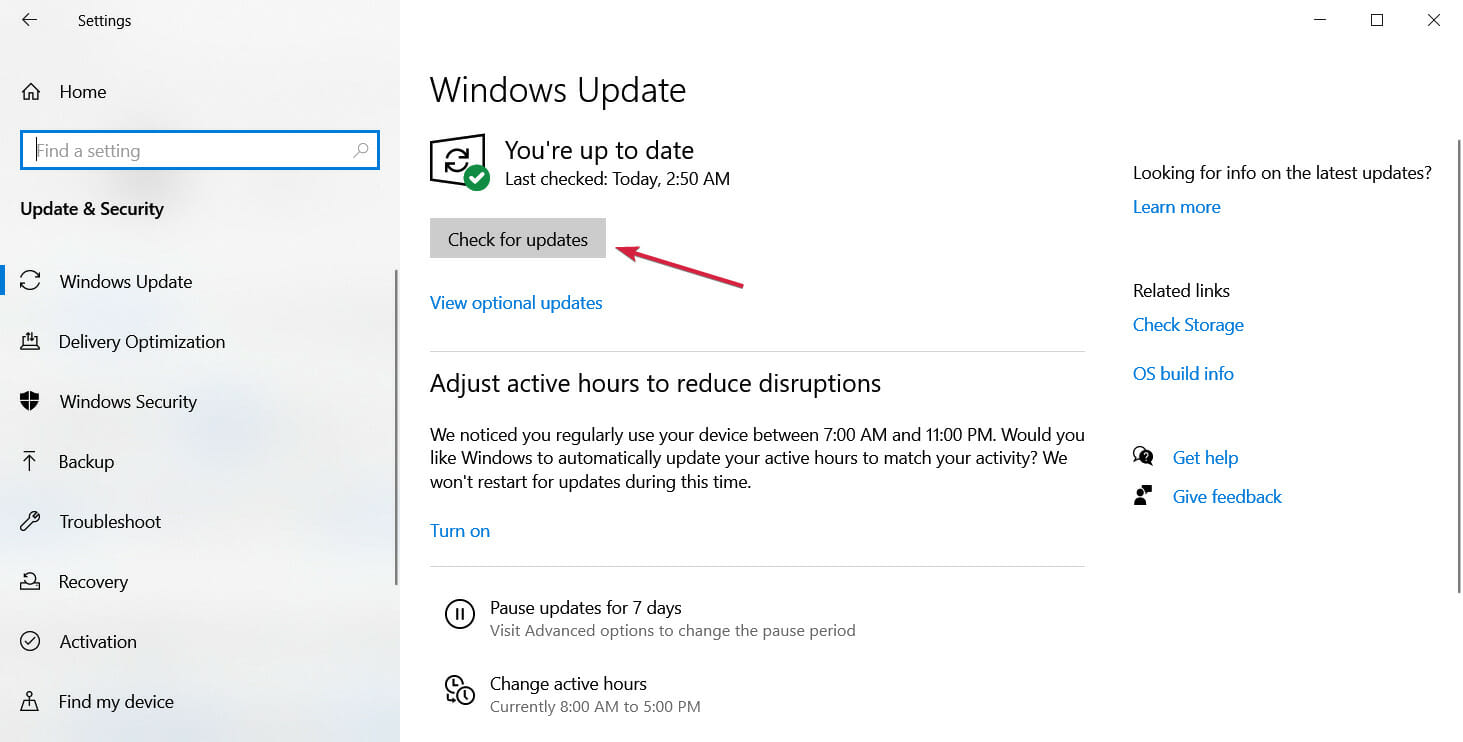
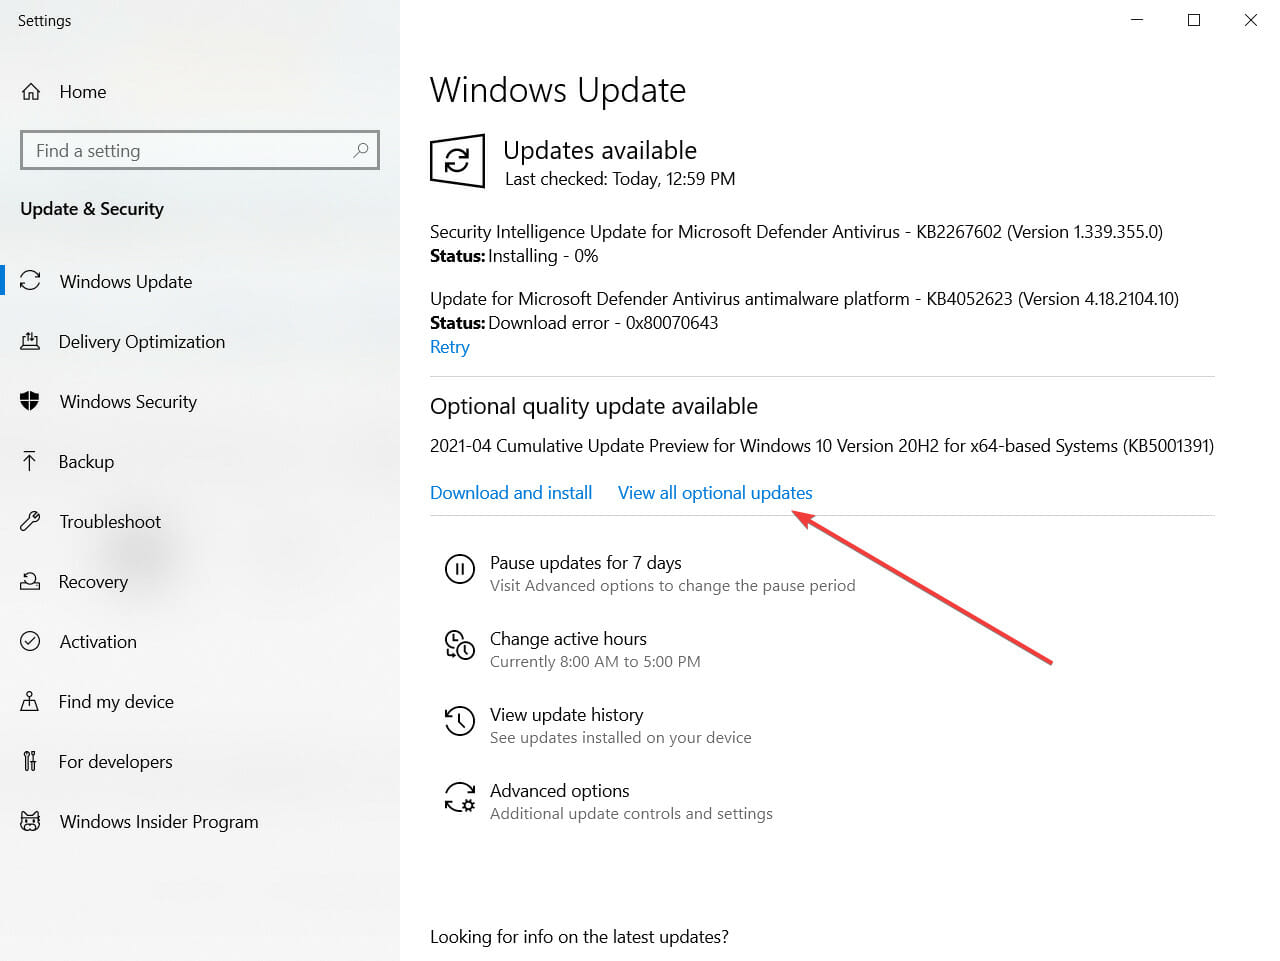
- You will reach the Windows Update menu so click on the Check for updates button to see if there are new additions you should install.
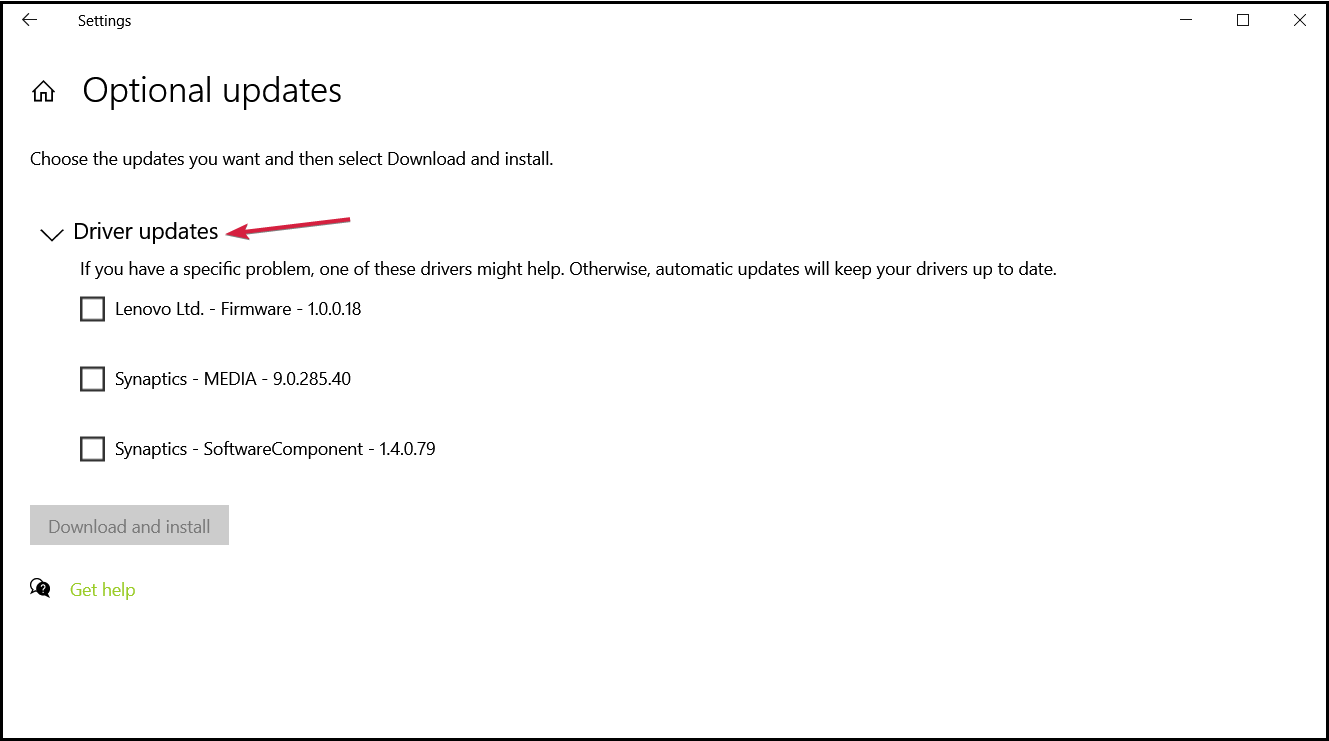
- If the system is up to date, hit View all optional updates.
- Select the Driver updates section, check the boxes for any new drivers and click the Download and install button.
- You should perform the first three steps for all the drivers, even if they don’t have the exclamation mark, just to be sure that all the drivers are up to date.
Modify the Memory Dump setting to fix Your device ran into a problem
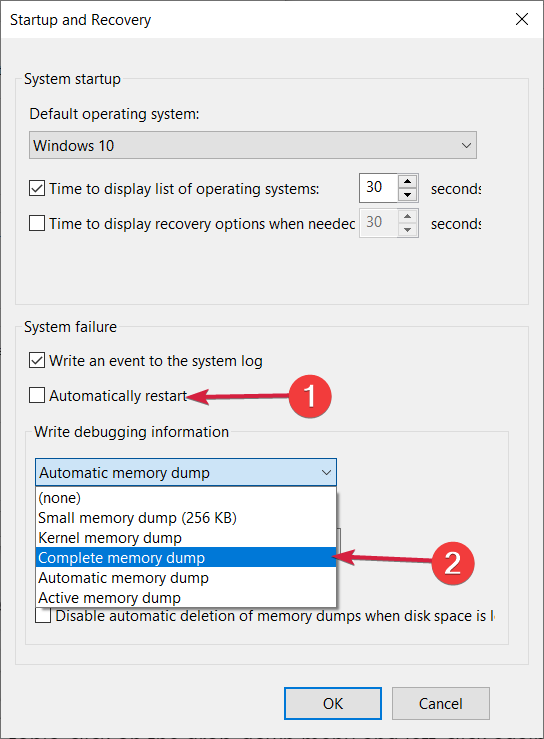
The Your device ran into a problem and needs to restart BSOD error can be solved by changing the Memory Dump setting.
You need to configure your computer to perform an automatic restart and write a complete Memory Dump whenever it encounters system failure.
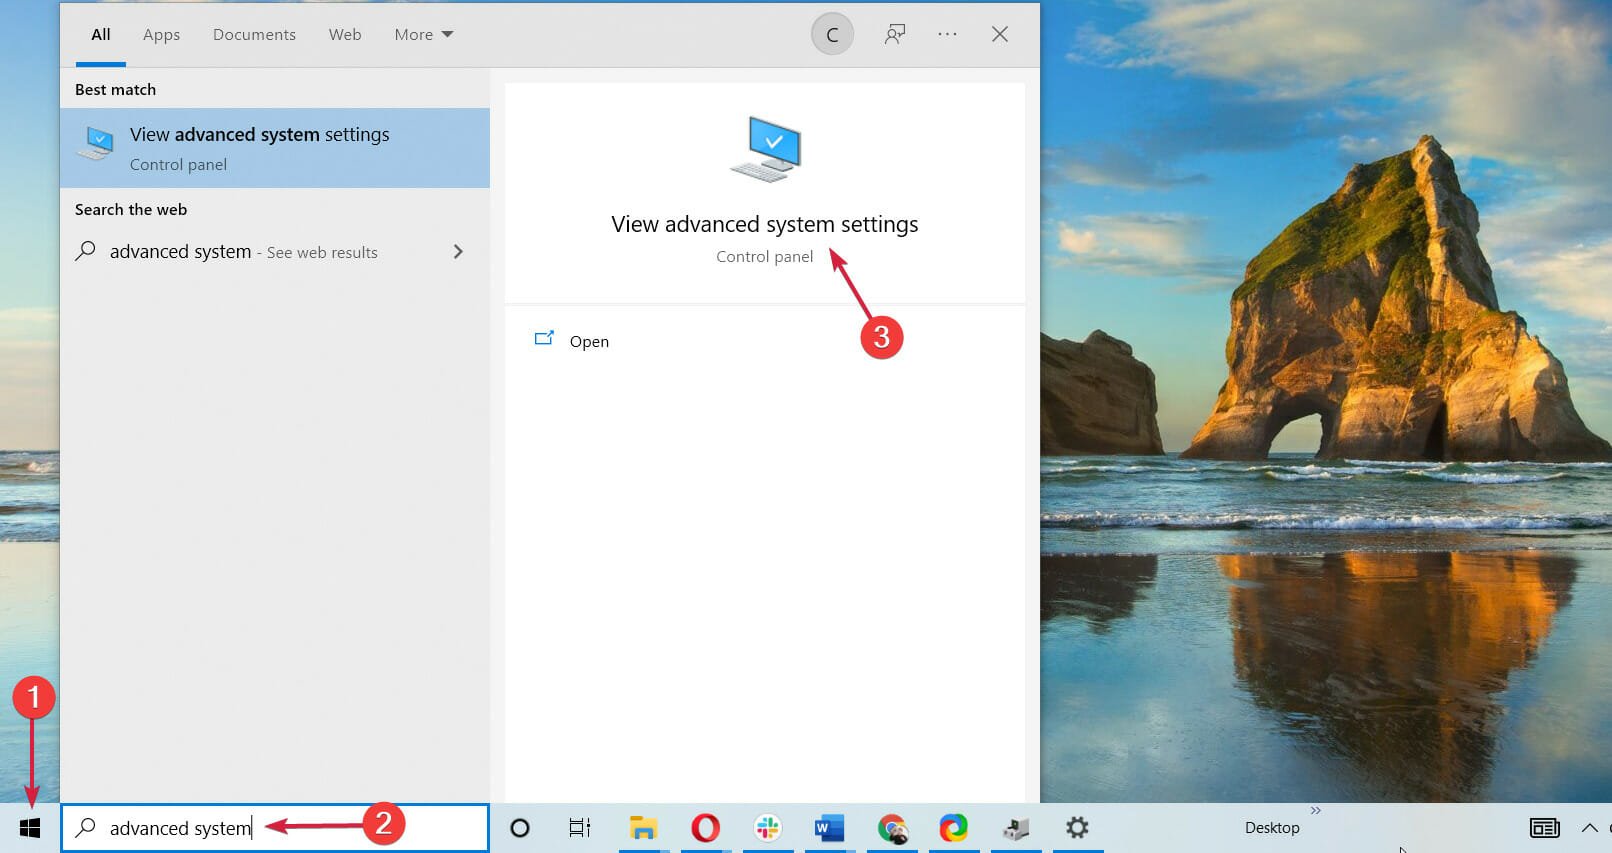
- Press the Start button and type advanced system.
- Select View advanced system settings from the list of results.
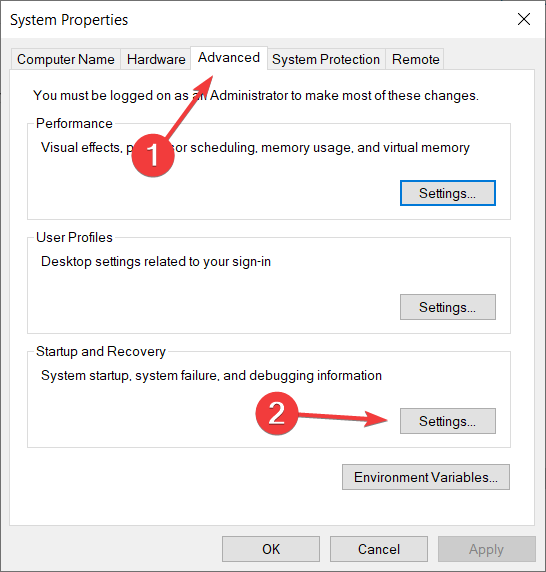
- Click on the Advanced tab on the upper side of the Properties window, then select Settings from the Startup and recovery section.
- Under the System failure section, uncheck the Automatically restart box.
- Click the Write debugging information drop-down menu and select the Complete memory dump option.
- Save changes.
- Reboot your Windows device.
- Check to see if you still have the error Your PC ran into a problem and needs to restart.
In some cases, Your device ran into a problem and needs to restart message can appear if your drivers are outdated.
This can be a problem, and in order to fix it, you need to find and update the problematic drivers. You can also visit the manufacturer’s website and download the latest drivers for your device.
However, another handy option that we recommend is updating and fixing drivers with a dedicated driver updater software for Windows.
If you keep getting Your PC ran into a problem and needs to restart message, the issue might be the missing updates.
Microsoft is frequently releasing updates, and they are usually installed automatically. However, sometimes you might miss an update or two.
How do you fix your device ran into a problem and needs to restart Windows 11?
If you’ve upgraded your system to Windows 11, you probably discovered that apart from the changed design and some new and interesting features, the new OS is not much different from Windows 10.
The majority of system apps and menus look the same or are at least in the same place you’re used to from the old OS.
In fact, all the solutions we presented above can be applied to Windows 11 without any problems, however, the Settings menu looks a bit different.
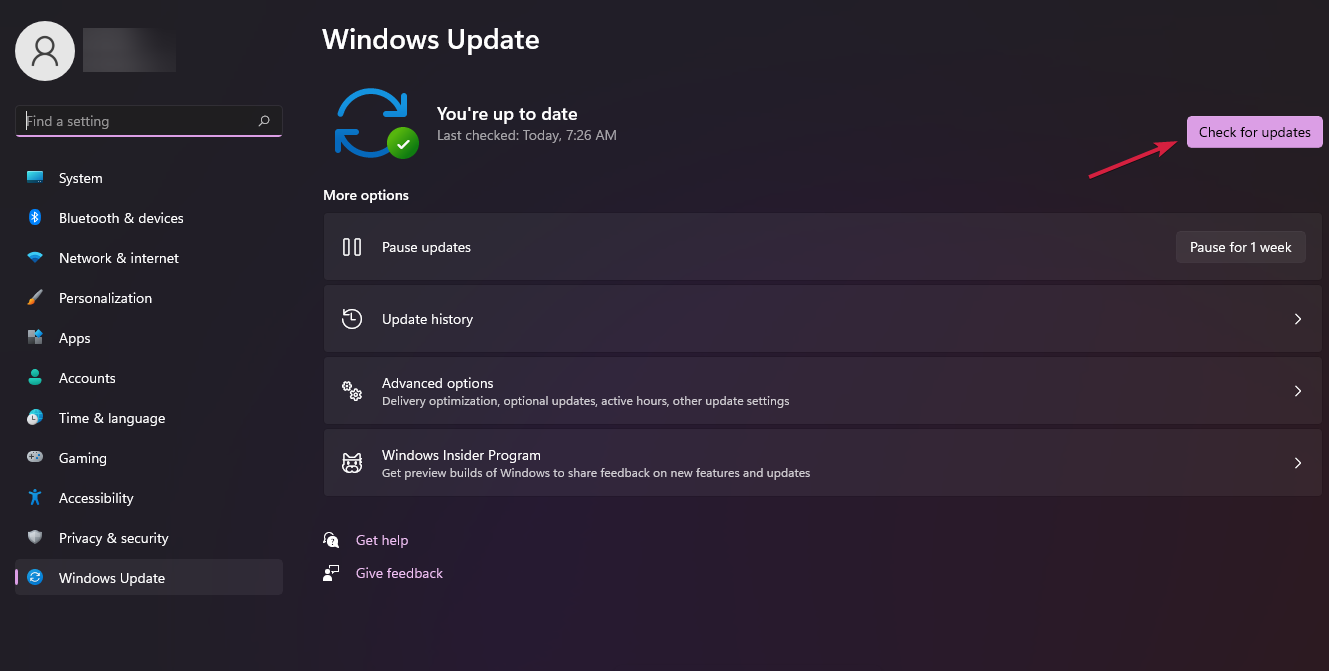
For instance, to view the optional updates, you will have to access the Advanced options from the Windows Update settings menu.
In case you still have this issue, and the machine is still in warranty, we would suggest you take the device to the store where you bought it because it is most likely a hardware malfunction.
Should the warranty period pass, you can either replace the faulty component yourself or ask for the help of a repair shop.
Now you have different ways to fix the Your device ran into a problem and needs to restart error in Windows 10 & 11.
If you have any other questions, don’t hesitate to leave them in the comments section below and we will get back to you as soon as possible.

