How to Access the Windows 10 Startup Folder
Learn how to find and modify the Startup Folder
4 min. read
Updated on
Read our disclosure page to find out how can you help Windows Report sustain the editorial team. Read more
Key notes
- The Task Manager’s Startup tab provides you with insights on what exactly are the apps that launch at startup.
- The Startup folder’s location on Windows 10 PCs is not always easy to find for users, so we made a guide to help you out.
- After you access the Startup Folder, you can add and remove software or programs to & from it.
- The software and programs you add to this folder are set to run automatically when Windows starts.
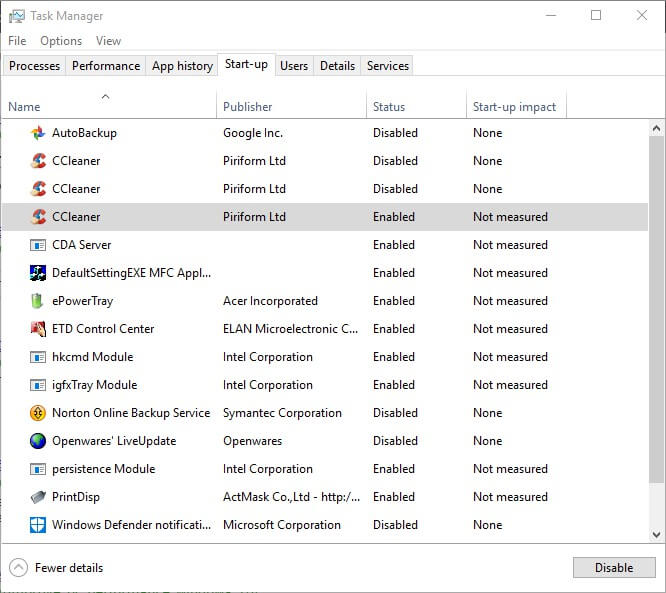
Windows 10’s Task Manager utility includes a Startup tab. That is Windows 10’s default startup manager with which users can disable startup software.
However, the Task Manager’s tab doesn’t include any options for users to add programs to the startup. So, some users might look for startup settings on software windows to add new programs to the system startup.
Yet, Windows 10 includes a Startup folder to which users can add programs and files. All software and programs within that folder will run automatically when Windows starts.
What is the Startup folder?
The Startup folder is an in-built Windows feature (first introduced in Windows 95) that allows users to set up those particular apps and programs that will automatically run when Windows starts.
The folder is buried within a series of subfolders and can be hard to find.
How can I manage the Windows 10 Startup folder?
Some users might wonder where is the Startup folder on their PC, how to open it and how to add or remove the software from it. In the text below you will find answers to all of these.
1. Open the Startup folder using File Explorer
For most users, the Startup folder is located at this address:
C:Users<user name>AppDataRoamingMicrosoftWindowsStartMenuProgramsStartupThere is also a second All Users Startup folder that should be located under:
C:ProgramDataMicrosoftWindowsStart MenuProgramsStartupAs you can see, the full path for the Startup folder is this:
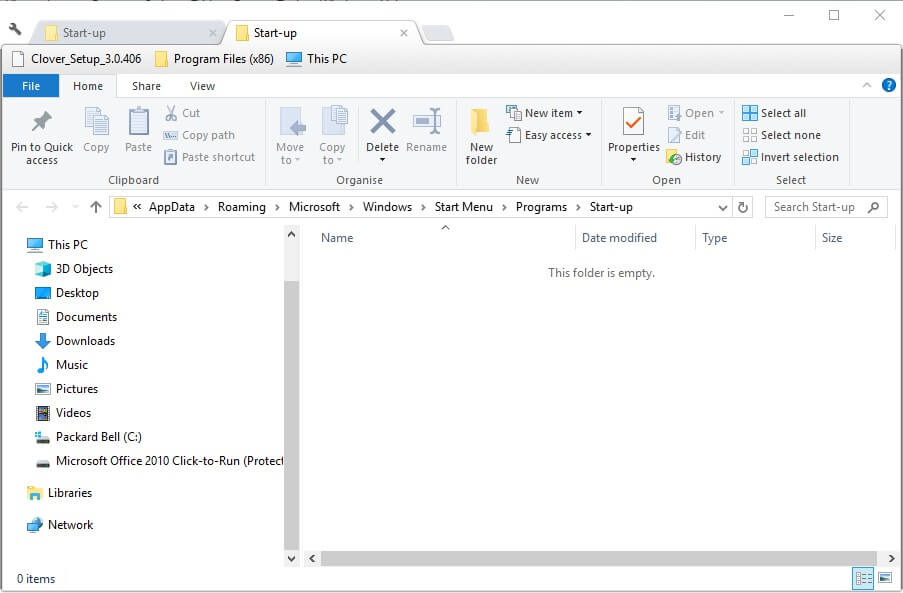
C:UsersUSERNAMEAppDataRoamingMicrosoftWindowsStartMenuProgramsStartupUsers will need to replace USERNAME with their actual user account name, and then enter that path in File Explorer. That path will open the folder shown in the snapshot directly below.
2. Access the Startup Folder using Run
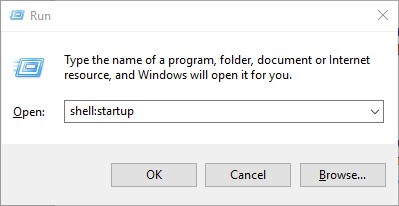
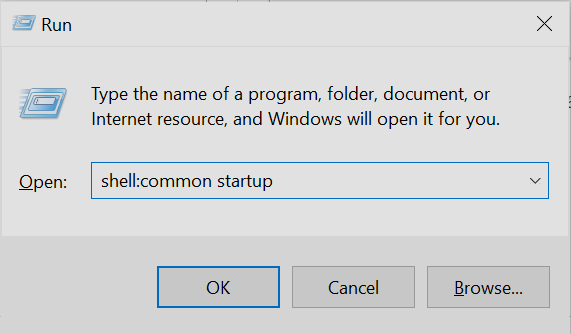
1. Press the Windows key + R hotkey to open the Run dialog.
2. To open the Admin User Startup folder, enter shell:startup in the text box.
3. To open the All Users Startup folder, enter shell:common startup in the text box.
4. Click OK to execute the command.
5. The Startup folder is now opened on your computer.
A quick and easy way to open the Startup folder on your PC is to use the built-in Run dialog. It works as a shortcut and all you need to do is input the appropriate command, then the folder will open.
3. Add Software to the Startup Folder
With the Startup folder open in File Explorer, users can now add new program shortcuts to the system startup. In addition, users can also include file shortcuts within that folder.
Then the files the Startup folder includes will usually open with their default software. This is how users can add shortcuts to the Windows Startup folder.
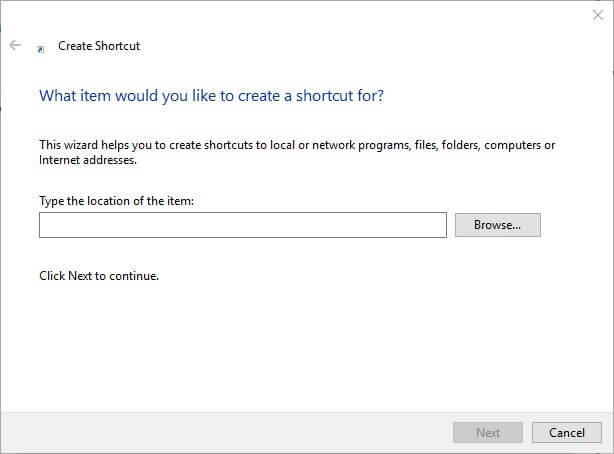
- Right-click an empty space within the Startup folder and select New > Shortcut.
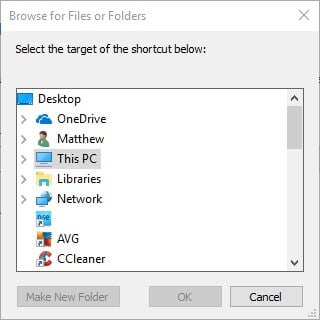
- Click the Browse button to open the window in the snapshot directly below.
- Select a program or document to include in the startup, and press the OK button.
- Press the Next button.
- Then press the Finish button. The Startup folder will now include the selected software or file.
- The software in the Startup folder will open after you’ve restarted Windows.
4. Remove Software From the Startup Folder
Users can remove programs in the Startup folder by deleting them. To do that, select a program in that folder and click the Delete button. That will probably erase the shortcut to the Recycle Bin.
Users can also press the Ctrl + A keyboard shortcut to select all shortcuts within the Startup folder. Then press File Explorer’s Delete button to erase them.
Task Manager’s Start-up tab in Windows 10 will also list the programs that users have added to the Startup folder.
Therefore, users can disable the programs with that utility by right-clicking the taskbar and selecting Task Manager.
Click the Start-up tab on that utility’s window. Then users can select the required program and click Disable.
Note: Task Manager doesn’t include a Start-up tab in Windows 7. However, Win 7 users can open the startup manager by entering msconfig in Run and clicking OK. Then select the Startup tab on the System Configuration window.
Windows 7 users can uncheck the item checkboxes on that tab to disable programs starting during startup. So, that’s how users can add new software and files to Windows’ Startup folder.
However, filling that folder up will slow down the system’s startup. Lots of startup software will also drain system resources. Therefore, don’t add too many things to the folder.
We hope you found this guide useful. To learn more, we have a guide on how to disable startup programs in Windows 7, so don’t miss it.
There you go, these solutions should help you manage the startup folder adequately. Let us know if you found them useful by hitting the comments section below.


User forum
0 messages