How to Disable Startup Programs in Windows 7
The best way to do that is with System Configuration tool
3 min. read
Updated on
Read our disclosure page to find out how can you help Windows Report sustain the editorial team Read more
Startup programs on Windows 7 can sometimes impact your performance negatively, so it might be necessary to remove them, and this guide will show you how to do that.
Is it OK to disable all startup programs?
For the most part, yes, since you’ll gain a performance boost and improve boot time. However, disabling all startup apps might cause certain features not to work. Also, disabling the antivirus can leave your system vulnerable.
How do I disable startup programs in Windows 7?
Before anything, you need to ensure you don’t disable any Microsoft programs. Also, if you don’t have any issues, perhaps disabling startup applications is unnecessary.
1. Deleting the program’s shortcut from the Startup folder
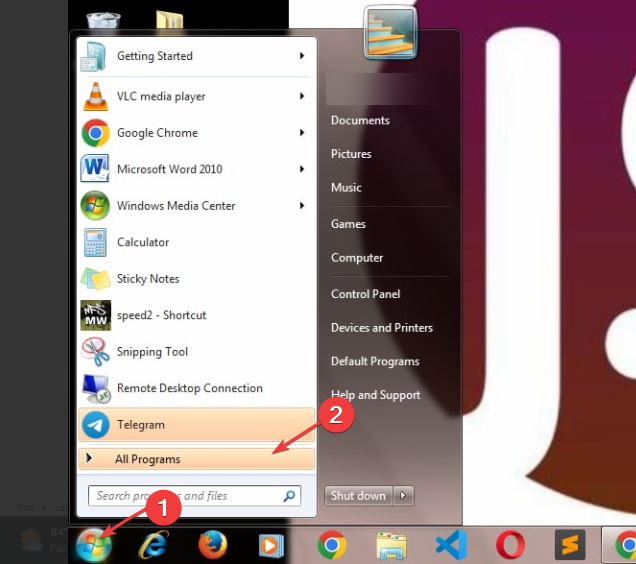
- Left-click the Start button and click All programs from the drop-down.
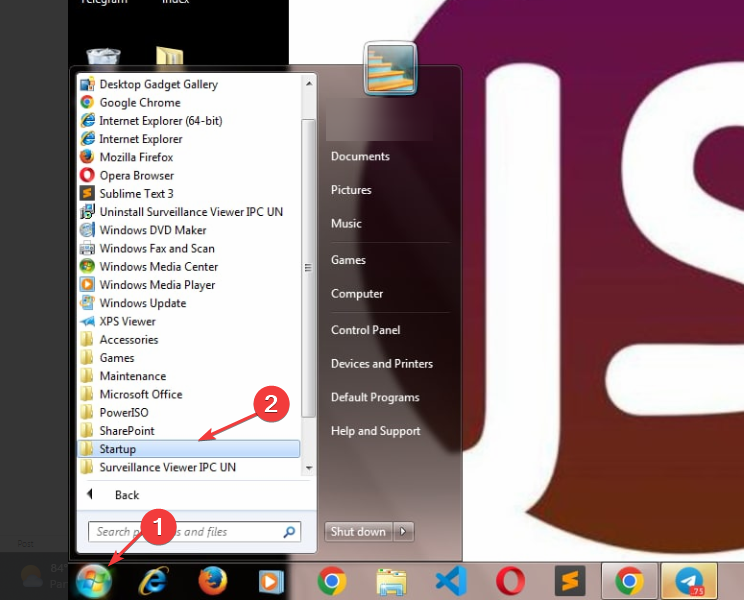
- Navigate through and click on the Startup folder to expand it.
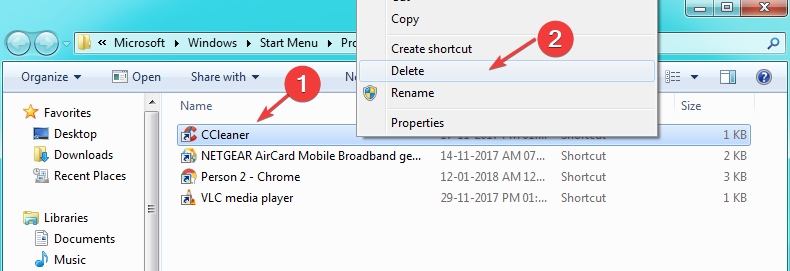
- Locate the shortcut to the program or application you want to disable under the Startup folder.
- Right-click on the Shortcut and click on Delete from the drop-down.
- Confirm the process in the new prompt and restart your PC to check if the program is disabled.
The program shortcut in the Startup folder is responsible for launching the program on startup. So, deleting the shortcut will prevent the program from launching on boot.
If you have issues locating the Windows startup folder on your PC, check for other means of accessing it.
2. Disable programs from launching on startup using the Registry
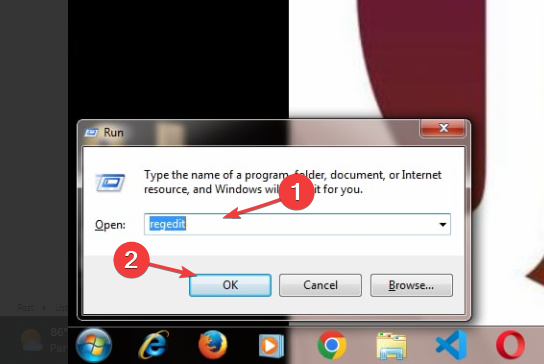
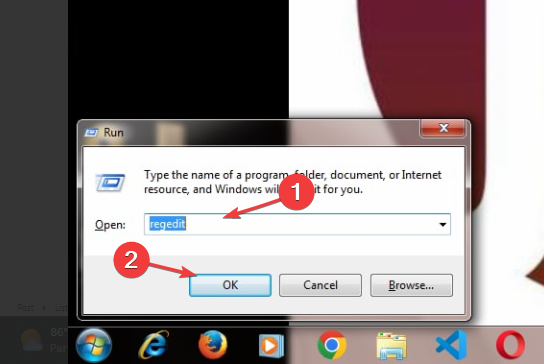
- Press the Windows + R key to open the Run box, type Regedit, and press ENTER to launch the Registry Editor.
- Navigate to the following directory:
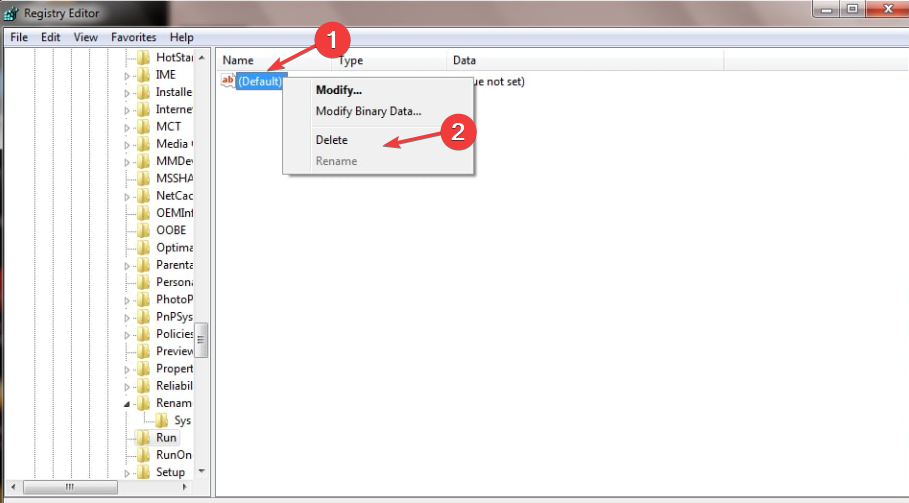
HKEY_LOCAL_MACHINE > SOFTWARE > Microsoft> Windows > CurrentVersion - Click on the Run folder, then right-click on it and click on Delete, then confirm the process from the new prompt.
- Restart your PC.
3. Disable the startup item via the System Configuration
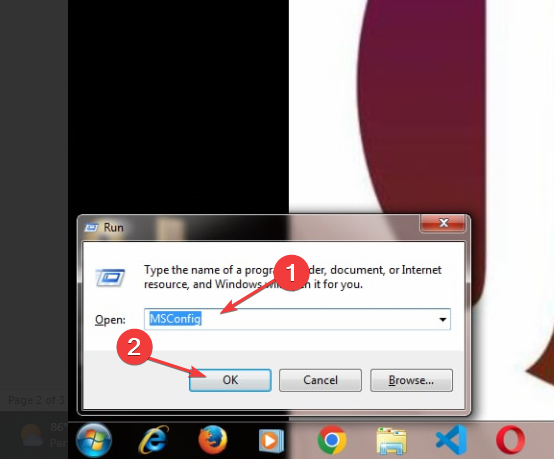
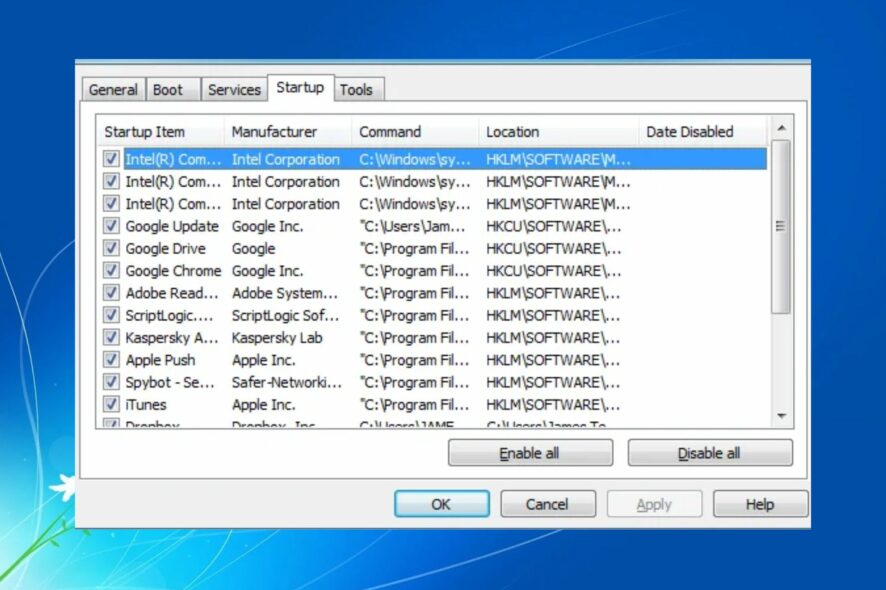
- Press Windows + R key to open the Run dialog box, type MSConfig, and press ENTER to prompt the System Configuration.
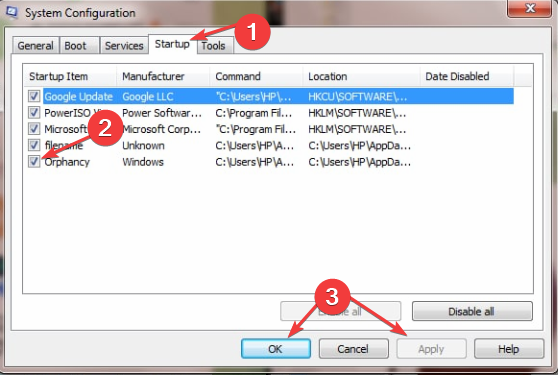
- Under the Startup item menu, find the program to disable from launching when your Windows starts up and uncheck its box; click on Apply, then OK.
- Restart your PC and check if the app doesn’t start on startup.
For users having difficulties accessing MsConfig in Windows, check for other methods to open it.
4. Delete the program from the Registry Startup
- Press the Windows + R key to open the Run window, type Regedit, and press ENTER.
- In the Registry Editor, go to the following location:
HKEY_LOCAL_MACHINE\SOFTWARE\Microsoft\SharedTools\MSConfig\startupreg - Right-click on the entry for the startup program and select Delete from the drop-down.
- Restart your PC to check if the program launches on startup.
Deleting the program from the startup reg folder will clear its startup option and prevent it from launching at the start.
Alternatively, users can check our article about the best apps to manage startup items on your PC and improve its boot time.
Also, you can fix the Windows Startup folder that is empty on your computer. We also have a guide on how to remove startup programs in Windows 10, so don’t miss it.
Also, don’t miss miss our guide on Startup Manager in Windows 10, if you want to learn more.
If you have further questions or suggestions, kindly leave them in the comments below.

