Time.windows.com Not Working: 4 Ways to Fix
The #1 solution fixed the time synchronization issue for most users
3 min. read
Updated on
Read our disclosure page to find out how can you help Windows Report sustain the editorial team. Read more
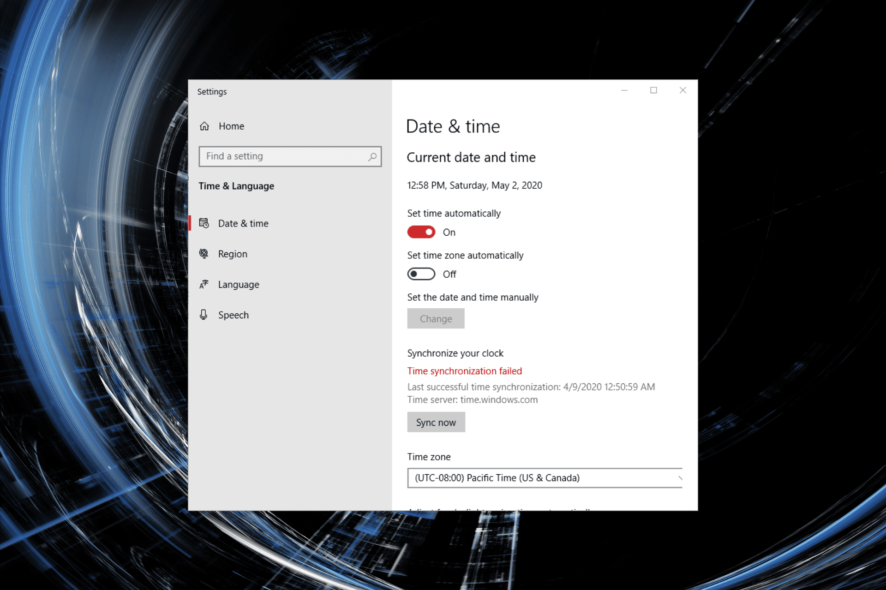
Windows has been using automatic clock syncing for years, but time.windows.com not working is a common issue. You’ll often get a message that reads An error occurred while Windows was synchronizing with time.windows.com.
Here’s how to make it go away:
How to fix time.windows.com not syncing
1. Reconfigure the Windows Time service (Worked best for users)
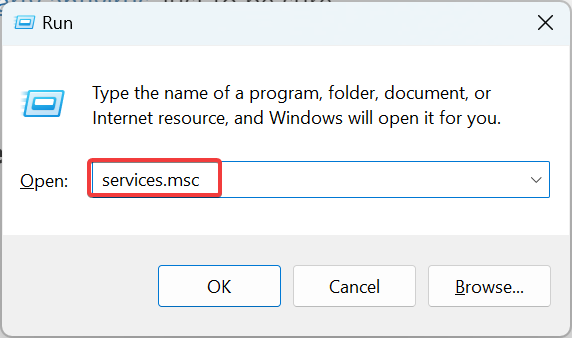
- Press Windows + R to open Run, type services.msc, and hit Enter.
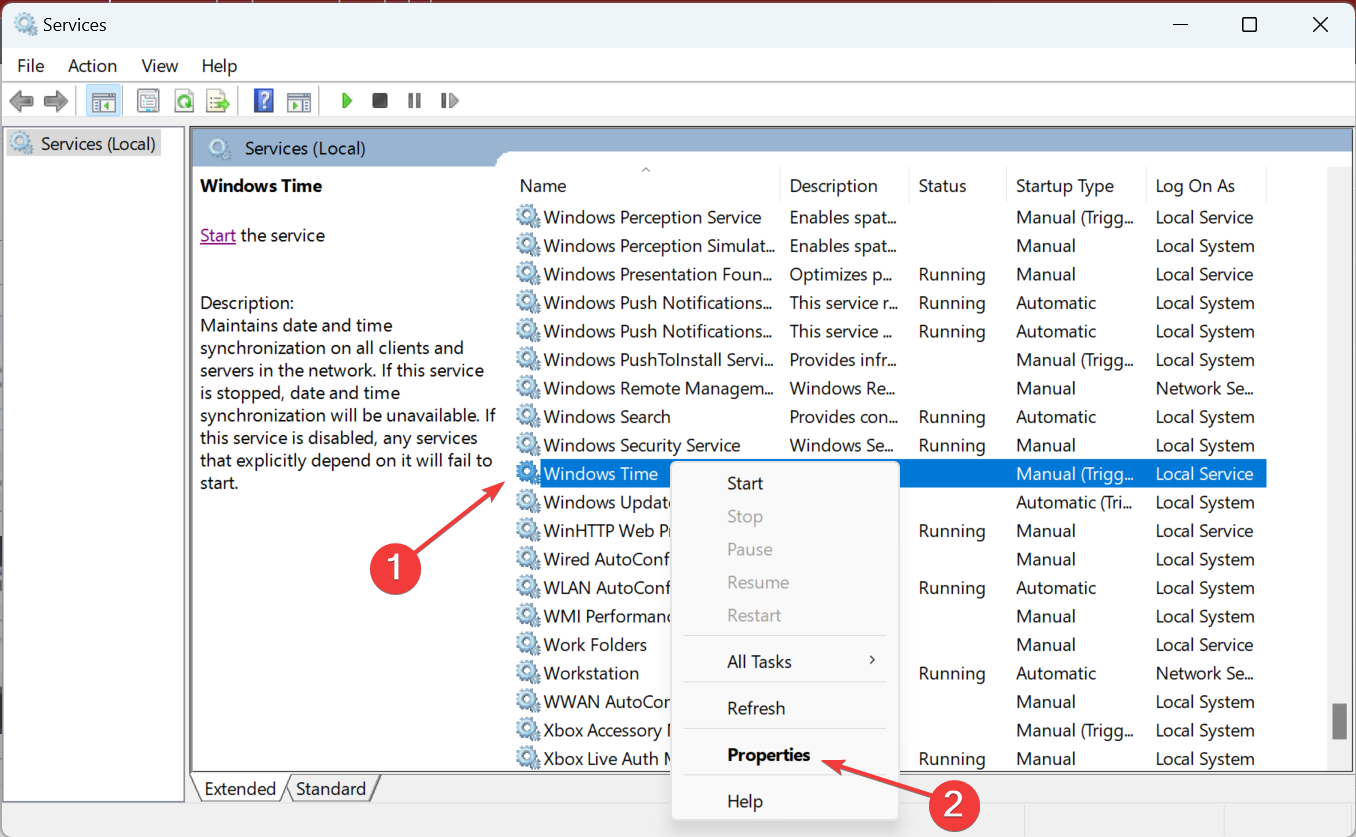
- Locate Windows Time service, right-click on it, and select Properties.
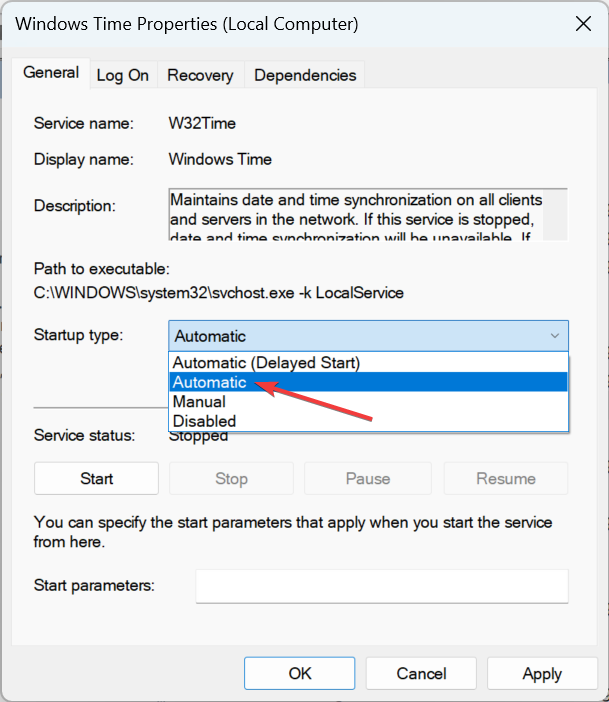
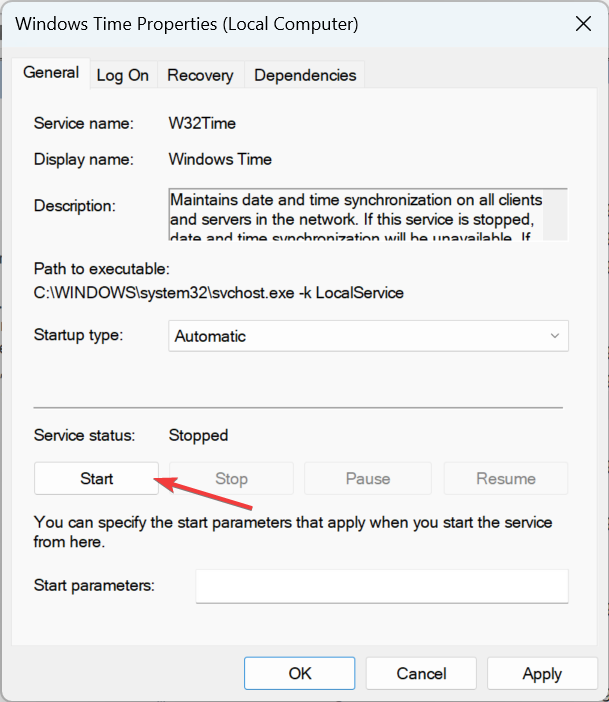
- Choose Automatic from the Startup type dropdown menu.
- Click on Start under Service status.
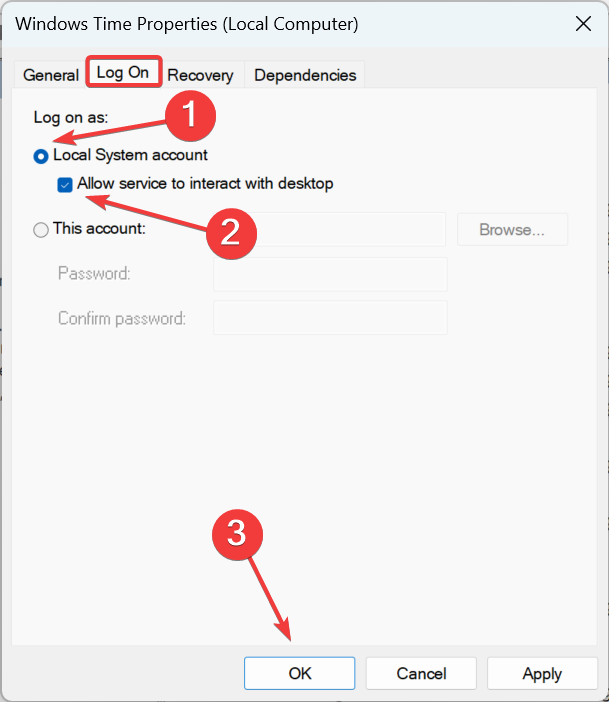
- Head to the Log On tab, select the Local System account option, tick the checkbox for Allow this service to interact with desktop, and then click on OK to save the changes.
2. Use a different server
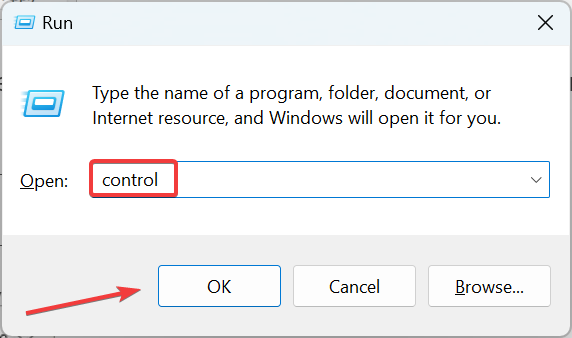
- Press Windows + R to open Run, type control in the text field, and click OK.
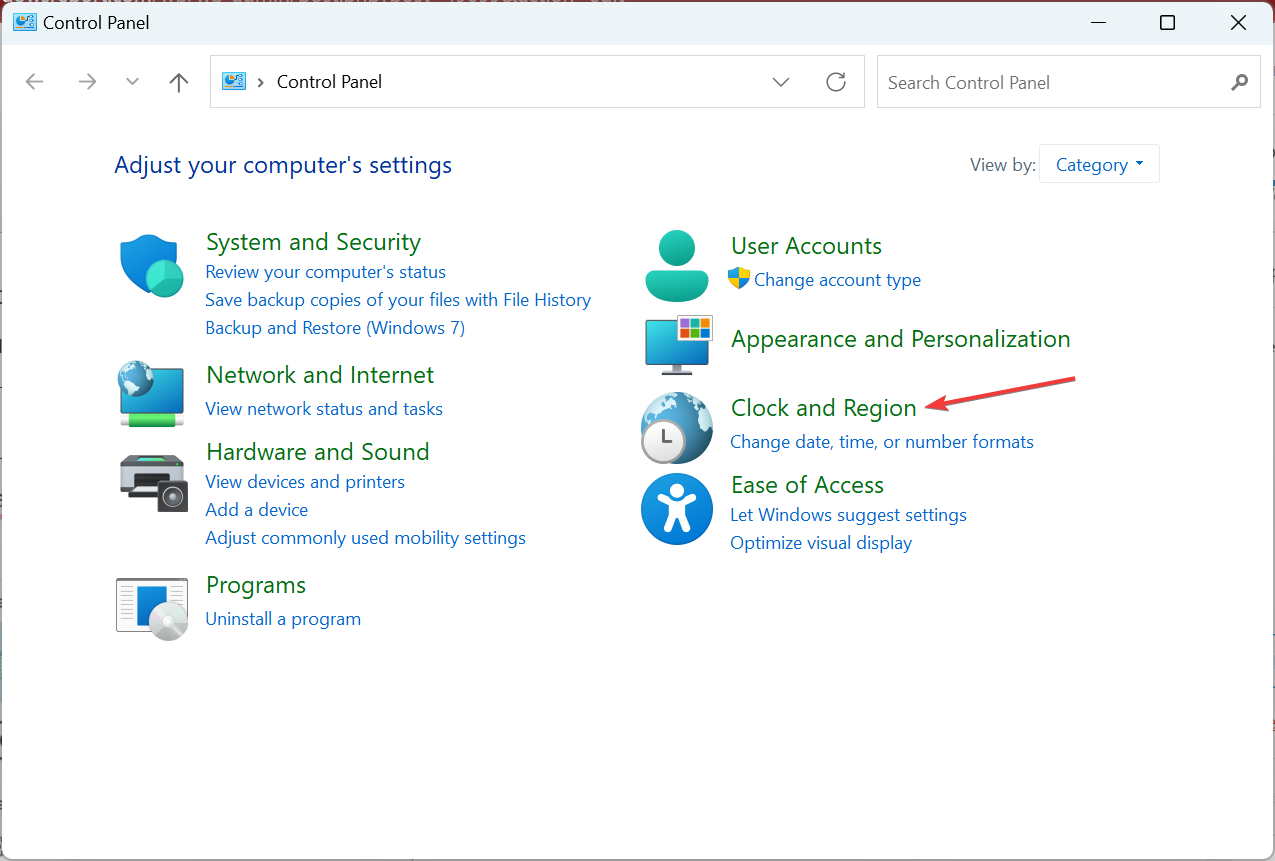
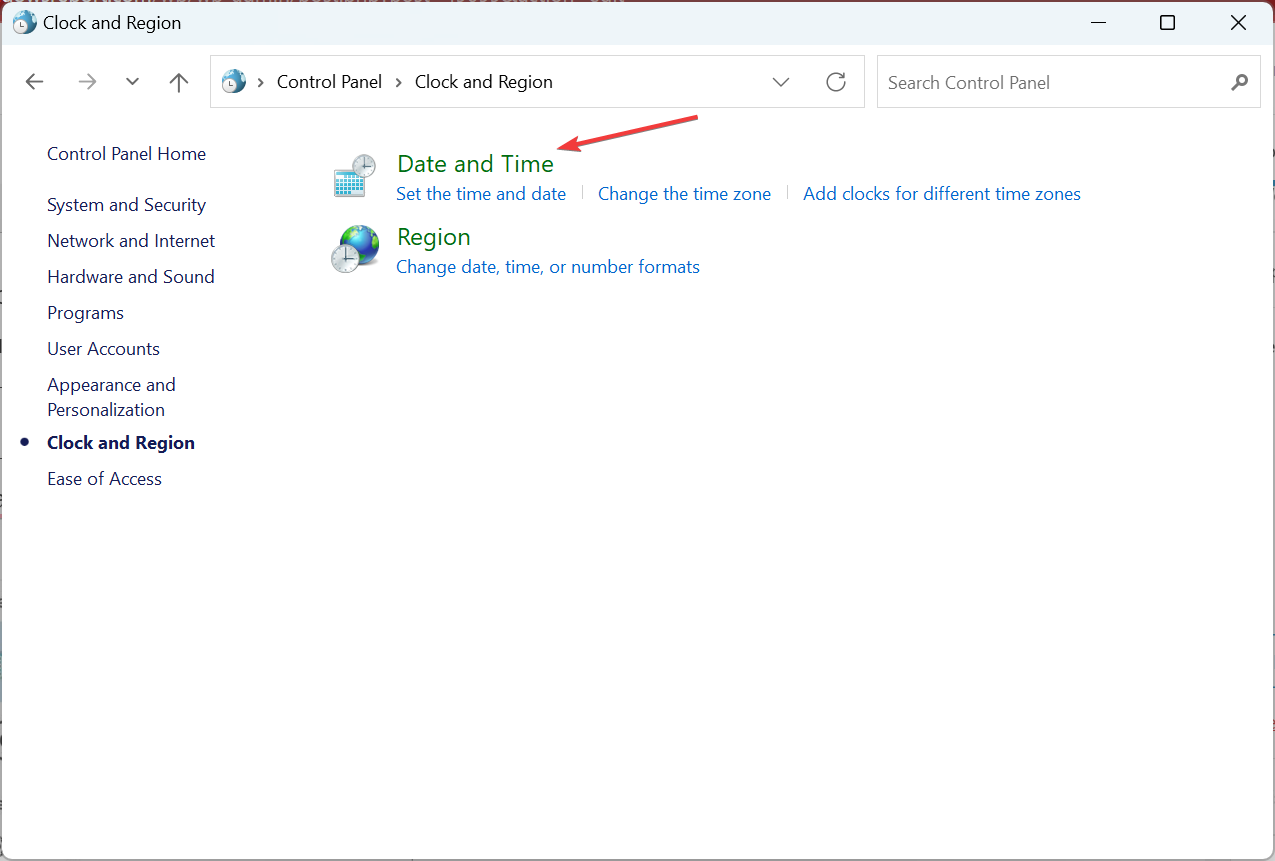
- Click on Clock and Region.
- Now, click on Date and Time.
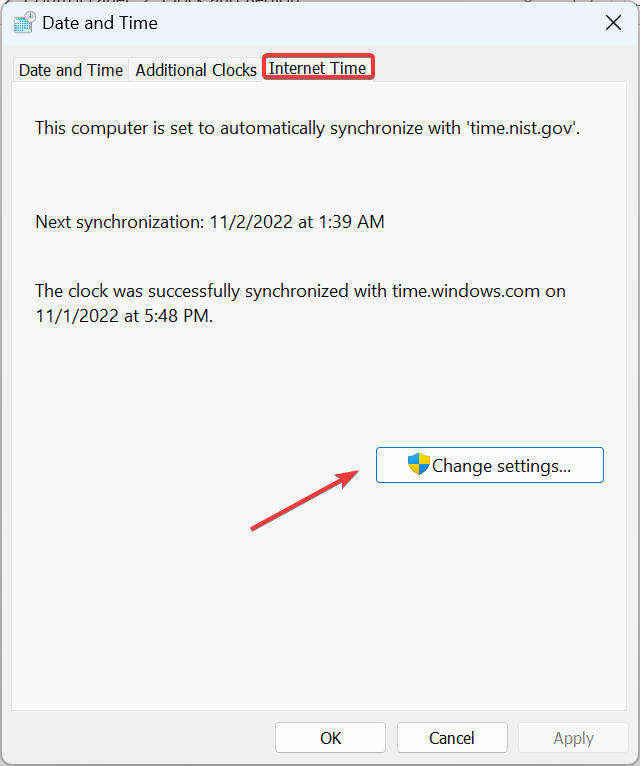
- Navigate to the Internet Time tab, and click on Change settings.
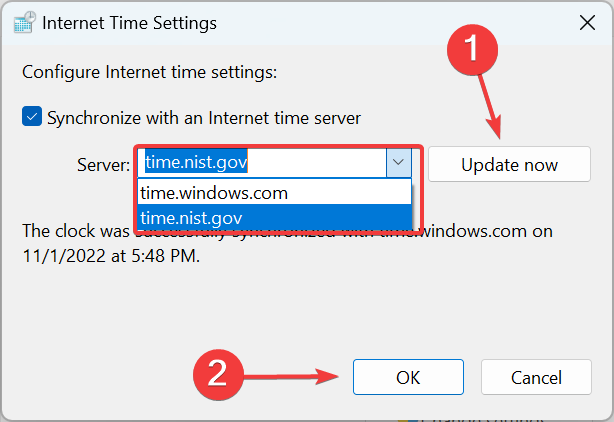
- Choose a different server from the dropdown menu, click on Update now, and then on OK.
- Again, click OK in the Date and Time box.
- Now, check if you can synchronize time without any trouble.
Users reported fixing Windows time not syncing simply by using a different server If the ones available by default don’t work, try these:
- pool.ntp.org
- time-a.nist.gov
- time-b.nist.gov
- time-a.timefreq.bldrdoc.gov
- time-b.timefreq.bldrdoc.gov
3. Run a few commands
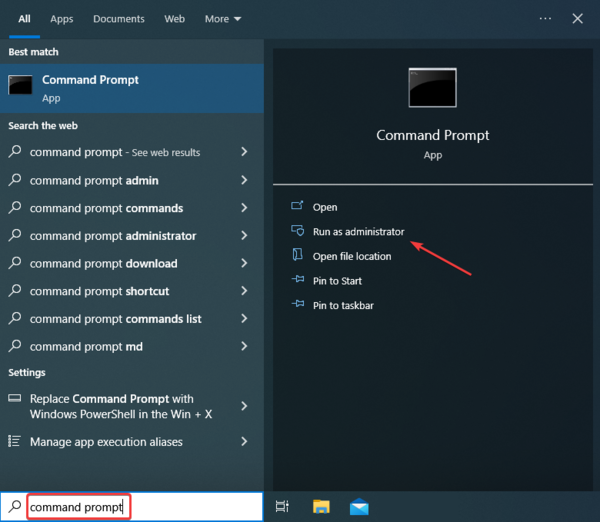
- Type Command Prompt in the Search bar, and click Run as administrator.
- Click Yes in the UAC prompt.
- Now, paste the following commands individually and hit Enter after each:
net stop w32timew32tm /unregisterw32tm /registernet start w32timew32tm /resync
If everything goes well, you should see, The windows Time Service is starting. The windows time service was started successfully.
4. Reset the BIOS
 NOTE
NOTE
- Turn off the computer, then turn it on, and repeatedly hit the F1, F10, or Del key (as the case may be on your PC) as soon as the display lights up to enter the BIOS.
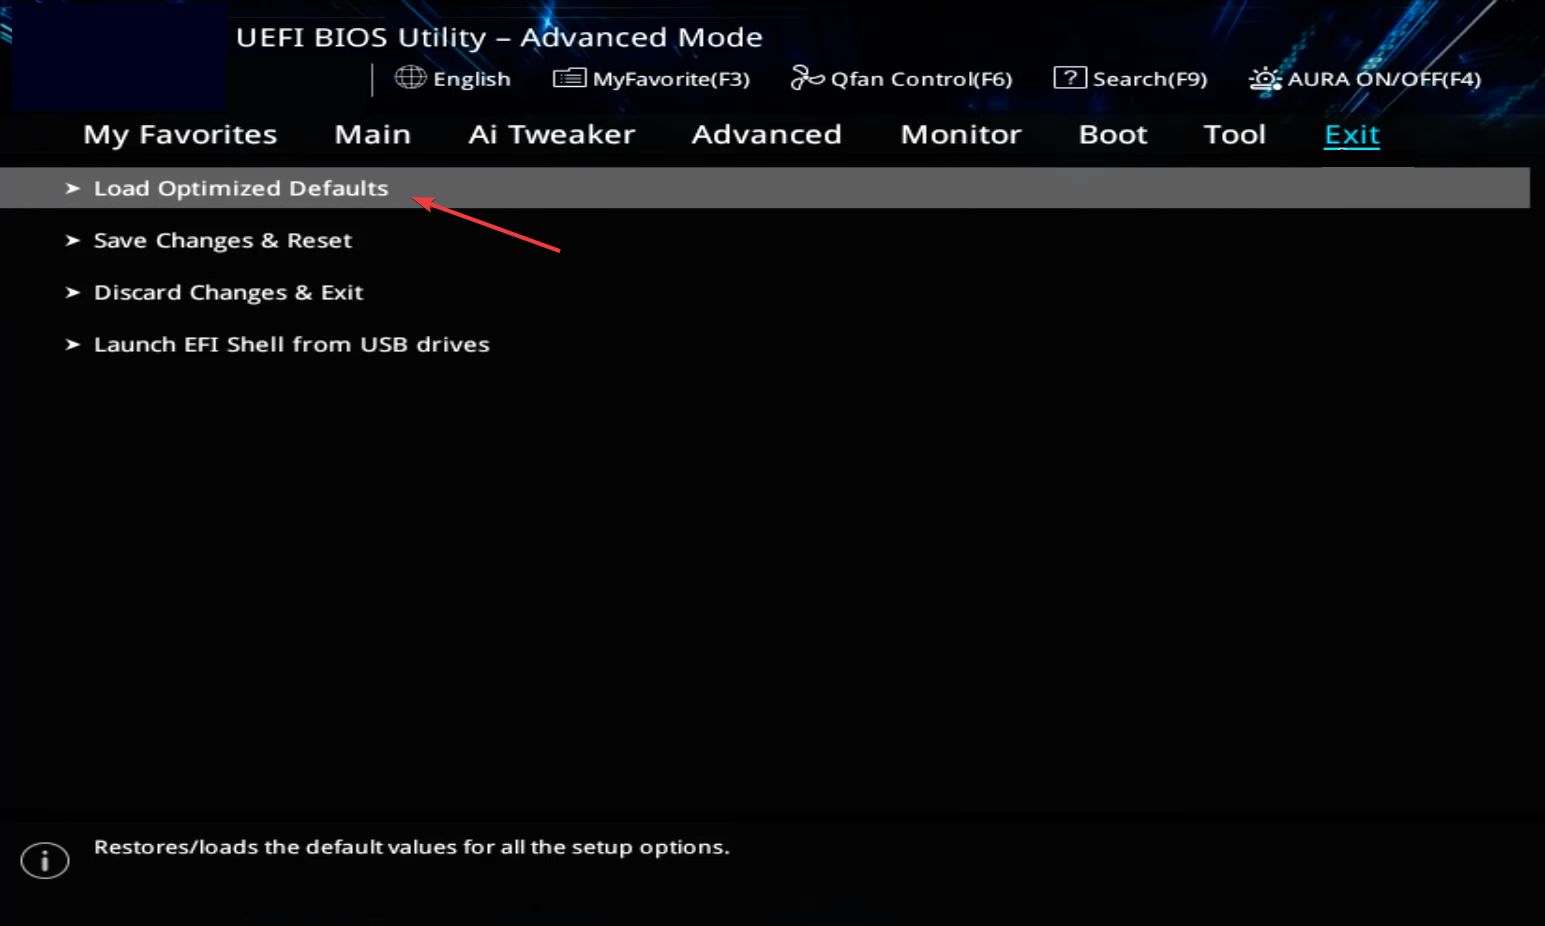
- Now, look through the various tabs for the Load Default Options, Load Optimized Defaults, or Load Setup Defaults option and select it.
- Finally, confirm the change and restart the computer.
- After resetting the BIOS, power off the computer and remove the CMOS battery for around 5-10 minutes, plug it back in, and then turn it on.
The last option in case an error occurs when you synchronize Windows time is resetting the BIOS. Often, the problem lies in the BIOS settings; resetting it is the only way to go.
How to enable automatic sync from settings
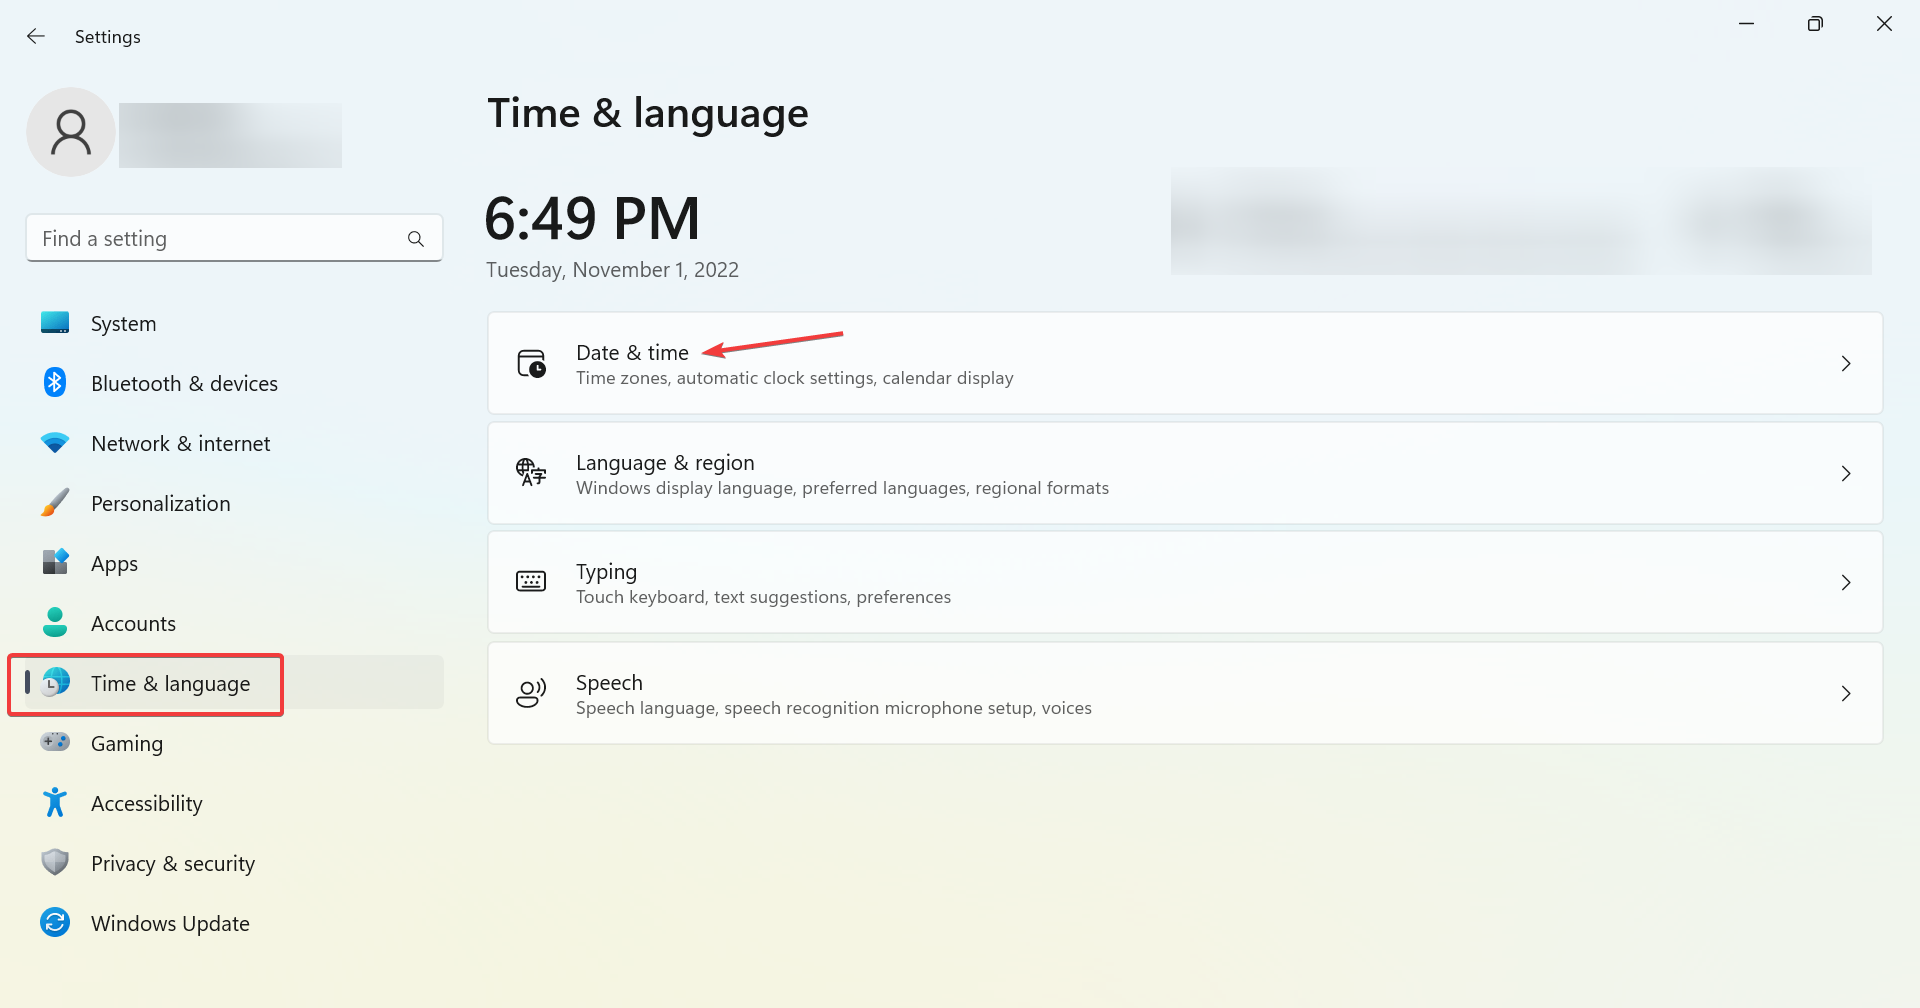
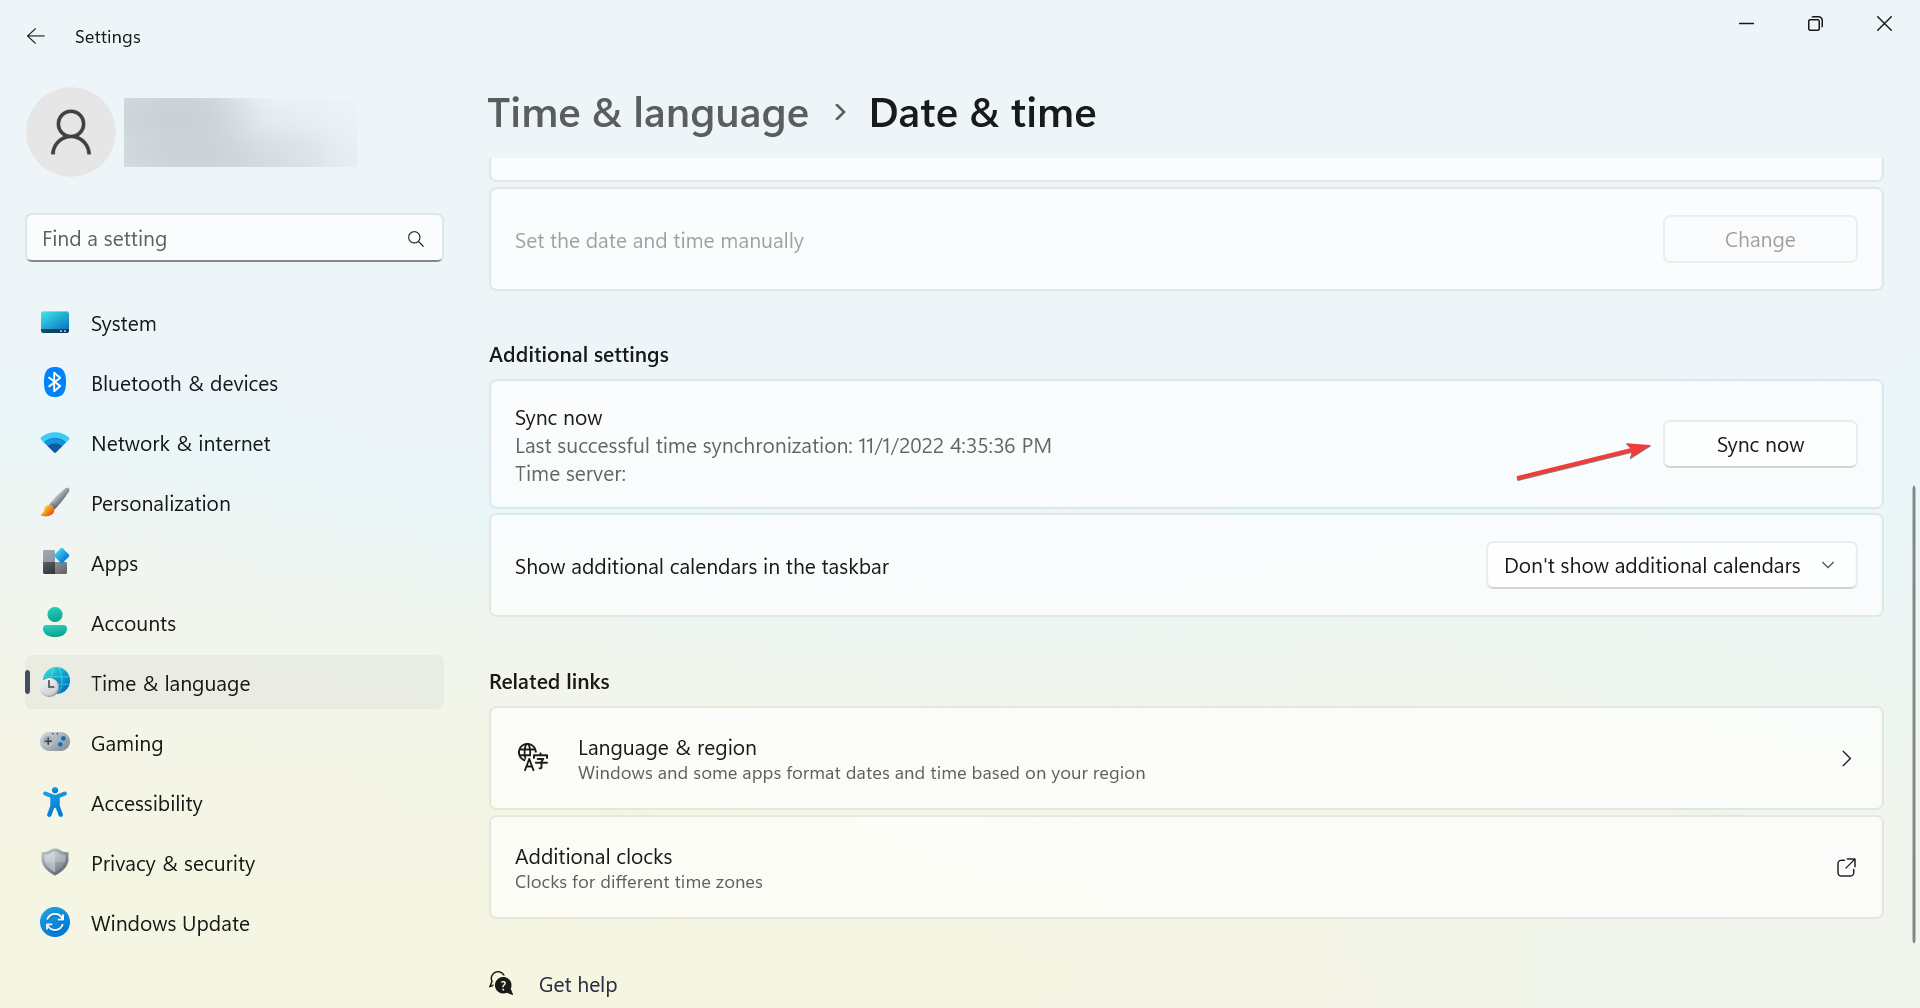
- Press Windows + I to open Settings, select Time & language from the navigation pane, and click Date & time on the right.
- Click on the Sync now button under Additional settings.
- Now, wait for the sync process to complete.
Some of the main reasons why Windows time won’t sync include the fact that the service isn’t running, corrupt system files, interfering apps, or network problems.
With the steps above, the time.windows.com not working should be a thing of the past. If you want to learn more, check out the time.windows.com vs time.nist.gov comparison to see which server will give you the most accurate time.






User forum
14 messages