NVIDIA Control Panel for Windows 10
4 min. read
Updated on
Read our disclosure page to find out how can you help Windows Report sustain the editorial team. Read more
NVIDIA Control Panel facilitates an intuitive graphical interface and easy controls for managing your NVIDIA graphics settings. It’s a software application designed that can tremendously help gamers get the best out of their NVIDIA graphics card, whether we’re talking about low- or high-end PCs.
If you have an NVIDIA GPU, then NVIDIA Control Panel is an excellent assistant. It’s not mandatory to get this tool on your PC, but it’s recommended if you’re looking for a simple way to tweak your graphics settings.
You don’t have to wonder about how to install, update or access NVIDIA Control Panel, nor how to configure its settings since we got you covered. Here’s everything you need to know about this utility.
NVIDIA Control Panel system requirements
- NVIDIA GPU with DCH1 driver installed
- Windows 10 Fall Creators Update or later (version 1803 build 17134 or higher)
- X64 CPU
- 1 Gb RAM
- The Windows Update service must be running
- A working Internet connection
- DirectX 9
NVIDIA Control Panel download & install [step-by-step]
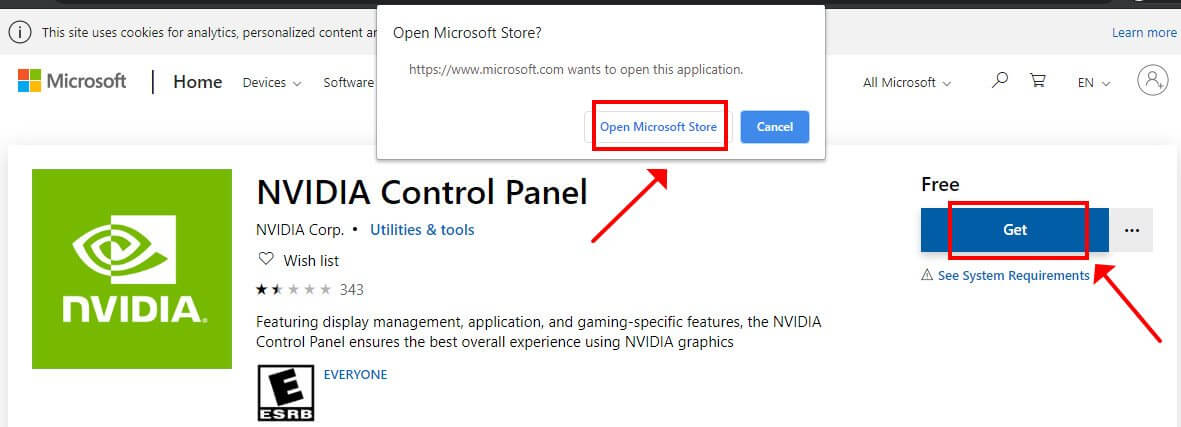
- Visit the NVIDIA Control Panel download page on Microsoft Store.
- Click Get and allow your PC to open Microsoft Store.
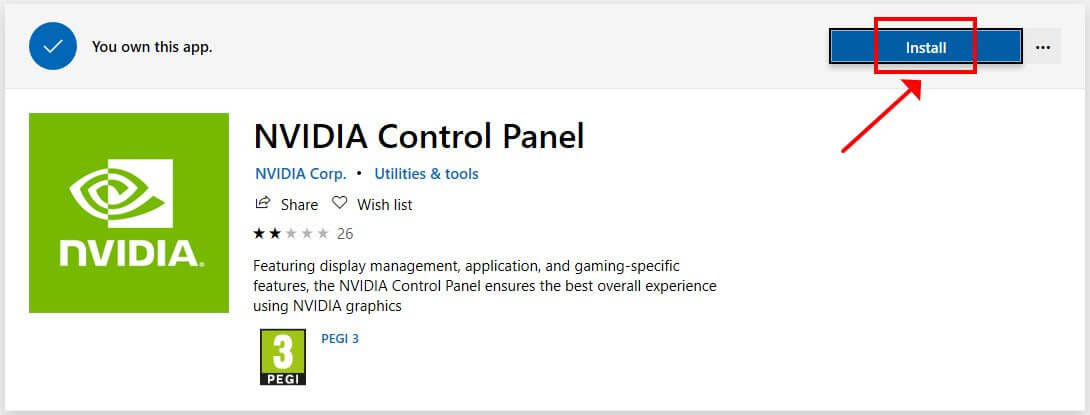
- Log in with your Microsoft account and click Install.
How to update NVIDIA Control Panel
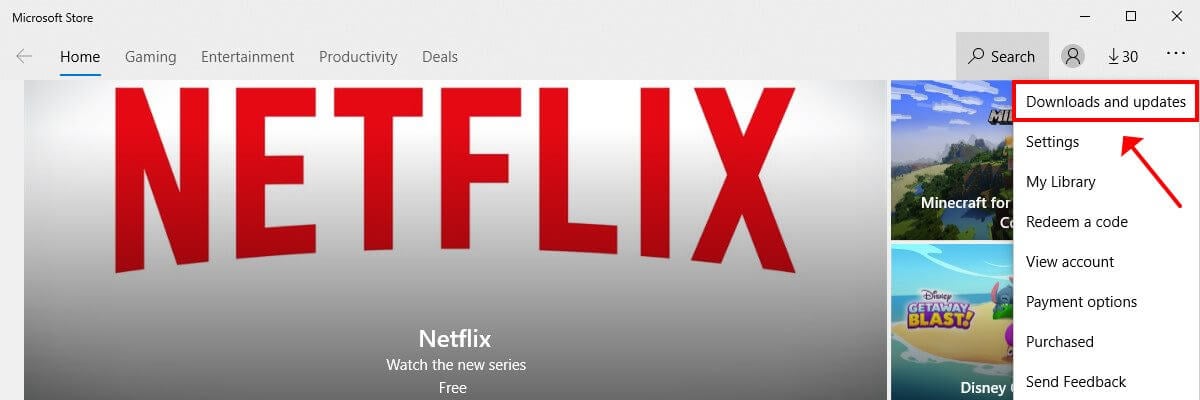
- Open the Microsoft Store app and click the … button on the top-right corner.
- From the menu, select Downloads and updates.
- Click Get updates to update all apps at once, or click the download button next to NVIDIA Control Panel.
If NVIDIA Control Panel crashes or stops working, you can try reinstalling your display drivers and disabling GPU virtualization.
How to access NVIDIA Control Panel
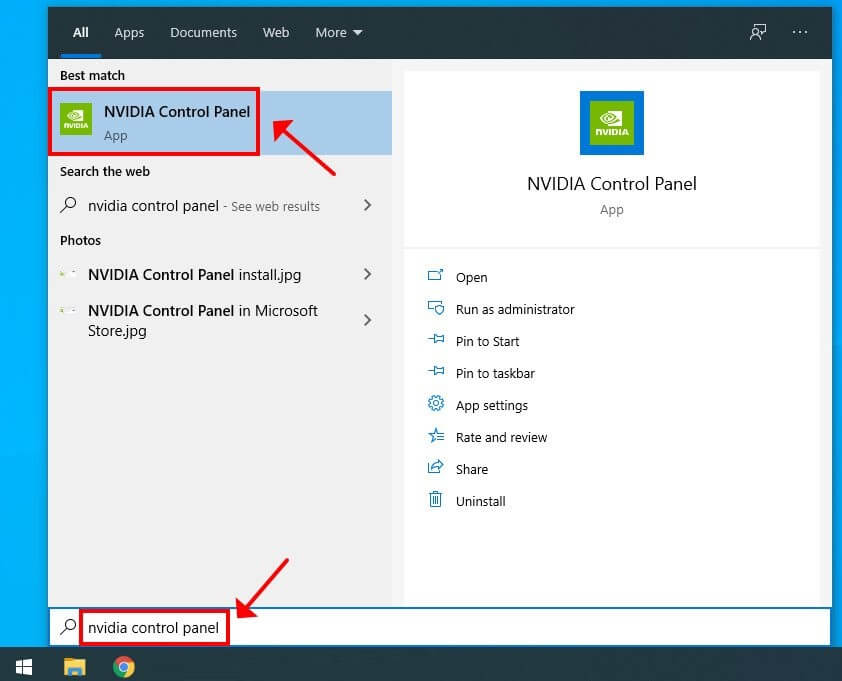
- On Windows 10, click the Start button or press the Win key.
- Type NVIDIA Control Panel in the search box and press Enter.
- You can also right-click an empty spot on the desktop and select NVIDIA Control Panel.
If you can’t access NVIDIA Control Panel, you can check your antivirus, end the NVIDIA Display Contain process, make sure the required services are running, and try other solutions.
Best NVIDIA Control Panel settings for PC performance
- Download the latest NVIDIA drivers, install them on your PC, and then restart your computer.
- Open NVIDIA Control Panel.
- Go to 3D Settings.
- Select Adjust image settings with preview and enable Use the advanced 3D image settings. Click Apply.
- Go to Manage 3D settings and perform the following changes:
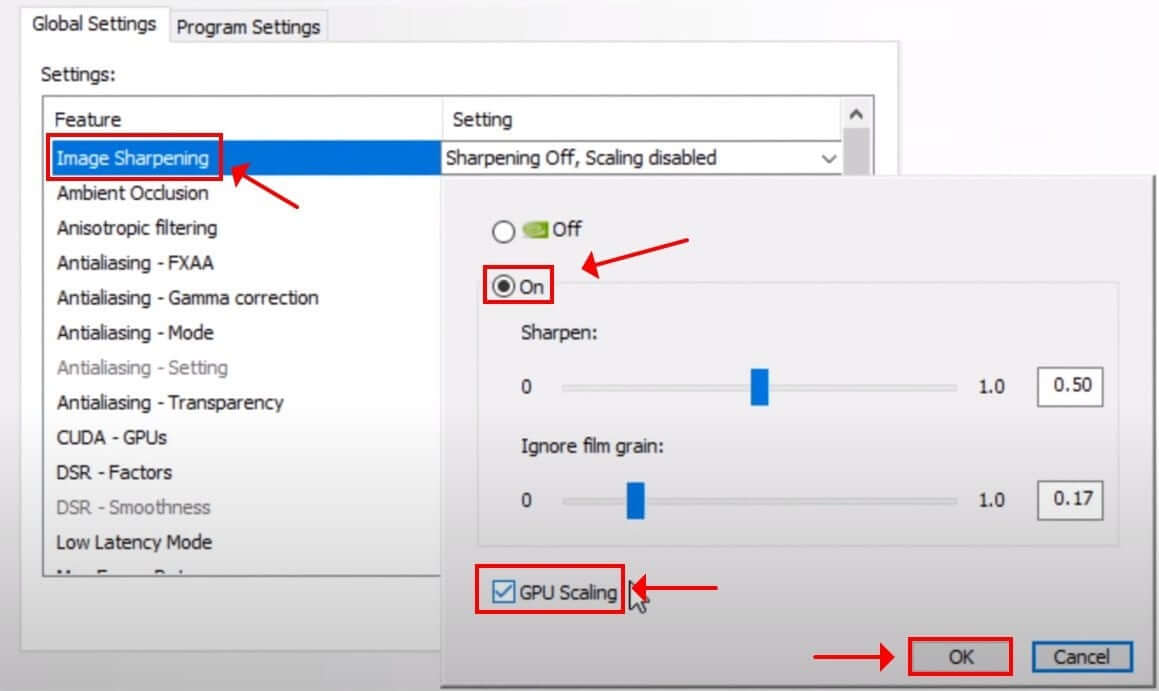
- Turn on Image Sharpening and enable GPU Scaling.
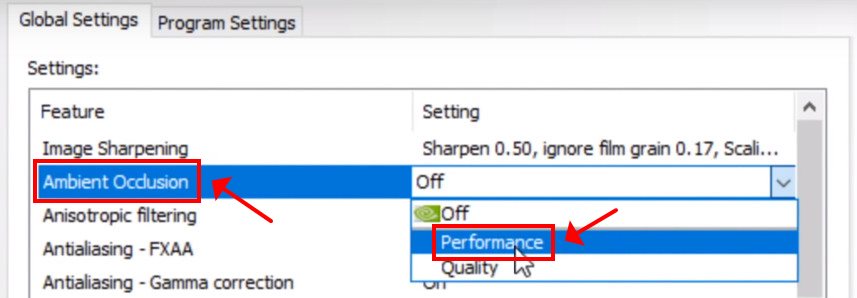
- Ambient Occlusion > Performance.
- Anisotropic filtering > Application-controlled.
- Antialiasing – FXAA > Off.
- Antialiasing – Gamma correction > On.
- Antialiasing – Mode > Application-controlled.
- Antialiasing – Transparency > Off.
- CUDA – GPUs > All.
- DSR – Factors > Off.
- Low Latency Mode > On.
- Max Frame Rate > Off.
- Monitor Technology > Fixed Refresh.
- Multi-Frame Sampled AA (MFAA) > Off.
- OpenGL rendering GPU > your graphic card.
- Power management mode > Prefer maximum performance.
- Preferred refresh rate > Highest available.
- Shader Cache > On.
- Texture filtering – Anisotropic sample optimisations > On.
- Texture filtering – Negative LOD bias > Allow.
- Texture filtering – Quality > High performance.
- Texture filtering – Trilinear optimisation > On.
- Threaded optimisation > Auto.
- Triple buffering > Off.
- Vertical sync > Off.
- Virtual Reality pre-rendered frames > 1.
- Click Apply.
- Turn on Image Sharpening and enable GPU Scaling.
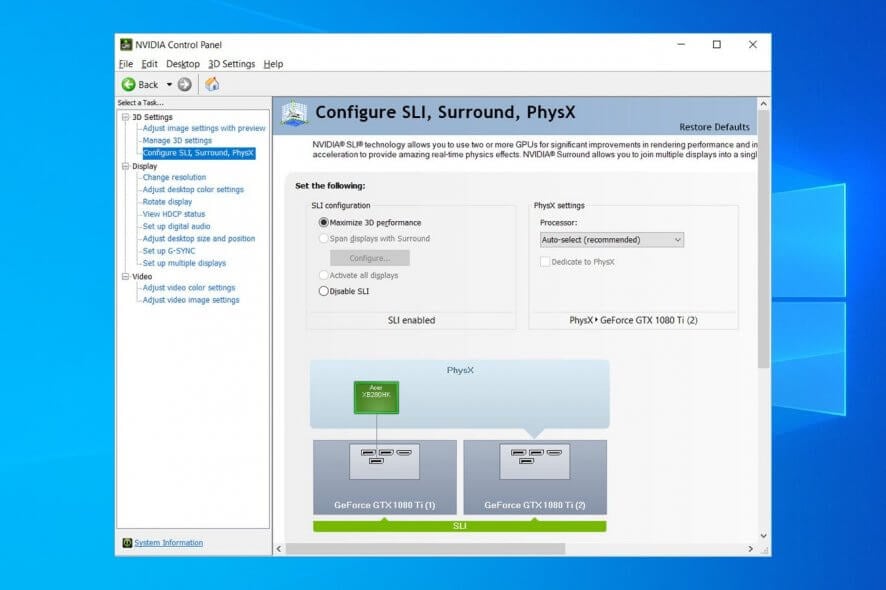
- Go to Configure Surround, PhysX and set Processor to your graphics card. Click Apply.
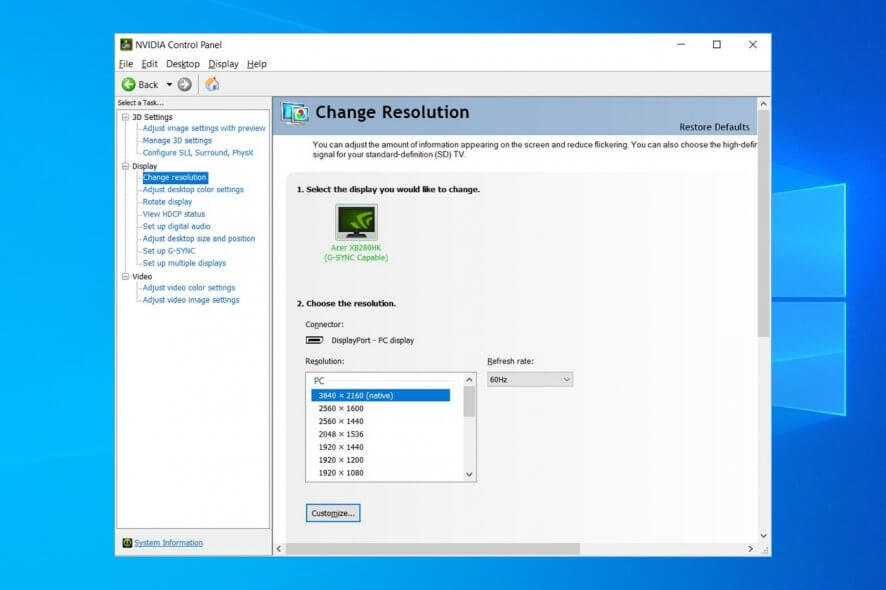
- Go to Change resolution.
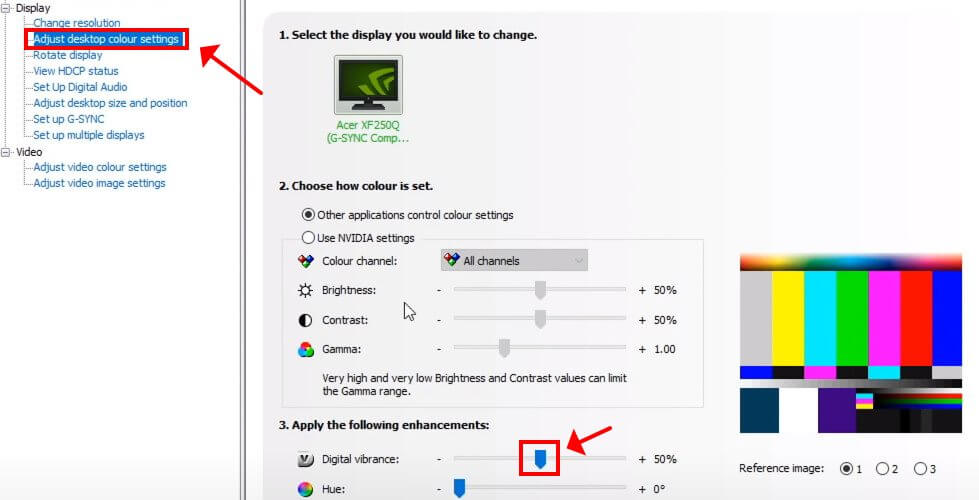
- Go to Adjust desktop colour settings > Apply the following enhancements and increase Digital vibrance. Click Apply.
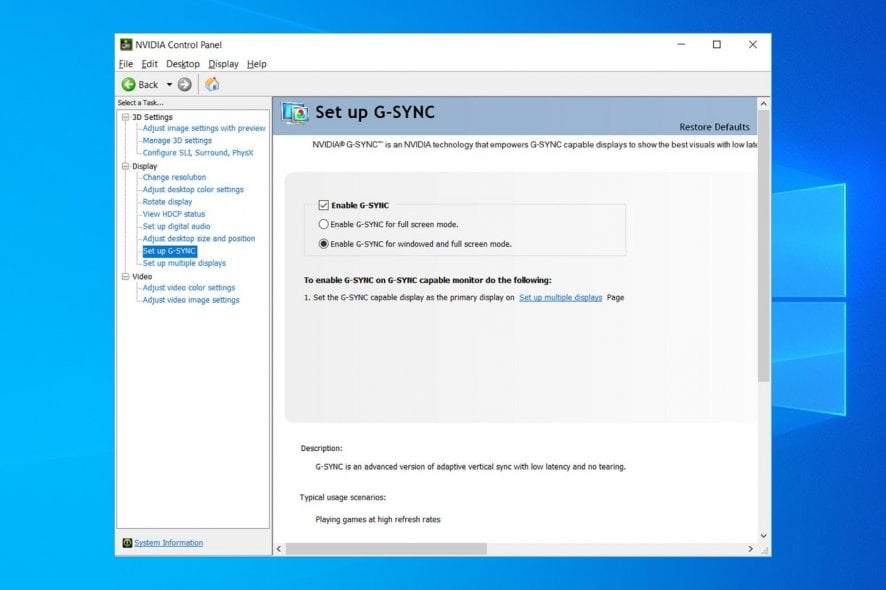
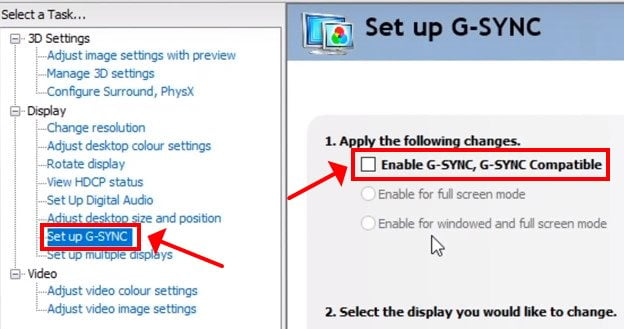
- Go to Set up G-SYNC and turn off G-SYNC, G-SYNC Compatible.
- Go to Adjust video colour settings.
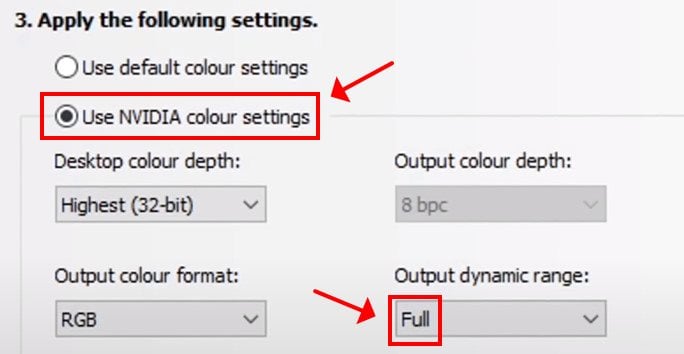
- Select With the NVIDIA Settings.
- Switch to Advanced and set Dynamic range to Full (0-255).
- Click Apply.
- Exit NVIDIA Control Panel and restart your PC.
Overview of NVIDIA Control Panel features
-
- Easily configure image, SLI, surround, PhysX, and image settings
- Change the resolution of all your monitors
- Adjust desktop color settings, size, and position
- Rotate the display and view the HDCP status
- Set up digital audio and G-Sync
- Tweak video image and color settings
- Restore defaults with one click
Screenshots
Our Review
- Pros
- Configure NVIDIA graphics card settings
- Easy to download, install and use
- Excellent settings to improve gaming and PC performance
- Completely free
- Cons
- None
A simple way to configure your NVIDIA graphics card
NVIDIA Control Panel is completely free to use. You can easily download, install, and access it on your PC. The tool can be quickly configured to obtain the best possible settings for gaming and performance so that you can get the most out of your computer without making any changes at the hardware level.
Stay in touch with everything you need to know about NVIDIA graphics cards, including fixes, by bookmarking our NVIDIA Troubleshooting Hub.
FAQ: Learn more about NVIDIA Control Panel
- What is NVIDIA Control Panel?
NVIDIA Control Panel is a lightweight and easy-to-use software solution that enables you to configure NVIDIA graphics card settings. Just make the tweaks you want, click Apply, and restart your PC.
- Where is NVIDIA Control Panel on Windows 10?
If you already have it installed, right-click an empty spot on the desktop and select the tool from there. Otherwise, you can get it from the Microsoft Store and launch it like a regular Store app.
- Where to download NVIDIA Control Panel?
You can download NVIDIA Control Panel from the Microsoft Store. If you can’t download NVIDIA Control Panel, you can try various solutions like deleting temporary files or updating Windows 10.
[wl_navigator]
Full Specifications
- License
- Free to use
- Keywords
- NVIDIA, GPU



User forum
0 messages