Windows Update Error 800B0100: 7 Quick Fixes
Learn what you need to to do resume update installations
4 min. read
Updated on
Read our disclosure page to find out how can you help Windows Report sustain the editorial team. Read more
Key notes
- Windows doesn’t install patch updates when error code 800B0100 arises.
- This guide includes some of the potential fixes for Windows update error code 800B0100.
- Third-party apps are likely to blame for this issue.
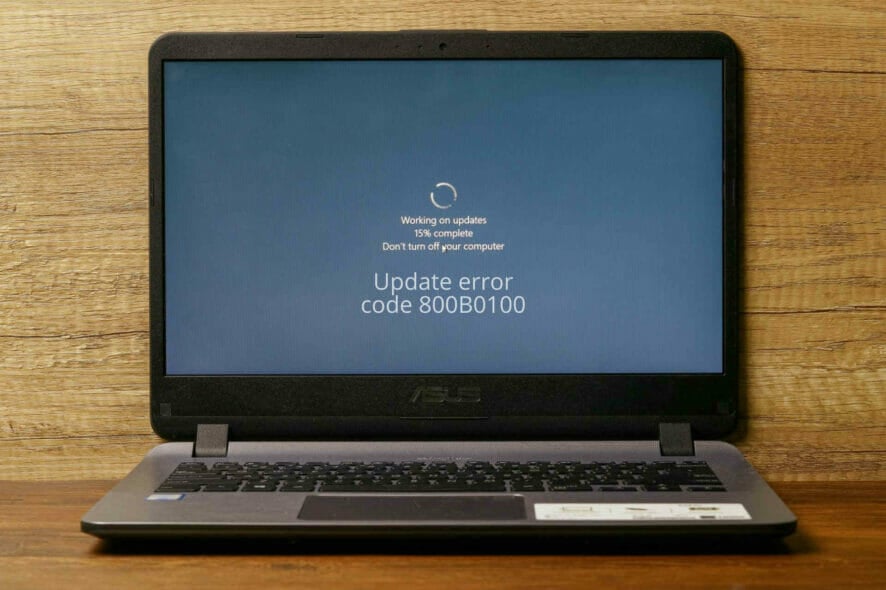
Some users have posted on support forums about a Windows error code 800B0100 issue that arises when they try to install updates.
The error message for that issue looks like this:
Windows Update encountered an unknown error code 800b0100.
Consequently, Windows doesn’t install updates when that issue arises. Read on to find out how to solve this error code on your PC.
How can I fix the error code 800B0100?
1. Run the Windows Update Troubleshooter
- First, click Windows 10’s Type here to search taskbar button.
- Enter troubleshoot in the search utility.
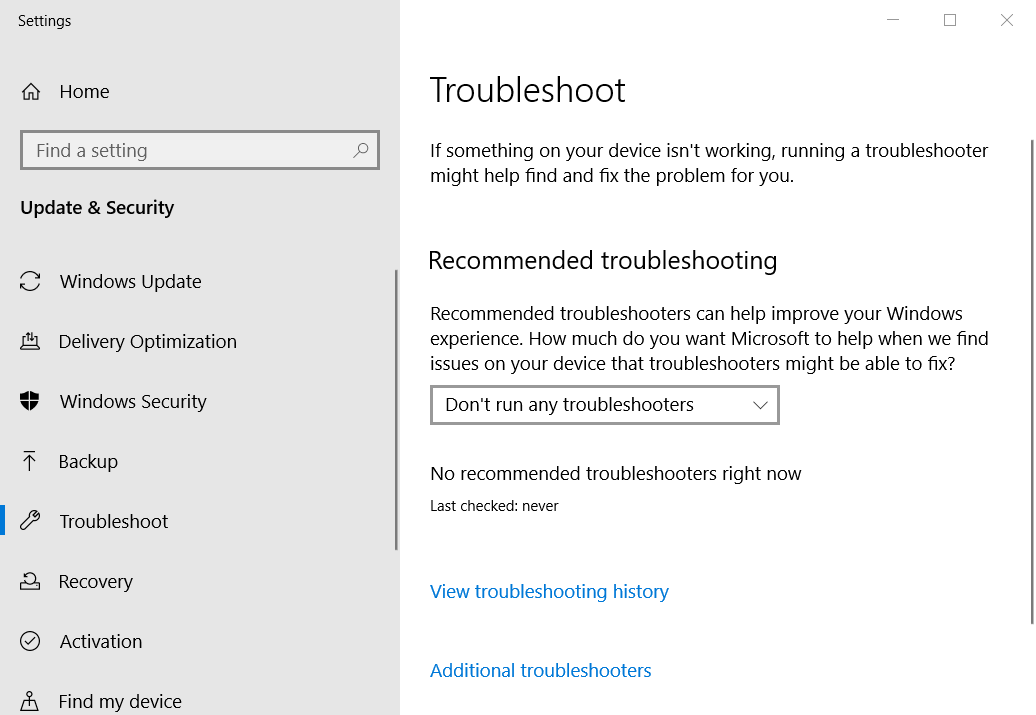
- Click Troubleshoot Settings to open the window in the shot directly below.
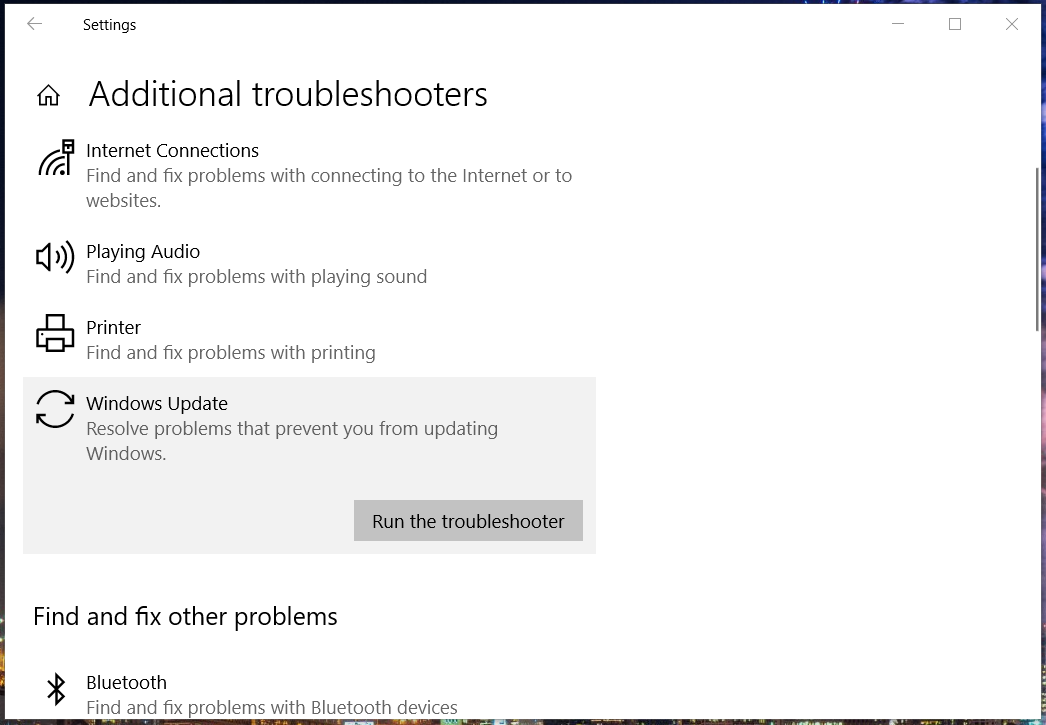
- Next, click Additional troubleshooters to open a list of troubleshooters.
- Press the Run the troubleshooter button for the Windows Update troubleshooter. Thereafter, the troubleshooter might provide some resolutions for the issue.
2. Disable Windows’ firewall
- Open the search utility in Windows.
- Enter firewall in the search box to find Windows Defender Firewall.
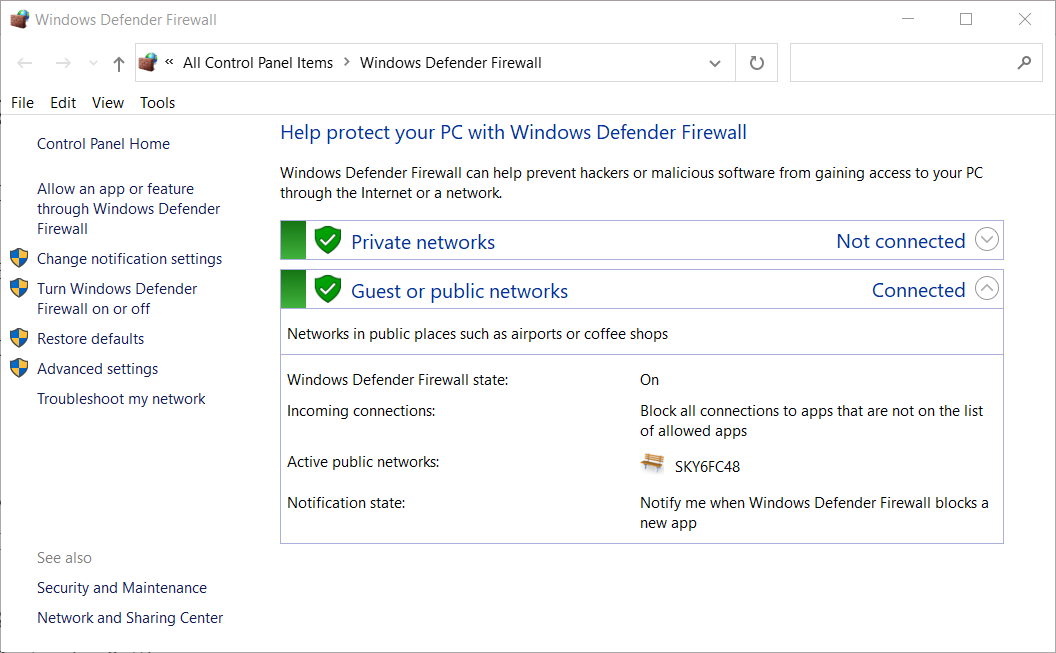
- Click Windows Defender Firewall to open that Control Panel applet.
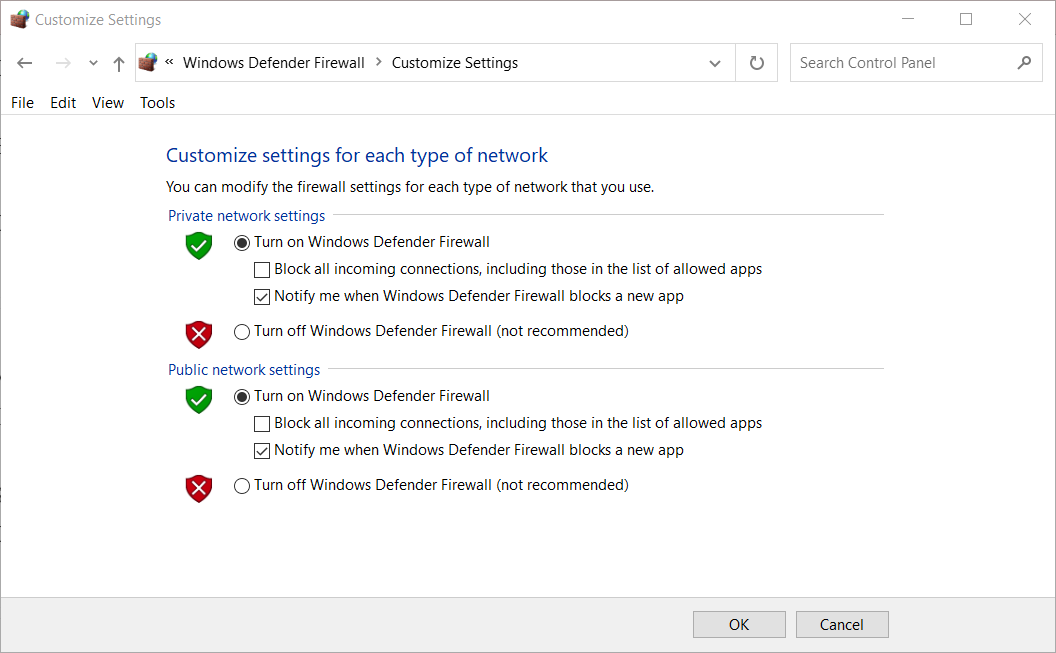
- Next, click Turn Windows Defender Firewall on or off on the left side of the Control Panel.
- Select both the Turn off Windows Defender Firewall options within Customize Settings.
- Click the OK option.
- Thereafter, try updating Windows 10 again.
3. Disable third-party antivirus software
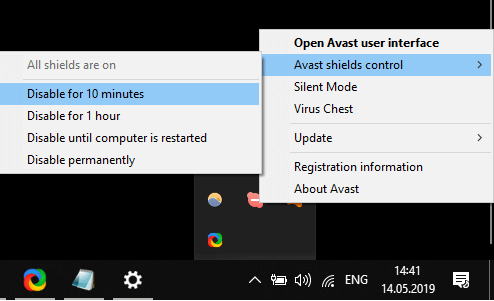
If you have installed third-party antivirus software, try disabling that utility to ensure it’s not conflicting with the update service.
Right-click the system tray icon for your antivirus utility to open its context menu. Then look for and select a context menu option that will temporarily disable the antivirus shield.
4. Clear the SoftwareDistribution folder
- Launch Run with the Windows + R keyboard shortcut for it.
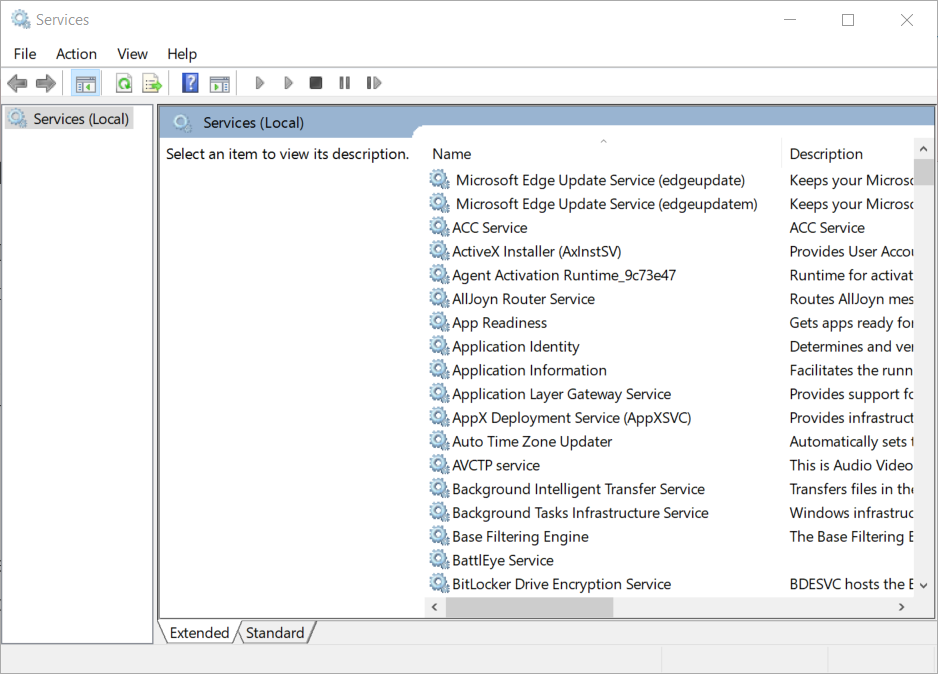
- Type services.msc in your Run accessory and click OK to open the Services window.
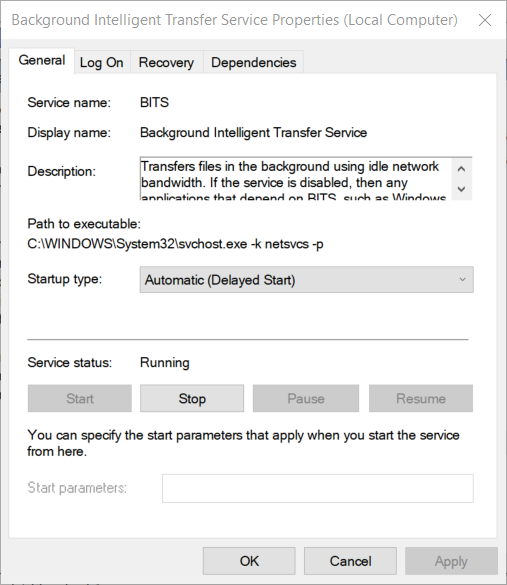
- Double-click Background Intelligent Transfer Service to open the window in the shot directly below.
- Click the Stop button.
- Select the Apply option, and click OK to exit the window.
- Next, double-click Windows Update to open the properties window for that service.
- Select the Stop option.
- Click Apply > OK to save the settings.
- Launch File Explorer by pressing the Windows and E keys at the same time.
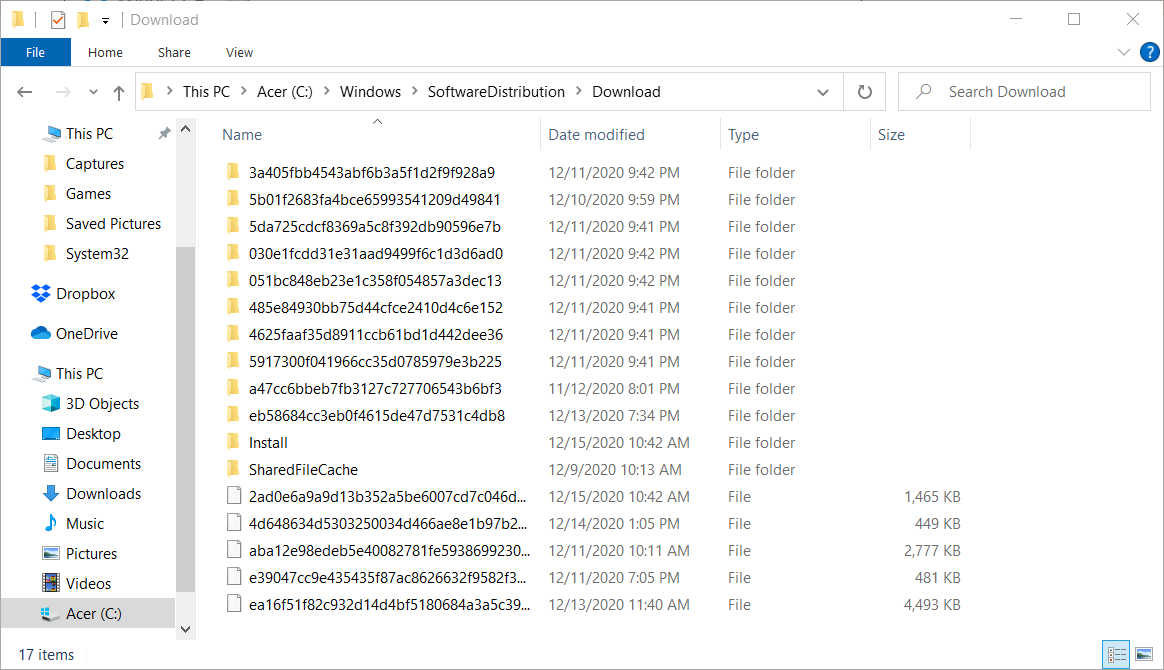
- Next, open this path in File Explorer:
Windows\SoftwareDistribution\Download - Press the Ctrl + A hotkey to select all the Download folder’s content.
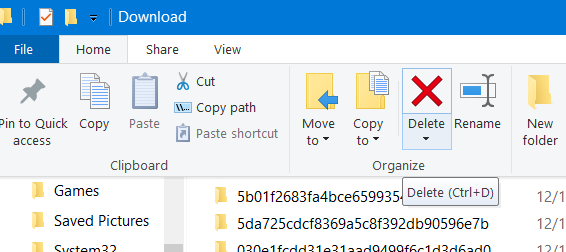
- Select the Home tab.
- Click the Delete button on the Home tab.
- Then return to the Services window.
- Restart the Windows Update and BITS services by clicking the Start buttons on their properties windows. Remember to click Apply after selecting to restart them.
5. Run a system file scan
- Type the keyword Command Prompt in Windows’ search utility.
- Right-click Command Prompt in the search results and select Run as administrator.
- First, input this Deployment Imaging command and press Return:
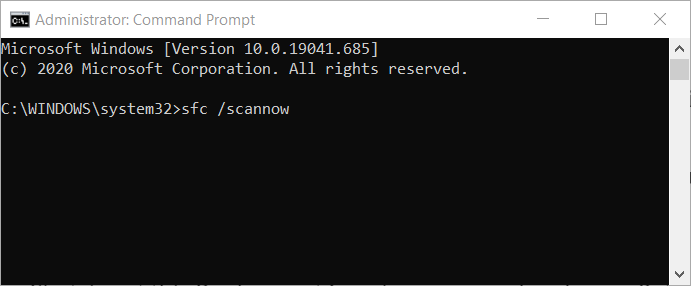
DISM.exe /Online /Cleanup-image /Restorehealth - Thereafter, type in the following System File Checker command:
sfc /scannow - Press Enter to start the SFC scanning.
- When the scan has finished, restart Windows if it repaired files.
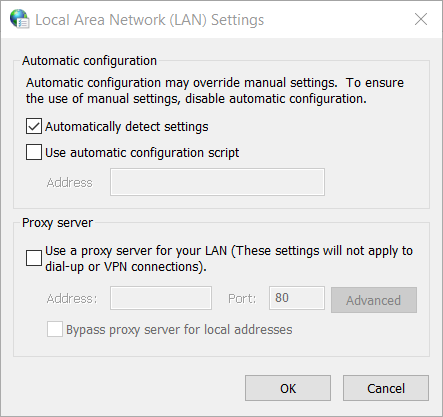
6. Disable proxy server
- Open Run’s text box, which you can launch with the Windows key + R hotkey.
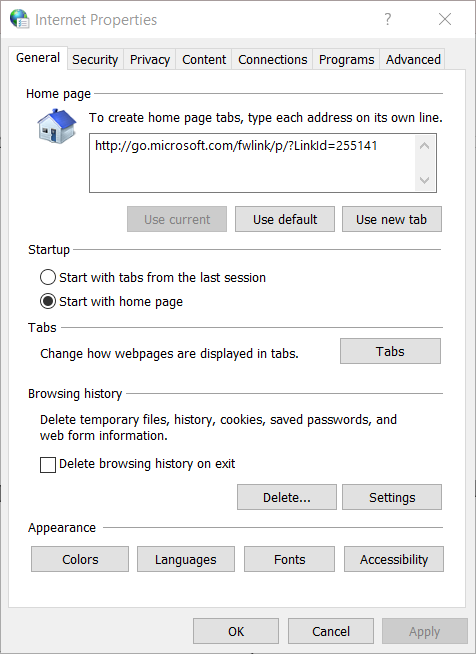
- Input inetcpl.cpl in Run’s text box and press Enter to open Internet Properties.
- Click LAN settings on the Connections tab.
- Deselect the Use a proxy server for your LAN option if it’s selected.
- Select the OK option to close the window.
- Press the Apply button on the Internet Properties window.
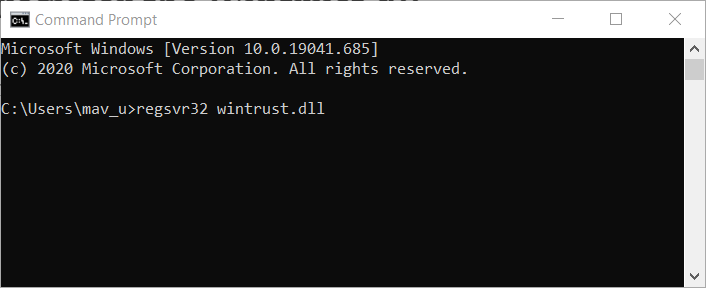
7. Re-register the Wintrust.dll
- Open Run in Windows as outlined for the first step of resolution six.
- Input cmd in the Open box.
- Press the Ctrl + Shift + Enter hotkey to launch an elevated Command Prompt.
- Type in this command and press the Enter key:
regsvr32 wintrust.dll - Then type in these separate commands to rename the catroot2 folder:
net stop cryptsvc
ren %systemroot%\system32\catroot2 oldcatroot2
net start cryptsvc
Those are some of the fixes that can feasibly resolve error code 800B0100.
Note, however, that you can also manually install updates from the Microsoft Update Catalog.
Enter the update code for the update you can’t install in the search box there to download and install it.



User forum
0 messages