5 Quick Ways to Install Printer Drivers in Windows 7
Learn to install drivers for your new printer
4 min. read
Updated on
Read our disclosure page to find out how can you help Windows Report sustain the editorial team. Read more
Key notes
- There are various ways you can install printer drivers in Windows 7, so take a look at our article.
- As expected, you can utilize third-party software to install printer drivers in no time.
- To install local printers in Windows 7, you may also use the handy built-in printer wizard.
- Users can easily install printer drivers by taking advantage of the platform’s built-in device utility.
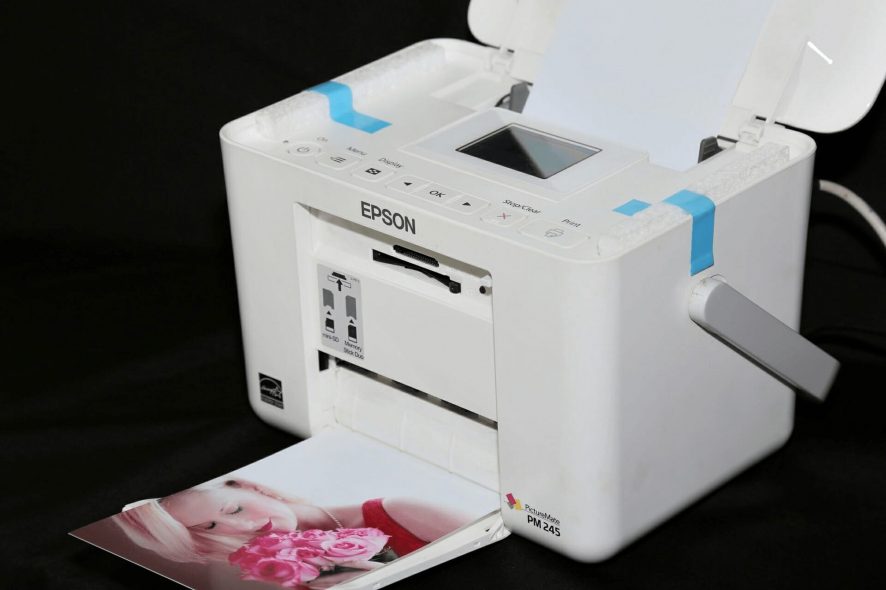
Windows 7 still has a big user count even though Microsoft no longer supports it. Although it’s an older platform, you can still install printer drivers in Windows 7 much the same as in Windows 10.
Although you can’t install a new printer driver with Settings in Windows 7, that platform still includes the Control Panel.
How can I install a printer driver in Windows 7?
Users need to both install drivers for new printers and update them for old ones. These are the various ways you can install drivers for newly purchased printers and install the latest drivers for printers within Windows 7.
We also have an article on how to install printer drives in Windows 11 that you can check out.
1. Use a reliable driver updater tool
If you want to check if there are newer drivers to install for your printer, run a driver updater software scan. A driver updater scan will show you what devices on your PC have outdated drivers. Then you can download and install the latest driver for your printer with the driver updater utility.
Using such specialized software is the best method to manage your missing drivers or just update the old ones from the official producers’ sources.
More so, you should take advantage of the following tool if you need the maximum capacity of your hardware components, including your printer device.
2. Take advantage of the Add Printer wizard
- Click the Windows 7 Start button.
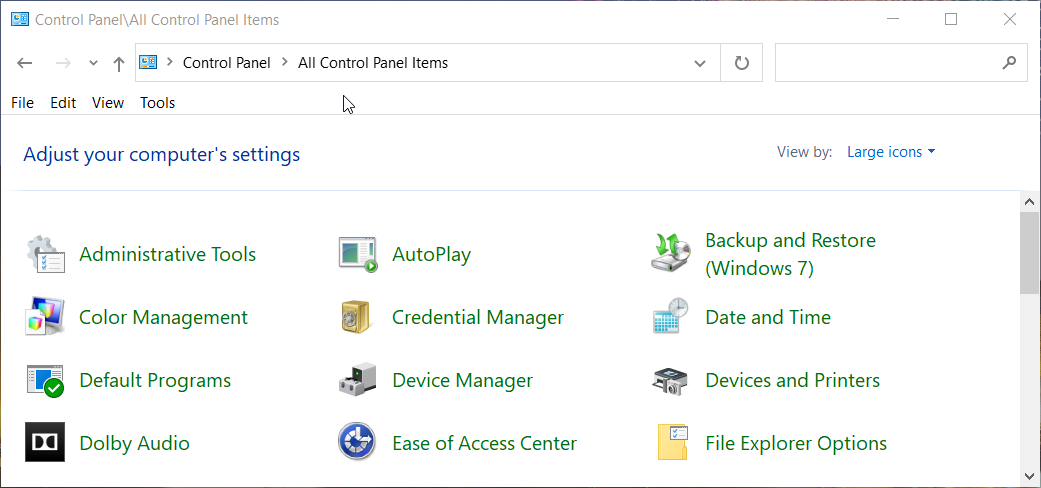
- Enter Control Panel within the search box on Windows 7’s Start menu.
- Then click on the app to open it.
- Select Large icons on the View by menu.
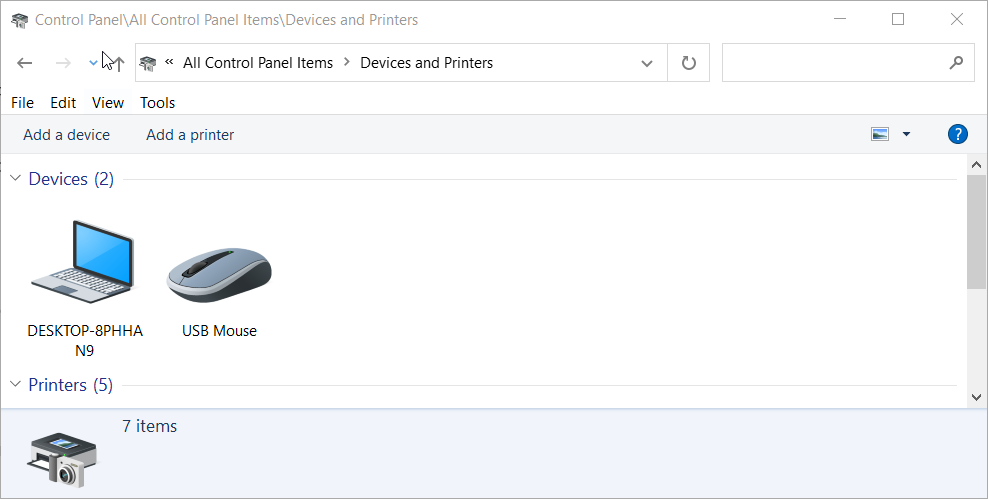
- Next, click Devices and Printers to open the applet shown directly below.
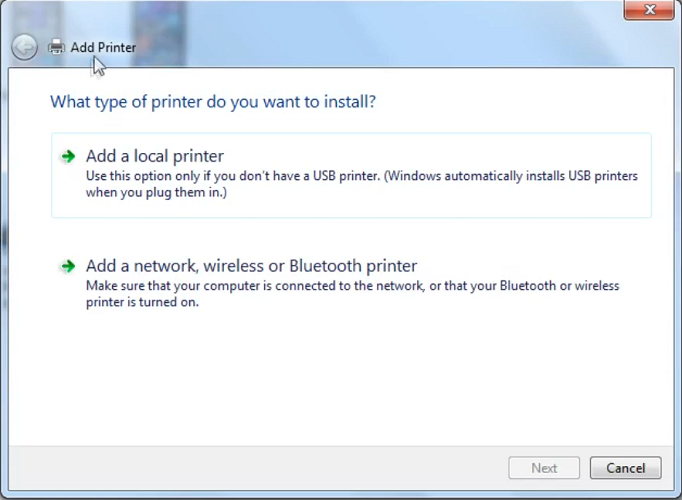
- Press the Add a printer option to open the window in the screenshot directly below.
- Select the Add a printer option if you don’t have a USB printer.
- For a wireless or Bluetooth printer, select the Add a network, wireless, or Bluetooth printer option. Note that your Bluetooth or wireless printer will need to be turned on when you select that option.
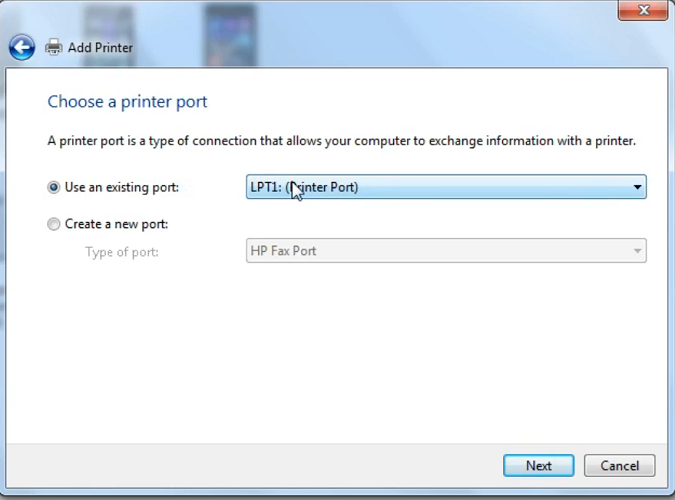
- If you selected the first option, you’ll need to select the Use existing port setting and choose an appropriate port on the drop-down menu. Then click the Next button.
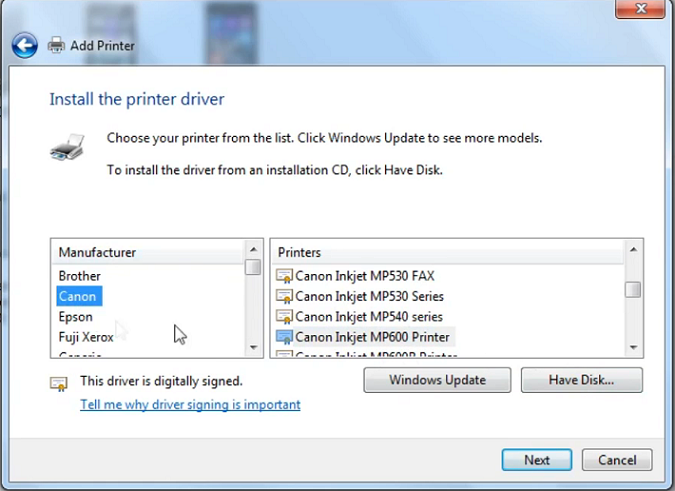
- Thereafter, select your printer’s manufacturer and a driver to install for it on the right of the window.
- Press the Next button to proceed to the last step of the wizard.
- Enter a name for your printer in the text box.
- Click Next to install the drivers.
- Thereafter, you can skip over optional printer sharing settings; and click the Finish button.
Most of the printers released over the last three years or so are probably USB ones. Drivers for USB printers get automatically installed when users plug the printers into PCs.
The method above is more applicable for installing drivers for older printers or wireless ones.
1. Open Run with the Windows + R hotkey.
2. Type this command into Run:
devmgmt.msc3. Click OK to open Device Manager.
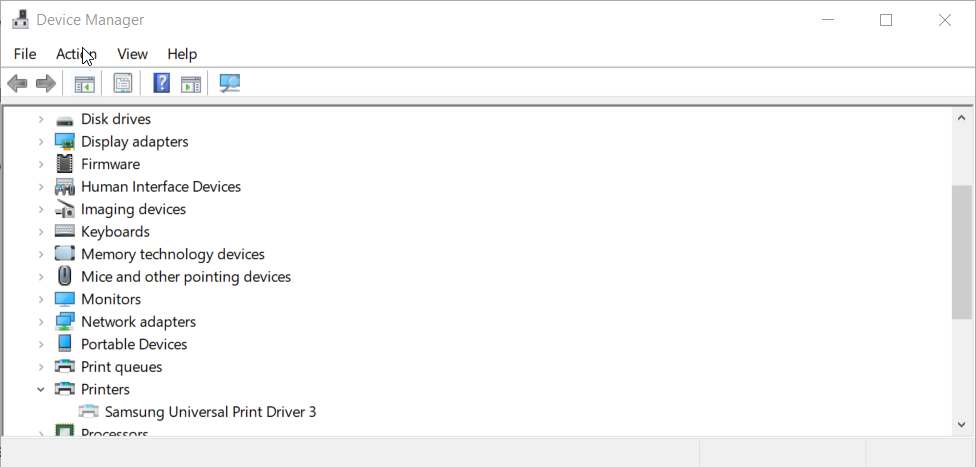
4. Double-click the Printers category.
5. Right-click your listed printer and select the Update driver option.
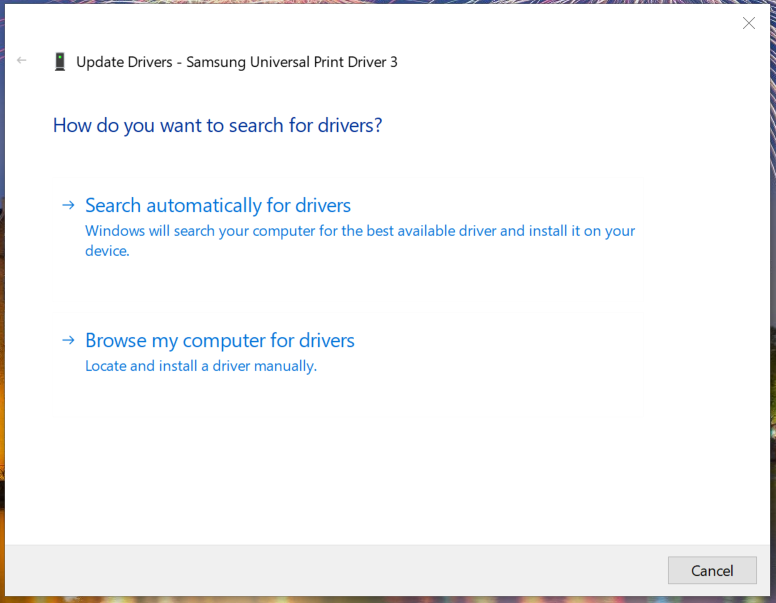
6. Select the Search automatically for drivers option in the window shown directly below.
7. Windows will then download and install a new driver for your printer.
3. Install printer drivers in Windows 7 with Device Manager
A classic and easy method to download and install a printer driver on your Windows 7 device is via Device Manager. All you need to do is locate your printer in the devices list and configure Windows to automatically search a driver for it.
4. Download printer drivers from manufacturer websites
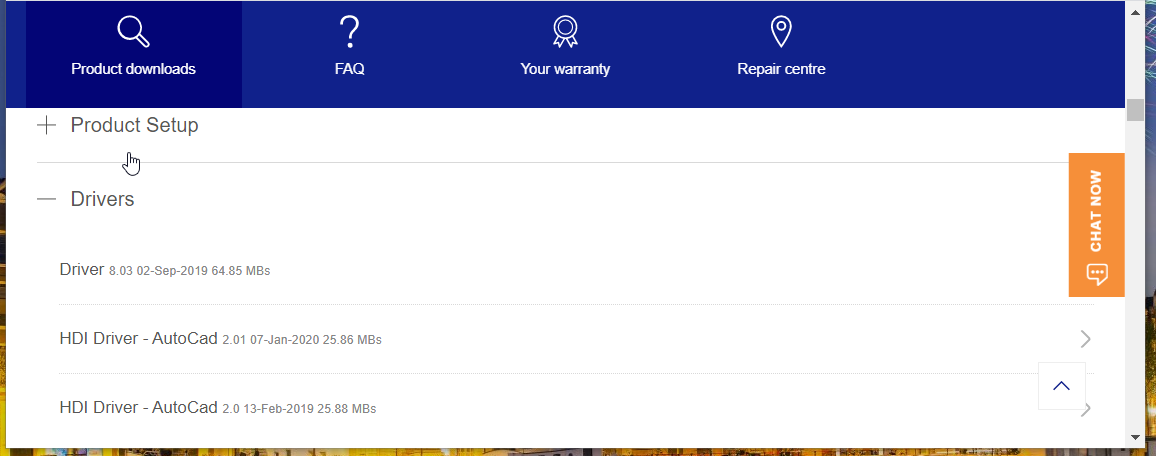
- You might find there is a newer driver available for your printer on the printer manufacturer’s website. To check, open your printer manufacturer’s website in a browser.
- Open the driver download section of the printer manufacturer’s website.
- Enter your printer’s model within the search box on the website, and click the Search button.
- Then browse through the list of driver downloads for your printer, and select to download the latest compatible driver for it.
- Thereafter, open the folder you downloaded the printer driver to.
- Click the installer.exe file for your downloaded printer driver to install it.
 NOTE
NOTE
5. Install Windows 7 drivers with a DVD that came with the printer
DVDs are in obsolescence, and most USB printers probably don’t come with driver discs these days. If your printer does happen to have a driver installation DVD, however, insert that disc into your PC’s CD/DVD drive.
When you insert it, an installation wizard will probably then automatically open. So, there are a few different ways you can install PC drivers in Windows 7.
For driver update purposes, you can utilize driver updater software and Device Manager or manually download and install new ones. Let us know your choice in the comments area below.





User forum
0 messages