How Do I Use Aiseesoft Screen Recorder with Audio? [Easy Way]
It's never been easier to record your screen with audio ?
![]() 5 min. read
5 min. read
![]() Updated on
Updated on
Share this article
Improve this guide
Read our disclosure page to find out how can you help Windows Report sustain the editorial team. Read more
Key notes
- If you want to record your screen with audio, Aiseesoft Screen Recorder will help you do that very easily.
- In fact, with this tool, you can capture everything on your desktop, including your webcam.
- The options include setting up the caption frame resolution and mouse cursor tracking.
Whether you want to produce great tutorials for your readers or fans, record your gameplay to show them your skills, or just show someone a trick, you will need a good screen recorder.
Screen recorder software can be pretty difficult to use and sometimes you will get lost through their settings.
That’s why we’re going to show you an easy way of recording your desktop using a great tool called Aiseesoft Screen Recorder.
⏺️How can Aiseesoft Screen Recorder help you to record the screen?
The purpose of Aiseesoft Screen Recorder is pretty obvious from its name but it does a lot more than record your screen or desktop.
➡️ It captures any activity on your PC, including a video call, a webcam, and your gameplay and it does all that at the exceptional video quality.
For instance, it is very useful for recording a lecture or a presentation, taking snapshots, or even recording your voice.
➡️Moreover, you can highlight the cursor movement during the screen capturing so that viewers can see it a lot better.
➡️The tool comes with a dedicated game recorder that captures the sound from the game and your mic simultaneously.
➡️Plus, it supports GPU acceleration to record the game without lag and webcam overlay for adding great commentary during the most exciting scenes.
So, the possibilities are only limited by your creativity and, as you will see next, it’s also extremely easy to use.
How to use Aiseesoft Screen Recorder to record my screen with audio?
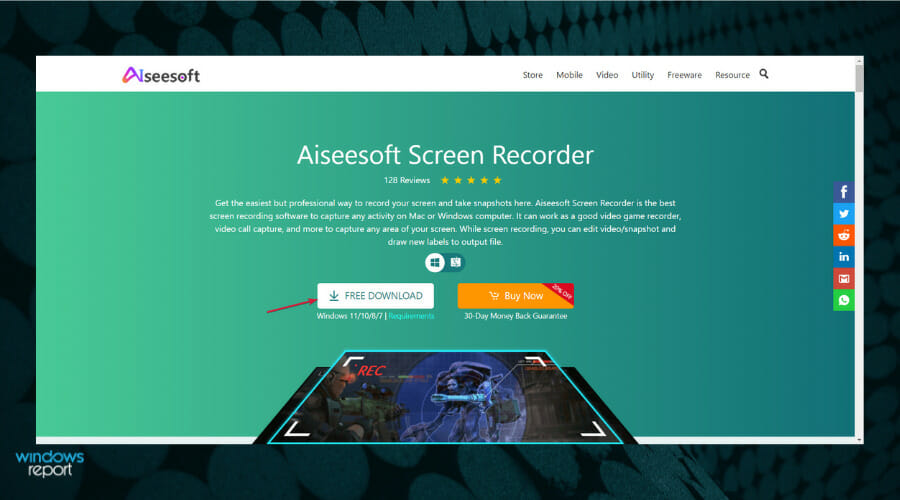
- Go to the dedicated Aiseesoft website and hit the Free Download button.

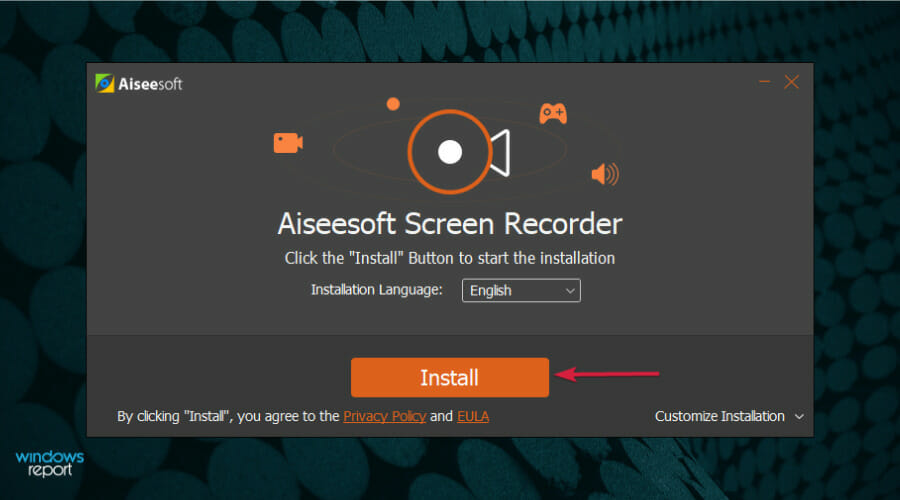
- You will receive the installer file and after you run it, click on Install.
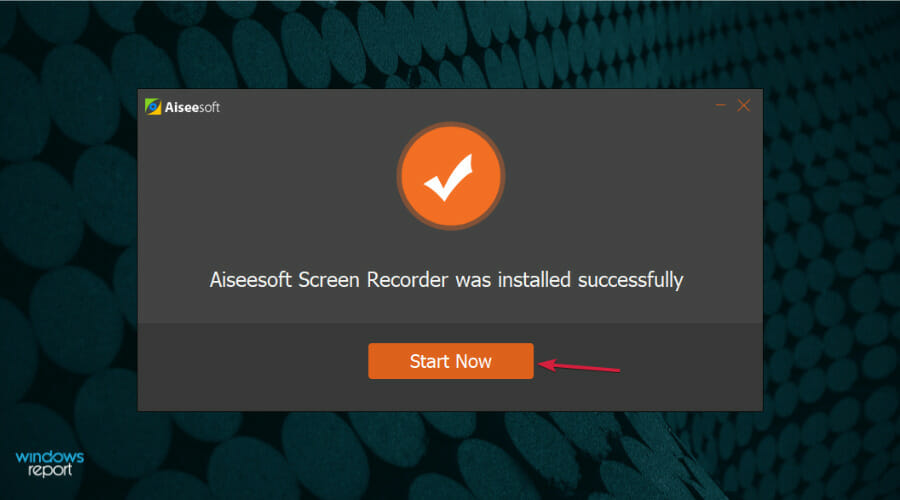
- After a few seconds, you will be prompted that the installation was successful so click the Start Now button.
- Now, you will be able to choose if you want to run the Free Trial version, to purchase or to register your product if you already bought the licence from the website.
- Next, you even get to choose between two skin options. We chose Elegance, of course, then hit OK.
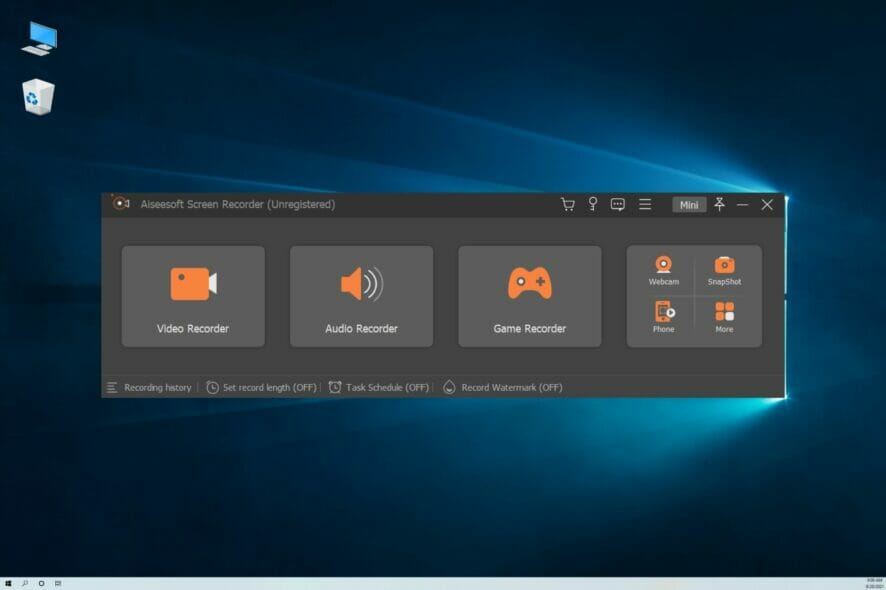
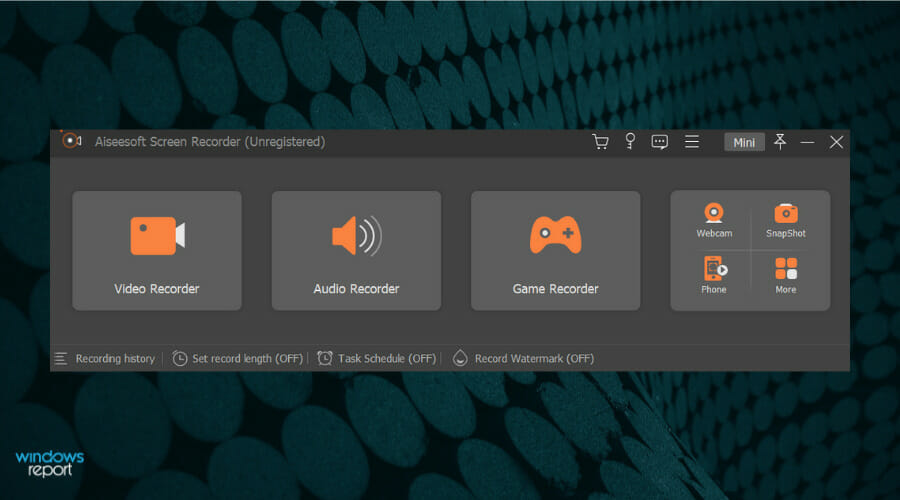
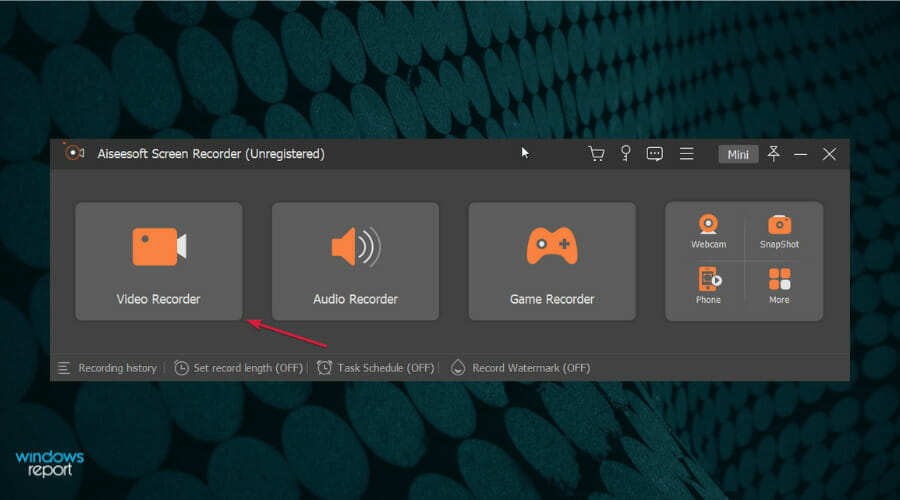
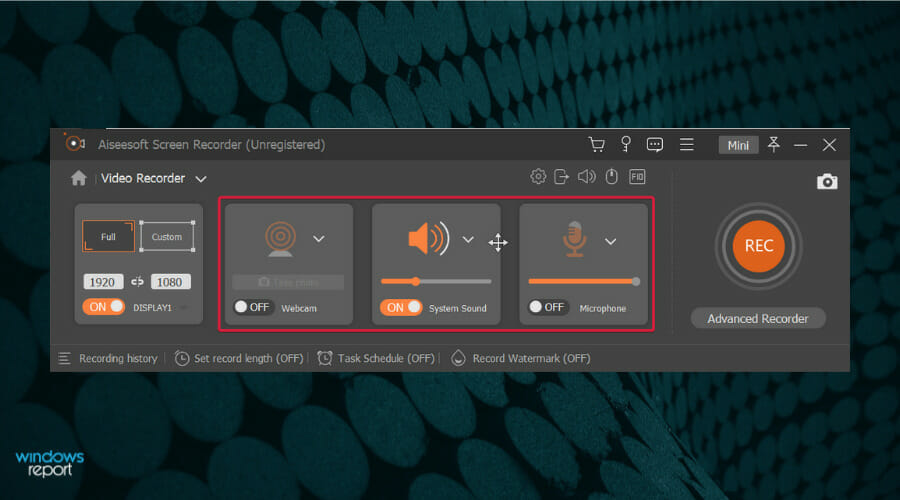
- Now, from the main screen, select Video Recorder.
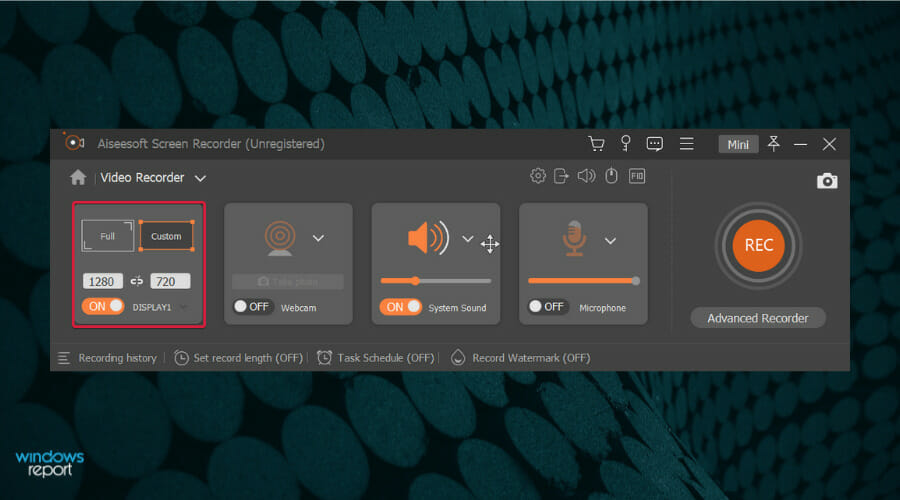
- In the next window, from the first tile you can select the Full screen or a Custom selection and right below you have the option to set the resolution of the caption selection. There’s even an option to choose the screen if you’re working with multiple displays.
- Next, you can turn on the webcam and change its settings, turn ON or OFF the system sound and set the volume level or turn on the microphone.
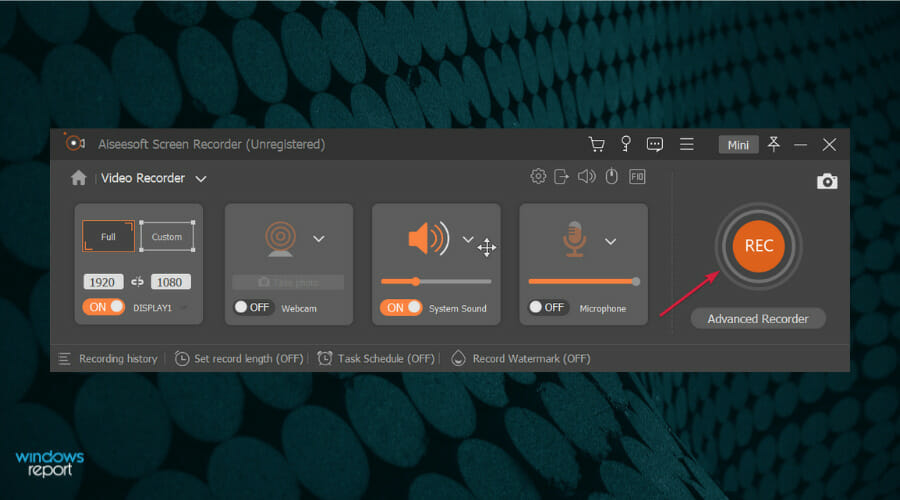
- The only thing left to do is to press the big red Record button.
- A countdown will indicate the recording start and when you click the Stop button, your recorded clip will show up on the built-in editor. If you buy the full version, you can also cut the desired selection and then hit the Save button.
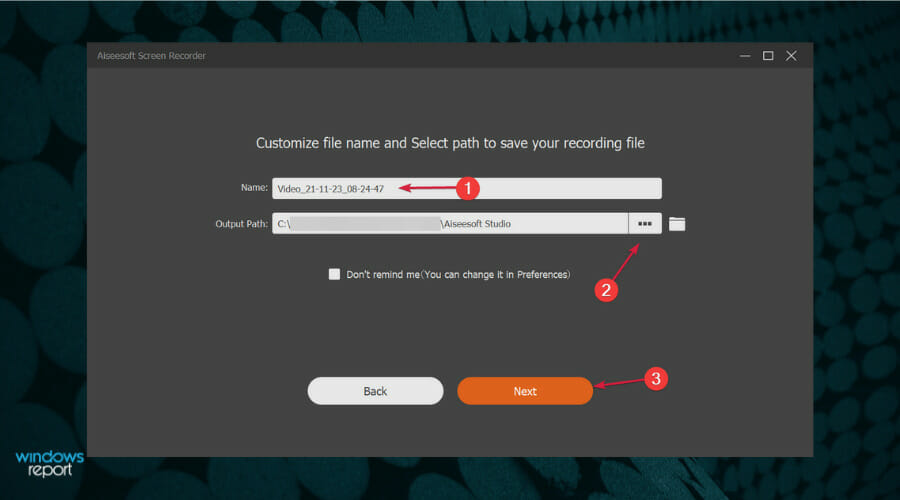
- Now type the name of the video, set the destination on your drive and click Next.
- If you’re running the free version, you will be prompted with the message that you can only save 3-minute clips but if you have the full version, you won’t have that limitation. Click the Save anyway option.
- After that, you will see a screen with a list with all your recordings and on the right, you will find 5 more tools that you can click on to download and use their free trial versions.

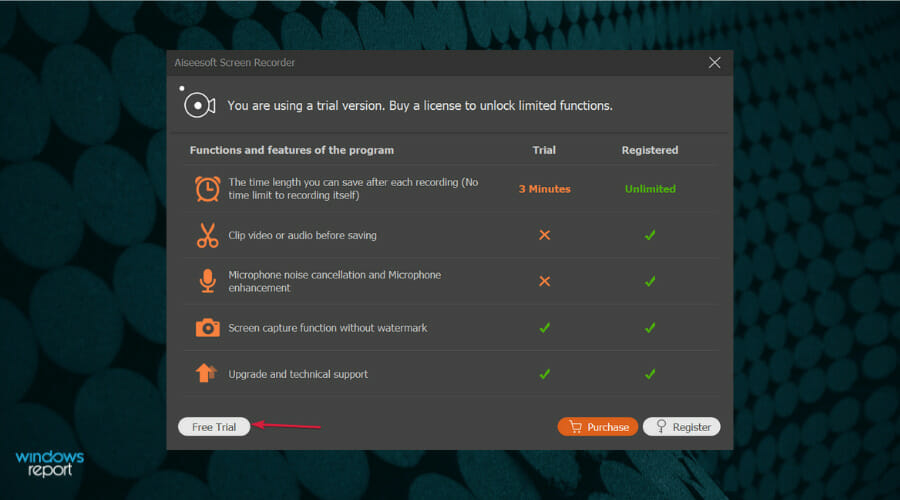


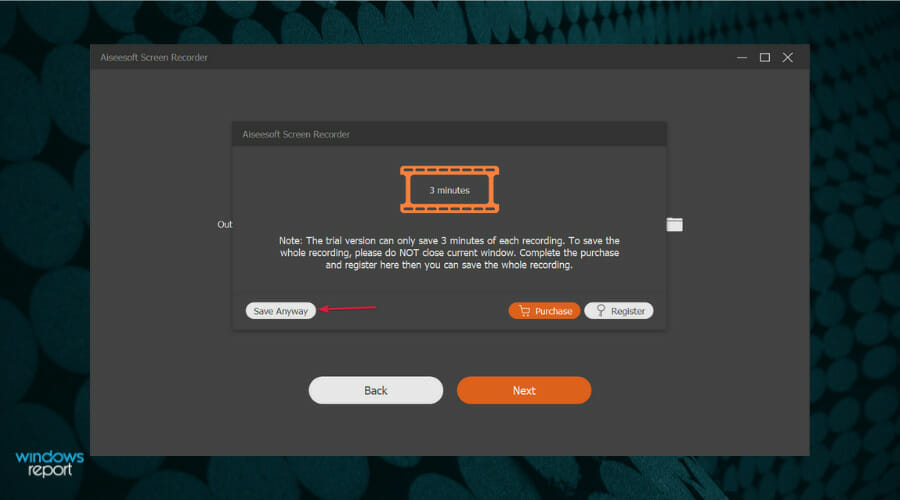

As you can see from one of our screenshots above, with the Free Trial version you will be limited to 3-minute intervals for saving after each recording.
Also, you won’t be able to edit your video and you will not benefit from the noise cancellation and microphone enhancement features.
However, you are free to make as many screens captures as you want without any watermark and the upgrades and technical support are free.
What are the other Aiseesoft Screen Recorder settings?
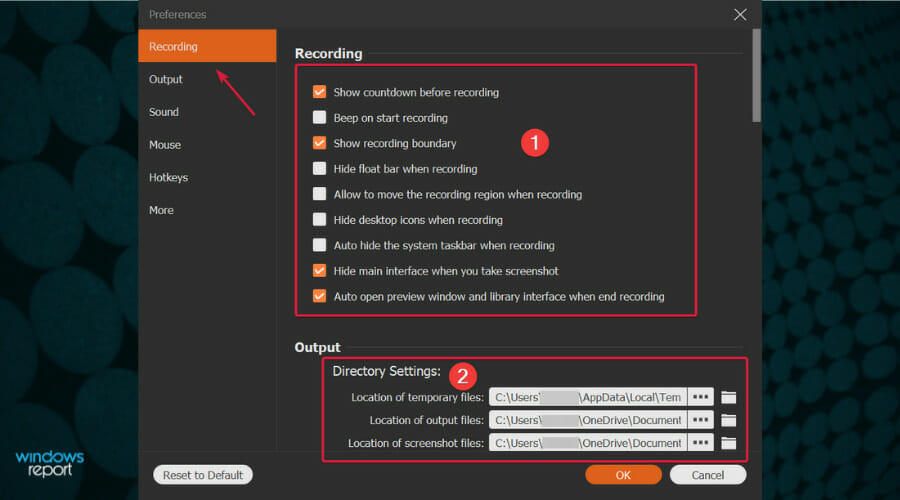
If you click the Settings button from the main screen, you will discover a comprehensive menu with a lot of options to play with.

By default, the first window will be the video recording Preferences. In the Recording panel above there are a lot of options like the ones to hide the interface when taking a screenshot, show the recording boundary, and more.
Below, you will be able to set up the Directory Settings, the location where you want to store all the files you’re saving.
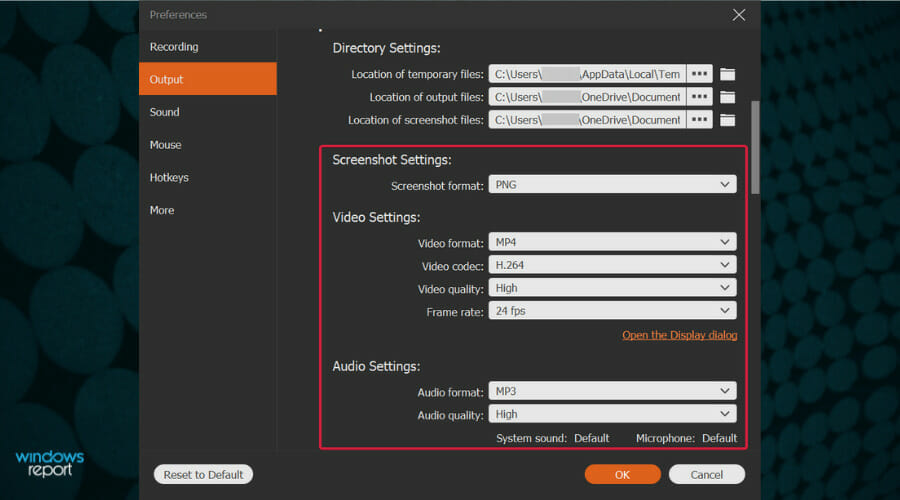
It’s also important to go through the Output menu because there you will be able to change the file formats for all the photos, videos, and audio you record.
For the photos, you can choose between PNG, JPG, BMP, GIF, and TIFF, for videos you have MP4, WMV, MOV, F4V, TS, Avi, and GIF, and the sound can be recorded as MP3, WMA, M4A, and AAC.
So, this is how you can record your desktop and webcam quickly by using the free version of Aiseesoft Screen Recorder.
Aiseesoft Screen Recorder also has other important functions, such as Game Recorder, Phone Recorder, real-time editing feature (available in trial version), etc.
We hope we convinced you that it’s extremely easy to capture anything on your screen. At least that’s how we felt like using this app.
Did you get to use Aiseesoft Screen Recorder? Let us know all about your experience in the comments section below.
User forum
0 messages