Oculus on Windows 11: How to Fix it if it's Not Working
Easy steps to get Oculus working on your device
8 min. read
Updated on
Read our disclosure page to find out how can you help Windows Report sustain the editorial team. Read more
Key notes
- Several users have reported that they are having issues connecting their Oculus device to their Windows 11 PC.
- You can follow the list of solutions mentioned in this guide to possibly resolve this problem with Oculus.
- Notably, you can turn off the USB power saving option, update installed drivers, or perform a power cycle to fix Oculus not connecting to PC issue.
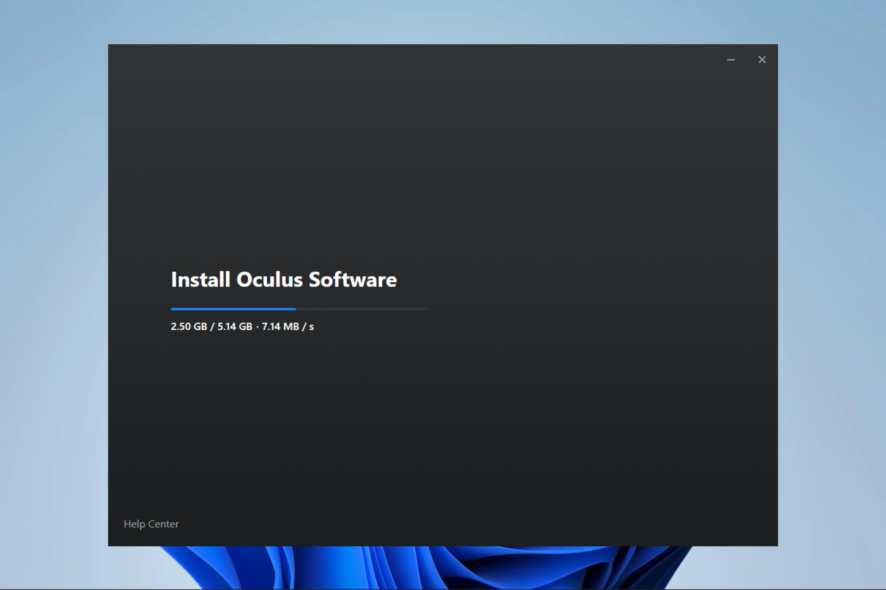
You must install the Oculus app on your Windows 11 PC to set up and connect your Oculus VR headset.
This seems simple, but for several Oculus users, even after properly installing the software, the Oculus VR headset isn’t connecting and working on their Windows 11 PC.
There isn’t just one, but numerous user reports claim they cannot connect Oculus to Windows 11. However, the software is not the only reason for this issue. There are could be a bunch of reasons that are triggering this problem.
Few users have raised their queries with the official tech support, and in reply, Oculus does not officially support Windows 11 as of yet.
But several people have managed to successfully run Oculus on Windows 11. The situation seems confusing, but that is why this guide is here to help you out.
Here, we have listed some effective solutions to help you fix Oculus not working on your Windows 11 PC.
What are the potential reasons behind Oculus not connecting to PC?
Oculus lets you enjoy content in Virtual Reality on your PC. However, there is no shortage of issues people currently face with their Oculus devices.
You can find several user reports about Oculus having problems such as black screens, frequent disconnection from the PC, poor performance, etc.
Moreover, these problems are recurring, and it could be frustrating if you have purchased your first Oculus device only to find out it isn’t working on your Windows 11 PC.
Considering all of the user reports, we have deduced some potential reasons for this issue. Having prior knowledge of what could be causing this problem will not only help you fix the problem if it occurs the next time, but you will also be able to quickly resolve it for others.
Here are some of the potential reasons behind Oculus not working on Windows 11 or not connecting to a PC:
- Mis-matched PC specifications – You may want to upgrade to a PC that suits the minimum requirements of the Oculus device.
- Damaged USB cable or port – The only solution here may be to get a replacement cable or change the hardware.
- Outdated Oculus PC software – Reinstalling a current version or an update will resolve the problem.
- Syncing issues with your account – These issues will mean that your Oculus device and Windows n11 have difficulty communicating.
These are just a few reasons you could be experiencing the problem at hand.
Does Windows 11 have problems with VR?
Virtual reality may not work properly with Windows 11, especially if you use Oculus Air Link or Oculus Link. Framerate decreases, freezes, stuttering, and strange flashes are typical symptoms. When Oculus and SteamVR are used together, these issues get significantly worse.
Now that you have some information about this issue let us check out how to resolve it.
How can I fix Oculus if it’s not working on PC?
1. Check PC specifications
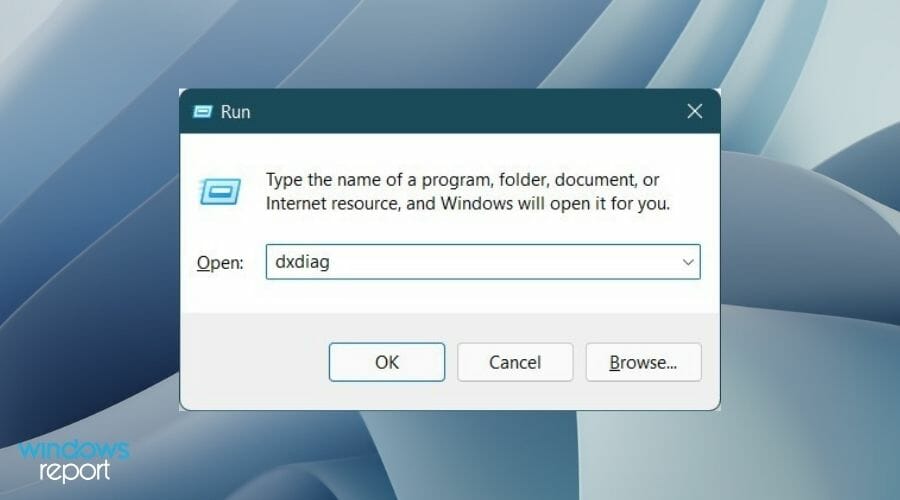
- Press the Windows + R buttons to open the Run dialog.
- Type dxdiag and click the OK button.
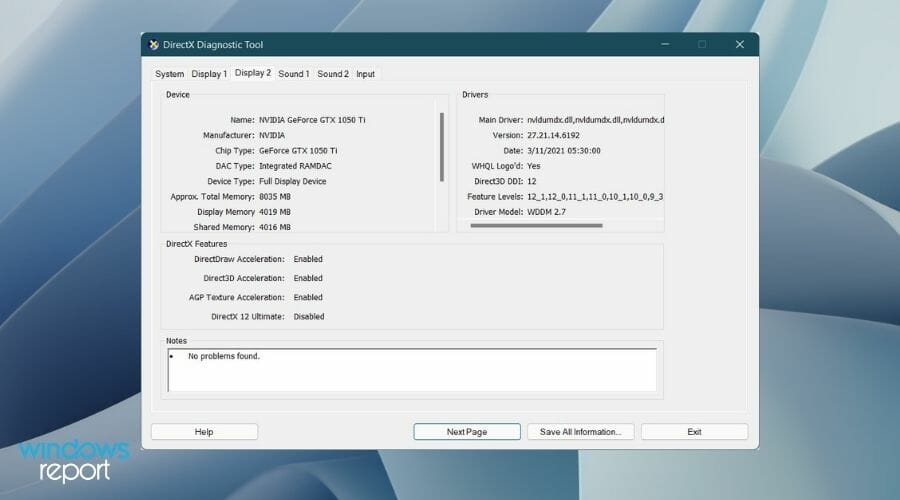
- You can switch between the System, Display, and other tabs to check your PC specifications such as operating system, memory, graphics card, etc.
To check your Oculus device’s minimum PC requirements, you can visit the official Oculus website or search for it over the internet. You should ensure your PC meets the minimum requirements for the Oculus device.
2. Update Oculus software
It is imperative to keep all the drivers installed on your Windows PC up to date. This ensures that you have all the latest available features along with the latest bug fixes.
As mentioned above, outdated software could trigger your Oculus device not working on your Windows PC.
In such a case, you should visit the official Oculus support page and check if a new software version is available. If yes, download it and see if it resolves your problem.
3. Check your USB cable and port for damage
To connect your Oculus headset, you have to use a USB cable. There is no foundation to using a proprietary USB cable to connect Oculus to your PC.
You can use any third-party USB cable as well. However, it should be of high quality to minimize power loss. If Oculus isn’t connecting to your PC, try replacing your USB cable with another one.
Besides, you can try connecting the USB cable to a different port on your PC. Because there might be some issue with your USB port that is triggering the problem.
Furthermore, you can also try disconnecting the USB cable on both ends, i.e., from the Oculus device and your PC. Then connect them back again and see if this helps.
4. Perform a power cycle
A simple restart can do wonders and fix several common problems on a device. The same applies to Oculus devices.
You can perform a power cycle by powering off your PC and your Oculus device. After 10-20 seconds, turn both the devices back on and see if your PC recognizes your Oculus device or not.
5. Update PC drivers
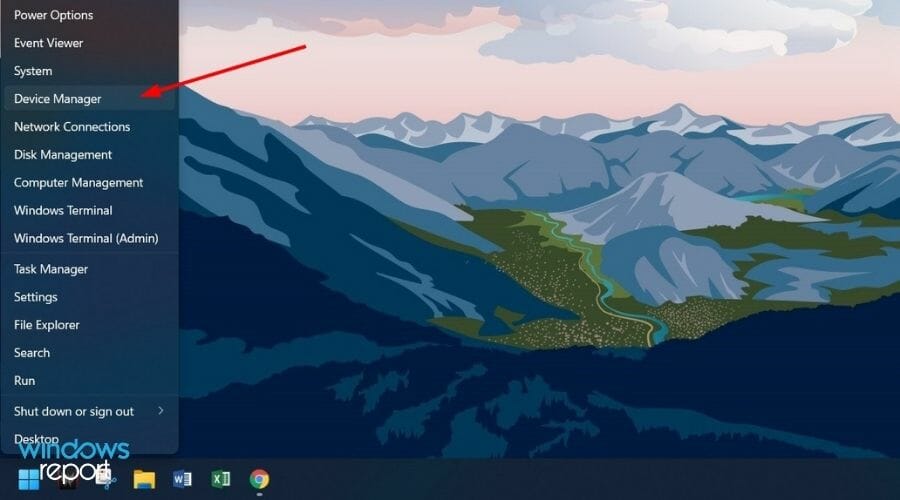
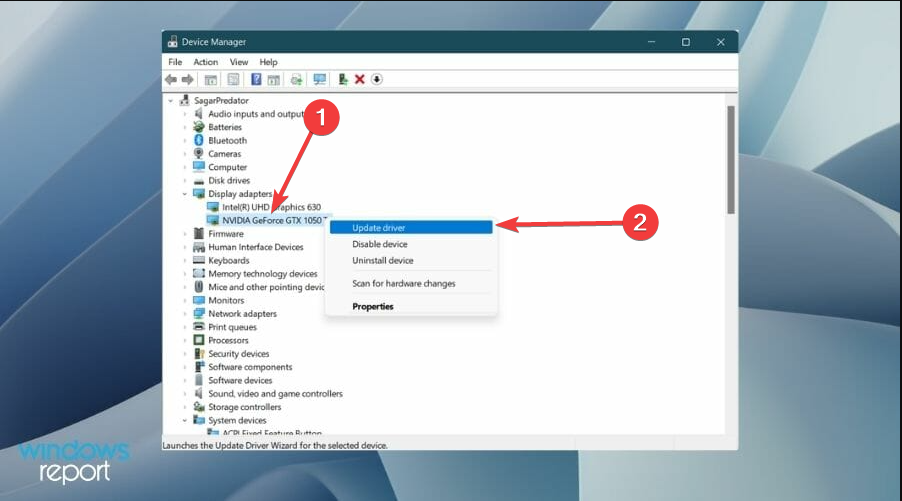
- Right-click on the Start menu and select Device Manager.
- Expand Display Driver and right-click on your graphics card. Select Update driver.
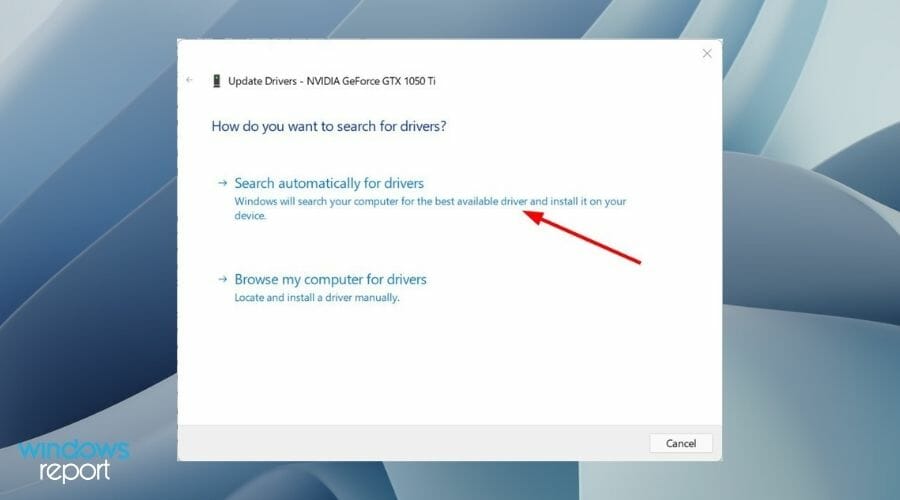
- Select Search automatically for drivers option.
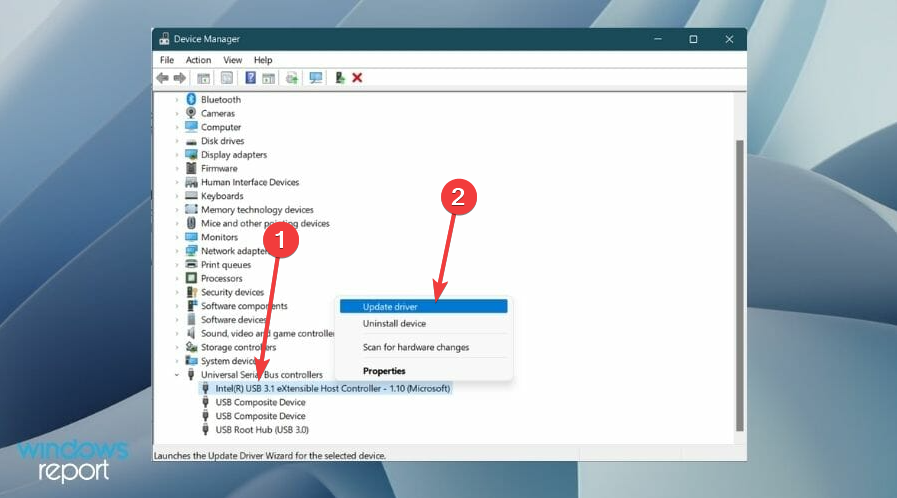
- Similarly, expand Universal Serial Bus controllers, right-click on the USB device you are having issues with, and select Update driver.
In case that did not work, using a specialized software is a good idea, as it scans your PC for missing or outdated drivers and updates them.
- Download Outbyte Driver Updater.
- Launch it on your PC to find all the problematic drivers.
- Afterward, Click Update & Apply Selected to get new driver versions.
- Restart your PC for the changes to take effect.

Outbyte Driver Updater
Do not let a faulty driver disrupt your gaming experience, use Outbyte Driver Updater to run them without any issues.6. Turn off USB power settings
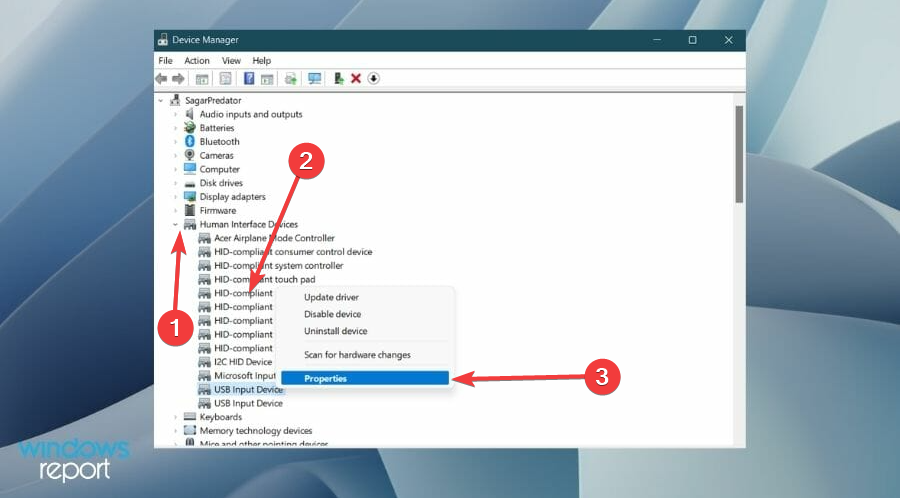
- Right-click on the Start menu and select Device Manager.
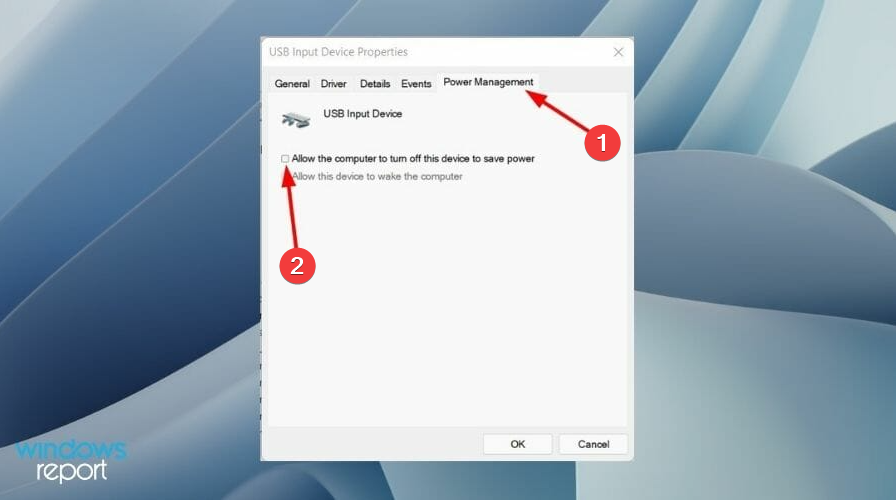
- Expand the Human Interface Devices section, right-click on the USB input device, and select Properties.
- Switch to the Power Management tab and uncheck Allow the computer to turn off this device to save power option.
- Finally, click OK and exit.
7. Reconnect your Oculus account
This solution may appear to be simple, but Oculus may misbehave and refuse to connect to your PC due to a problematic sign-in.
To fix this, simply open the Oculus software on your PC and log out of your account. Then log back in again and see if this fixes the issue or not.
8. Factory reset your Oculus headset
8.1 Using phone
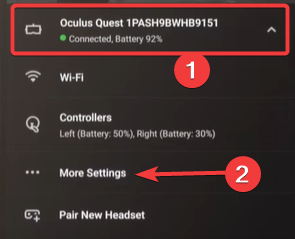
- Open the Oculus app on your smartphone.
- Tap Settings in the bottom menu.
- Tap the headset connected to your phone, and tap More settings.
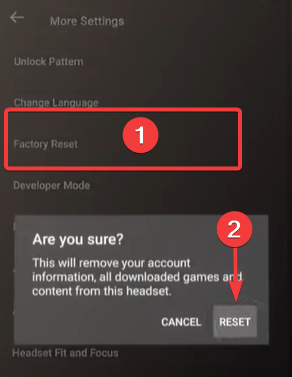
- Then tap on Factory Reset and Reset.
8.2 Using the headset
- Power off your Oculus headset.
- Hold the Power and Volume down buttons together. Wait until the boot screen loads up on your headset.
- Navigate using the volume buttons and select Factory Reset using the power button.
- Highlight Yes using volume buttons and press Power button to select the option.
9. Contact customer support
If none of the above fixes resolve Oculus not connecting to a PC or not working on Windows 11, then as a last resort, you should contact customer support.
Explain your problem to customer support and apply the solution that they give you.
What are the best settings to get optimum quality and performance from your Oculus headset?
Even if Oculus is connected to a Windows PC that meets the minimum requirements, it does not guarantee optimal performance.
You need to tweak a few Oculus settings to get the best quality and performance out of your Oculus headset.
Here are some tips that you can apply to get the optimum output from your Oculus headset:
- Ensure you are using a USB 3.0 cable. This is because USB 3.0 unlocks the 80Hz and 90Hz modes. On the other hand, if you use USB 2.0, it operates at 72Hz refresh rate. So, usage of USB 3.0 is a must for best performance.
- Oculus will give you the best output with the latest NVIDIA 3000 series and AMD 5000 series graphics cards.
- While 90Hz can look smooth and can reduce latency, it adds more processing load on your PC. So, try reducing the refresh rate for stuttering and lagging games.
- Set the Encode Bitrate to 250 in the Oculus Debug Tool (ODT). You can find this tool inside the Oculus Support folder, under Oculus-diagnostics. It is found that going beyond 250 bitrate increases latency and stuttering issues.
How do I install Oculus app on Windows 11?
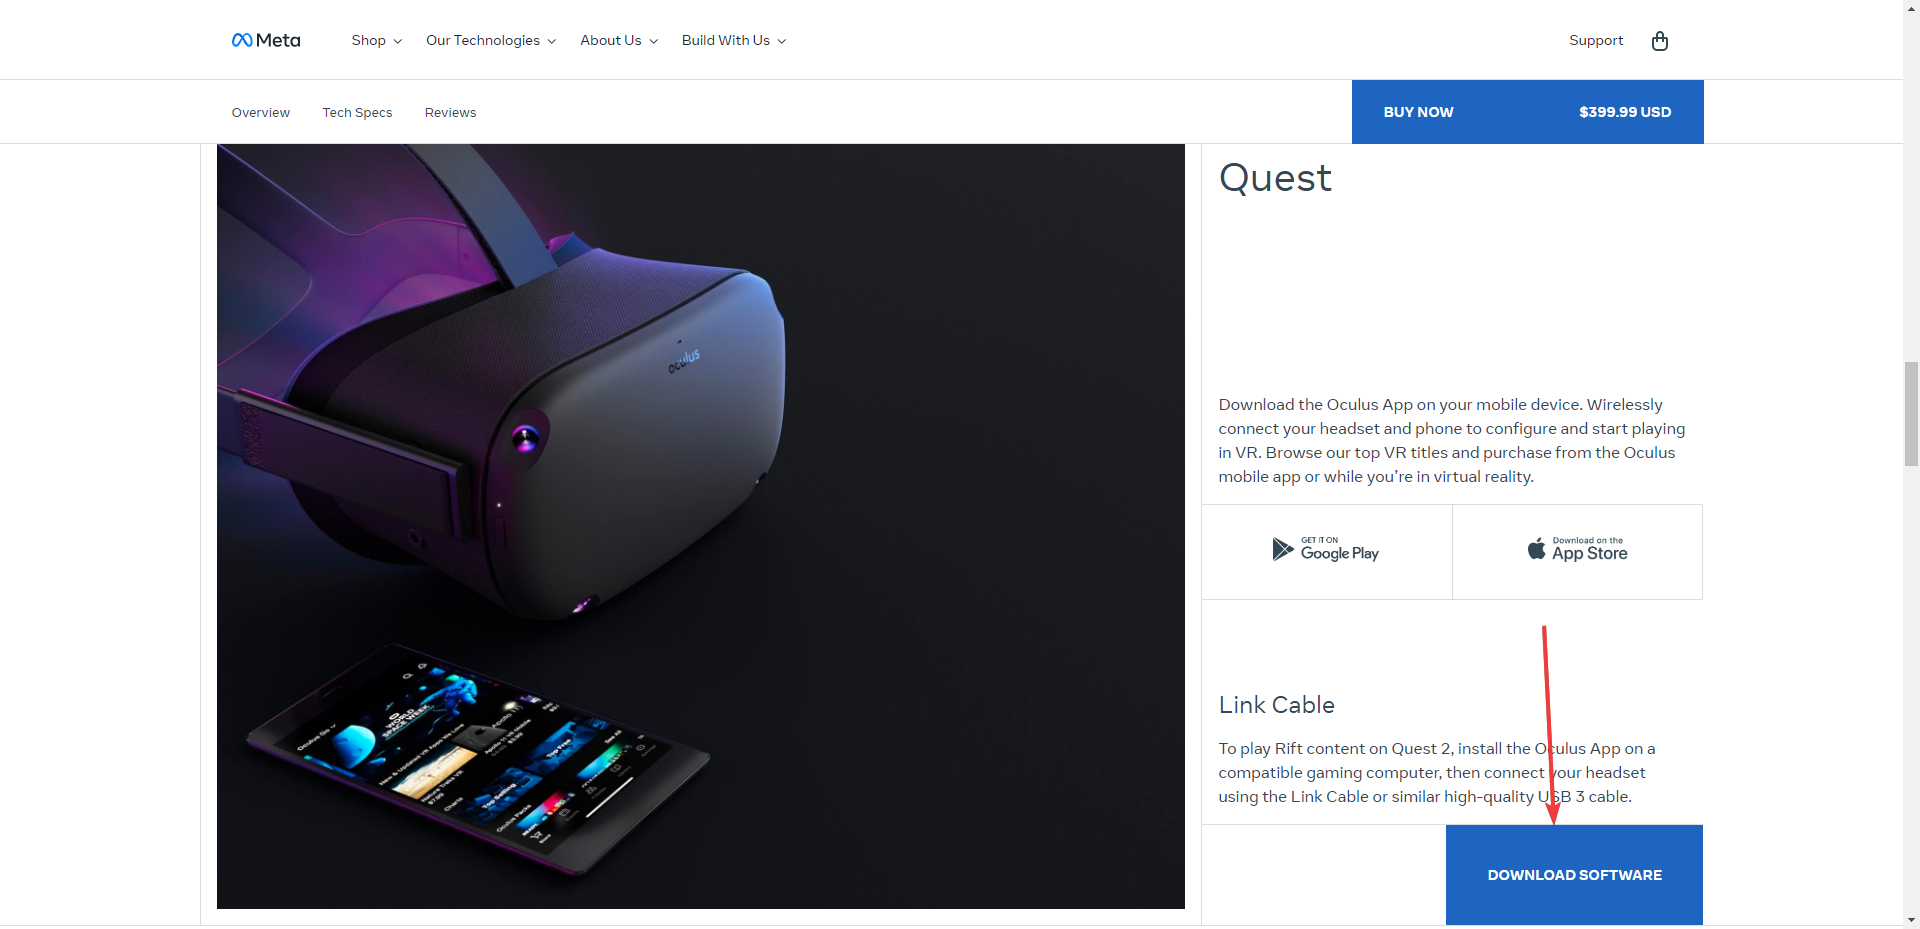
- Navigate to the Oculus website.
- Click on Download Software for any of the software you need to be installed.
- Click on the downloaded app to begin the installation.
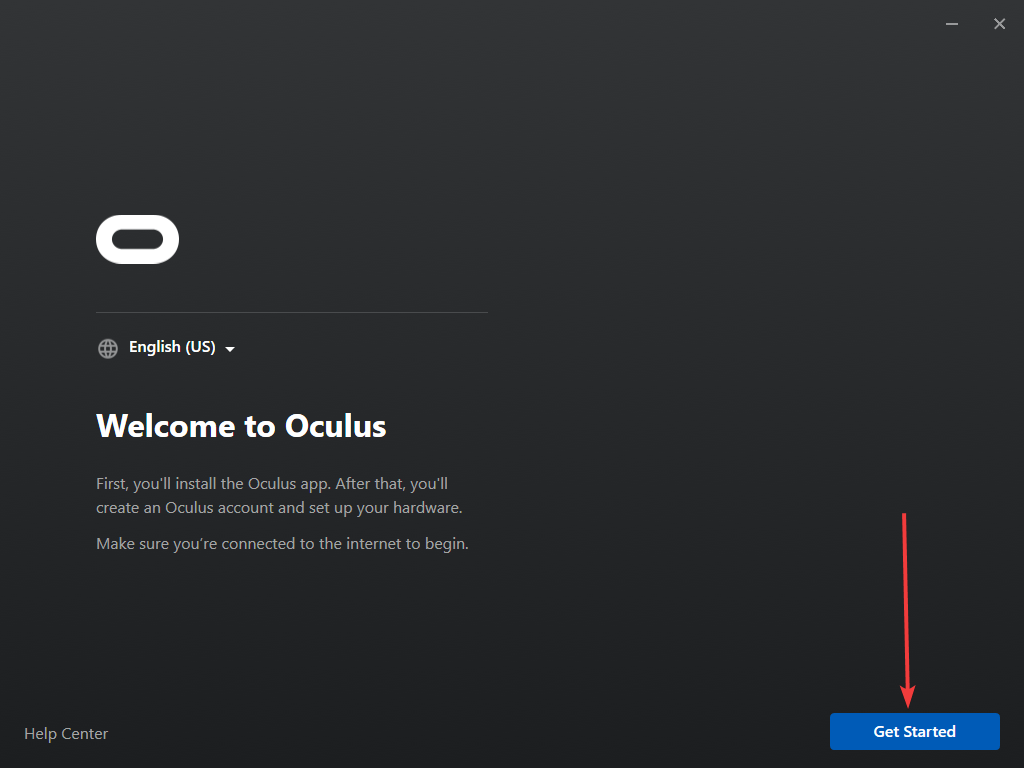
- Now, click on Get started.
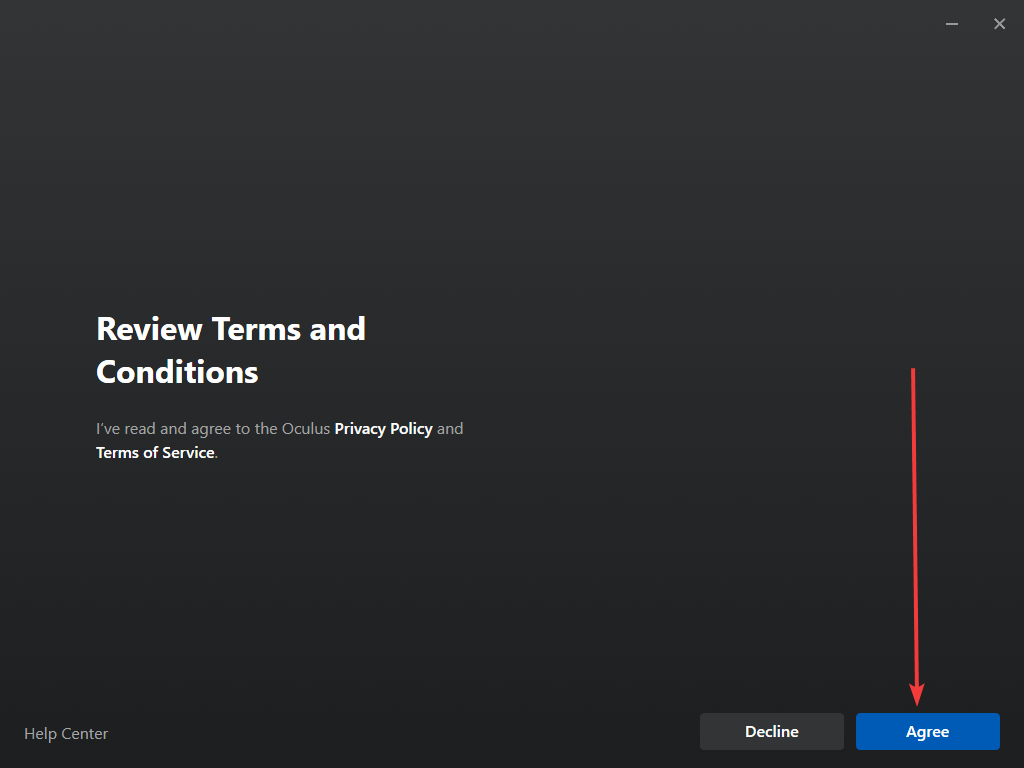
- Click Agree.
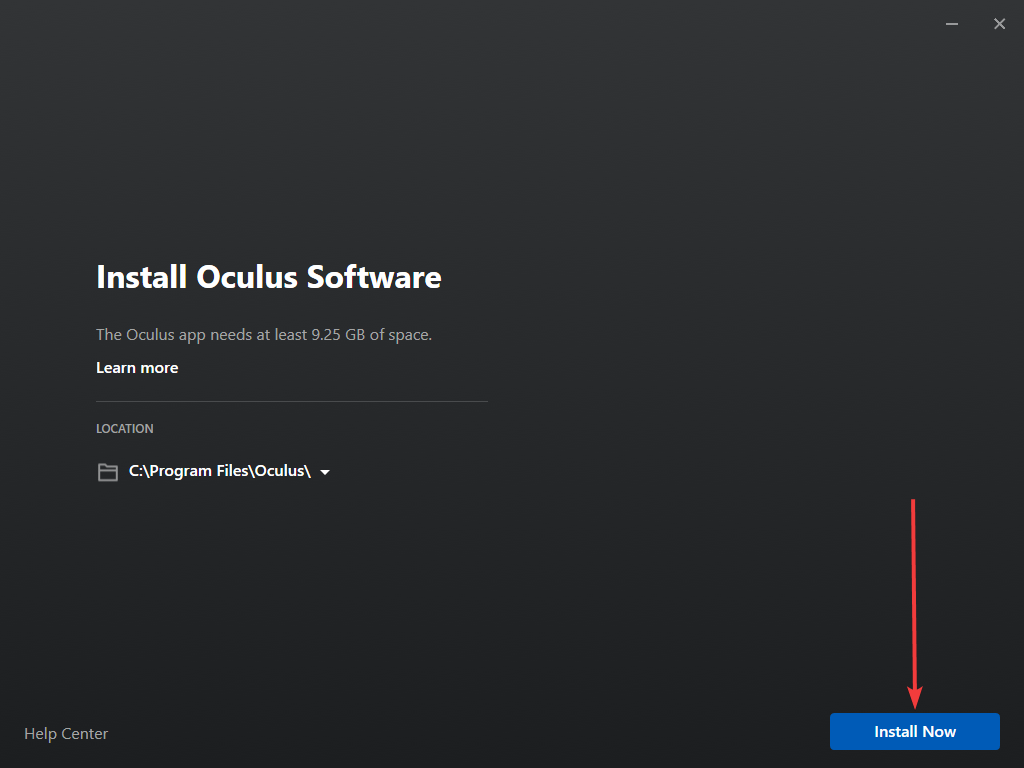
- Finally, click on Install now, and give it a moment.
And there you go. If Oculus is not working on your Windows 11 device, you should have been able to fix it with this guide.
Let us know in the comments below if you found this guide helpful in fixing Oculus not working on Windows 11 PC.





User forum
0 messages