Best Ways to Access Webcam Settings in Windows 10
Changing the webcam settings has never been this easy
![]() 5 min. read
5 min. read
![]() Updated on
Updated on
Share this article
This article is translated in
Improve this guide
Read our disclosure page to find out how can you help Windows Report sustain the editorial team. Read more
Accessing webcam settings may not be as intuitive as you’d think, but we’ll walk you through all the steps.
Where are my webcam settings?
The webcam settings in Windows 11 are available in the Camera app on the PC. It offers a bunch of customizations to users, including the ability to change the Video Quality and Flicker Reduction.
The camera app comes preinstalled on the PC and helps you capture pictures and record videos. Also, it’s a great tool for modifying the camera settings. However, several users go with third-party apps to access more customizations and modifications.
How can I access the webcam settings on Windows 10?
1. Acces the camera from the Start screen
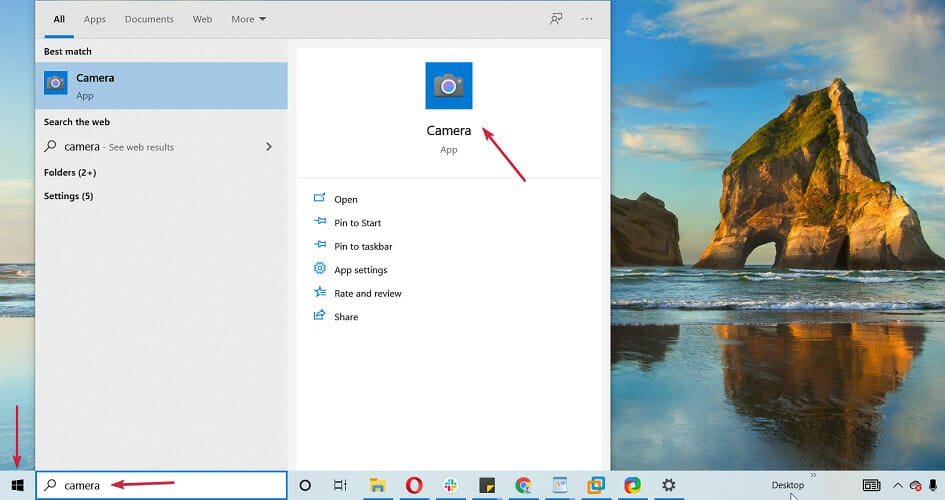
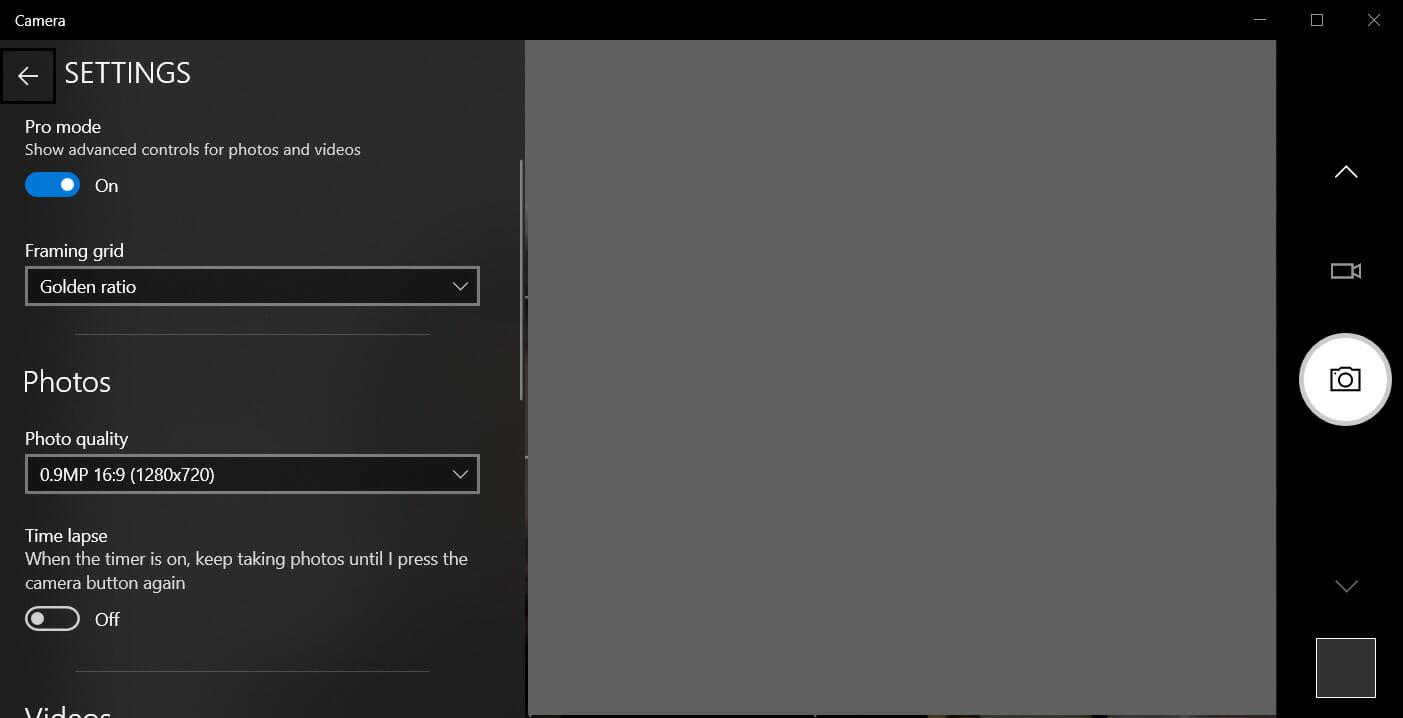
- Click the Start button, type camera, and select the app from the results.

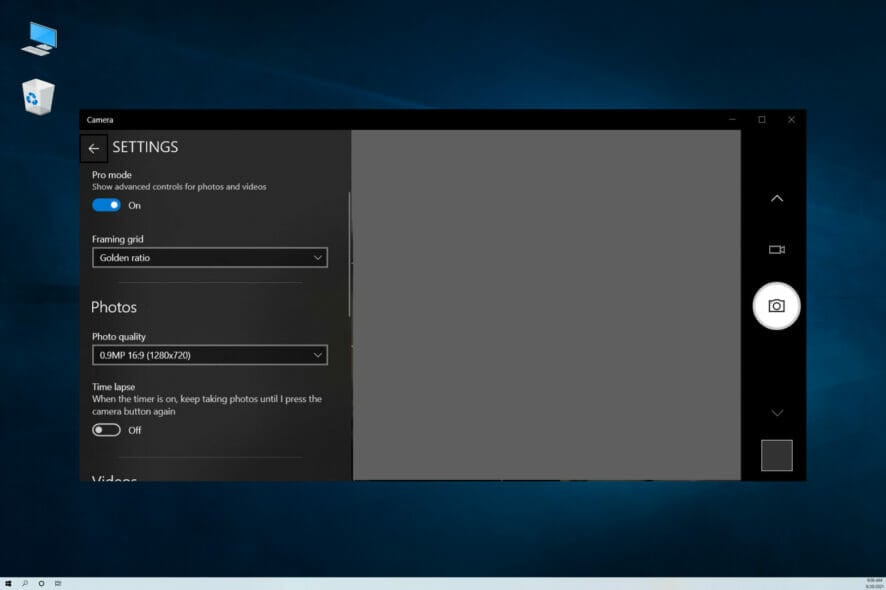
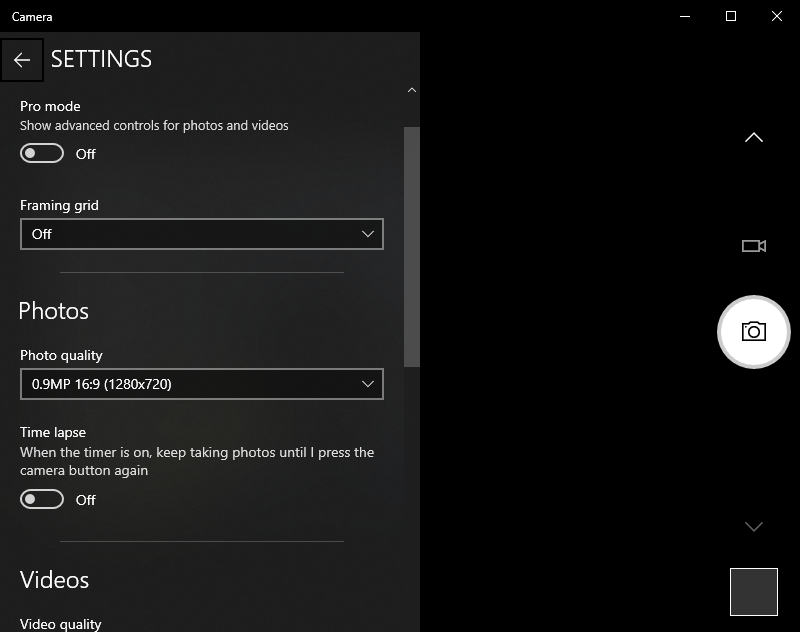
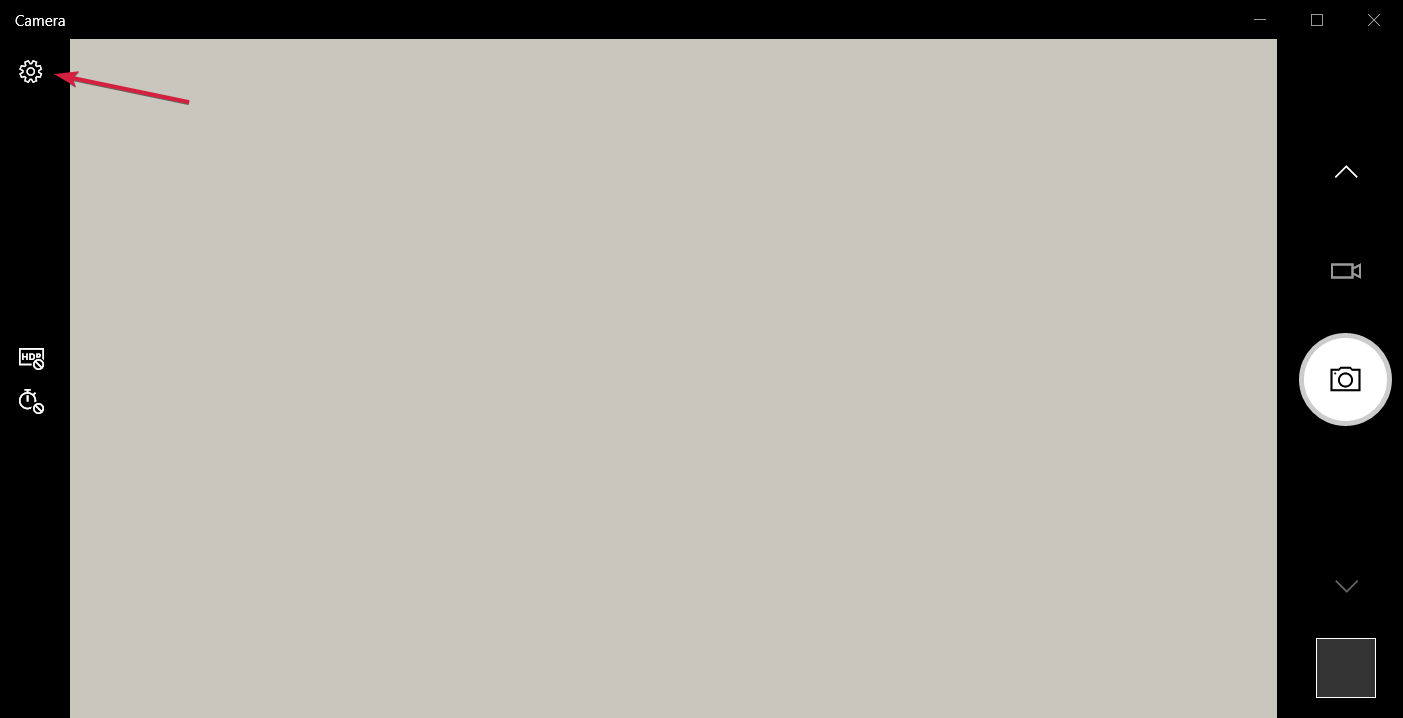
- Select the cogwheel button to open Settings.

- Now, from the panel on the left, you can do a lot of adjustments like the resolution for photos and videos, time lapse settings, framing grid, and more.
- These settings might differ depending on what your webcam is able to do for example your webcam might not support the Spot adjust option, therefore, you won’t have it in the Settings menu.
If you intend to upgrade to the new OS in the near future, learn how to enable your camera in Windows 11.
2. From a third-party webcam app
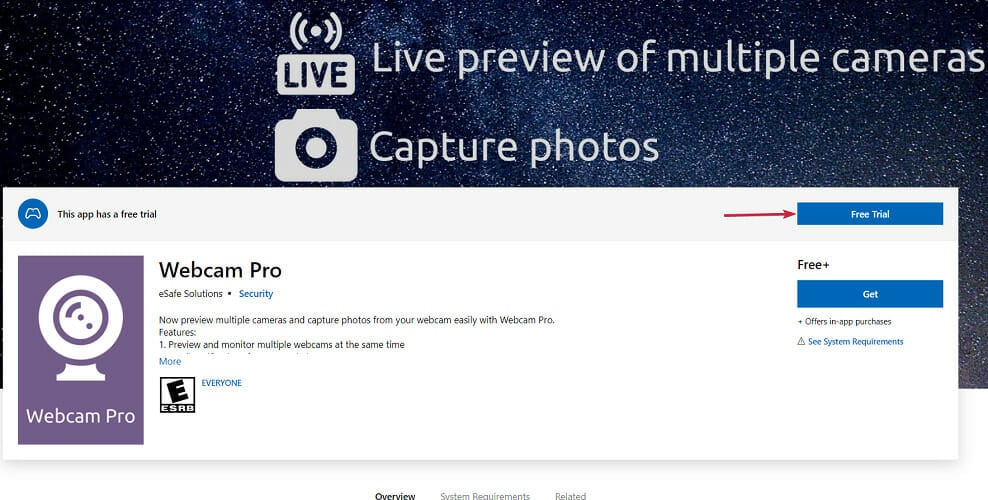
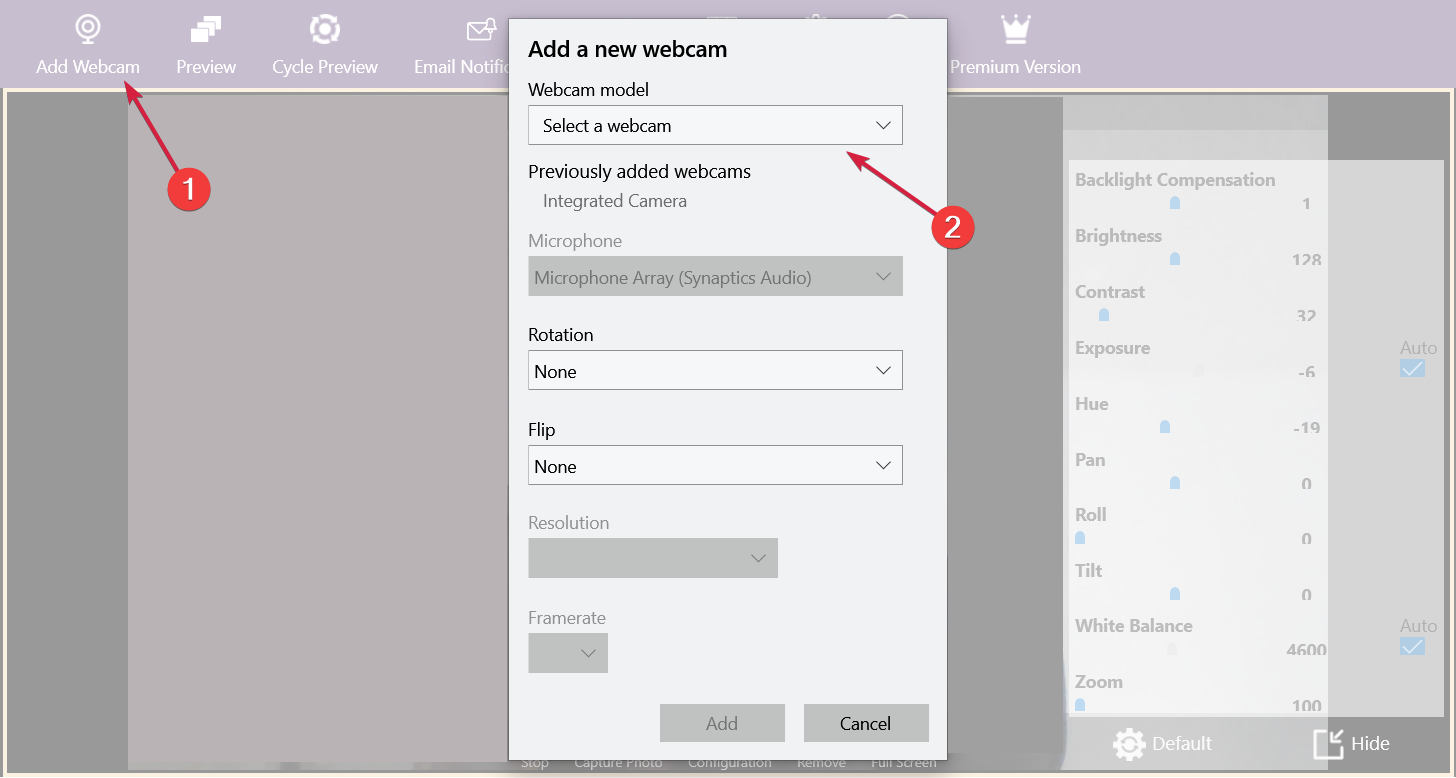
- Go to Microsoft Store and download a webcam app. We discovered Webcam Pro, but you can go with any other app you desire. Just click the dedicated button to get it.

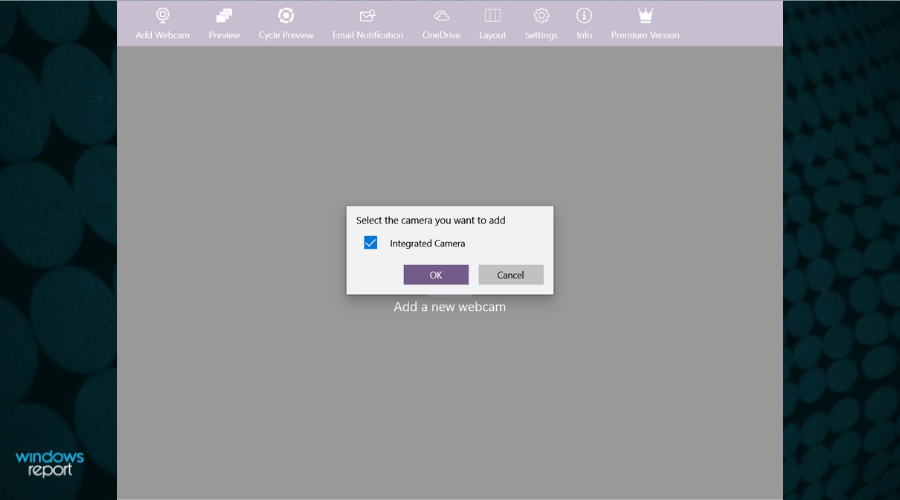
- After you install it, you need to select the webcam you want to use. In our case, it’s the integrated laptop webcam, but if you have multiple cameras, you can select the one you prefer.

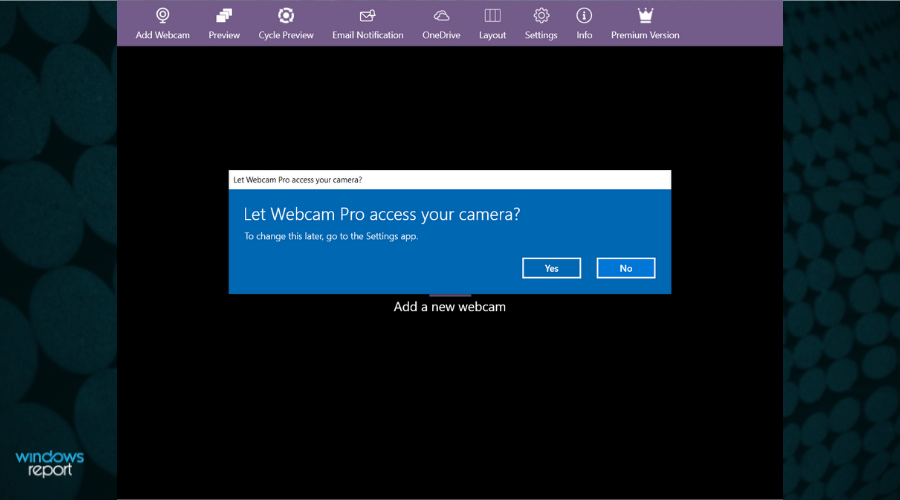
- The next step is to acknowledge that the app can access the webcam.
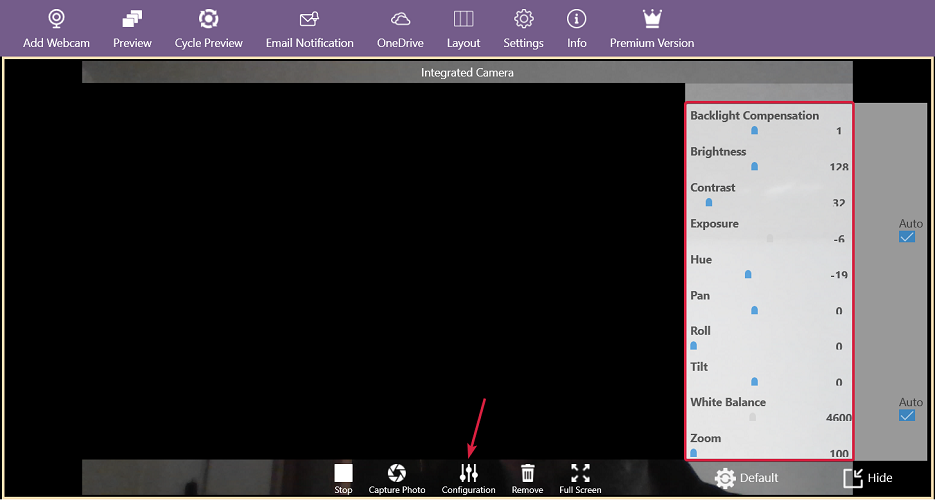
- Now, to access the camera settings, click on Configuration. You will notice a rich pannel of possible camera settings, from brightness and contrast to zoom and roll.

- This particular app can handle up to 3 webcams at the same time. You can click the Add webcam button and select them one by one.

We just gave you an example of an application that you can use to access the camera settings. As you can see, it has more options than the Windows Camera app that comes with your OS. Here are some of the additional features you get with webcam software in Windows 10:
- Zoom webcam setting in Windows 10
- White Balance webcam settings in Windows 10
- Brightness webcam settings in Windows 10
In fact, we have a great third-party camera software list that will offer a lot of ideas in that direction. Also, many use the Logitech Capture app to change the Logitech webcam settings in Windows 10.
Also, the process to change the location of photos captured by the camera on Windows 10 is really simple.
How can I restrict apps access to my camera?
What if you don’t want one or more apps to access your camera? Well, you can restrict all desktop apps from using your camera. Or, you can select them from a list with just a few steps:
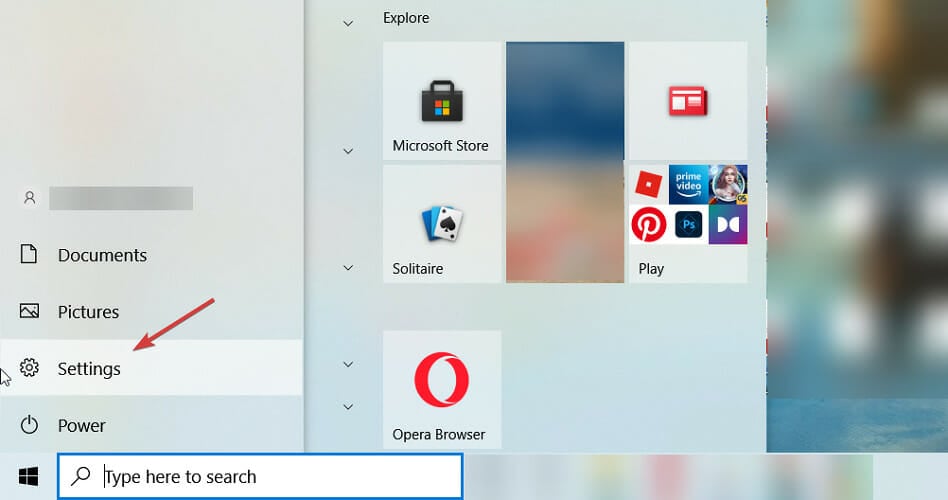
- Click the Windows button and then select Settings.

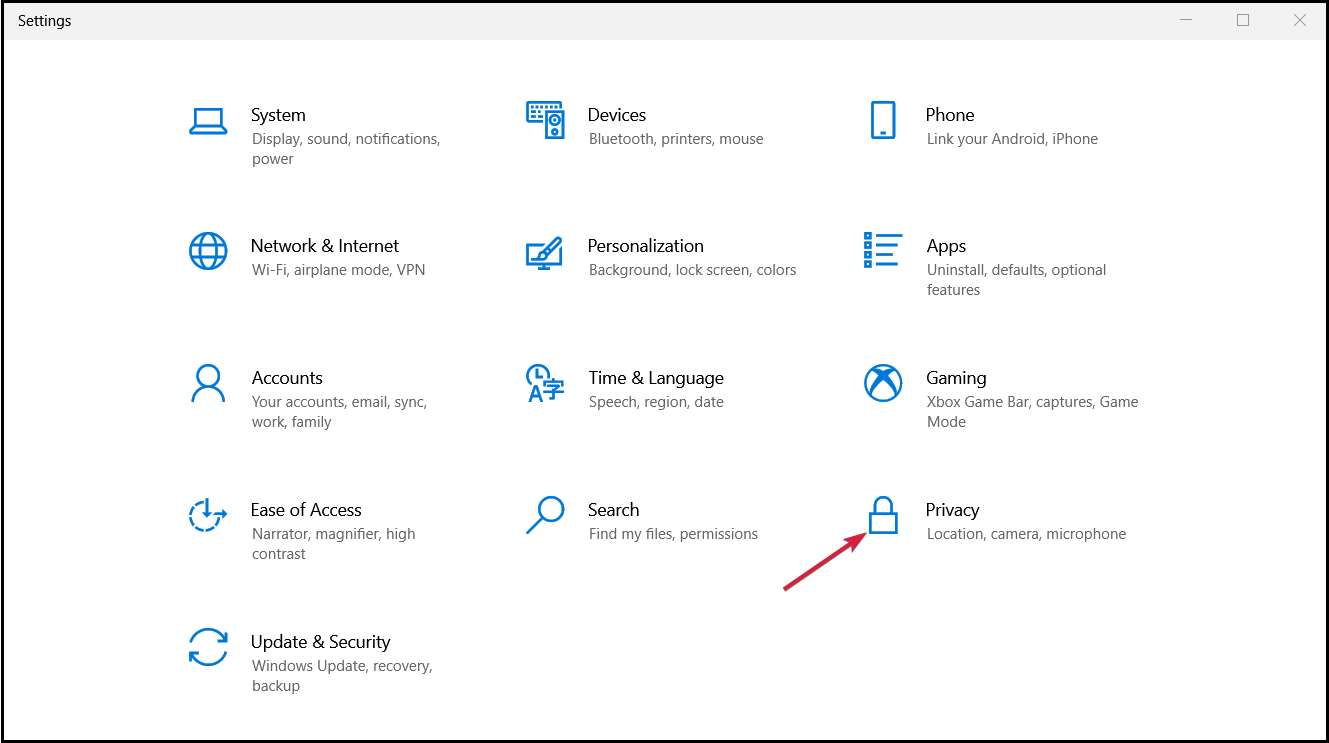
- Next, click on Privacy.

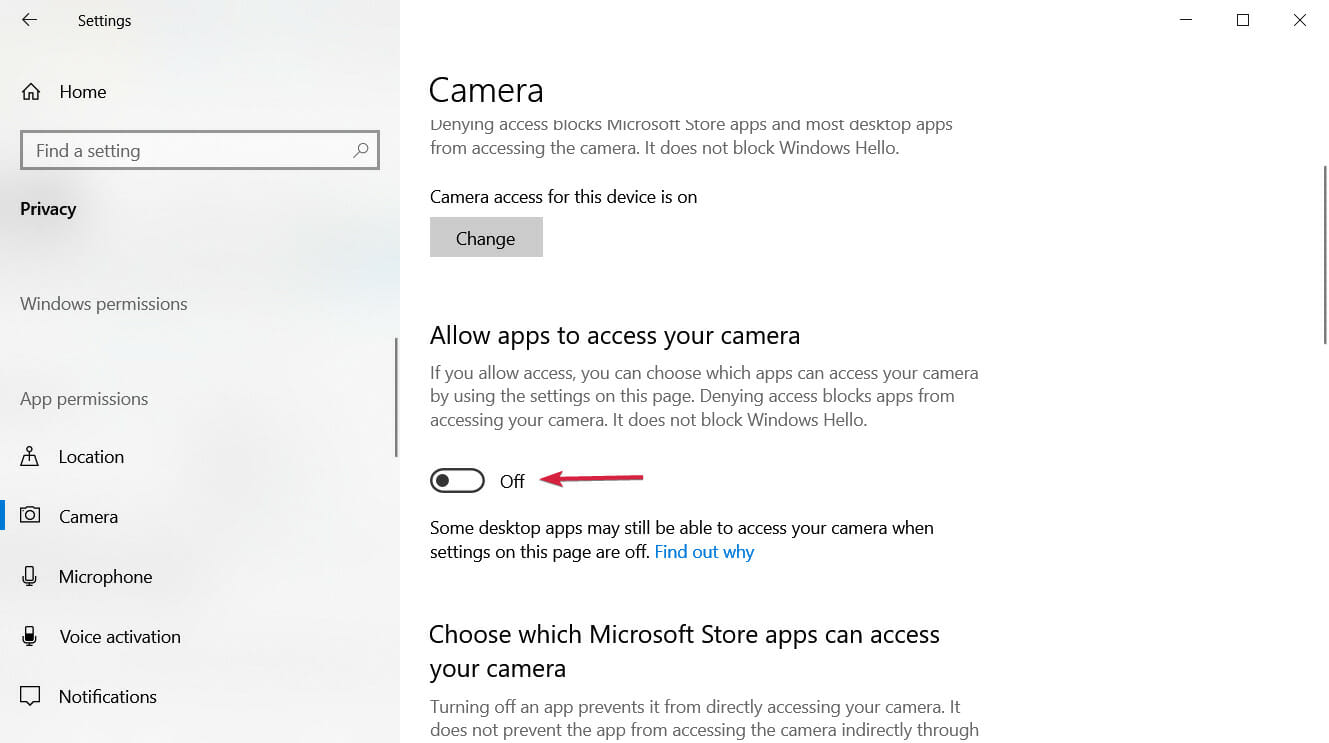
- Select Camera from the left pane.
- Now, the first decision you can take is to turn off all apps access to your camera by clicking the switch right below Allow apps to access your camera.
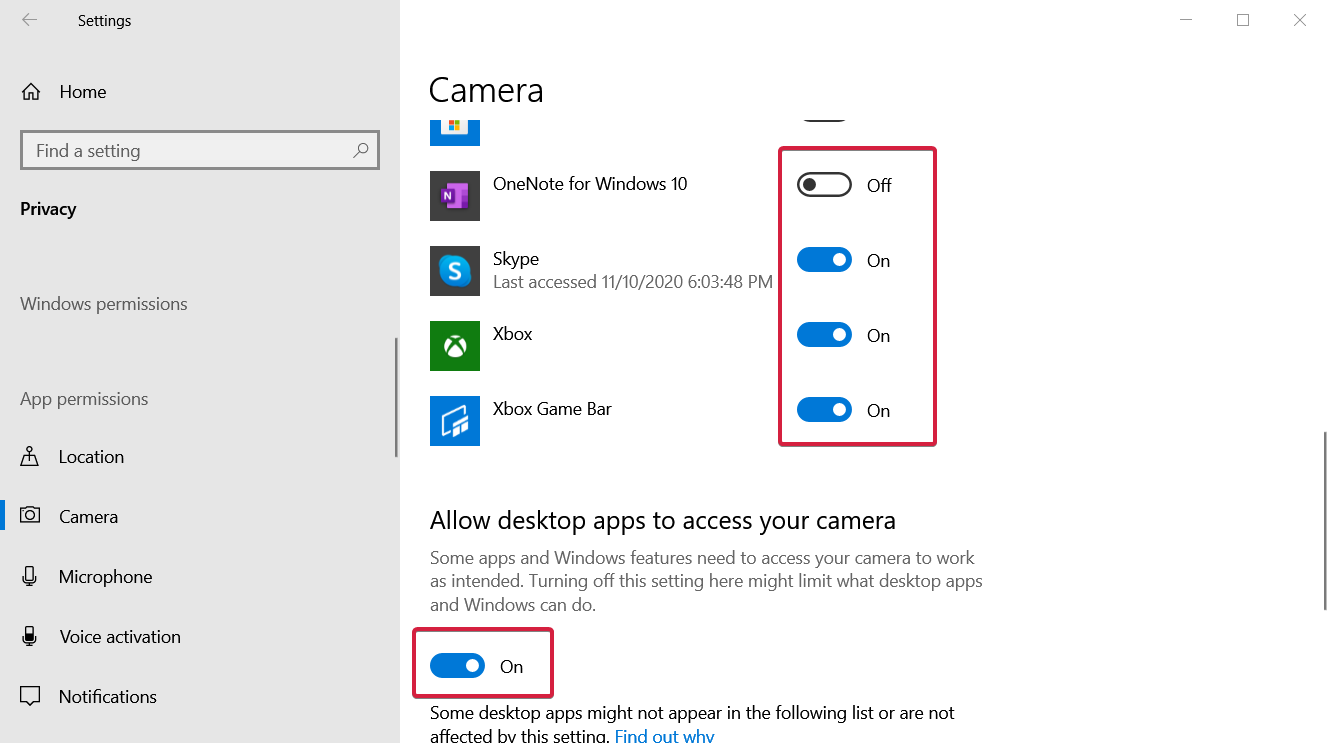
- If you scroll down in the right pane, you will see that all Microsoft Store apps and desktop apps now have restricted access to your webcam.
- However, if you keep the Allow apps to access your camera on, you can only turn off the access to Microsoft Store apps or desktop apps by toggling their individual switches to off. This will allow you flexibility in choosing the apps to restrict from accessing your webcam.


How do I enable or disable the camera access for the users?
If you have more than one account or user on your PC or laptop, it’s good to know that you can change their access to the camera and the apps using it.
As an administrator, you can simply block their access, and that would be a good measure to protect them. Here’s how to do that in Windows 10:
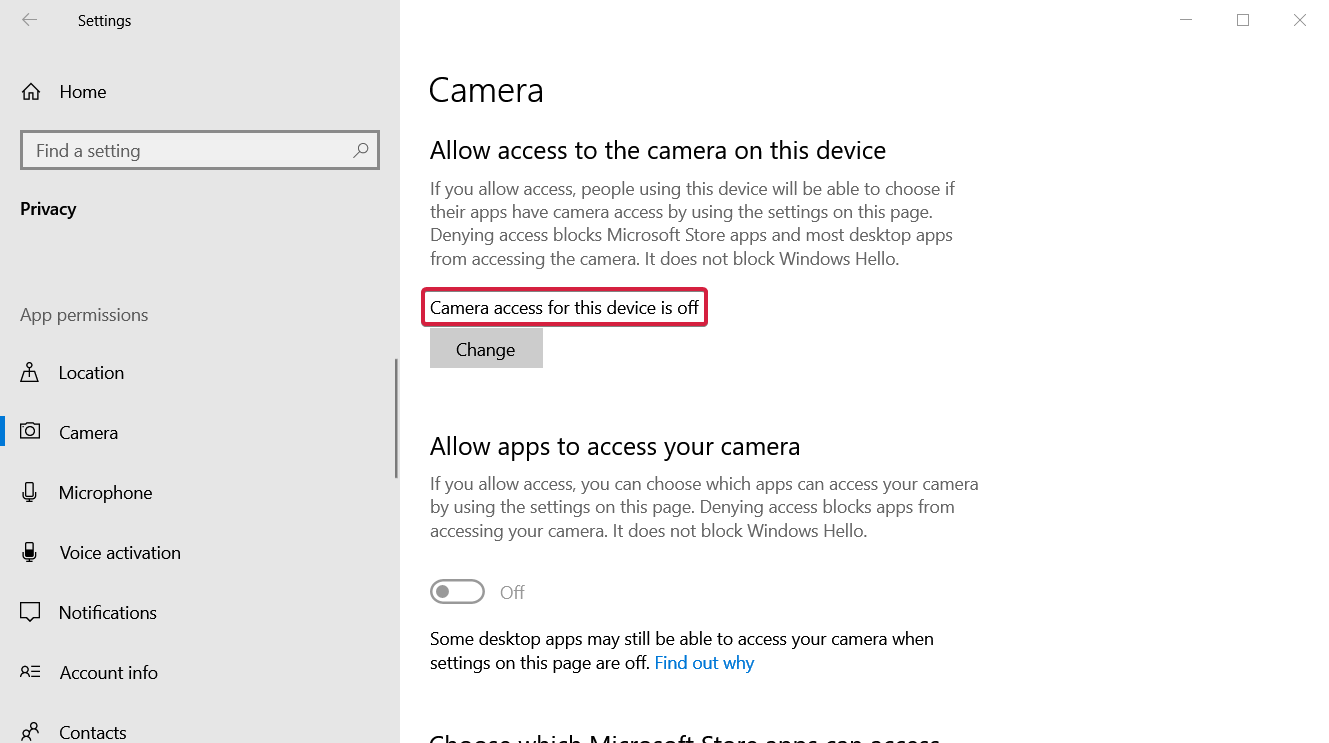
- Click the Windows button and select Settings.
- Select Privacy.
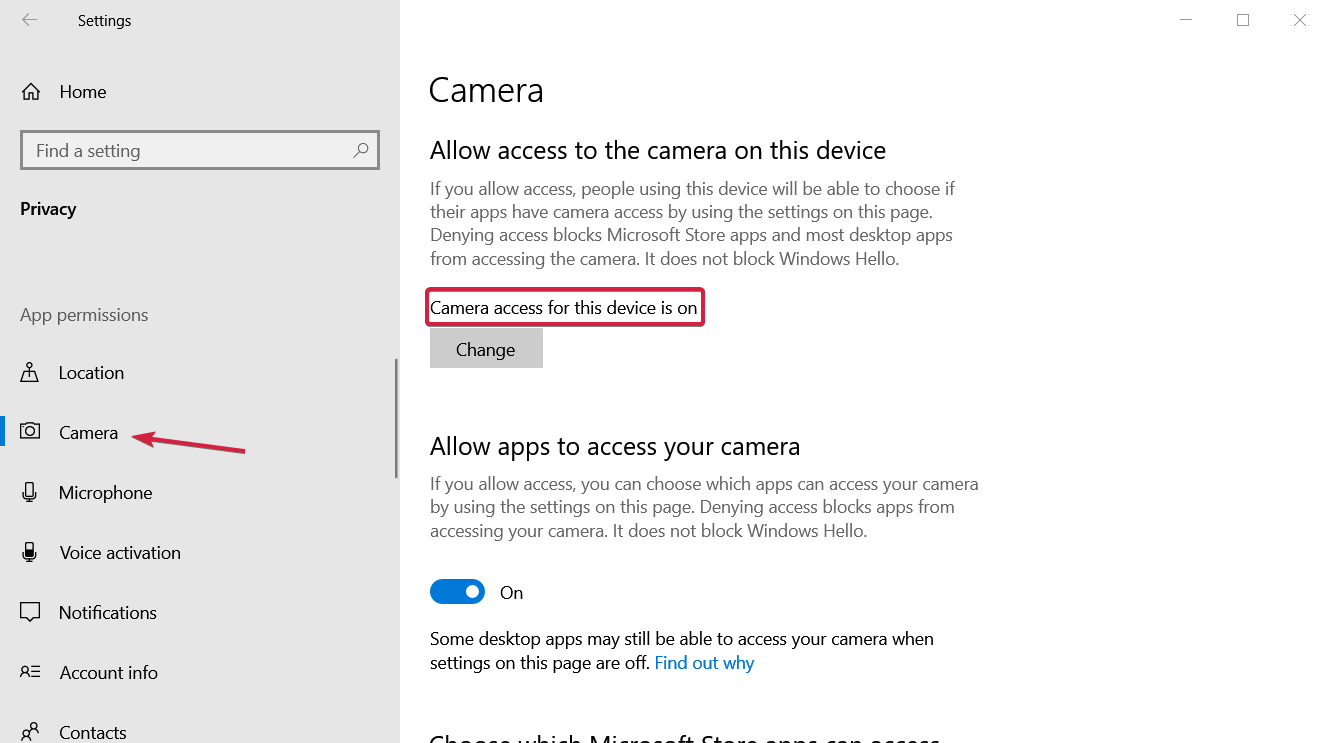
- Now click on Camera from the left pane and check the current status for the camera access. Our camera access is turned on.
- If you want to change that, just click the Change button, and it will show you the switch to change this setting.
- By turning the switch off, we prevented other users from accessing it. Of course, if you want, you can switch it back at any time by following the same steps.


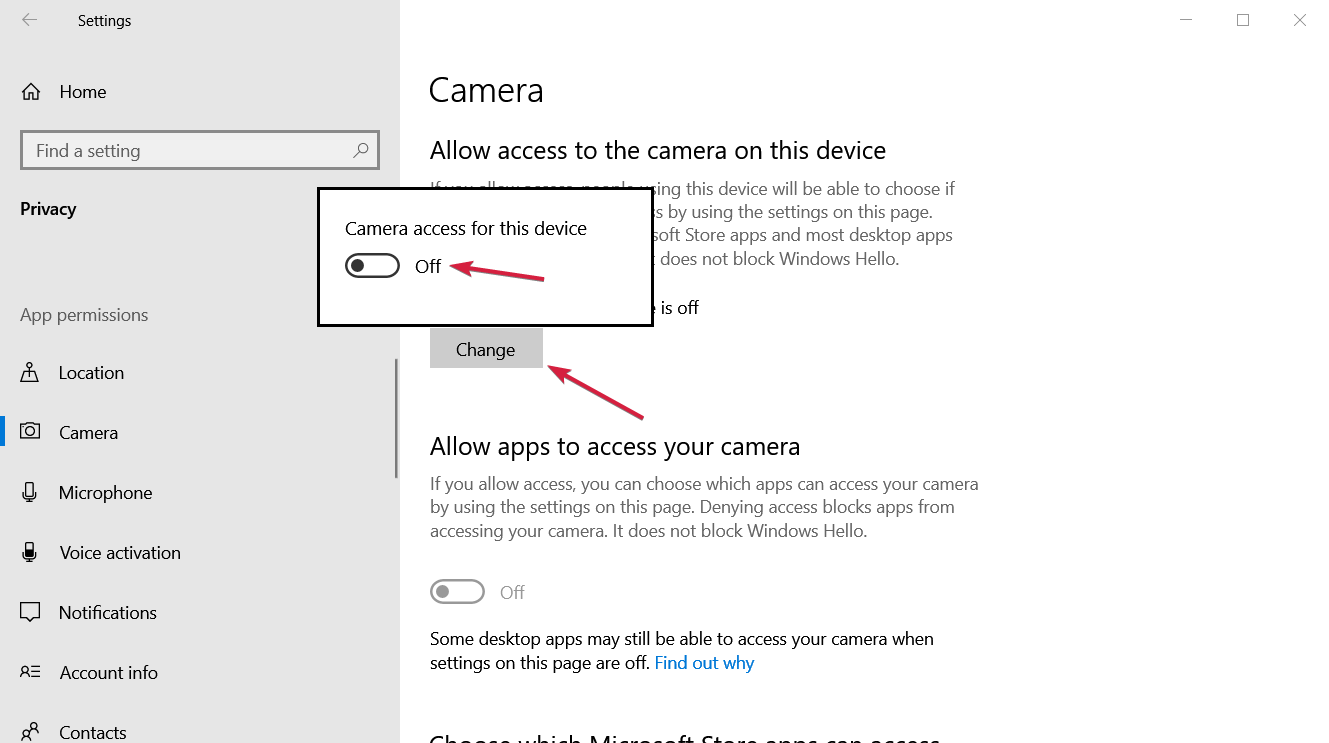
We have to mention that by blocking the user access to the camera, you are also blocking any apps from using it.
Now that you know how to grant or block camera access for other users, you have a few different methods to open the camera app and change its settings.
If your PC doesn’t have an integrated webcam, find out the best 4K webcams available right now.
Don’t hesitate to leave any other questions in the comments section below if you want to know more about the subject.


User forum
6 messages