How to add fonts to GIMP [Download & Install]
4 min. read
Updated on
Read our disclosure page to find out how can you help Windows Report sustain the editorial team Read more
Key notes
- GIMP is an incredibly popular image editing software with thousands of users worldwide.
- This program works perfectly with the text, and we’re going to show you how to easily add new fonts to GIMP.
- Don't hesitate to bookmark our thorough Software section to ensure you'll always be prepared to deal with any issue.
- Looking for more detailed guides? If so, check out our comprehensive How-to Hub.

GIMP is a free image editor, and it’s an open-source alternative to Photoshop. The software has similar features as other photo editors, and you can easily edit images or add text with it.
Speaking of text, GIMP can work with all sorts of fonts, and you can even add third-party fonts to it. This is pretty easy to do, and in this article, we’ll show you how to add fonts to GIMP.
How can I add fonts to GIMP?
1. Add fonts by using GIMP
- Visit any website that hosts fonts.
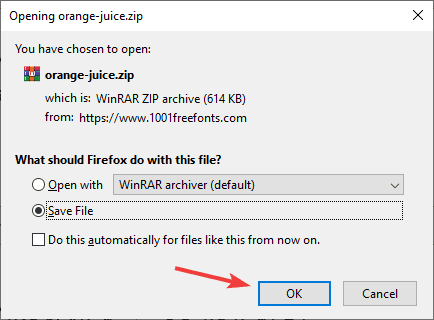
- Locate the font that you want to download and click the Download button.
- Choose the option to save the font and select the download location.
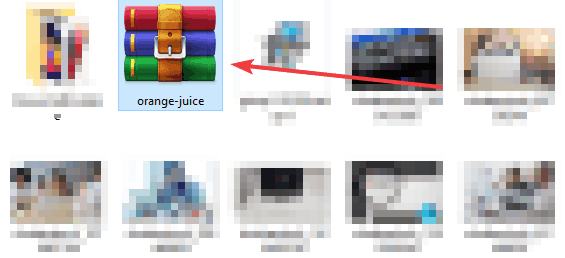
- Locate the font that you downloaded and open its archive.
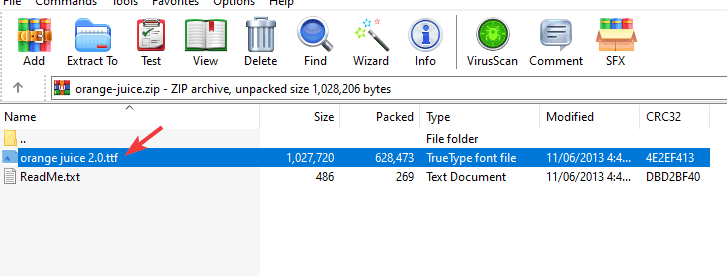
- Locate the font file and extract it to the desired location. You can do that simply by dragging and dropping it.
- Extract the font to a directory on your PC – we extracted the font to D:\WindowsReport (memorize the path you choose because you’ll need it for future steps).
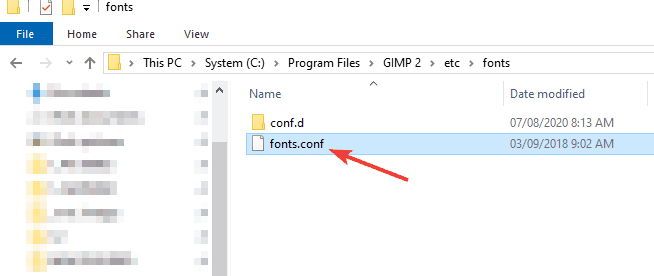
- Go to the GIMP’s installation directory, by default it should be:
C:\Program Files\GIMP 2\etc\fonts - Locate fonts.conf file and double-click it.
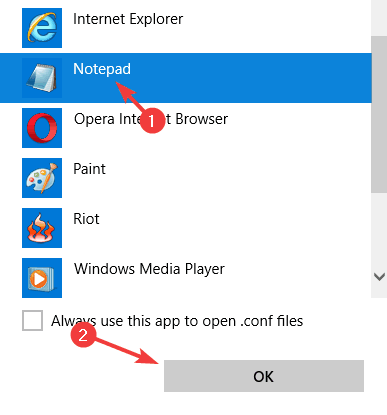
- Open the file with Notepad.
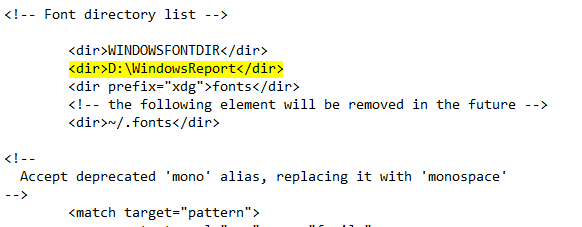
- Locate the following line :
<!-- Font directory list --> - It can be found under the entry:
<dir>WINDOWSFONTDIR</dir> - Add the path:
dir>D:\WindowsReport</dir
Keep in mind that you need to use the file path that you used in Step 6. - Save changes. If you’re unable to overwrite the file, like we were, check our note at the end of this section.
- Open GIMP.
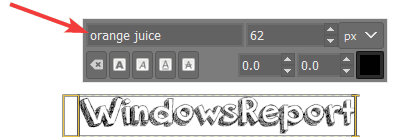
- Try adding text to your images and you’ll notice that the downloaded font is now available.
Note: If you’re unable to overwrite the fonts.conf file, you’ll need to modify your permissions. When we tried to save our changes, the file wasn’t overwritten, instead, we were asked to save our changes as a new file.
This isn’t what we want, since the original file will remain unchanged, and our new fonts won’t be added. To fix that, we need to change a few permissions.
- Locate fonts.conf in the following path:
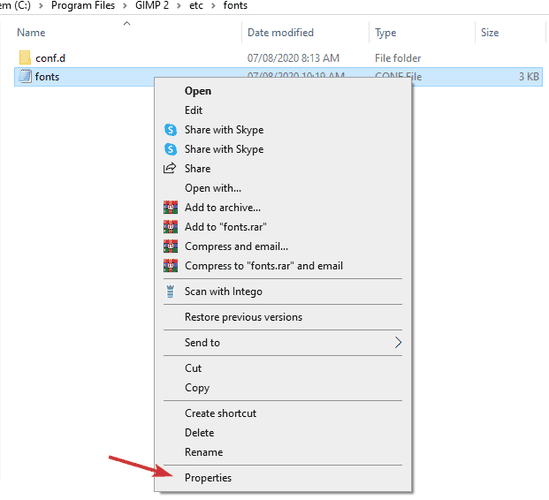
C:\Program Files\GIMP 2\etc\fonts - Right-click the fonts.conf file and choose Properties from the menu.
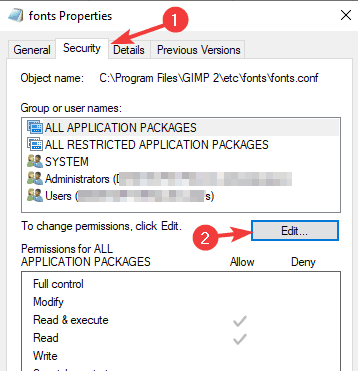
- Go to the Security tab and click the Edit button.
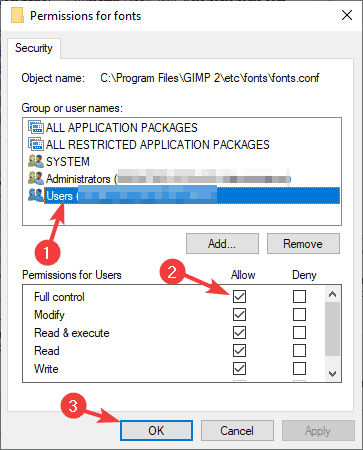
- Select Users from the list and check Full control in the Allow You can do the same for the Administrators group. Save changes.
- Now try to edit and save the fonts.conf file as we described above.
This method might be a bit complicated, but it’s useful if you want the new font that you downloaded to be available just in GIMP and not system-wide.
And if you just want to add new fonts, you just need to extract them to the same directory that you used and they’ll be automatically added to GIMP.
2. Add fonts globally
- Download the desired font.
- Locate its archive and open it.
- Locate the font file, and double-click it to open it.
- You should now see a preview of the font.
- Click the Install button.
- Start GIMP and the font should be available to use.
Instead of installing the font, you can also move it to the Fonts directory inside your Windows folder, and it will be installed automatically.
Although this method is a lot simpler, it will install fonts globally and in GIMP, so you’ll be able to use them in any application on your PC.
Conclusion
Adding fonts to GIMP is simple, and there are two ways to do that. While the second method of installing fonts globally is a lot faster and simpler, it might not be what some users need.
If you want to install dozens of fonts just in GIMP, then you’ll have to extract them to a specific folder and modify the fonts.conf file accordingly.
If you’re working with different fonts constantly, and you need to organize them better, you might want to consider using font management software in the future.


