BIOS Settings for Windows 10 [Setup Guide]
Changing BIOS settings can significantly improve your PC's performance

Table of contents
Whether it is overclocking your CPU or tweaking power management options, you need to access BIOS settings to unlock unparalleled performance on your Windows 10 computer. Let’s discover the best BIOS settings on Windows 10 to unleash the true power of your machine.
 NOTE
NOTE
1. Overclocking CPU
- Switch off your computer, press the Power button, and keep pressing the Esc key until you see the Startup Menu.
- Press F10 to enter BIOS Setup Utility.
- Go to Advanced/ OC Tweaker/Tuner.
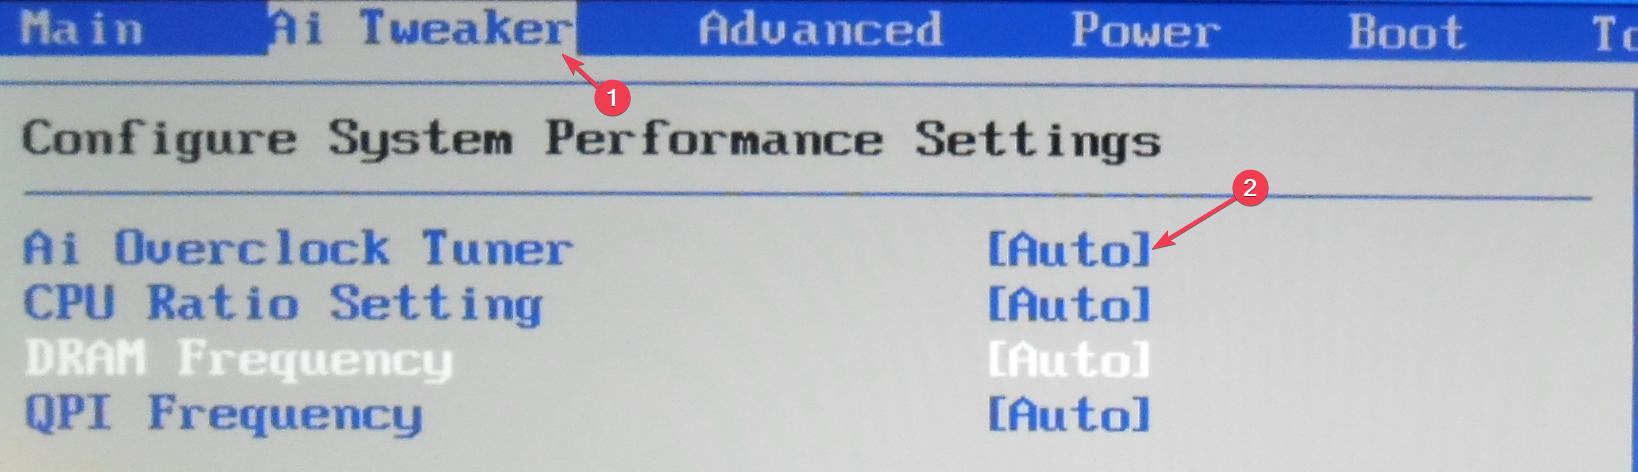
- Locate Overclock and set it to Manual.
- Press F10 to save and exit the BIOS utility.
If you have a problem accessing BIOS on your computer using this method, you can check out the other two methods in this guide.
2. Tweak the fan speed
- Enter the BIOS menu using the steps mentioned in Solution 1.
- Look for settings named Hardware Monitor, Fan Info, Cooling, Smart Fan Mode, or Fan Control.
- Now, check the current CPU and overall temperature, then change the temperature/RPM graph to modify the fan speed.
- Press F10 to save and exit the BIOS utility.
Make sure increasing the fan speed doesn’t make your system reach high temperatures. If it does, you need to lower the speed to reduce the temperature.
3. Disable Spread Spectrum
- Enter the BIOS menu using the steps mentioned in Solution 1.
- Go to Advanced.
- Locate Spread Spectrum and check its status.
- If it is enabled, use the arrow keys to set it to Disabled.
- Press F10 to save the changes and exit the BIOS utility.
The setting is disabled by default, but if it is enabled, you might have some issues while overclocking your system, as enabling this feature can help reduce electromagnetic interference of your device.
4. Enable memory profiles
- Enter the BIOS menu using the steps mentioned in Solution 1.
- Go to Advanced.
- Locate EOCP (Extended Overclock Profiles), XMP (eXtreme Memory Profiles) or DOCP (Direct Overclock Profiles).
- Select it and set it to Enabled to ensure your RAM runs at a faster speed.
- Press F10 to save and exit the BIOS utility.
Once done, the RAM will run on a higher frequency, resulting in an increase in FPS and load times. However, the downside is you may notice a rise in system temperature as well.
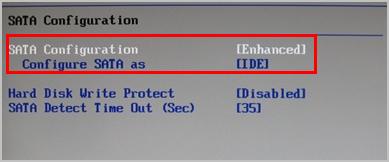
5. Increase the speed of your SSD drive
- Enter the BIOS menu using the steps mentioned in Solution 1.
- Locate Configuration or a similar option and press Enter.
- Go to Serial ATA and press Enter to select it.
- Now, choose IDE Compatibility Mode.
- Press F10 to save and exit the BIOS utility.
6. Enable TPM & Secure Boot
- Enter the BIOS menu using the steps mentioned in Solution 1.
- Go to the Advanced/Security menu.
- Look for TPM settings.
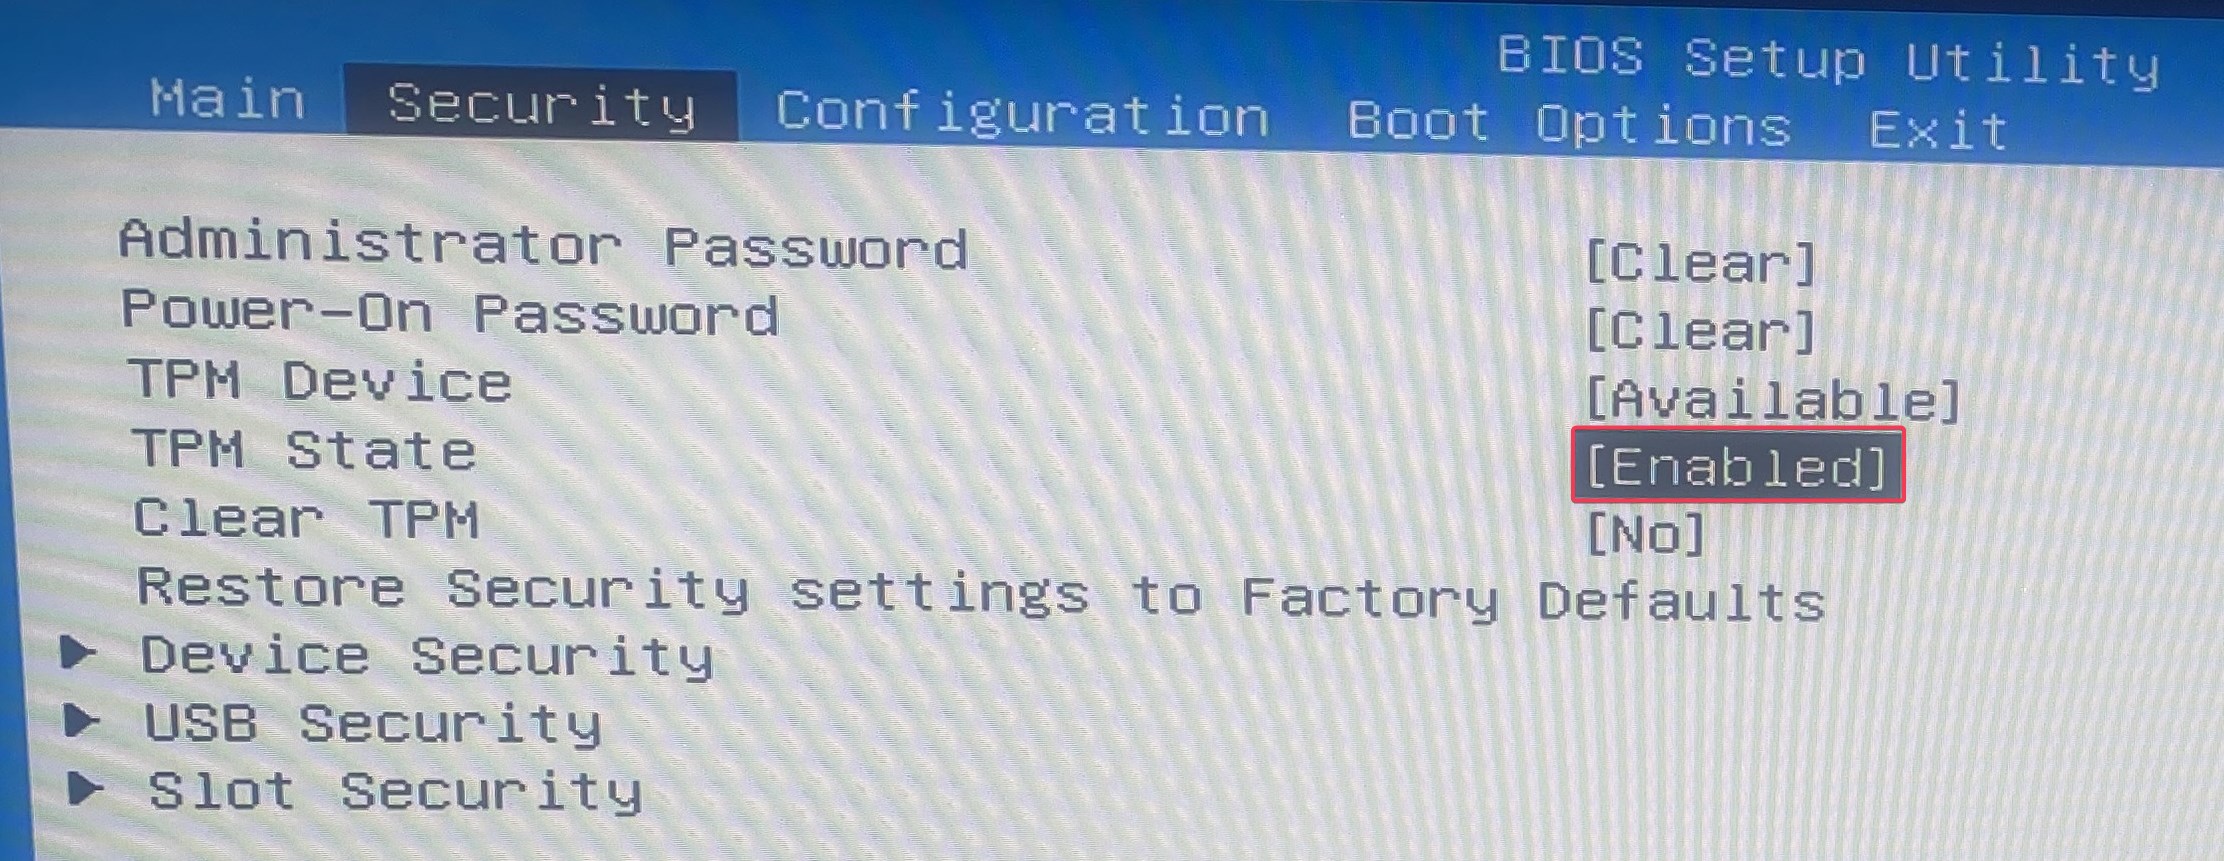
- Select it and set it to Enabled.
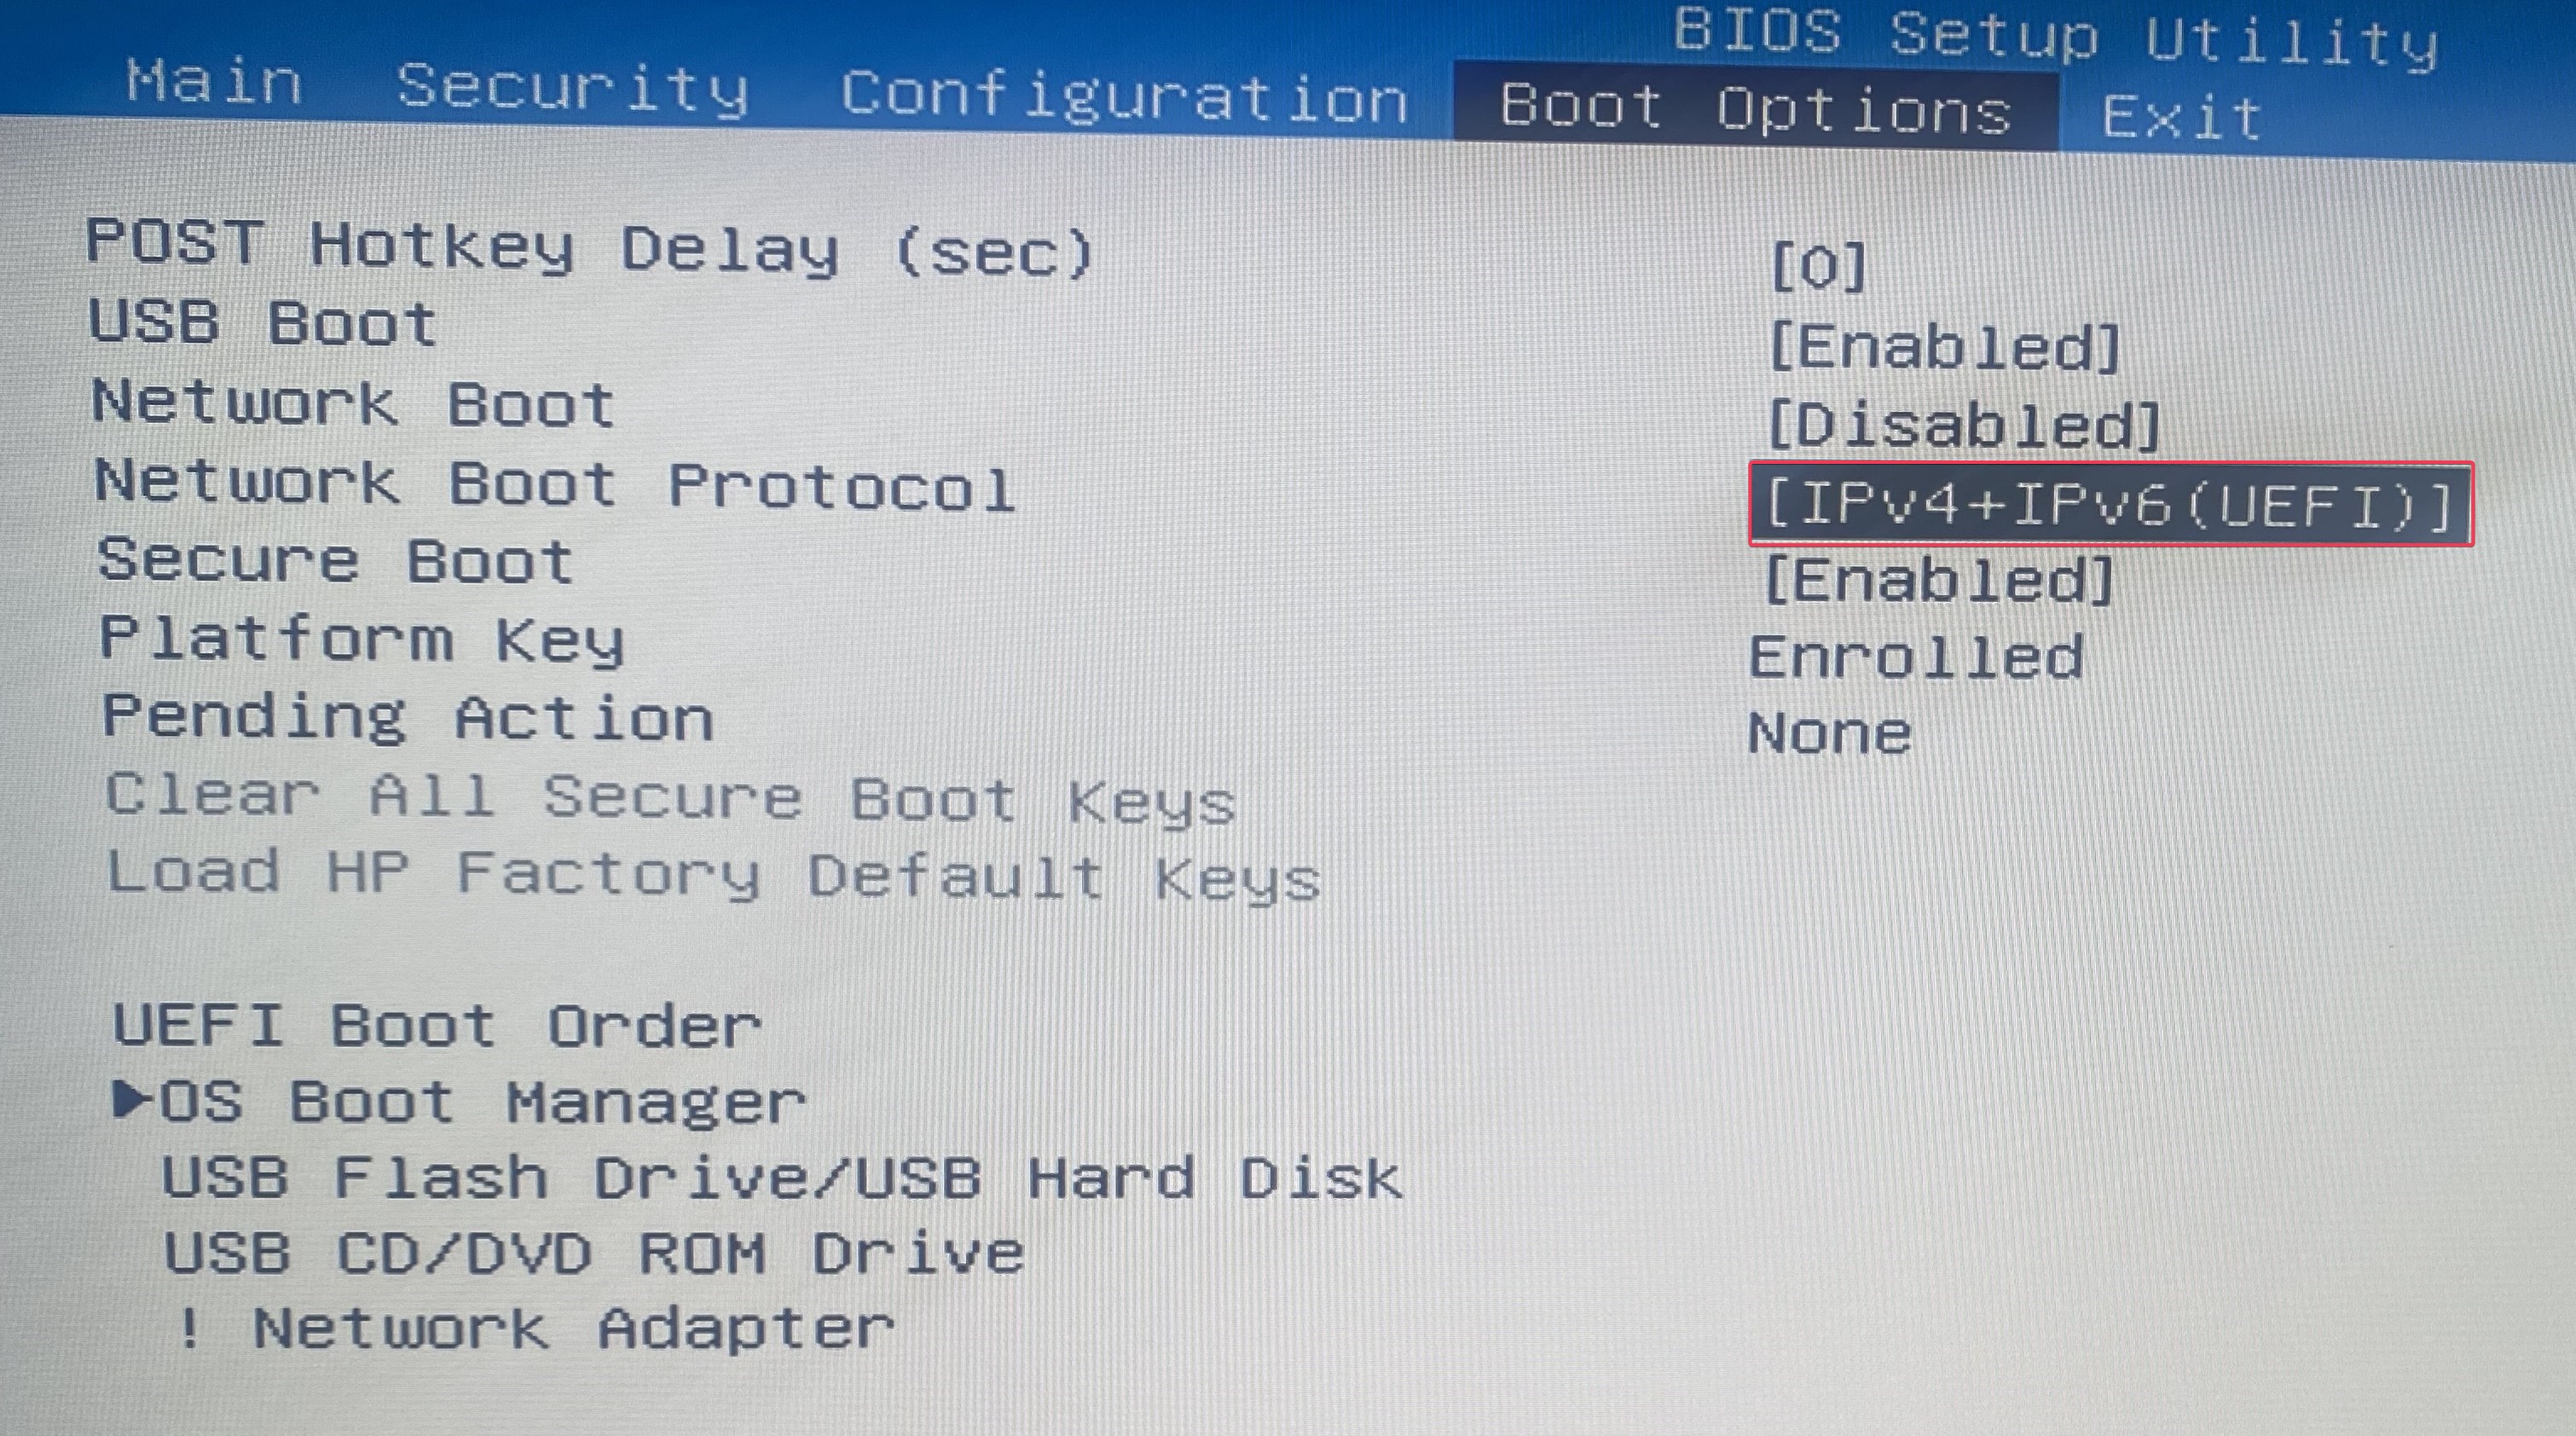
- Now go to the Boot menu.
- Locate Secure Boot, select it, and press Enter. Now set it to Enabled.

- Press F10 to save the changes and exit BIOS.
7. Disable C-states
- Enter the BIOS menu using the steps mentioned in Solution 1.
- Locate CPU Power Management, Advanced CPU, or similar options.
- Go to Global C-states, select it, and set it as Disabled.
- Press F10 to save the changes and exit BIOS.
8. Disable Compatibility Support Module
- Enter the BIOS menu using the steps mentioned in Solution 1.
- Go to Boot options or similar options, then locate Boot mode and set it to UEFI.
- Next, locate CSM Support and set it to Disabled.
- Press F10 to save the changes and exit BIOS.
To sum up, to optimize your computer for better performance and security, ensure you have enabled Overclocking, memory profiles, TPM, Secure Boot, and increased fan speed.
Read our disclosure page to find out how can you help Windows Report sustain the editorial team. Read more


Improve this guide


User forum
0 messages