Become an expert at Microsoft Teams meetings with these top five best practices
7 min. read
Published on
Read our disclosure page to find out how can you help Windows Report sustain the editorial team. Read more
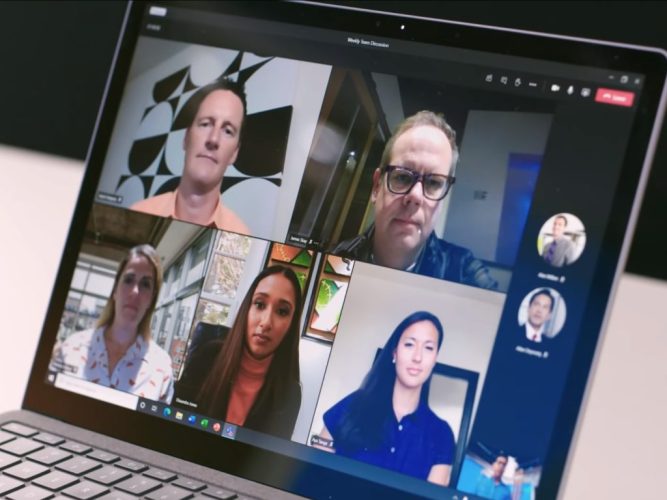
Now more than ever, you’re likely spending more time in meetings in Microsoft Teams. However, the more time you spend in Teams, the more important it becomes to try and make the most of all the features available for you, so you can have a seamless experience. Here’s a look at some of those features, and some best practices to leverage so you can become an expert at meetings in Microsoft Teams.
Practice 1: Blur your background or use background images
The first best practice on our list is one that is the most obvious and most popular in the current situation. That is, using the ability to blur your background in Teams or use background images.
With this best practice, you can have your meeting almost anywhere, and disguise whatever happens in the background around you. Indeed, thanks to the feature, Teams will only put an emphasis on your face and hides everything else. Just be aware, it uses artificial intelligence, and only works with humans. So, you might want to be a little careful if your furry friends are in the background.
There are a few ways to blur your background or use a background image in Teams. You can do this before the meeting, or during the meeting.
Before the meeting, on the join screen, you’ll want to click the square box to the left of PC Mic and Speakers under your video feed. From there, you’ll see an option for Background Settings. You can choose the first one, which says Blur. Or, if you want a different background, you can choose one from the list. Your feed will change to the desired background, and when you’re done, you can close the Background settings window with the X.
To Blur your background during the meeting, click the three periods ( . . . ) at the top of the meeting window. Then, from there, click Apply Background Effects. You can then choose one from the list, and click Apply.
Practice 2: Use a headset for a better experience
Next up, is a practice that your coworkers might end up appreciating: using a headset. With this practice, you’ll end up having a higher quality call in Teams. You won’t have to worry about coworkers not hearing you, or you not hearing them. Here’s how you can set one up in Teams.
To use a headset with Teams, just make sure it is plugged in or connected to your device, either via Bluetooth or headphone jack. Once connected, you’ll want to make sure Teams is configured properly for the headset. Again, there are two ways you can do this, either before the meeting on the join screen or during the meeting from the menu.
Before the meeting, you can configure the settings by clicking the PC Mic and Speakers button under your video feed. Once you do that, you’ll see Device Settings pop up. Be sure to look at the sections for Speaker and Microphone. Click the down arrow, and choose your headphone from the list for both speaker and microphone. Then, close the window with the X.
During the meeting, you can change to your headset by clicking the three periods ( . . . ) at the top of the screen and choosing Device Settings. From there, you’ll be able to choose the same settings as we describe above. When finished, close the window with the X.
It’s worth noting that you also can use the Make a test call feature here too, to ensure everything works right before you head into a meeting.
Practice 3: Schedule your meetings
One of the worst things about meetings is being pulled into one at the very last minute or second. That’s why, as a best practice, we suggest scheduling and fine-tuning your meetings. You can do this with the Scheduling Assistant in Microsoft Teams. Here’s a look at how to use it.
First, click the Calendar icon in the sidebar of Teams. From there, click the Scheduling Assistant tab on the top. From that tab, you’ll be able to schedule a meeting based on the availability of your coworkers. You can add locations, attendees, and so much more. When adding attendees, your coworkers will show up as either available unavailable, or unknown. The assistant pulls information from your coworker’s Outlook calendar to fill this out. You’ll see a schedule view, showing their already scheduled meetings in purple. You can also scroll through days and hours to find the time that’s right for everyone.
Related to this, is the ability to share a meeting agenda. You can do this so that your coworkers and everyone in the meeting will be on the same page. When creating a net meeting, you’ll see this in the compose box. You’ll be able to put your agenda here, and it will appear in the invite email.
Practice 4: Take meeting notes
What happens if you’re in the middle of an important meeting, but need a way to take some notes? You think you’d have to use Microsoft Word or another program, but did you know that Teams has its own meeting notes feature, too?
This is one of our other best practices for meetings in Teams. The reason why? Notes get saved as part of the meeting itself, and can go anywhere with you, and will be saved for later or for sharing with your coworkers.
To use the feature, join the meeting as you normally would, and then click the (. . . ) more actions button, followed by Meeting Notes. You should then see a Meeting Notes window pop up. From there, you’ll want to click Take notes. This will then give you full access to a formatting toolbar, with bold, italic, highlighting, and some of other things you are used to in Microsoft Word. You also can create a new section with the (+) button, too.
When the meeting is finished, you can access your notes from the chat. There should be an option that says Show notes in full screen. Click it to view the notes.
Practice 5: Record your meetings (with permission of course!)
Final on our list of best practices is recording a meeting in Teams. One of the worst things in meetings is when you have to constantly ask your coworkers to repeat things over and over because you weren’t able to get it down or take some notes. Well, if you have the consent of all parties in the meetings, you can actually record a meeting live, as it happens, to ensure that you can have a copy of the meeting for reference later.
To record a meeting, you can click the three dots ( . . . ) at the top of the screen, followed by the Start Recording button. From there, you’ll see a disclaimer that the meeting is being recorded. You can ignore it, this is just for your coworker’s security. When the meeting is over, and you’re ready to stop, you can then click the same menu and choose Stop Recording.
When the recording is finished, you’ll get an email letting you know that it is available in Microsoft Stream. You can click that link in the email to access it, and even download a file, so you can view it offline.
Check out our other tips
While the focus of this article has been some of the best practices for Teams meetings, there’s a lot more to know about Microsoft Teams. Over the past few months, we’ve been diving deeper into Teams. Topics include how to run multiple instances of Teams, how to use Bots, manage notifications, and a lot more. Check out our news hub here for more, and let us know if you have any Teams tricks and tips of your own by dropping us a comment below.



User forum
0 messages