Current BIOS Setting Don't fully Support Boot Device [Fix]
Check your hard drive if you're having this problem
Key notes
- This issue affects ASUS and other motherboards, so if this happens, check if your storage is properly connected.
- Adjusting the boot order on your PC is a great way to tackle this issue.
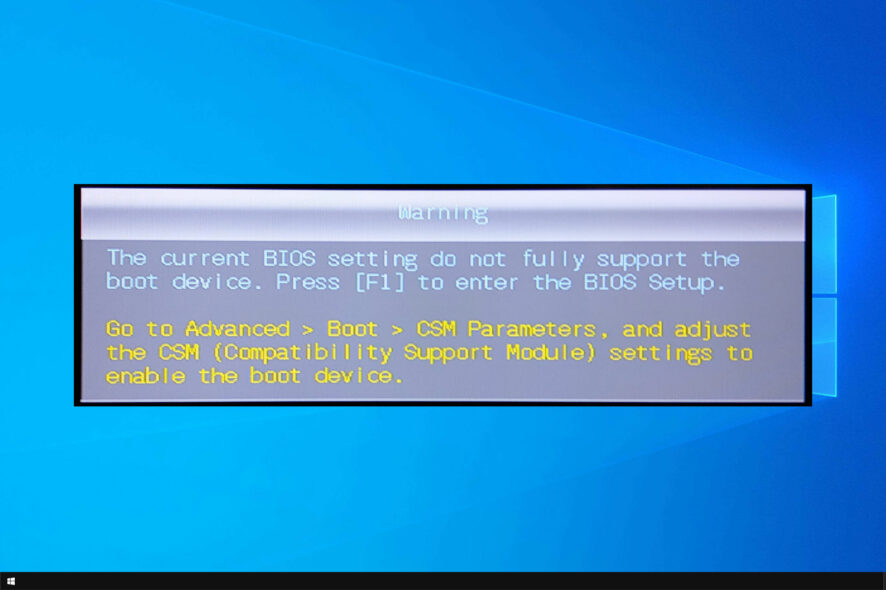
BIOS-related errors in the Windows system are not common. One such error is The current BIOS setting do not fully support the boot device.
This can be a serious issue, and your PC can end up stuck on the motherboard boot screen, so it’s important to fix it, and today we’re going to show you how to do it.
Why does the current BIOS setting not fully support the boot device message appear?
- Issues with hard drives, such as loose connections, can cause this and other problems.
- Incorrect boot order will cause this issue to appear on your PC.
- Problems with startup can sometimes lead to this problem.
- Certain BIOS settings will cause this issue to appear.
How can I fix the current BIOS setting do not fully support the boot device?
1. Check your HDD
- Assuming you are having a problem with a new or relatively new build, check the HDD for connection issues.
- Open the computer and disconnect the SATA cable from the HDD and motherboard.
- Also, disconnect all the power from the HDD and leave the components idle for a few minutes.
- Now plug all the cables and connect the hard drive to your motherboard.
- Turn on the computer and check for any improvements.
If that does not work, try plugin the HDD to a different SATA port on the motherboard to see if that helps.
This solution requires you to open the computer and disconnect and reconnect the hardware inside. Proceed only if you know what you are doing.
2. Run Startup Repair
- Insert the System Repair Disc or Windows DVD in the DVD/ USB flash drive.
- Restart your computer. The computer will boot using the inserted DVD drive.
- When the Press any key to boot from CD or DVD appears, press any key.
- Select the correct time and Keyboard type.
- Select the Repair your computer option in the lower-left corner.
- Select the Troubleshoot option under the Choose an option screen.
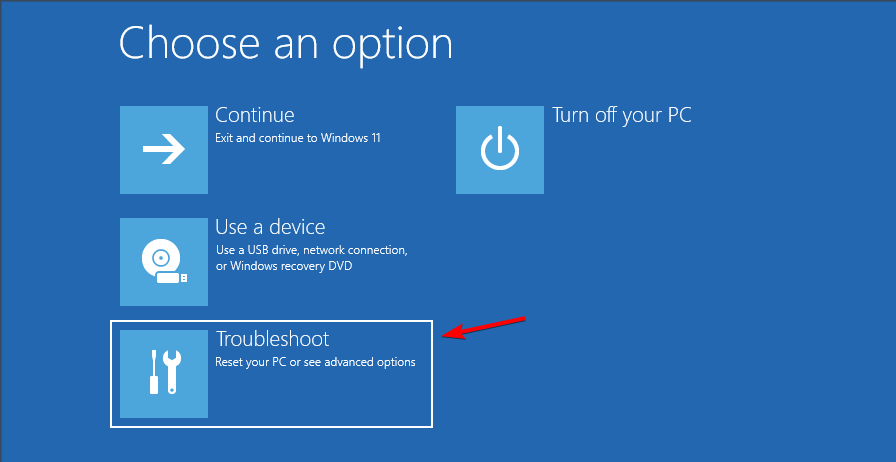
- Under the Troubleshoot screen, click on Advanced Options.
- Click on Startup Repair.
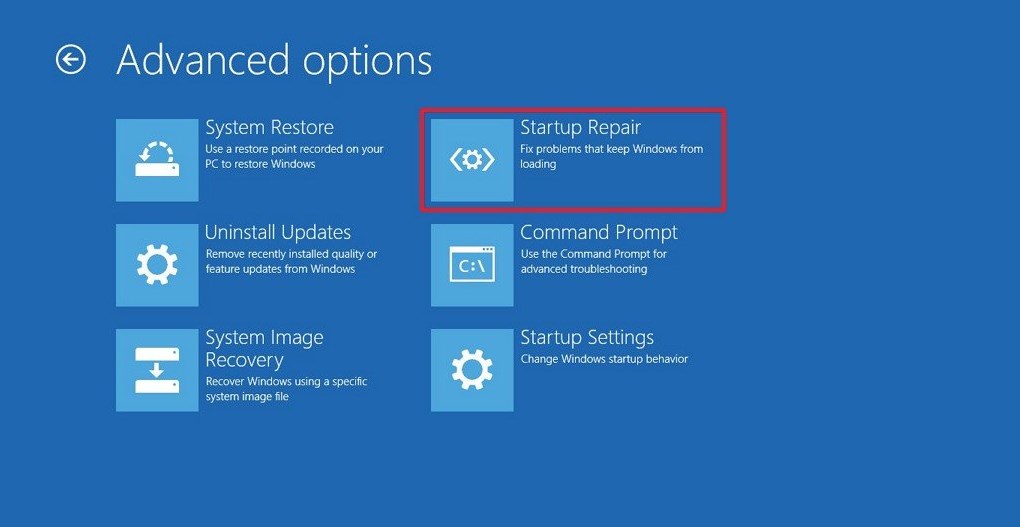
- Windows will now scan for any issues with the system that is causing issues during the startup and fix them.
If you don’t have a Windows DVD, you can create one using Windows 10 ISO. Here is how to create a Windows 10 bootable drive.
3. Check boot device order
- Start the computer and press ESC/F1/F2/F8 or F10 during the initial startup screen.
- Choose enter BIOS setup option.
- Since the mouse does not work, use the arrow keys to navigate.
- Go to the Boot tab.
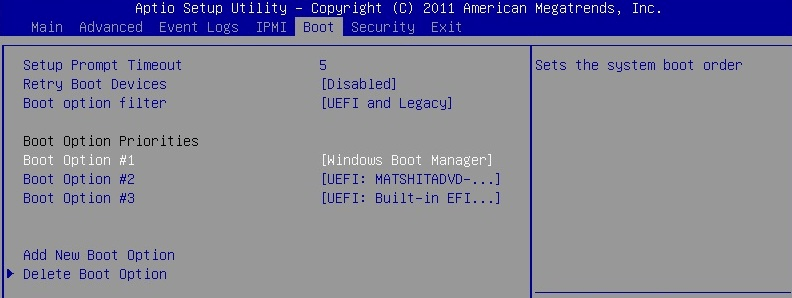
- Now check the boot device order. Make sure your HDD is selected as the priority device.
- Exit and restart the computer. Check if the error is resolved.
4. Reset BIOS settings
- Restart your computer and repeatedly press ESC/F1/F2/F8 or F10 during the startup to get into BIOS.
- If you are using Windows 10, click on Start and select Power. Now press and hold the Shift key and press Restart. Go to Troubleshoot > Advanced Options > UEFI Firmware Settings and click on Restart.

- Once you are in BIOS, press F9 to open the Load Default Options dialogue box.
- Select Yes using the arrow keys to reset BIOS settings to factory default.
- Exit and restart the computer and check for any improvements.
The current BIOS settings do not fully support the boot device error that occurs due to issues with the BIOS. Follow all the fixes in this article to resolve the issues and get your system back online.
In some rare cases, there might be BIOS corruption present, but we have a guide that can help you fix that.
If you have any other questions or suggestions, leave them in the comments section below and we’ll surely check them out.
Read our disclosure page to find out how can you help Windows Report sustain the editorial team. Read more


Improve this guide


User forum
0 messages