Black Box on Mouse Pointer: 5 Ways to Get Rid Of It
Fix the black box around your cursor by adjusting its settings
3 min. read
Updated on
Read our disclosure page to find out how can you help Windows Report sustain the editorial team Read more
Key notes
- A black box on the mouse pointer is a somewhat curious issue that can arise because the WDDM driver is enabled for Remote Desktop Connections.
- When a mouse pointer is showing a black square, some users might need to adjust mouse pointer settings.
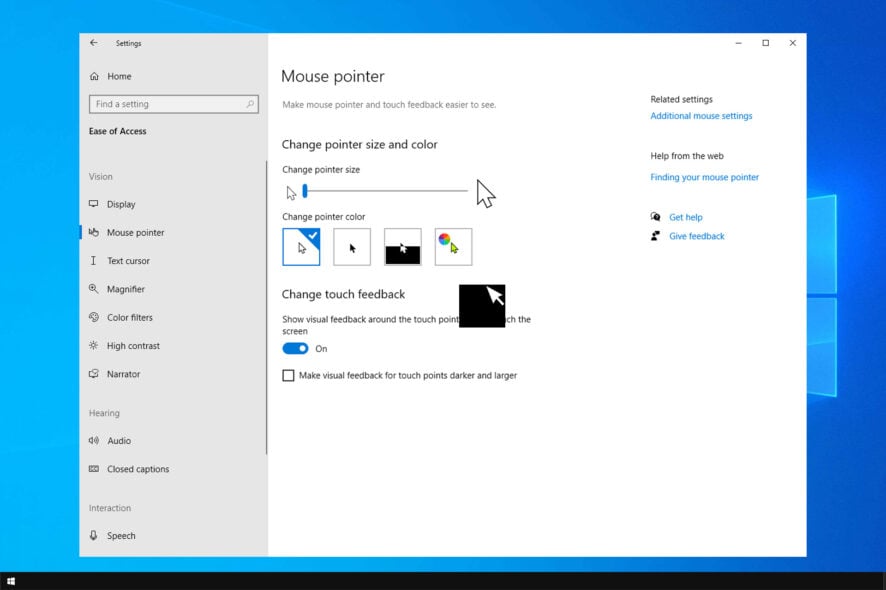
Some users reported a black box on mouse pointer, and it seems that this issue appears if your mouse cursor is corrupted.
This is an annoying issue, and in today’s guide we’re going to show you how to properly fix it.
Why does my Mouse pointer have a black square?
This is an annoying issue, and it’s usually caused by the following:
- Outdated drivers – If your graphics drivers are out of date, you might encounter glitches. Therefore, it’s advised to update your graphics drivers.
- Mouse settings – In order to fix this issue, sometimes you just need to change mouse settings on your PC.
How can I fix black box on mouse pointer?
1. Select the None mouse pointer scheme option
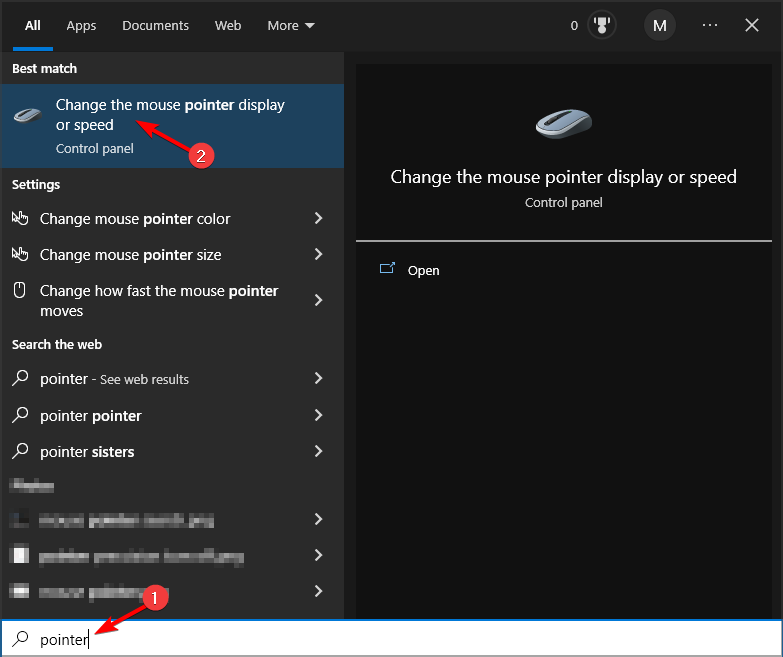
- Press the Windows key + S and type pointer. Select Change the mouse pointer display or speed.
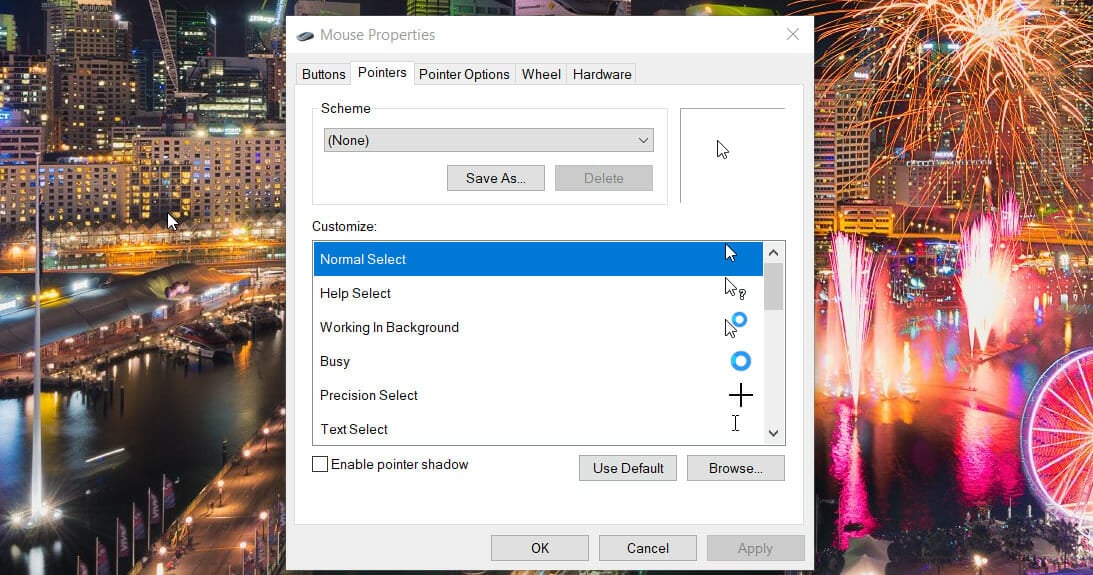
- Select the Pointers tab.
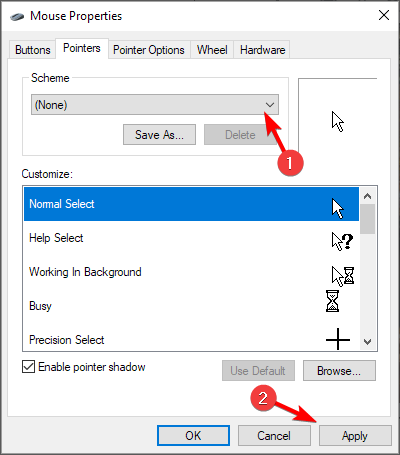
- Then select the (None) option on the Scheme drop-down menu. Press the Apply button to save the new settings.
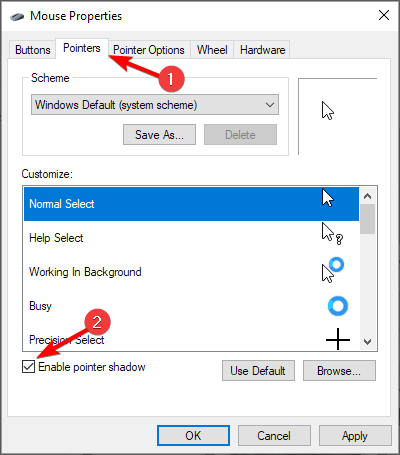
2. Select the Enable pointer shadow setting
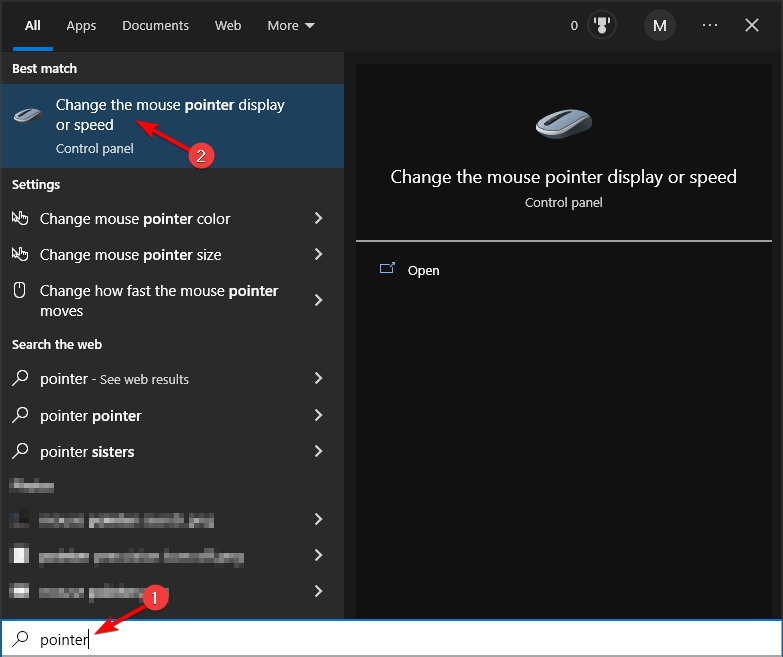
- Press the Windows key + S and type pointer. Now select Change the mouse pointer display or speed.
- Go to the Pointers tab and check Enable pointer shadow.
- Lastly, click Apply and OK to save changes.
3. Adjust the mouse pointer’s size
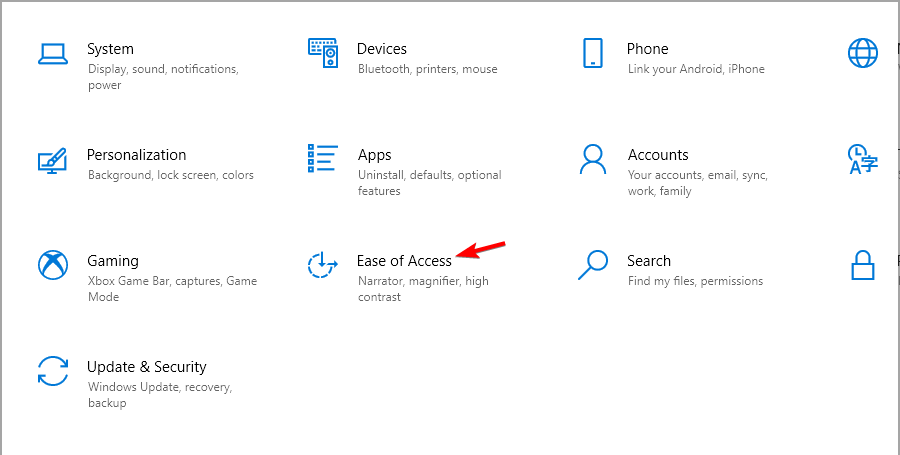
- Press the Windows key + I to open the Settings app.
- Next, navigate to Ease of Access.
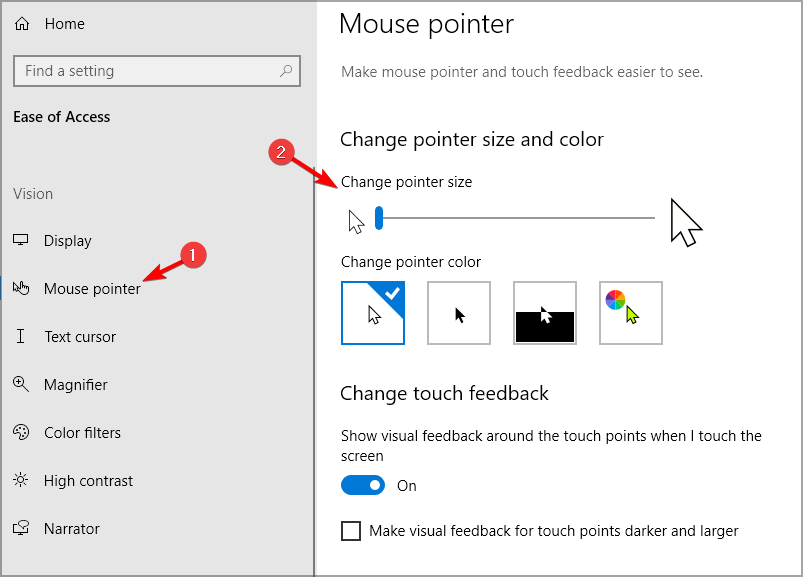
- Select the Mouse pointer from the left pane. After that, drag the slider on the Change pointer size bar to the far right to select an extra-large setting.
- Thereafter, close and then reopen the Mouse pointer tab in Settings.
- Then drag the Change pointer size bar’s slider to its original setting or one of preference.
4. Update your graphics card’s driver
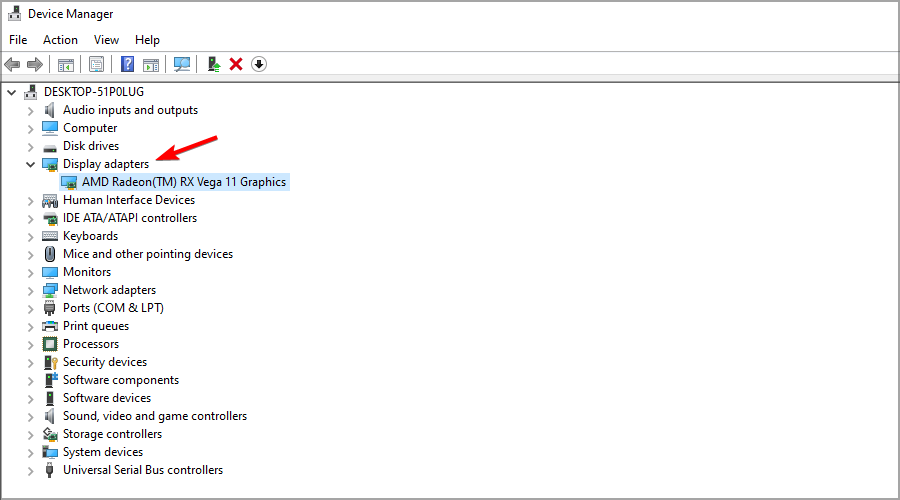
- Press the Windows key and X at the same time. Next, click the Device Manager menu shortcut.
- Double-click the Display adapters category in Device Manager.
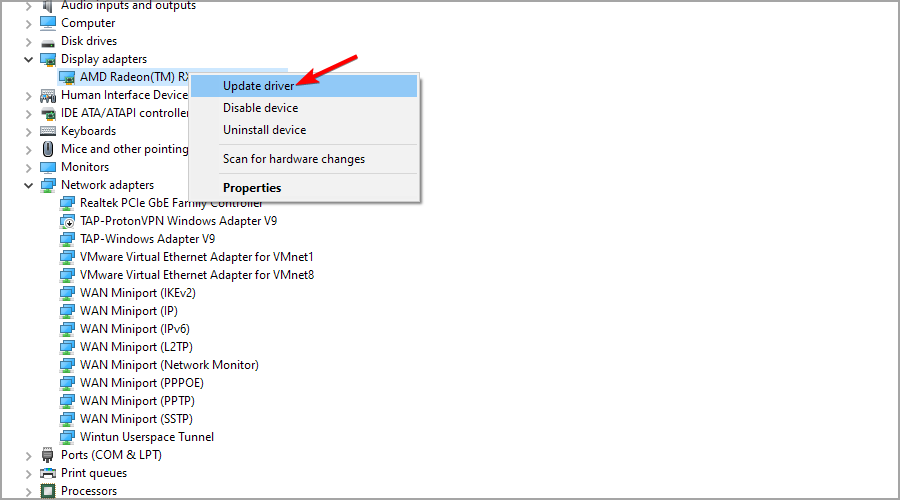
- Right-click your PC’s listed graphics card and select Update driver.
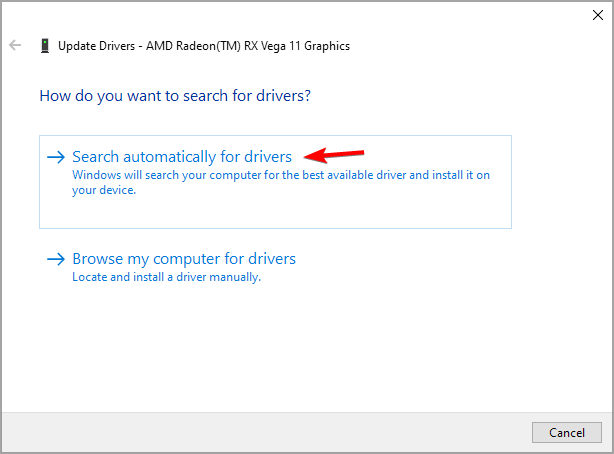
- Click the Search automatically for drivers option. The Update Drivers utility might then download and install the latest driver for your graphics card.
Note that the Update Drivers utility in Windows doesn’t always update drivers even when there are more recent ones available. So, it’s usually better to update drivers with third-party driver updater software.
5. Disable the WDDM graphics display driver for Remote Desktop Connections policy
 NOTE
NOTE
- Press Windows key + R and type gpedit.msc. Next, press Enter.
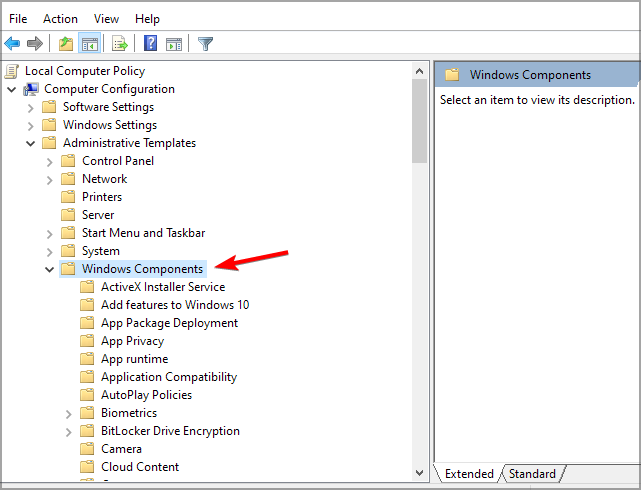
- Then click Computer Configuration within Group Policy Editor’s window.
- Expand Administrative Templates to select Windows Components.
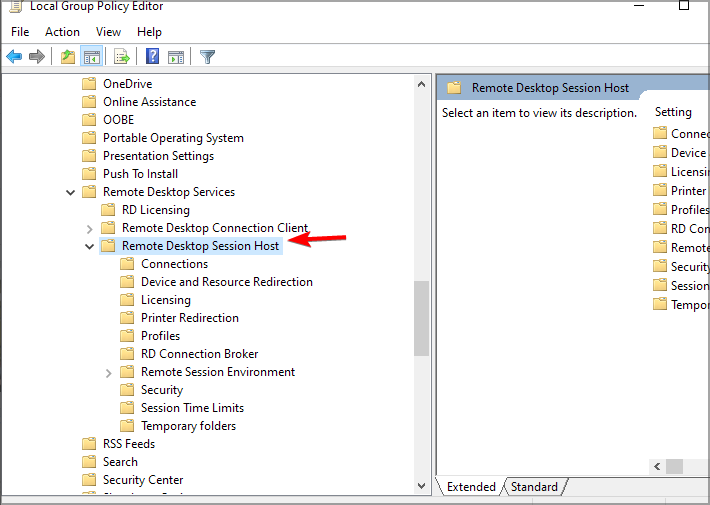
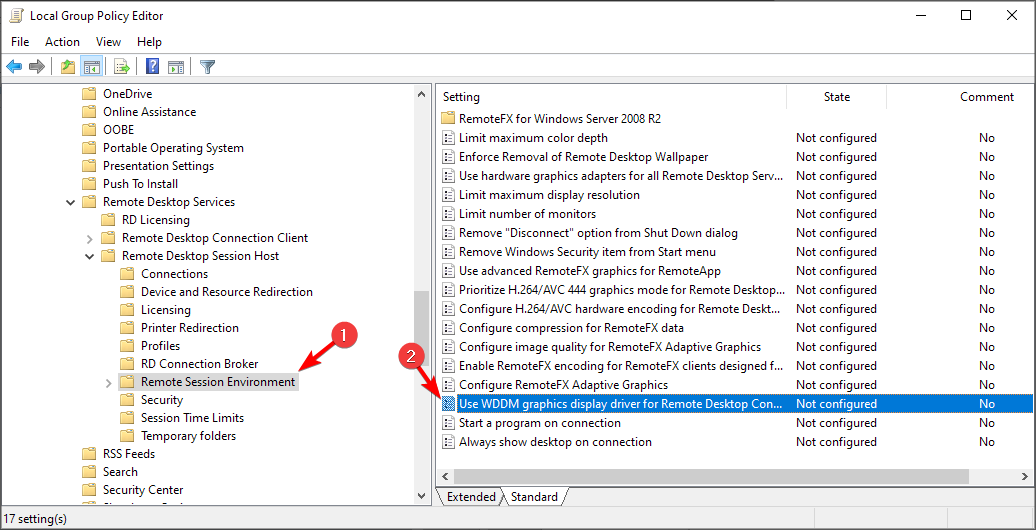
- Select the Remote Desktop Services component. After that, navigate to Remote Desktop Session Host.
- Next, go to Remote Session Environment on the left side of Group Policy Editor. Finally, double-click on Use WDDM graphics display driver for Remote Desktop Connections.
- Click the Disabled radio button. Select the Apply and OK.
.
Those are some of the potential resolutions for fixing black boxes around cursors users have confirmed to work.
We hope this guide helped you get your mouse cursor back. What other solutions did you try? Let us know in the comments below.

