How to Restrict User Access to Programs in Windows 10
Prevent programs from running at all or restrict users' access to them
Key notes
- There are times when you share your PC with multiple people, each with its own user account.
- In many cases, you might not want to share all your programs with the rest of the users and restrict their access to them.
- You can restrict user access to a program by blocking access to it for all users via the Registry or the Group Policy Editor.
- However, when using the Group Policy Editor, you can also only restrict program access for specific users.

Network administrators might need to block user access to certain Windows 10 programs for various reasons.
There are a few ways that network administrators, and anybody else, can block users from running certain software on their desktops or laptops.
Users can apply locks to folders or add passwords to programs with third-party software. However, users can also block access to programs in Windows 10 without any third-party software as follows.
How can I restrict access to only certain programs for users on Windows 10?
1. Block Software from running by editing the Registry
Users can stop certain programs from running by editing the registry. It might be worth setting up a system restore point before editing the registry so you can undo the changes if required. Then, follow the guidelines below.
- First, press the Windows key + R hotkey.
- Enter regedit in Run’s Open text box, and select the OK option.

- Next, open this registry path: HKEY_CURRENT_USER\SOFTWARE\Microsoft\Windows\CurrentVersion\Policies.
- If there isn’t an Explorer key under Policies, right-click the Policies key on the left of the window to select New > Key. Enter ‘Explorer’ as the key name.

- Select the new Explorer key. Then right-click an empty space on the right of the Registry Editor window and select New > DWORD (32-bit).
- Enter ‘DisallowRun’ as the title for the new DWORD.

- Double-click the new DisallowRun DWORD to open its Edit DWORD window.
- Enter ‘1’ in the Value data box as shown directly below, and click the OK button.

- Next, right-click the Explorer key to select New > Key.
- Then input ‘DisallowRun’ as the title for the new subkey.

- Right-click the new DisallowRun subkey to select the New and String Value context menu options.
- Now enter ‘1’ as the string value name.

- Double-click the 1-string value to open the Edit String window.
Then enter the exact name of the software’s executable file that you need to stop running in the Value data box as shown directly below.
- Click the OK button to close the Edit String window.
- Close the Registry Editor window.
- Now, the blocked program will display the error message shown below when users try to launch it.

Some users might not need to set up an Explorer key if there’s already one there under the Policies subkey. If so, users can skip the step for setting up a new Explorer key.
Open the Computer HKEY_CURRENT_USER Software Microsoft Windows CurrentVersion Policies Explorer path in the Registry Editor. Then, add the DisallowRun subkey to the existing Explorer key instead.
To set up blocks for more software, users will need to enter different names for string values within the DisallowRun key. For example, the string value names within the DisallowRun key for the second and third program blocks will need to be 2 and 3 as shown below.
If you’re establishing a seventh program block, enter 7 as the string value title.

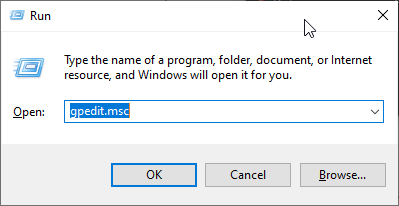
1. Press the Win + R keys at the same time on your keyboard to open the Run dialog.
2. Enter gpedit.msc in the text box, and then click the OK button to open the Group Policy Editor.
3. Navigate to User Configuration > Administrative Templates > Templates on the left of the Group Policy Editor window.
4. Double-click on Run only specified Windows applications to open that setting’s window.
5. Select the Enabled option on the Run only specified Windows applications window.
6. Press the Show button to open a Show Contents window.
7. Then click a line on the Show Contents window to enter the executable file name of the program to block. Some users might need to open the software’s folder to check what exe file name they need to enter.
8. Press the OK button.
9. Click the Apply and OK buttons on the Run only specified Windows applications window. These guidelines will block the program for all users on a device.
10. To block the software for a specific user, you’ll need to add the Group Policy Object Editor snap-in to the Microsoft Management Console. Then you can configure policies to apply to specific users as follows.
11. First, press the Win key + Q keyboard shortcut.
12. Enter mmc.exe in the search box, and select to open mmc.exe.
13. Click Yes on the UAC prompt window that might open.

14. Then click File > Add/Remove Snap-in to open the window shown directly below.

15. Select Group Policy Object Editor on the left of the window.
16. Press the Add button.
17. Click Browse on the Select Group Policy Object window that opens.
18. Select the Users tab.
19. Then select an account to apply the policies to.
20. Press the OK button.
21. Click the Finish option.
22. Select the OK option on the Add or Remove Snap-ins window.
23. Click File >Save As on the console window.
24. Enter a file title in the Save As window, and click the Save button.
25. Thereafter, double-click the saved MSC file to apply the block program policies to the selected account group.
That will launch the Group Policy Editor window from which you can select to block a program as outlined above.
2. Block user access to programs in Windows 10 via Group Policy Editor
Windows 10 Pro and Enterprise include the Group Policy Editor tool, with which users can stop programs running without editing the registry.
Users can adjust a Run only specified Windows applications setting with the Group Policy Editor. Moreover, you can configure access to some software to only be restricted for all or only certain users.
That’s how users can block access to programs in Windows 10. You can unblock the software by erasing the new string values in the registry or disabling the Run only specified Windows applications setting.
However, to ensure that you can always undo registry changes, set up system restore points before establishing program blocks. Then, you can reverse changes made even to admin accounts by rolling Windows back to the restore point.
We hope you found this article helpful and managed to restrict user access to programs you don’t want them to open. Besides, you can block Internet access for specific apps in Windows to enjoy seamless network connectivity.
Let us know in the comments section below if you have any questions.
Read our disclosure page to find out how can you help Windows Report sustain the editorial team. Read more


Improve this guide


User forum
0 messages