How to Fix BlueStacks Error Code 2004?
Run BlueStacks as an administrator
5 min. read
Published on
Read our disclosure page to find out how can you help Windows Report sustain the editorial team Read more
Key notes
- To fix the Bluestacks error code 2004, recover disk space, update the Windows operating system, and update or reinstall BlueStacks.
- Continue reading to learn the steps.
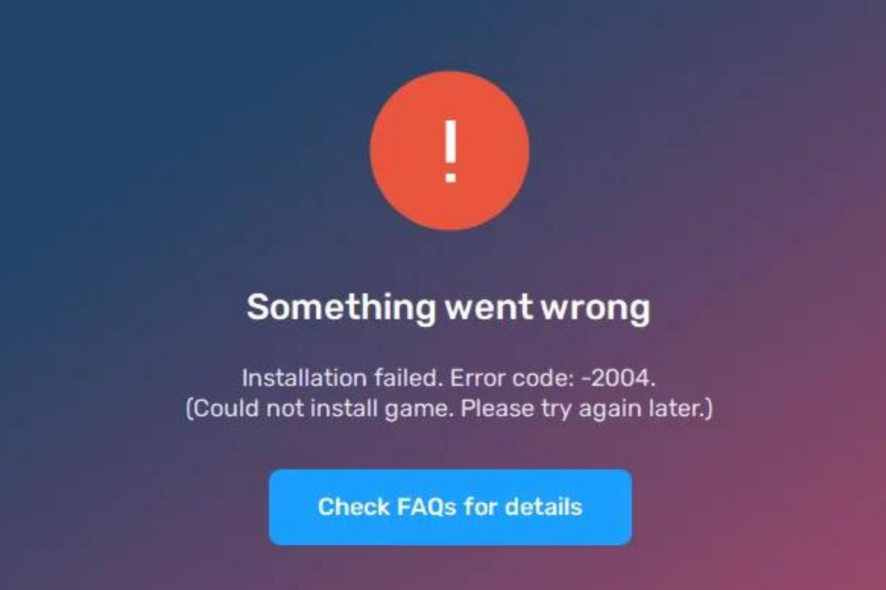
If you encountered the BlueStacks error 2004 Something went wrong, Installation Failed message while trying to install a game or app, this guide can help!
We will discuss the probable causes and offer the WR experts-tested solutions to fix the error and get BlueStacks up and running.
What causes the BlueStacks error 2004?
- BlueStacks software is outdated, or Virtualization on your PC is disabled.
- Windows OS or drivers are outdated, or your PC doesn’t meet the requirements.
- Antivirus interference.
How do I fix the BlueStacks error code 2004?
Before we go to the advanced fixes to get rid of BlueStacks Something went wrong with error code 2004; here are a few preliminary checks you should do:
- Ensure your Windows operating system is up to date with the latest version, and check the system requirements for the app.
- Restart your computer and router to refresh the connection.
- Check if you have a stable internet connection & end unwanted processes in the background.
1. Set the app to run as an administrator
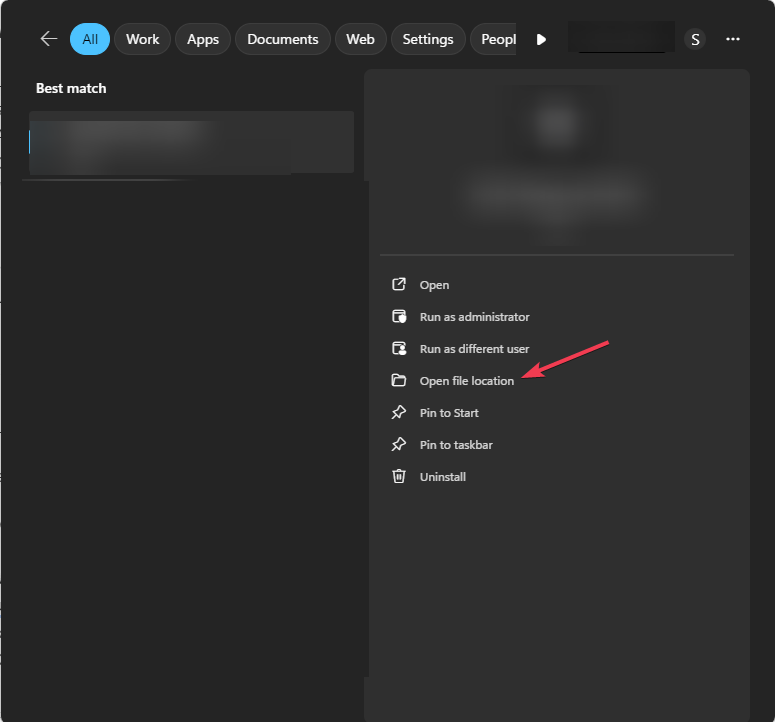
- Press the Windows key, type Bluestacks and click Open file location.
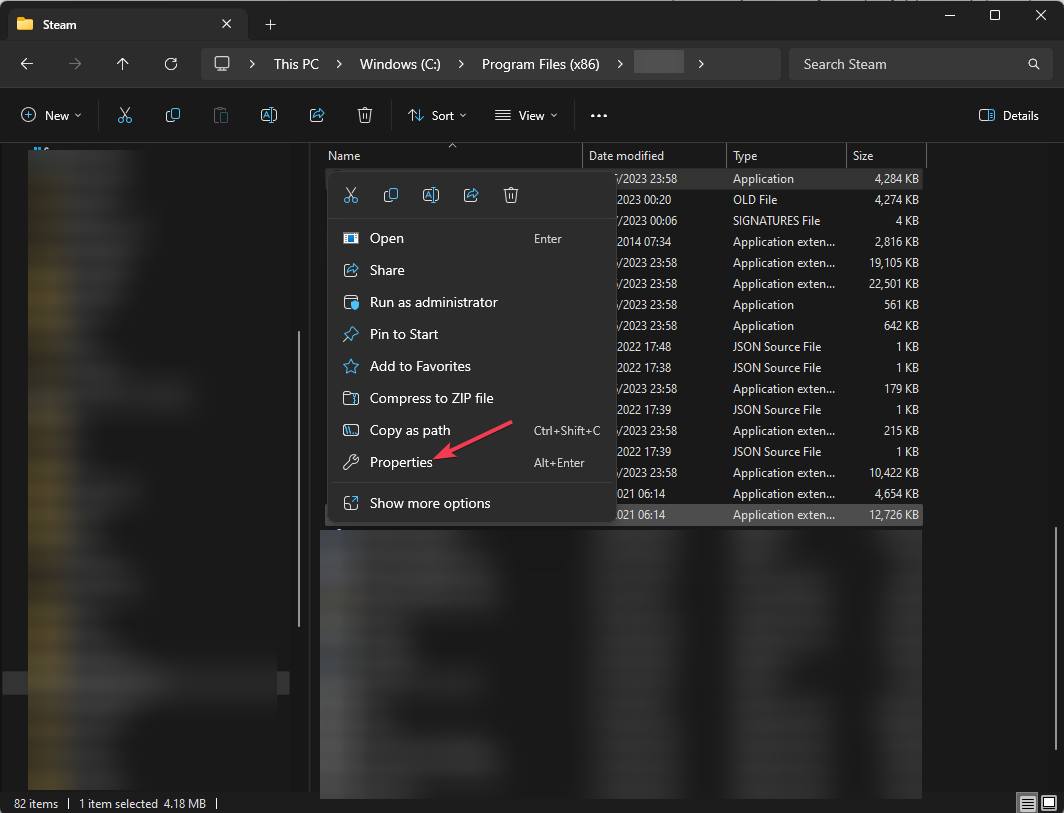
- Locate the HD-Player.exe from the folder, and then choose Properties.
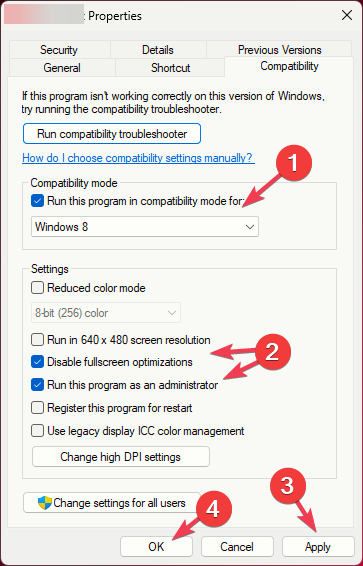
- Go to the Compatibility tab, and place a checkmark next to Run this program in compatibility mode for, then choose Windows 8 from the drop-down menu.
- Now go to Settings, and place a checkmark next to Run this program as an administrator & Disable fullscreen optimizations.
- Click Apply, then OK to save the changes.
2. Enable Virtualization
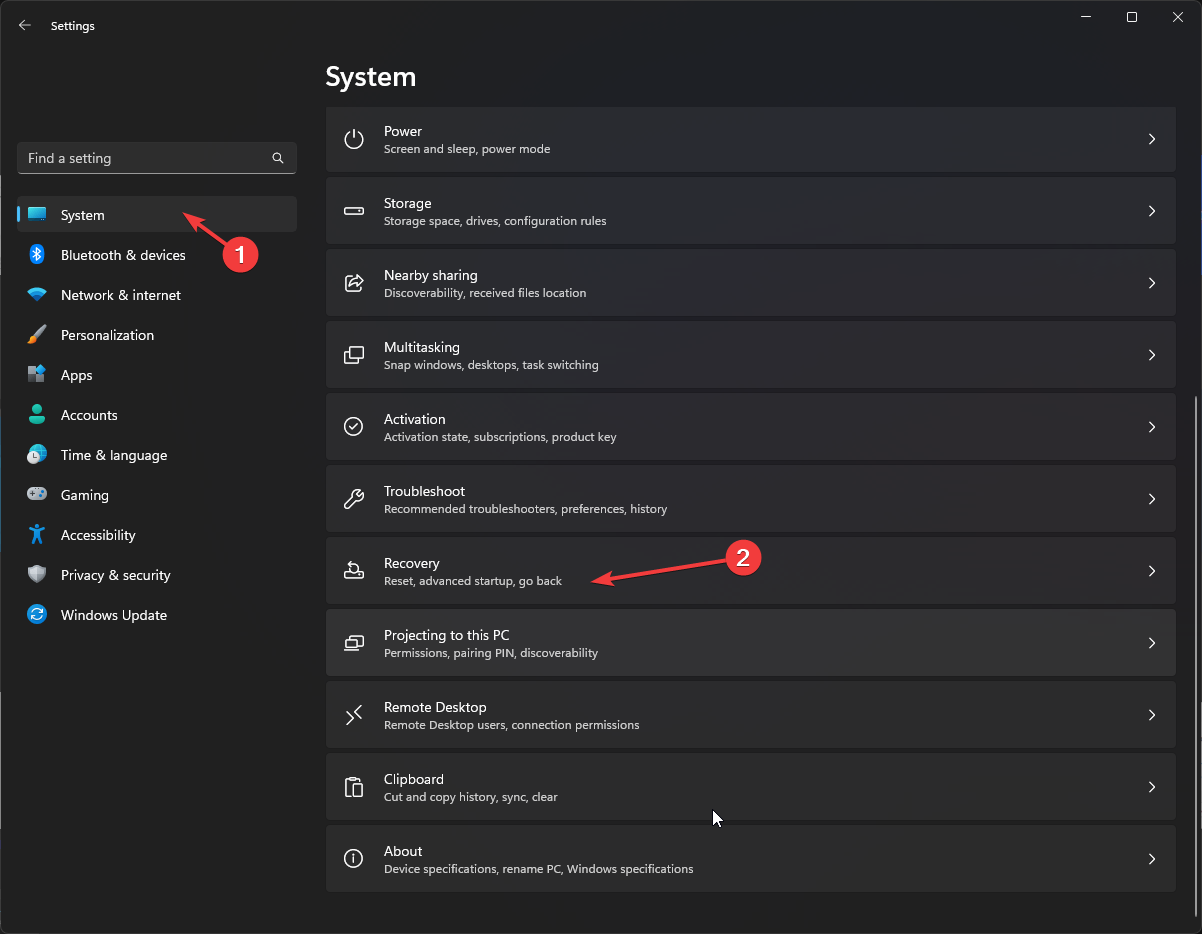
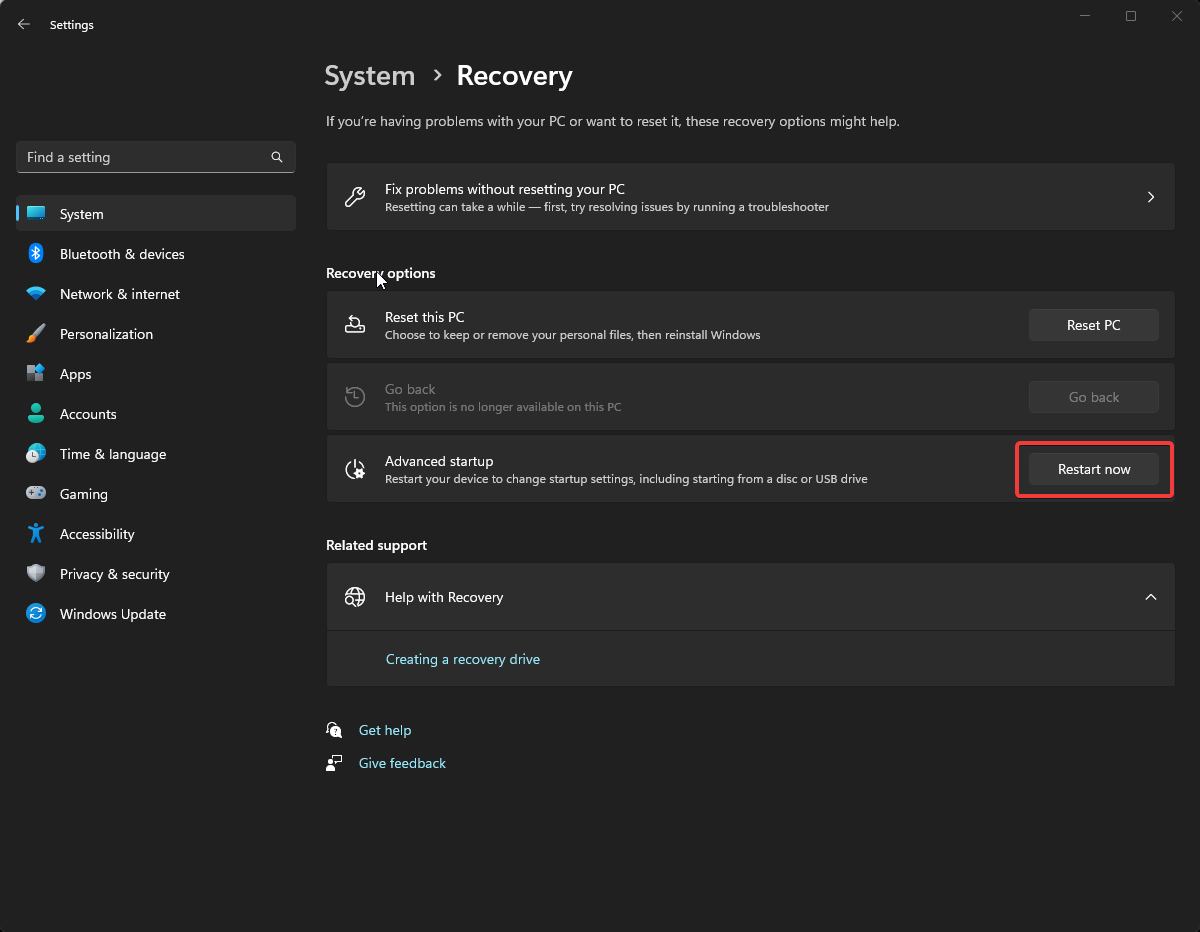
- Press Windows + I to open Settings.
- Click System, then choose Recovery.
- Locate Advanced startup and click the Restart now button.
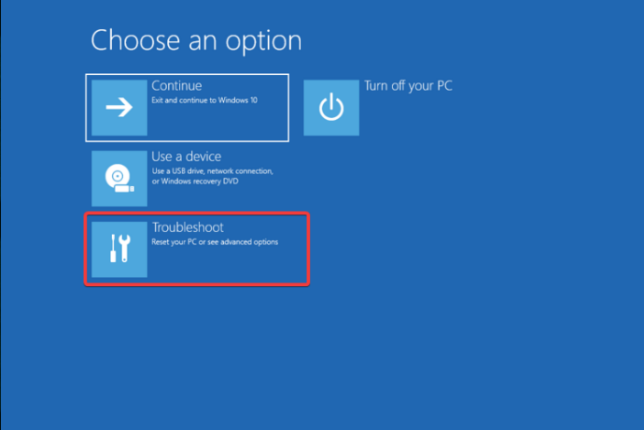
- On the Choose an option screen, select Troubleshoot.
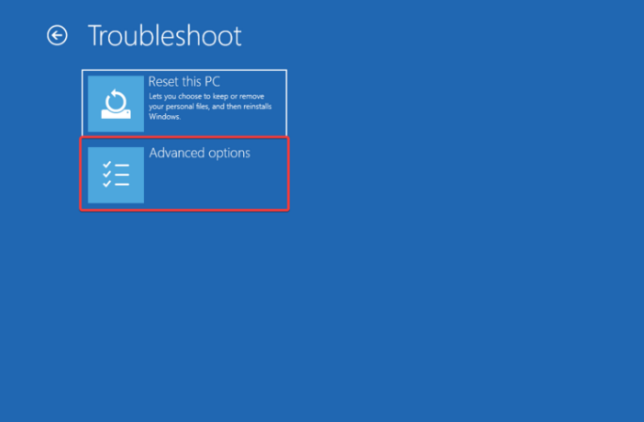
- Click Advanced options.
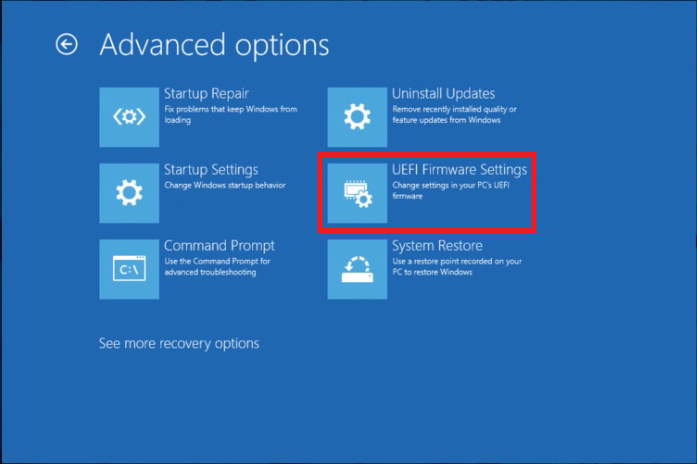
- Choose UEFI Firmware Settings.
- Click Restart to enter the BIOS setup.
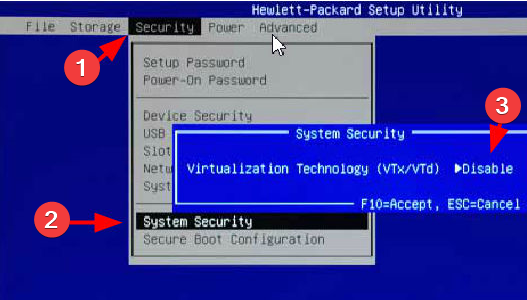
Once in BIOS mode, the steps to enable virtualization can vary depending on the device manufacturer. Here, we are using HP computer to demonstrate the steps:
- Use the arrow keys on your keyboard to go to the Configuration tab, then press Enter to select it.
- Now select Virtualization Technology.
- Choose Enable.
- Press F10 to save the changes and exit the BIOS setup.
Next, you need to turn on the virtual machine platform in Windows; follow these steps to do so:
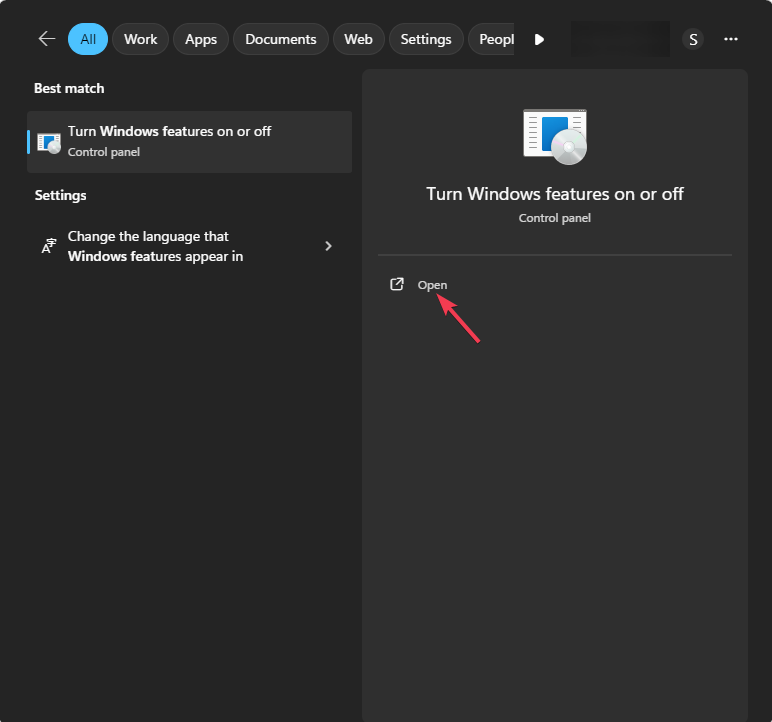
- Press the Windows key, type windows features, select Turn Windows features on or off and click Open.
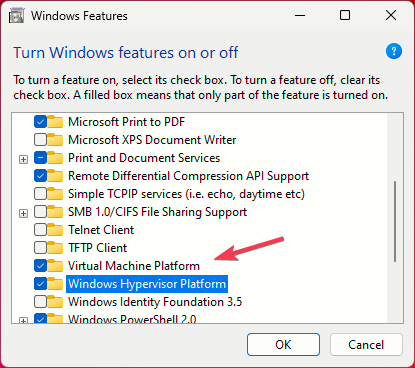
- On the Windows Features window, place a checkmark next to Virtual Machine Platform.
- Make sure Hyper V, Windows Hypervisor Platform, Windows Subsystem for Linux, and Windows Sandbox are also selected.
- Click OK and restart your PC when prompted.
3. Run the Disk Cleanup tool to recover space
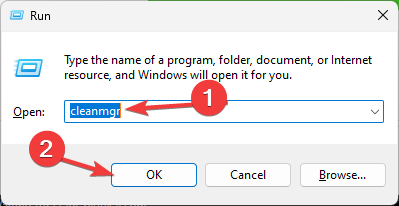
- Press the Windows + R to open the Run window.
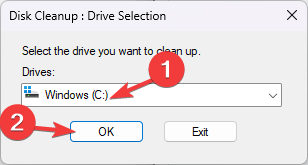
- Type cleanmgr and click OK to open the DiskCleanup window.
- Select the system drive, usually it is C, then click OK.
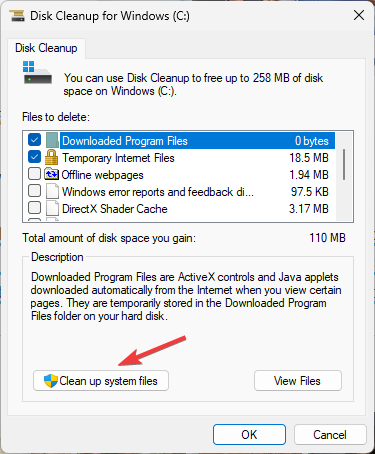
- Click Clean up system files.
- Select the drive again and click OK.
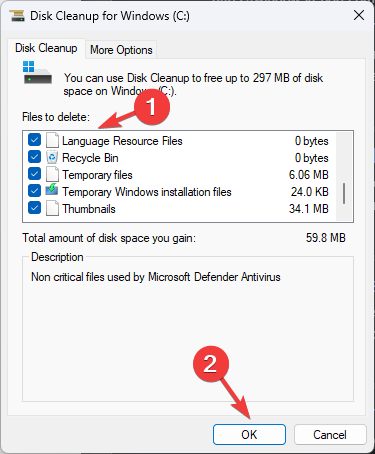
- Place a checkmark next to all the items under Files to delete and click OK.
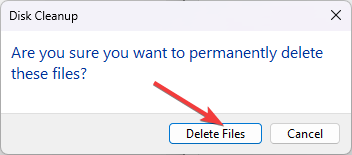
- Click Delete Files to complete the action.
4. Check for updates
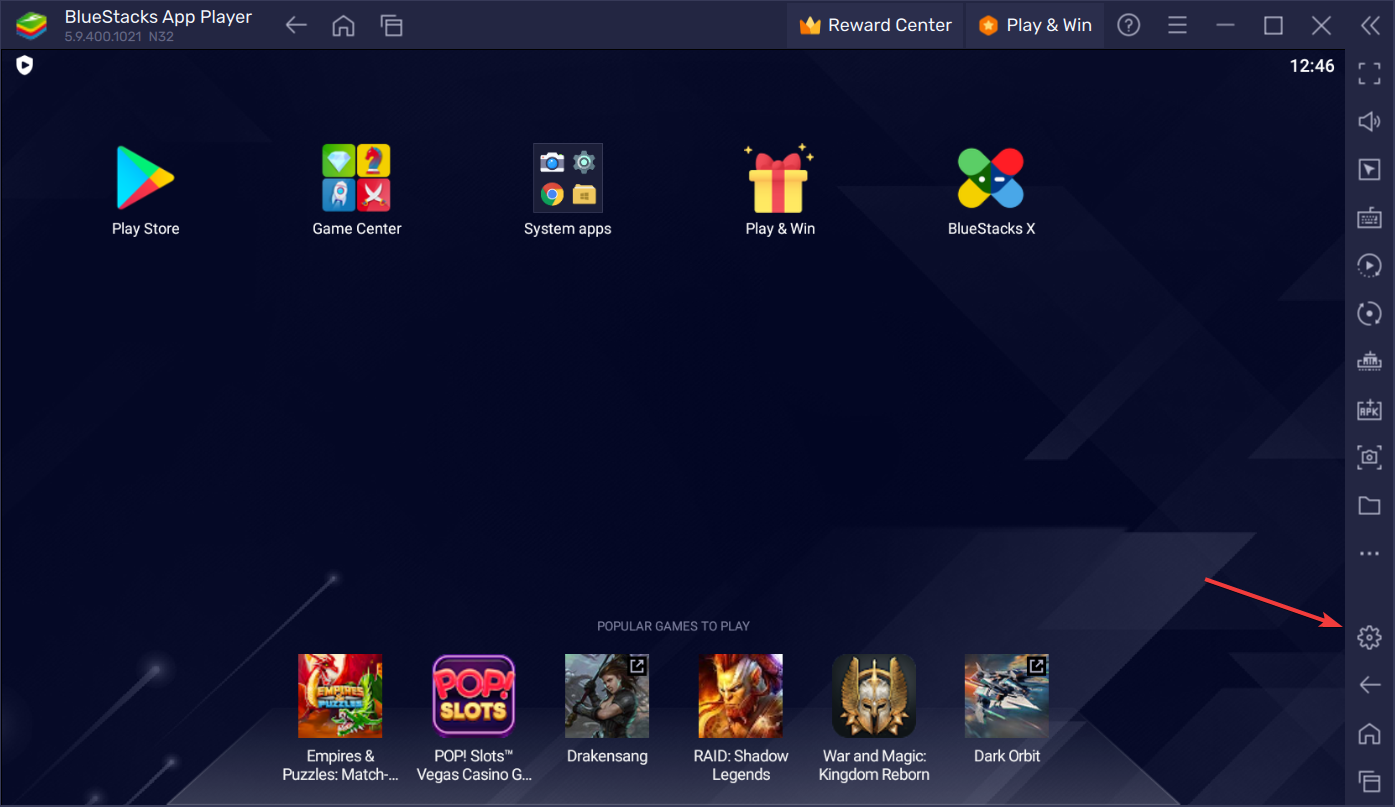
- Press the Windows key, type bluestacks and click Open.
- Click the Settings menu.
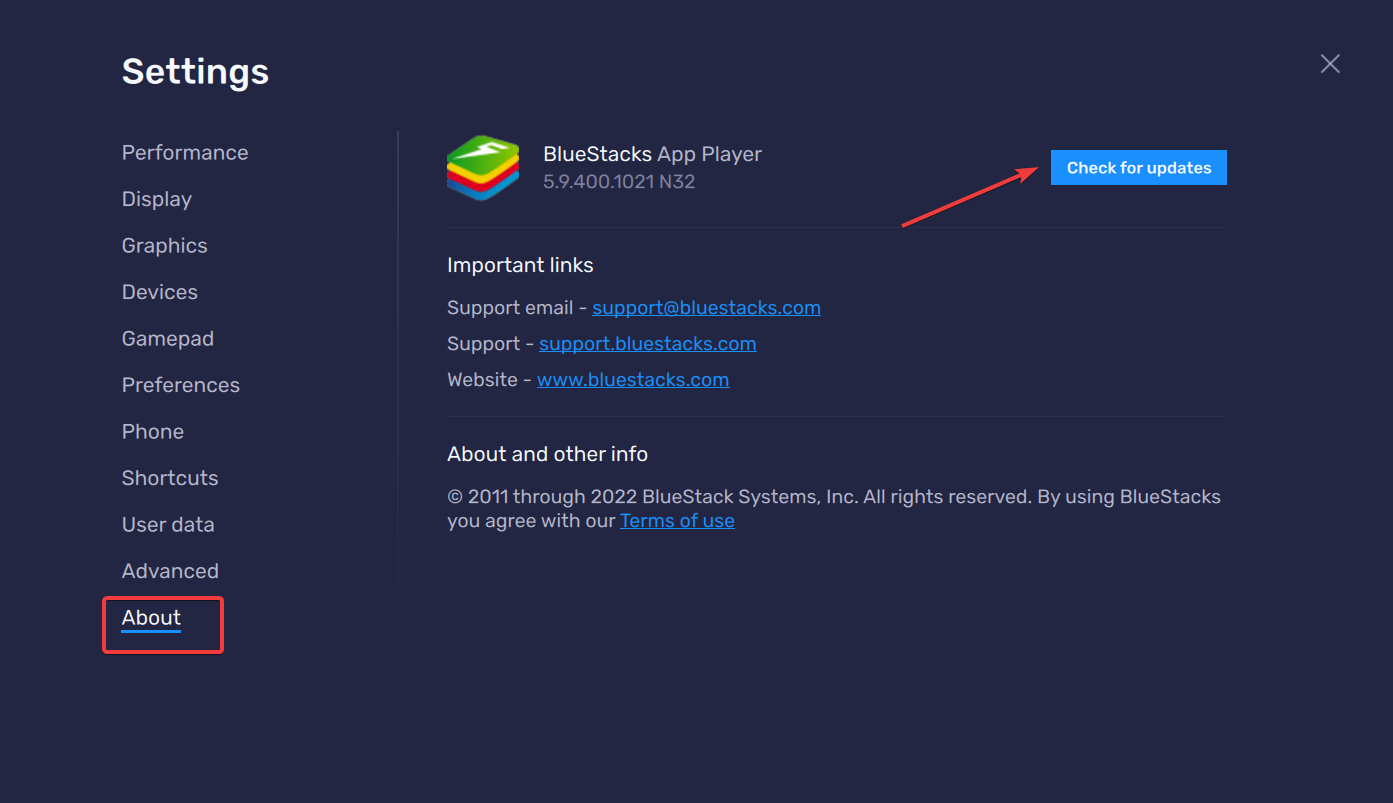
- Go to the About option from the left pane.
- Next, click the Check for updates button. If you see any update, download & install it by following the on-screen instructions.
5. Update the graphics driver
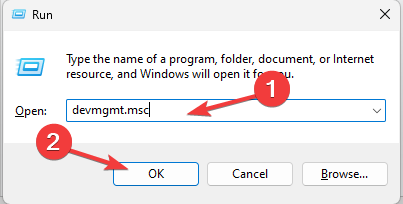
- Press Windows + R to open the Run dialog box.
- Type devmgmt.msc and click OK to open the Device Manager app.
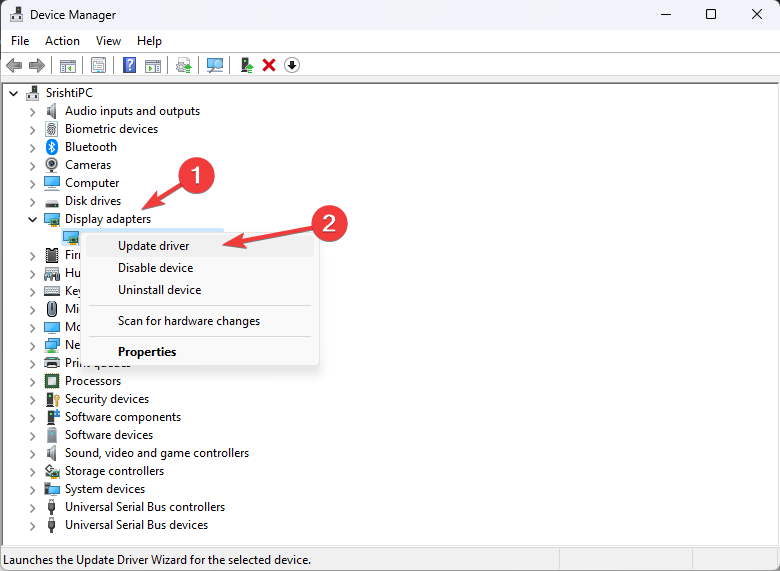
- Go to Display adapters and click it to expand.
- Right-click the driver and select Update driver.
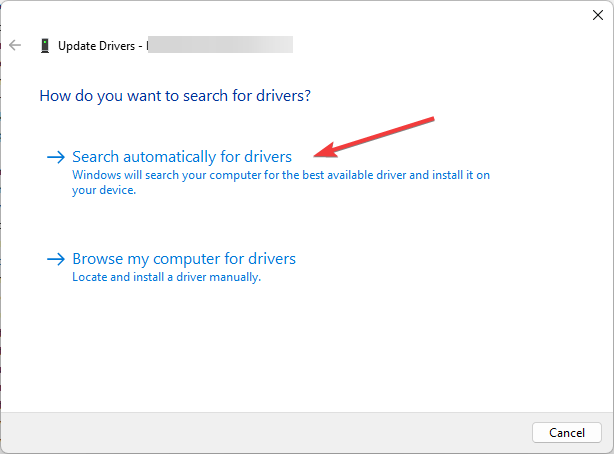
- Click Search automatically for drivers.
- Follow the onscreen instructions to complete the process.
Using the updated version of the graphics driver and BlueStacks app can help you fix issues like BlueStacks not opening; read this guide to learn more about it.
6. Run SFC & DISM scans
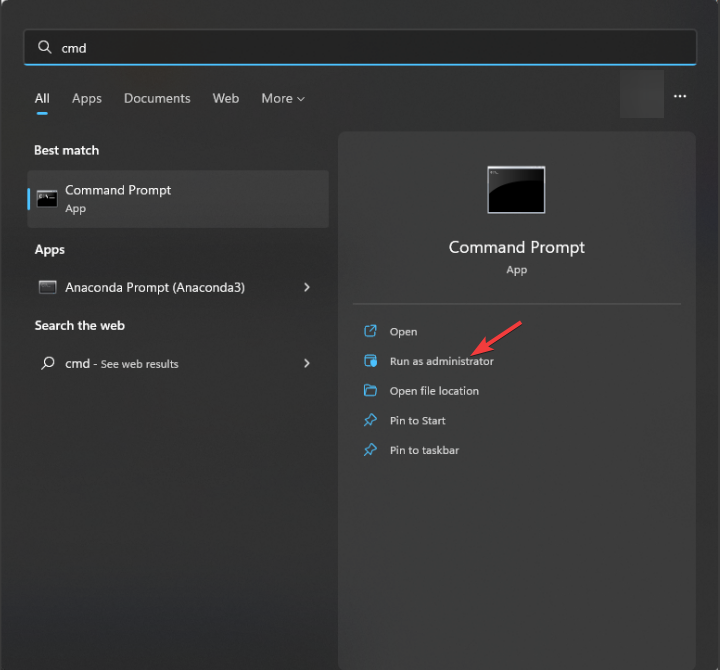
- Press the Windows key, type cmd and click Run as administrator.
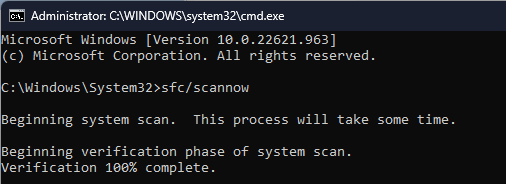
- Type the following command to replace the corrupted files and press Enter:
sfc / scannow - Wait for the command to be executed, then copy & paste the following command and hit Enter:
Dism /Online /Cleanup-Image /RestoreHealth - Restart your computer to save the changes.
7. Reinstall the app (Last resort)
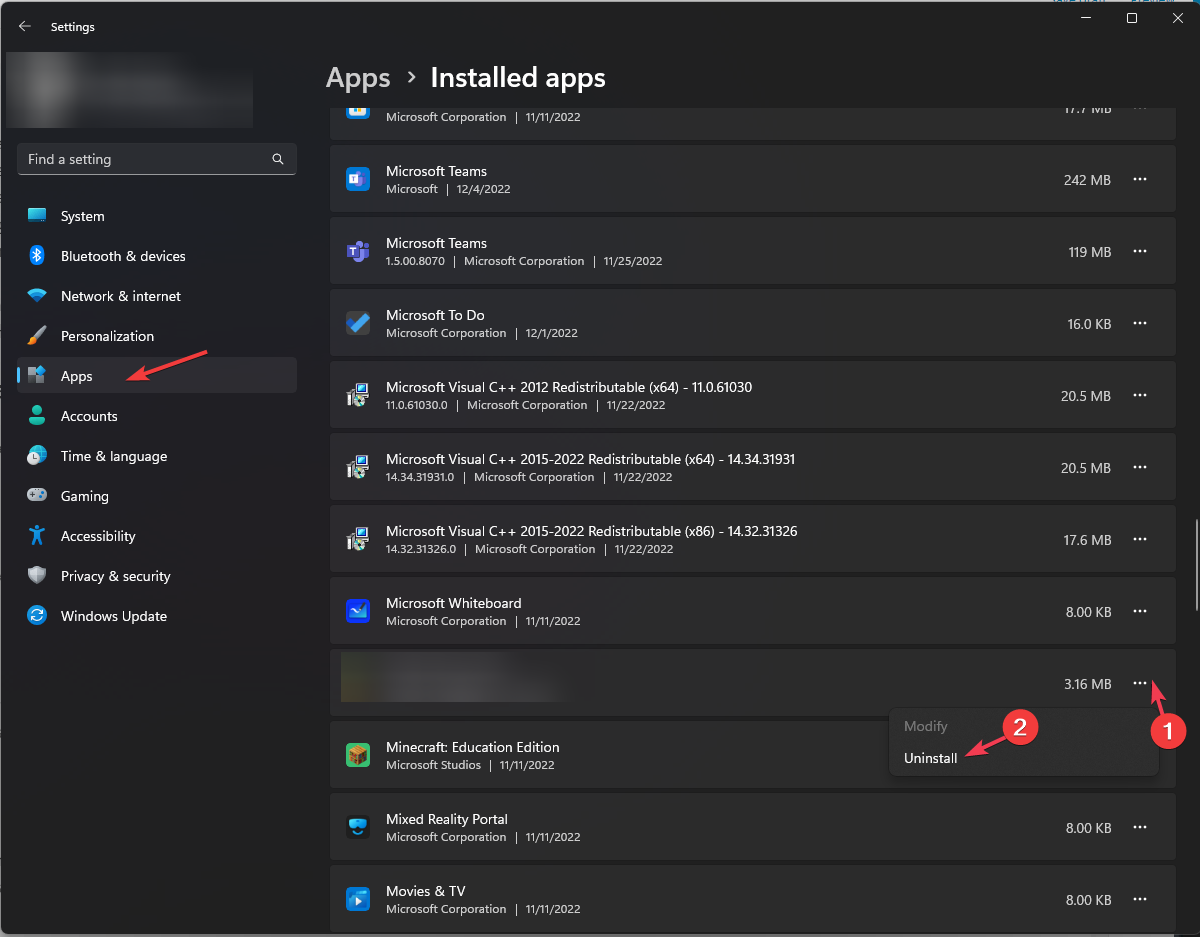
- Press Windows + I to open the Settings app.
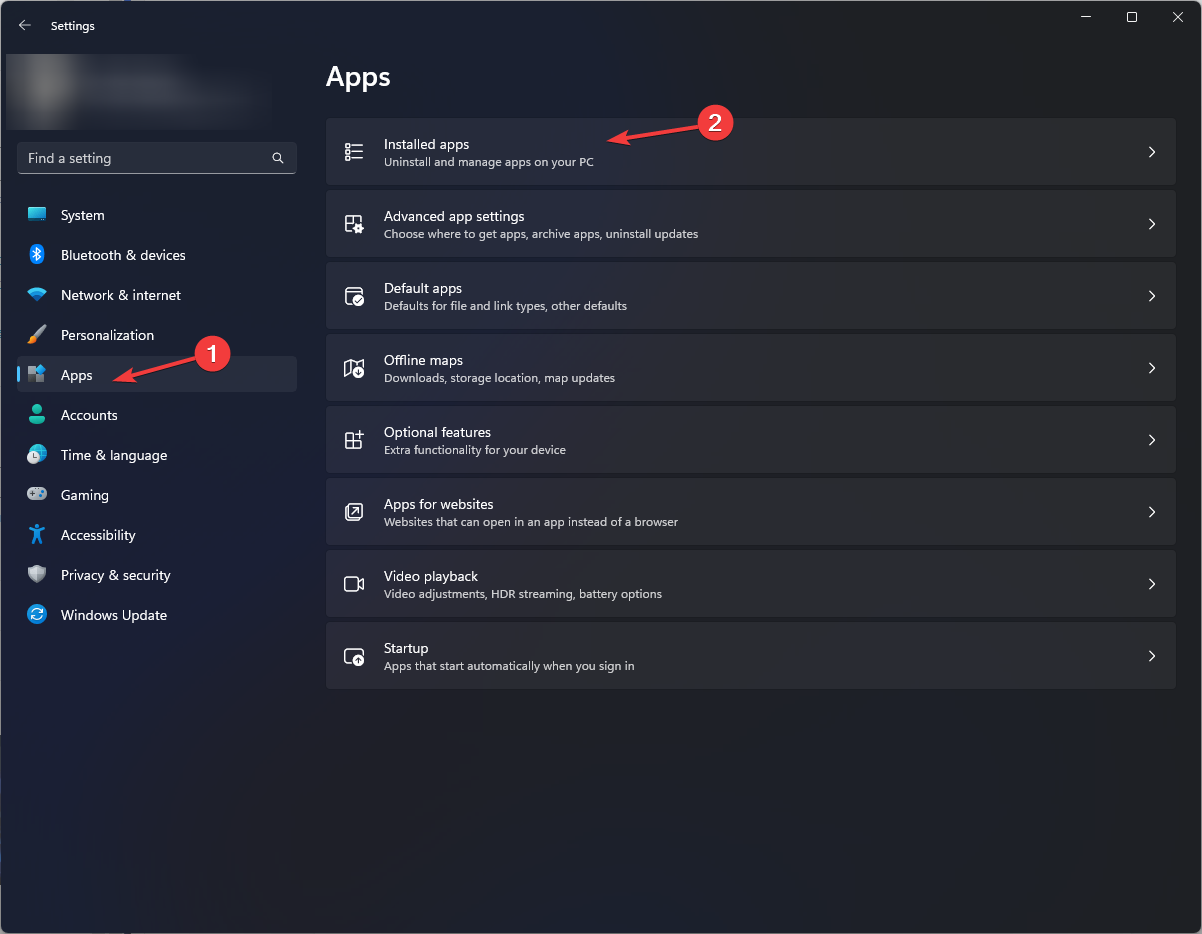
- Go to Apps, then select Installed apps.
- Locate BlueStacks, click the three dots icon, and select Uninstall.
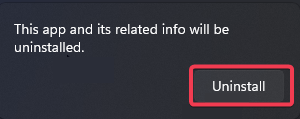
- Click Uninstall again to confirm.
- Now press Windows + E to open the Windows File Explorer window.
- Navigate to the following paths one by one:
C:\Program Files (x86)\BlueStacks
C:\ProgramData\BlueStacks
C:\ProgramData\BlueStacks\Setup
- Press Ctrl + A to select all the content in the folder and click the Delete icon.
Deleting the leftover files is always recommended to ensure the app in question is completely uninstalled, and it can also prevent issues like BlueStacks is already installed error.
Restart your computer and follow these steps to reinstall BlueStacks:
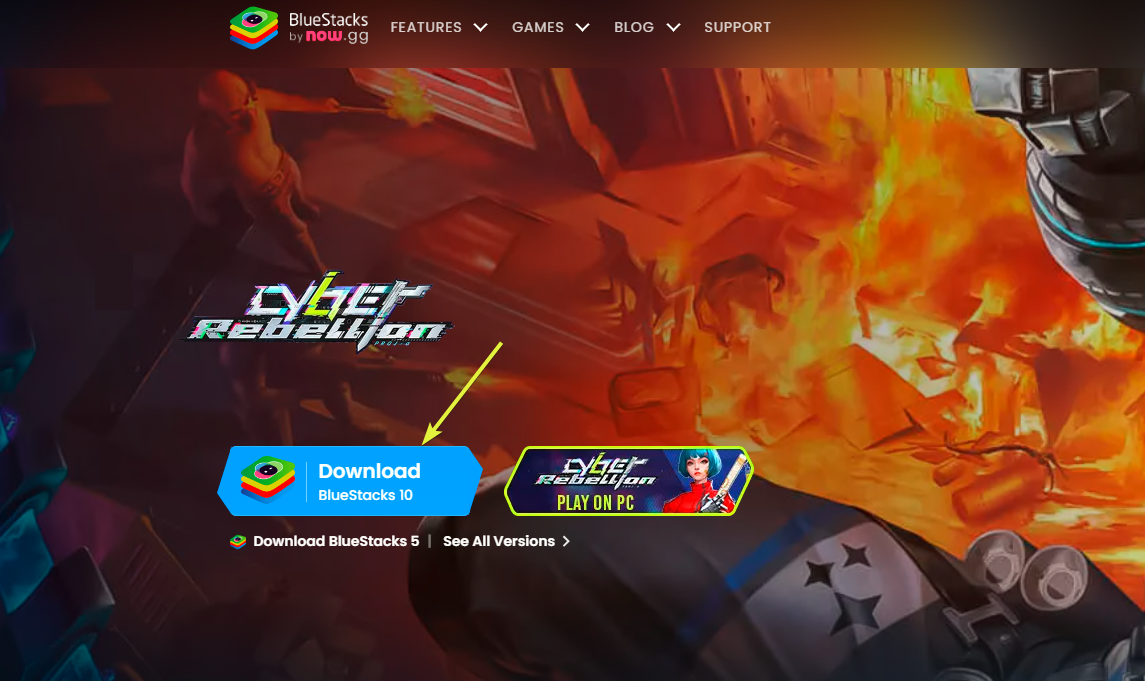
- Go to the official website of BlueStacks and click Download Bluestacks 10.
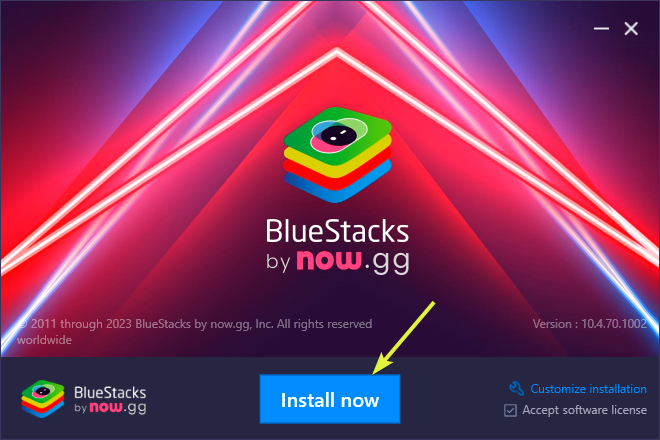
- Double-click the installation file and click Install now.
- Follow the on-screen instructions to complete the installation process, then check if you see the same error.
In case you face any issues while installing the BlueStacks app on your Windows 11 PC, we suggest you check out this guide.
If none of the fixes worked for you, you must contact the BlueStacks customer support team and explain to them the issue & the fixes you tried for further assistance.
As the error code 2004 can appear due to low disk space or an outdated app, you must ensure you have enough space in the system drive and Bluestacks app is updated to the latest version.
Also, make sure you check if the app is blocked by Windows Firewall; read this guide to learn about it in detail.
If you have any questions or suggestions about the subject, feel free to mention them in the comments section below.

