Brusbsib.sys Incompatible Driver: How to Fix This Error
Use a driver remover software to delete incompatible drivers
Key notes
- Incompatible drivers in your system can cause all kinds of issues, such as altering how your PC functions.
- If this is the case, you can delete the incompatible driver using a third-party tool, as you shall see in this article.

Drivers are the software required to allow your computer to communicate with other devices. Some drivers are built-in and automatically installed when you connect a device to your computer. Others may come pre-installed on your system.
If a driver is incompatible with the version of Windows installed on your PC, it may interfere with how it works. That’s exactly the problem facing users who have come across the Brusbsib.sys incompatible driver error. Let’s dig deeper and find out possible solutions below.
Should I turn on core isolation in Windows 11?
Core isolation is a feature of the Windows 11 operating system that allows you to protect your computer from security threats by limiting what applications can do. It is good practice to turn it on as soon as possible to protect your computer from malware and other threats.
For users who deal with virtual machines, turning on core isolation may be necessary. Enabling memory integrity in Windows 11 is a great idea to keep your PC safe from malware and other viruses.
Memory integrity is another feature that prevents applications from accessing parts of the memory that they shouldn’t be able to access. However, you may find you can’t turn on memory integrity because of incompatible drivers.
For users who experienced the Brusbsib.sys incompatible driver with the Brother printer error, they were unable to enable memory integrity on their PCs. The message said Brusbsib.sys incompatible driver preventing memory integrity from functioning.
You may end up with an incompatible driver under the below circumstances:
- Installing the wrong driver – A good example is if you have an Intel graphics driver and you install the AMD graphics driver instead. Your computer will probably not work correctly.
- Installing a driver for a different OS – If you try to install a driver that has not been optimized for your version of Windows, you’ll have trouble getting your PC to work.
- Installing drivers from unauthorized sources – Some websites offer illegitimate drivers that may have been tampered with or altered, so they won’t work properly on your computer.
How do I fix an incompatible driver?
Before jumping into the slightly technical solutions, try the following basic steps:
- Ensure you’re running an updated version of Windows.
- Run a DISM scan to check for corrupted files.
- Try restarting your PC.
1. Enable memory integrity
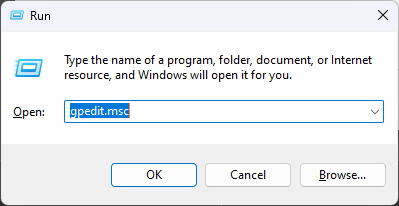
- Hit the Windows + R keys to open the Run command.
- Type gpedit.msc in the dialog box and hit Enter.
- Double-click on Computer Configuration.

- Next, double-click on Administrative Templates.

- Locate System and double-click on it,
- Double-click on Device Guard.

- Again, double-click on Turn on Virtualization Based Security.

- In the window that opens, click on the Enabled checkbox, then click Apply and OK to save changes.

- Restart your PC.
2. Uninstall the drivers
- Hit the Windows key, type cmd in the search bar, and click Open.

- Type and Enter the following command:
pnputil /delete-driver oem21.inf /uninstall /force
- Close the Command Prompt window and restart your PC.
3. Turn on Core isolation
- Hit the Search icon, type Core Isolation, and click Open.

- Navigate to Memory integrity and toggle it On.

In case memory integrity is grayed out, you can refer to our helpful article to resolve this issue.
4. Remove the Brusbsib.sys driver using a third-party tool
If a driver incompatible with your system has been installed and is causing problems, you will need to remove it. The process for doing so varies depending on the type of driver you have installed and how it was installed.
If you cannot uninstall the driver using the Device Manager, try using driver remover software. These tools have been around for years, and they are very effective at removing drivers that are not working properly or are incompatible with your system.
Some also provide you with a free scan so that you can determine if there are any other drivers that need to be removed from your system before you can use them again.
5. Delete the driver using Autorun
- Visit the Microsoft Official Autoruns Download Page and download the zip file.

- After the download, press Windows + E keys to open File Explorer.
- On the left pane, click on Downloads and locate the downloaded file. Right-click on the file i.e Autoruns.zip and select Extract all.

- After the extraction is completed, open the newly created folder, locate the supporting.exe, and double-click the file to launch the app.
- Once the tool loads successfully, type Brusbsib in the Quick Filter Search Box and hit Enter.

- Locate any item related to Brusbsib and delete them.
- Restart your PC to enable memory integrity.
6. Perform a clean boot
- Hit the Windows + R keys to open the Run command.
- Type in msconfig and hit Enter.

- In the System Configuration window that opens, navigate to the Services tab, check Hide all Microsoft services option, and click on Disable all.

- Click on Apply, then OK.
- Restart your PC.
As always, we recommend getting third-party antiviruses for your PC as an extra layer of protection.
You may also run into a similar issue with the wdcsam64.sys error, so don’t hesitate to check out our detailed article for fixes.
That’s all we had for this article, but for any additional thoughts, leave us a comment down below.
Read our disclosure page to find out how can you help Windows Report sustain the editorial team. Read more


Improve this guide


User forum
0 messages