Windows Cannot Install Kernel Mode Print Driver [Fix]
Group Policy settings can often prevent driver installation
4 min. read
Updated on
Read our disclosure page to find out how can you help Windows Report sustain the editorial team Read more
Key notes
- If you're having this issue, try updating the drivers from Device Manager or with other methods.
- Remove the corrupted printer drivers and install them again to fix the issue.
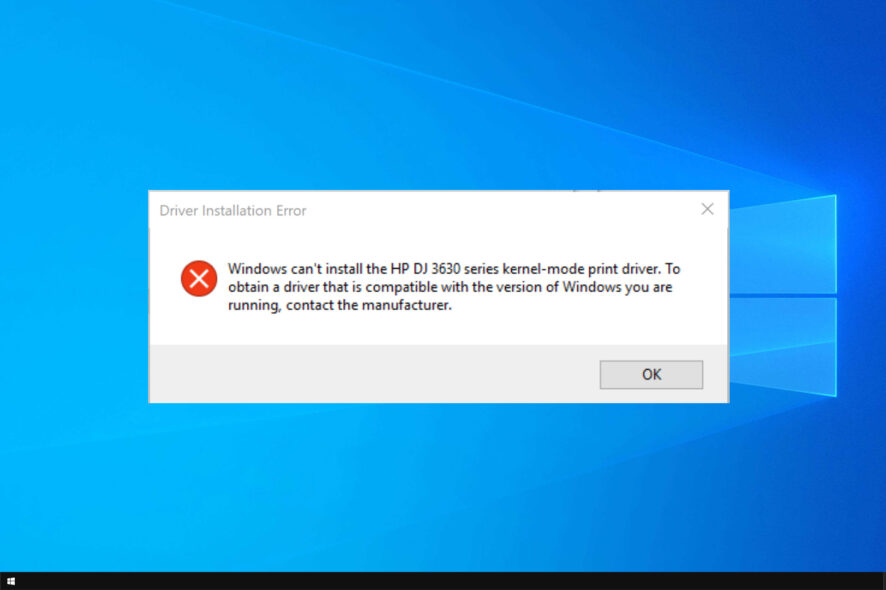
While installing a third-party PDF reading software like PhantomPDF, you may encounter the Windows cannot install the kernel-mode print driver error.
In this article, we look closely at a few troubleshooting tips to help you resolve the Windows cannot install kernel-mode print driver error in Windows 10.
What can I do if Windows cannot install the Kernel Mode print driver?
1. Disable the blocking policy for installation of drivers
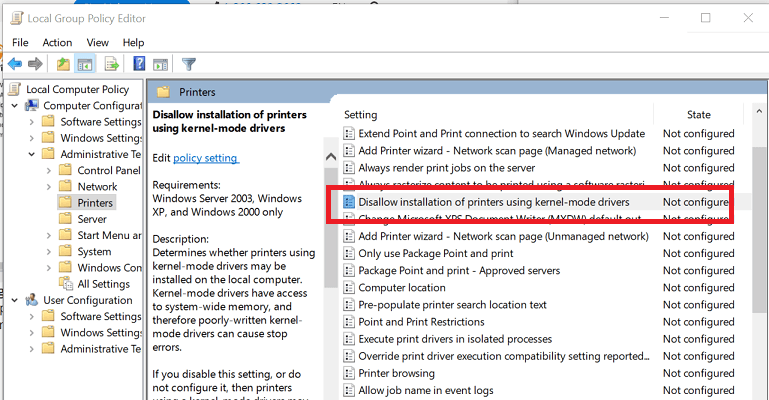
- Press the Windows key + R, type gpedit.msc and click OK to open the Group Policy Editor.
- In the Group Policy Editor window, expand the Local computer Policy option.
- Next, navigate to the following path:
Computer Configuration\Administrative Templates\Printers - On the right pane, locate and double-click on Disallow installation of printers using kernel-mode drivers policy.
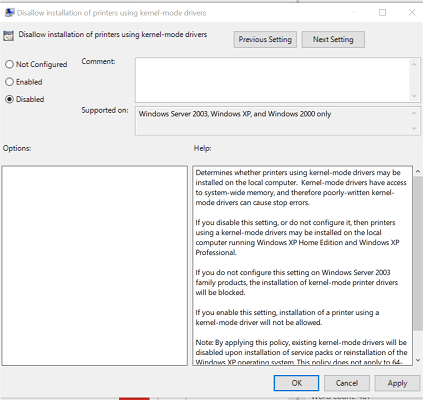
- In the properties window, select Disabled and click OK.
- Click Apply and OK to save the changes and close Group Policy Editor.
- Press the Windows key and type cmd. Right-click on Command Prompt and select Run as administrator.
- In the Command Prompt, enter the following command and hit Enter:
gpupdate - If that did not work, use
gpupdate/force - Close the Command Prompt and try to install the program.
Depending on the version of Windows installed, the Group Policy Editor may or may not be available on your computer.
Those that run Windows 10 Home Edition do not have the Group Policy Editor Installed. For more details, check our guide to install Group Policy Editor on Windows 10 Home.
2. Update your printer drivers
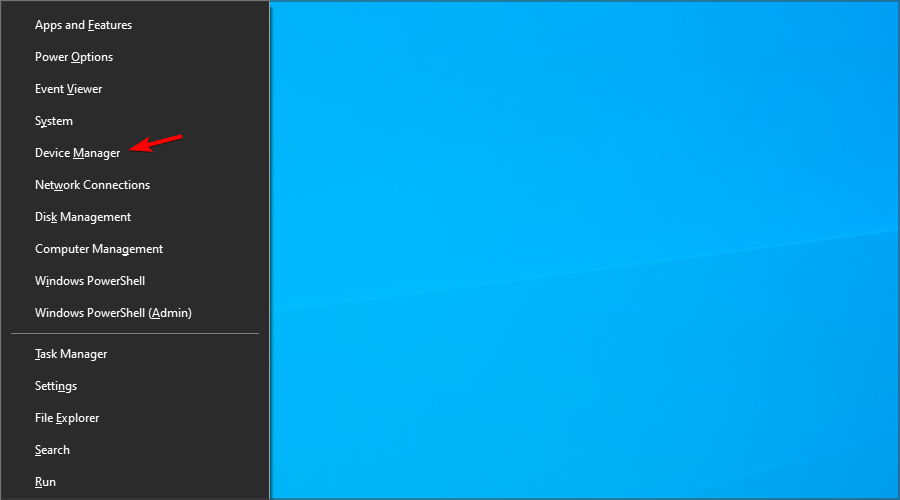
- Open the Device Manager by pressing Windows key + X and choosing Device Manager from the list.
- Right-click on Printers and select Properties.
- Click on Settings and select Devices and Printers Folder.
- Right-click on the printer you want to update.
Outdated or damaged printer drivers might cause the Windows kernel-mode print driver error. You can manually update them by following the above steps. We also have a great guide with detailed steps on how to download printer drivers, so don’t miss it.
You can also use an automatic tool that scans your PC and installs the most suitable drivers, optimizing your Windows OS and the overall system performance.
- Download and install the Outbyte Driver Updater app.
- Launch the software and wait for the app to detect all incompatible drivers.
- Now, it will show you a list of all outdated drivers to select the ones to Update or Ignore.
- Click on Update & Apply Selected to download and install the latest versions.
- Restart your PC to ensure the applied changes.

Outbyte Driver Updater
Maintain your device healthy by letting OutByte Driver Updater find the latest driver options.3. Configure point and printer restriction
3.1 Rename W32x86 / X64 folders
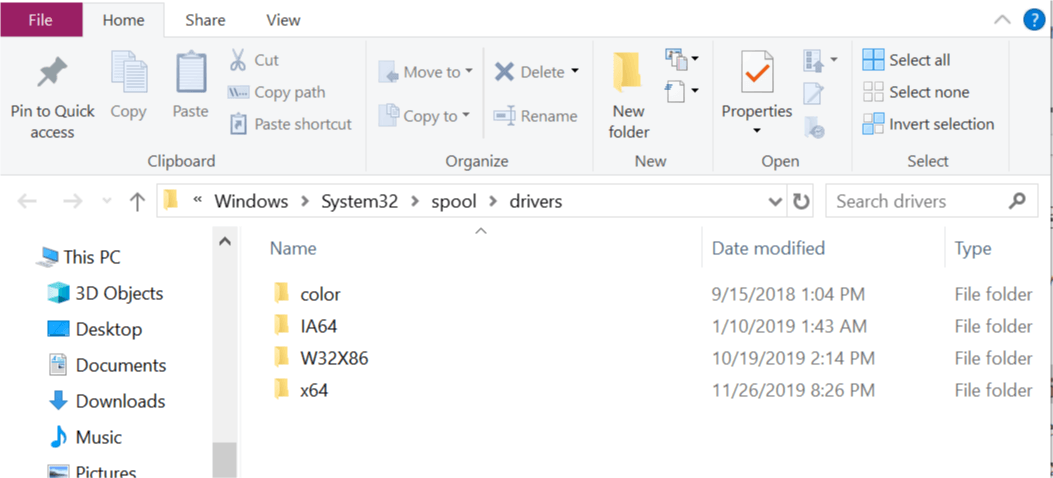
- Open the File Explorer and navigate to the following location: C:\windows\system32\spool\drivers
- In the Drivers folder, rename the following folders to anything you want:
- W32x86
- X64
- Renaming these folders will remove incomplete or corrupt printer driver installation.
It will also remove your printer settings. So if you have a working printer, you may have to reinstall the printer drivers again to make your printer work.
3.2 Configure point and printer restriction
- Press the Windows key + R to open Run.
- Type gpedit.msc and click OK.
- In the Group Policy Editor, expand Local Computer Policy.
- Next, navigate to the following location:
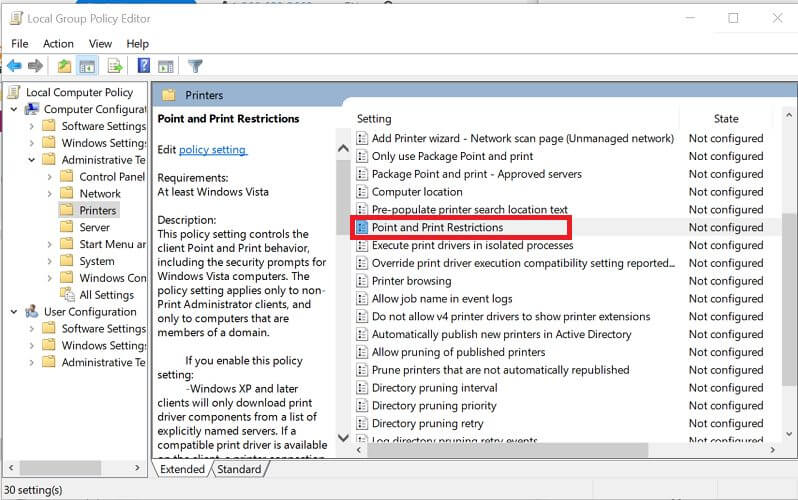
Computer Configuration\Administrative Templates\Printers - On the right pane, locate and double-click on Point and printer Restrictions.
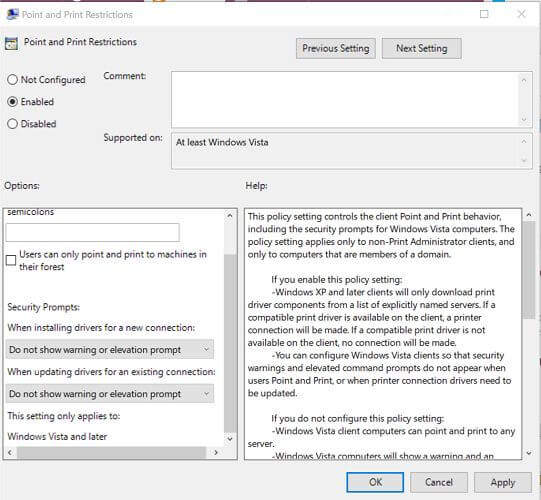
- Select Enabled in the properties window.
- Make sure the following options are unchecked:
- Users can only point and print to these servers
- Users can only point and print to machines in their forest
- Under Security Prompts, click the drop-down menu for When installing drivers for a new connection.
- Select Do not show warning or elevation prompt.
- Click the drop-down menu for When updating driver for an existing connection
- Select Do not show warning or elevation prompt.
- Click Apply and click OK save the change.
- Open Command Prompt as administrator and enter the following command:
gpupdate - Close the command prompt and check if the error is resolved.
Why can Windows not install kernel mode print driver?
- Group Policy blocks driver installation.
- The printer drivers are corrupted.
Following this article’s steps, you can remove the limitations and resolve the error. Let us know which method helped you resolve the error in the comments.

