App does not support the contract specified error [Solved]
Key notes
- This application does not support the contract specified or is not installed is one of the errors that can come up after upgrading your operating system to Windows 10.
- If you are looking for ways to fix this error, keep on reading.
- Bookmark our Microsoft Store Hub for tips and guides.
- Check out our Errors Hub for more dedicated solutions.
If you upgraded your operating system to the new Windows 10, then you most certainly noticed that some of your apps, if not all of them, fail to start properly or they give you error messages along the way.
If you cannot open any Windows 10 apps, follow the tutorial available below for a quick and easy fix.
Most of the Microsoft Store apps that won’t work in Windows 10 will also have an X on the lower right side of the icon on the Start menu.
The application usually either freezes when you want to start it or it gives you a specific error message like Store failed with error: This application does not support the contract specified or is not installed and many others.
Tutorial on how to open Windows 10 Apps
- Use DiskCleanup
- Run SFC scan
- Show hidden files and folders
- Uninstall problematic apps
- Sync licenses
- Update Microsoft Store Apps
- Run the Microsoft Store Apps Troubleshooter
- Clear Store cache
- Disable your antivirus/ firewall/ VPN
- Scan your system
- Reset your PC
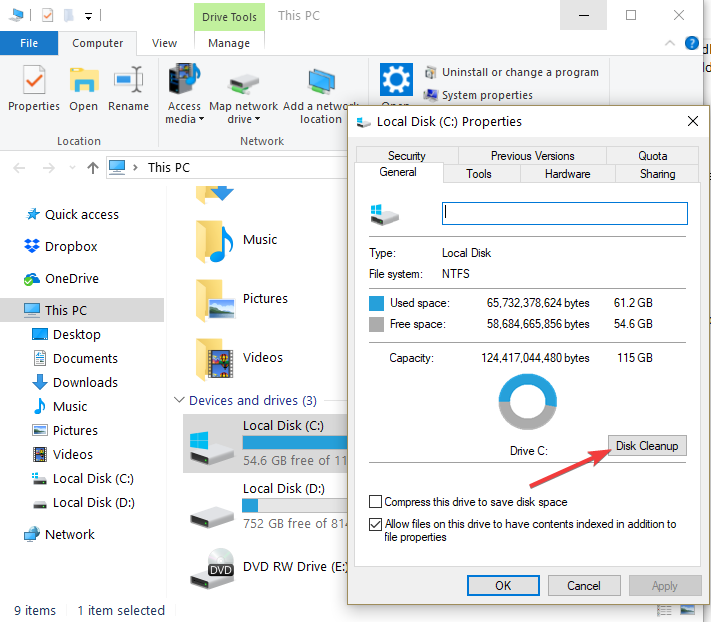
1. Use DiskCleanup
So start clean and fresh, it’s time to clear the cache on your computer. The quickest way to do this is by running Disk Cleanup, which scans your computer’s hard drive for files.
- Go to This PC > right-click on your main partition > go to Properties.
- In the Properties window select Disk Cleanup.
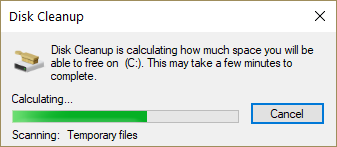
- The tool will then calculate how much space it could free up.
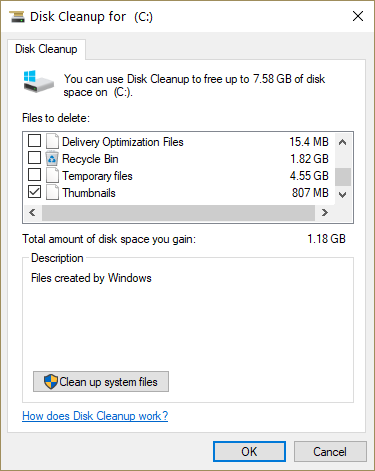
- You can then select which files and folders you want to clean > hit OK and wait until the process finishes.
One of the best tools you can use for in-depth cleaning of your PC and removing junk files a specialized software.
What is no longer necessary, such as temporary files, cached webpages, and rejected objects wind up in Recycle Bin. To erase System Restore and Shadow Copies, Dump files, Service Pack Backup Files, and more, you can use a tool that has advanced settings.
More importantly, thanks to disk cleanup software automation and advanced AI, you avoid any mistakes in deleting some of the important data on the hard drive.
2. Run SFC scan

- Go to Search > type cmd.
- A command prompt icon should appear > right-click on it.
- Select the Run as Administrator option.
- Click YES if you are prompted to enter your user account and password.
- In the Command Prompt window, enter the following command:
sfc /scannow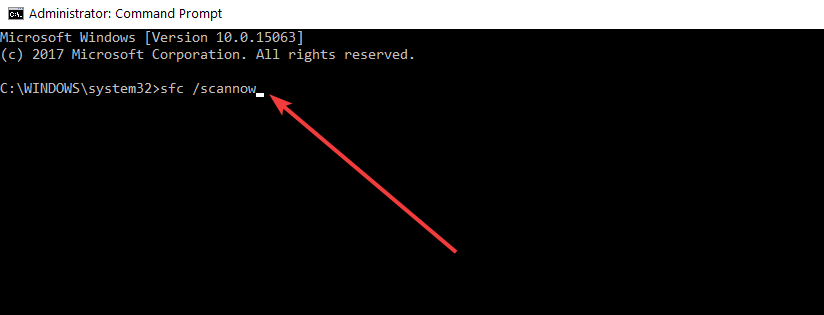
- Press the Enter key on the keyboard.
- Let the System File Checker finish the process.
- Close the Command Prompt window.
- RebootWindows 10 operating system.
- Check to see if your apps are functioning correctly after the reboot.
3. Show hidden files and folders
- Go to Start > type folder.
- Select the first result File Explorer options.
- Select the View tab located on the upper side of this window.
- Locate the option Show hidden files, folders, and drives > hit Apply.
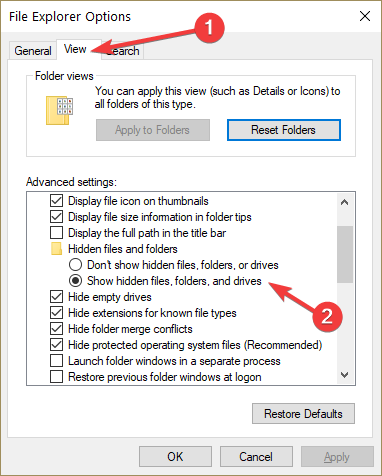
- Select the OK button to close this window.
- Now, navigate to This PC > double click to open the C: partition where Windows 10 is installed.
- Go to Program Files > select the Microsoft Apps folder.
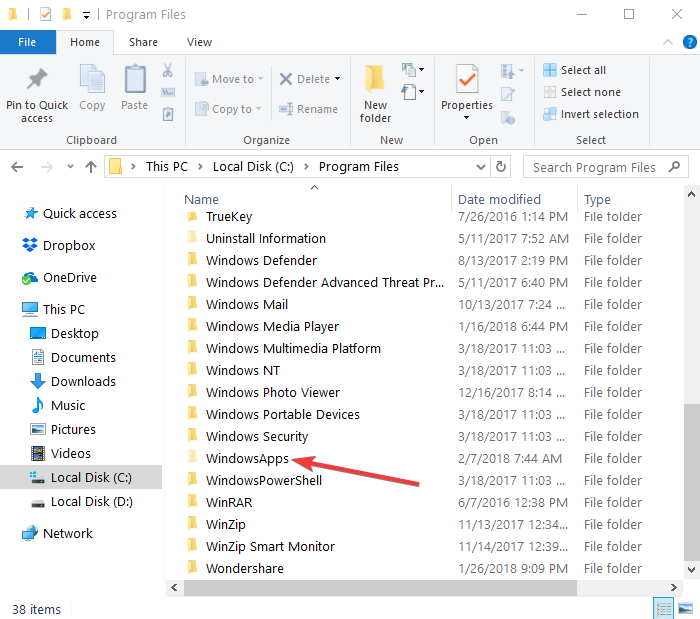
- Right-click on this folder > go to the Properties option.
- Select the Security tab located on the upper side of the Properties window.
- Change the permissions for this folder to the Administrator group > hit Apply > OK.
- Reboot your Windows 10 device.
- Check to see if your apps are working again.
4. Uninstall problematic apps
- Go to Apps & Features > locate the problematic app
- Select the respective app > click on the Uninstall option
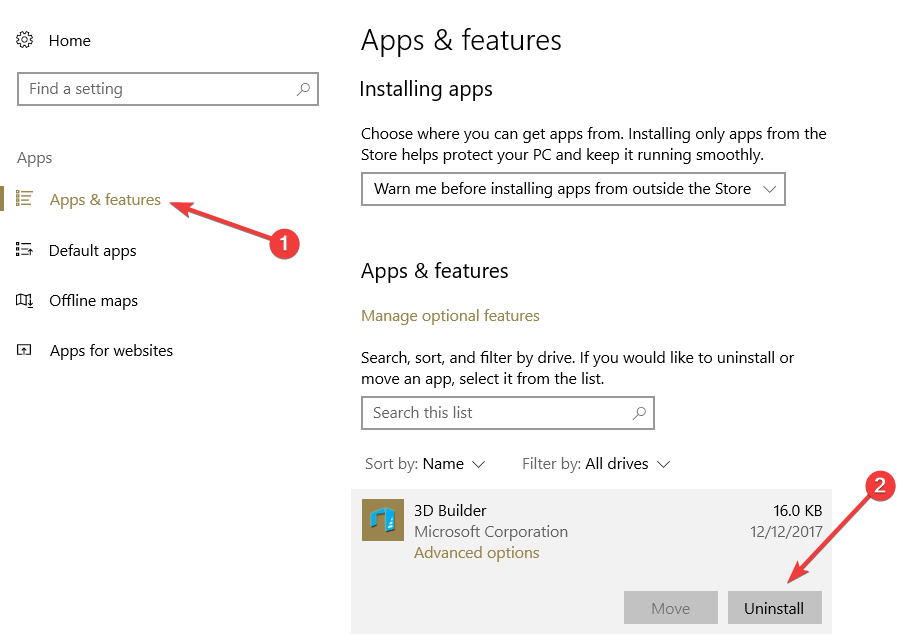
- Wait until the uninstall process is complete.
- Go to the Microsoft Store.
- Search the application you just uninstalled only this time select the Install feature to reinstall it.
- Follow the on-screen instructions to finish the installation process.
- Reboot your computer.
- Check again to see if your app is working as it should.
5. Sync licenses
- OpenMicrosoftStore > go to Settings.
- Navigate to App updates > select Sync licenses.
- After the process is completed, close the Microsoft Store and try opening your apps again.
- If the problem persists, reboot your Windows 10 operating system and try again.
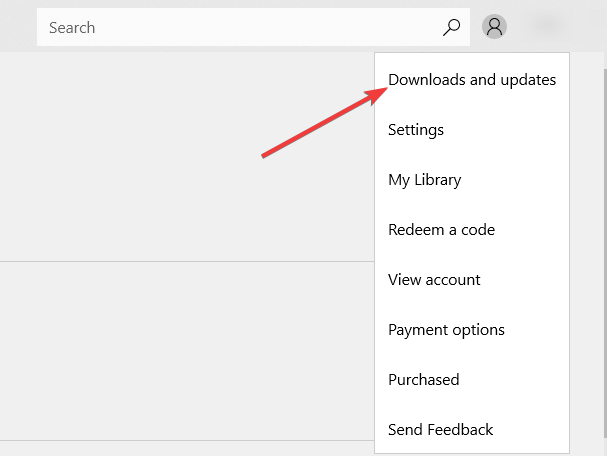
6. Update Microsoft Store Apps
- Launch the Microsoft Store app.
- From Microsoft Store, go to the Settings option.
- From the Settings window, select the App updates > enable the feature that automatically updates apps.
- Go back to the three-dot menu > select Download and Updates > update your apps
- Reboot Windows 10 once more and check if apps are working.
7. Run the Microsoft Store apps 
Windows 10 also features a series of dedicated troubleshooters that allow you to quickly fix general issues.
Speaking of which, if you can’t launch your Microsoft 10 apps after installing the latest OS updates, there is one troubleshooter that you can use to fix the problem.
- Go to Settings > Update &Security > select Troubleshoot.
- Scroll down and select the Microsoft Store Apps Troubleshooter > run the tool.

8. Clear Store cache
If you’re having issues when using your Microsoft Store apps, the cache may be the culprit. Fortunately, there’s a quick way to clear the Store cache.
- Go to Start > type run >hit Enter to launch Run > enter
WSReset.exe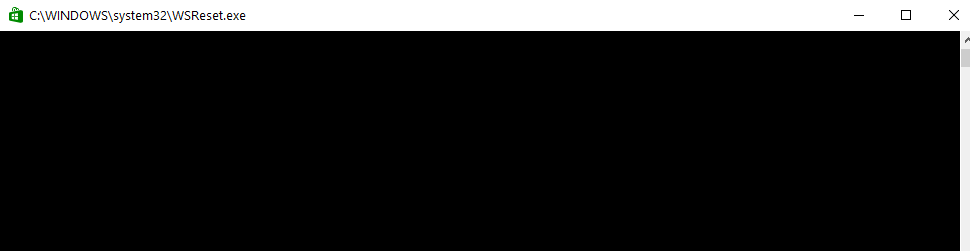
- Now enter the
WSReset.execommand again. - An empty Command Prompt window should now appear on the screen.
- Wait for a few seconds (or minutes depending on your cache size).
- Microsoft Store will pop on the screen as soon as the reset is completed.
9. Disable your antivirus/ firewall/ VPN
In rare cases, your cybersecurity software may prevent your Microsoft Store apps from launching.
Fortunately, you can quickly fix this problem by temporarily disabling these tools. So, simply turn off your antivirus and firewall protection.
If you’re also using a VPN tool, disable it as well and check if this changes anything.
10. Scan your system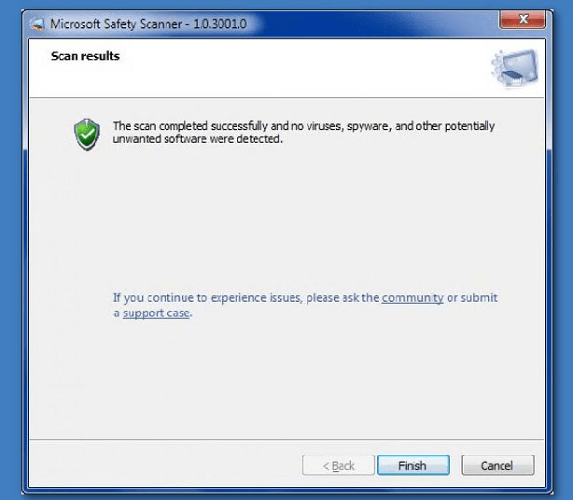
Malware may also prevent your Microsoft Store apps from opening. Run a full system scan to detect and remove any potential threats that may have sneaked into your system.
11. Reset your PC
- Go to Settings.
- In the Settings window, go to Update & Security
- Navigate to Recovery
- Select Reset this PC> click on WSReset.exe
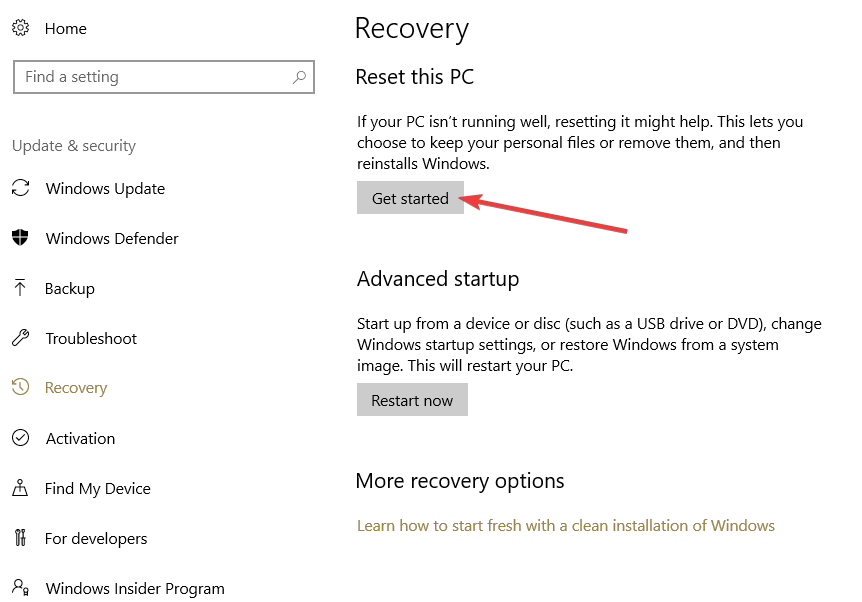
- You can choose to keep your files or remove them
- From there on, it is easy, you only need to follow the on-screen instructions to finish the reset process for your Windows 10 device.
These are the steps you need to follow in order to get your apps up and running in the Windows 10 operating systems.
If you have additional questions regarding this article, please drop us a line in the comments section below and we will get back to you as soon as possible.
Read our disclosure page to find out how can you help Windows Report sustain the editorial team. Read more


Improve this guide


User forum
0 messages