Can't Resize or Move an App? Here's How to Force It
Update your Display drivers to move and resize apps
![]() 5 min. read
5 min. read
![]() Updated on
Updated on
Share this article

Improve this guide
Read our disclosure page to find out how can you help Windows Report sustain the editorial team Read more
Key notes
- The ability to move and resize your apps makes it easier to organize your desktop whenever you want.
- If you can’t move things around, there could be a bug in your system, and you should perform a virus scan.

In Windows 11, moving or resizing an app is as easy as dragging it on your desktop. You may be looking to space out or make your app icons more compact on your desktop but are stuck.
While this may seem like a normal function, some users have found themselves unable to do either. If you’re in the same predicament, we have some solutions below to help you regain this functionality.
Why can’t I resize or move an app in Windows?
If you are using a PC and it is not possible to move or resize an app, here are some possible reasons:
- Multiple versions of the application – If you have more than one version of an app, there may be incompatibility issues between them.
- Buggy update – A recent Windows update may have brought about this change. Some updates may come coupled with some bugs.
- Corrupt user profile – If the integrity of your user profile has been compromised, modifying anything on your PC can be extra hard.
- Virus/malware – If a malicious code has found itself on your PC, it may be interfering with how some programs behave, and that’s why you can’t move or resize an app.
- Outdated drivers – Drivers are essential for the proper functioning of your system. If your PC is missing some drivers or they are outdated, there may be a disconnect when you try to perform some actions.
How do I force an app to resize or move?
A few basic tweaks that could help resolve the problem include:
- Ensure all your drivers are up-to-date.
- Disable or uninstall any third-party software that you may have recently installed on your computer.
- Try switching profiles to establish if yours is corrupt. You can create a new one if you don’t already have one.
- Check for any Windows updates and install them.
- Check for any disk errors using the CHKDSK command.
- Turn off your computer and unplug it from the wall. Then plug it in again and restart it.
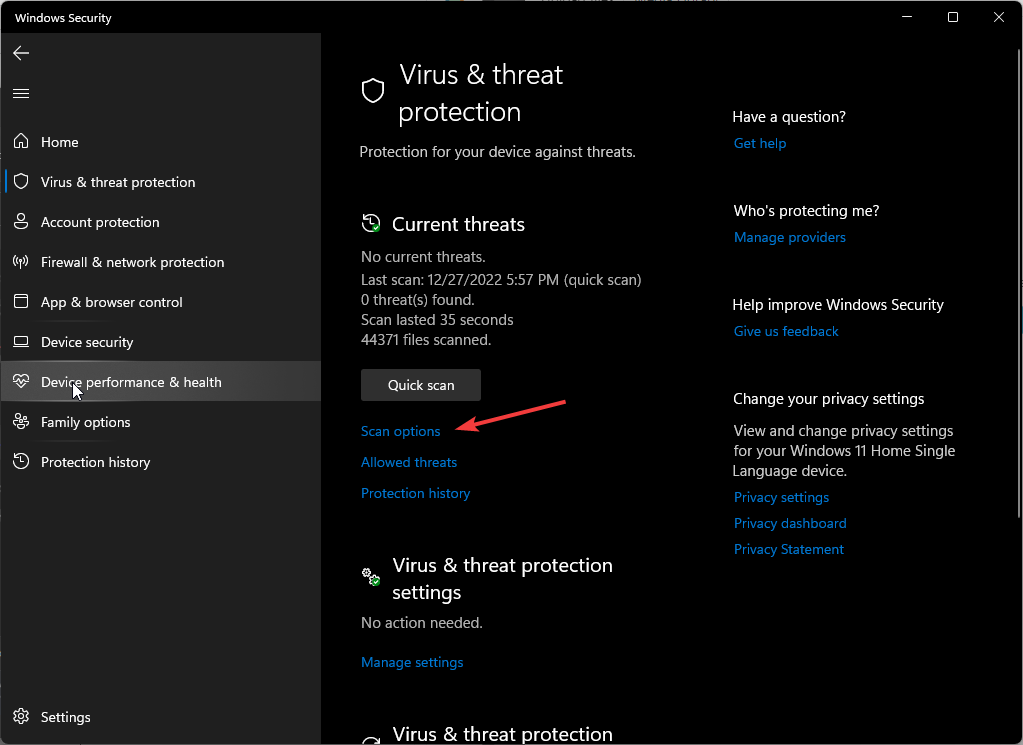
1. Run a virus scan
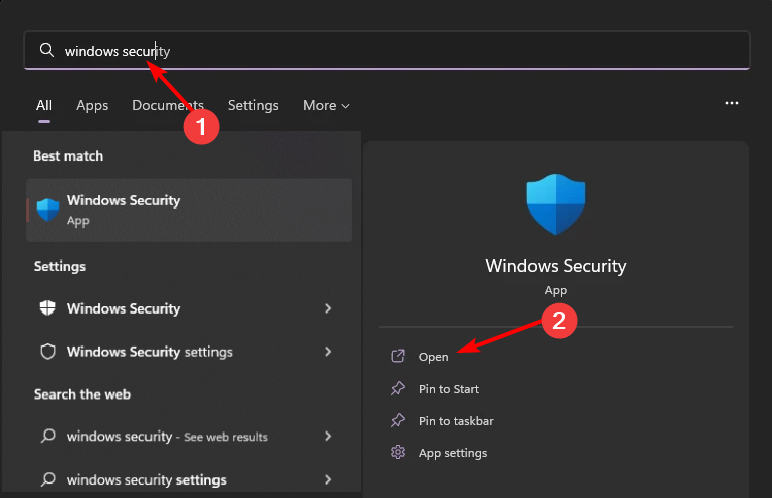
- Press the Windows key, search Windows Security and click Open.

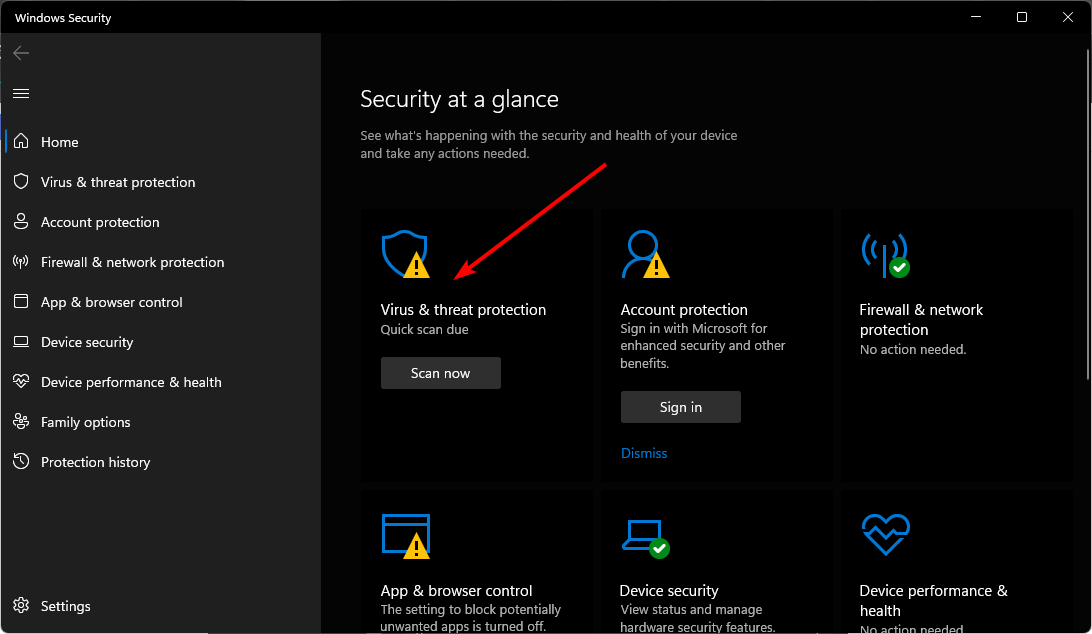
- Select Virus & threat protection.

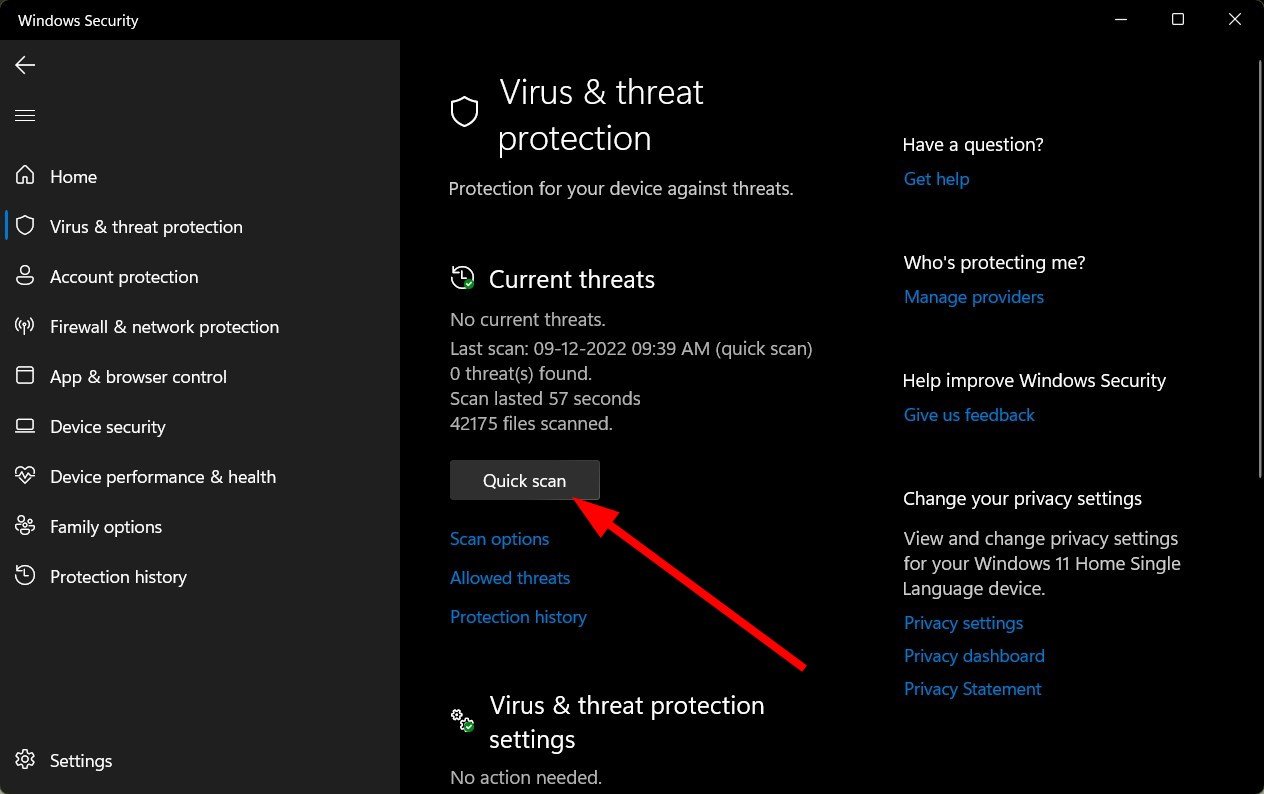
- Next, press Quick scan under Current threats.

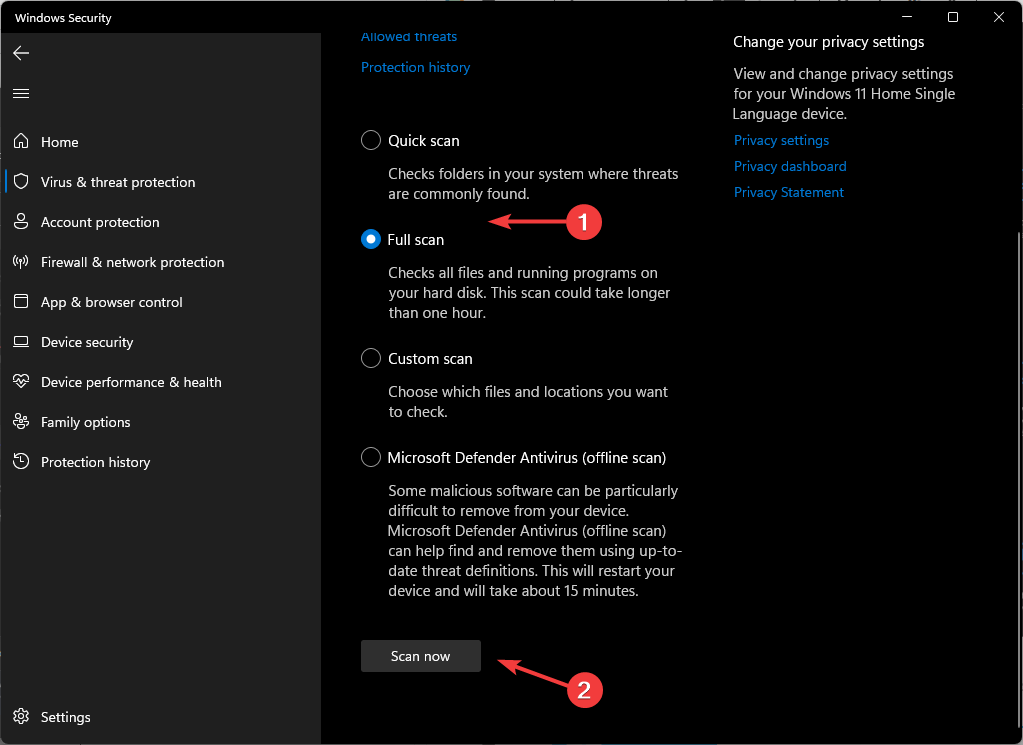
- If you don’t find any threats, proceed to perform a full scan by clicking on Scan options just below Quick scan.

- Click on Full scan then hit Scan now to perform a deep scan of your PC.
- Wait for the process to finish and restart your system.
Also, if you have a third-party antivirus for your Windows 11, running a scan may help detect issues that Windows Security may have missed.
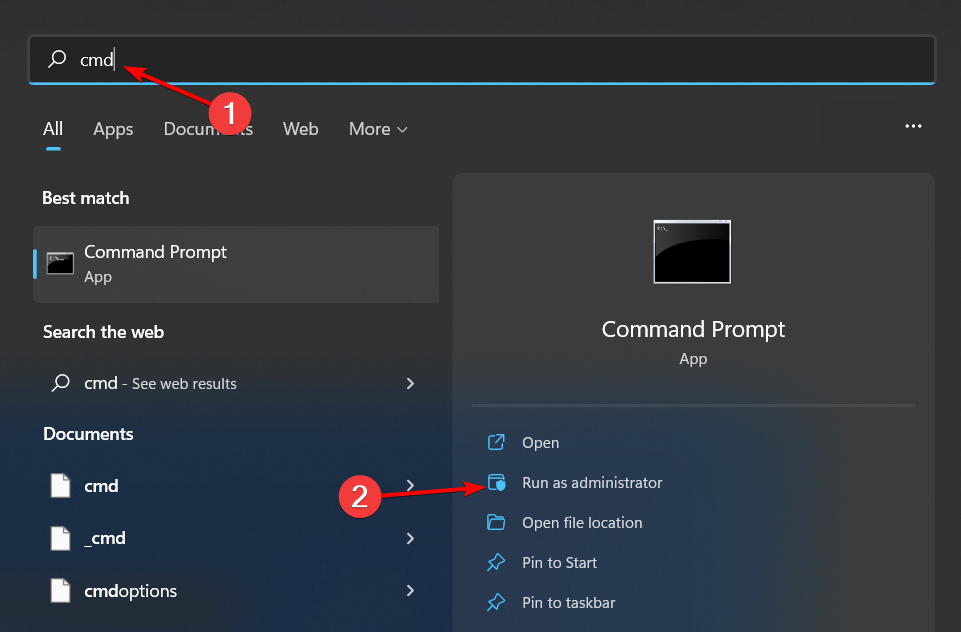
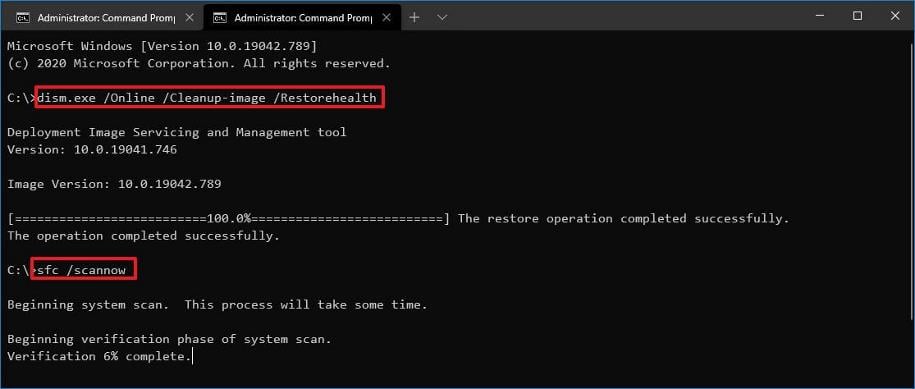
2. Run the DISM and SFC scans
- Hit the Windows key, type cmd in the search bar and click Run as administrator.

- Type the following commands and press Enter after each one:
DISM.exe /Online /Cleanup-Image /Restorehealthsfc /scannow
3. Uninstall recent Windows updates
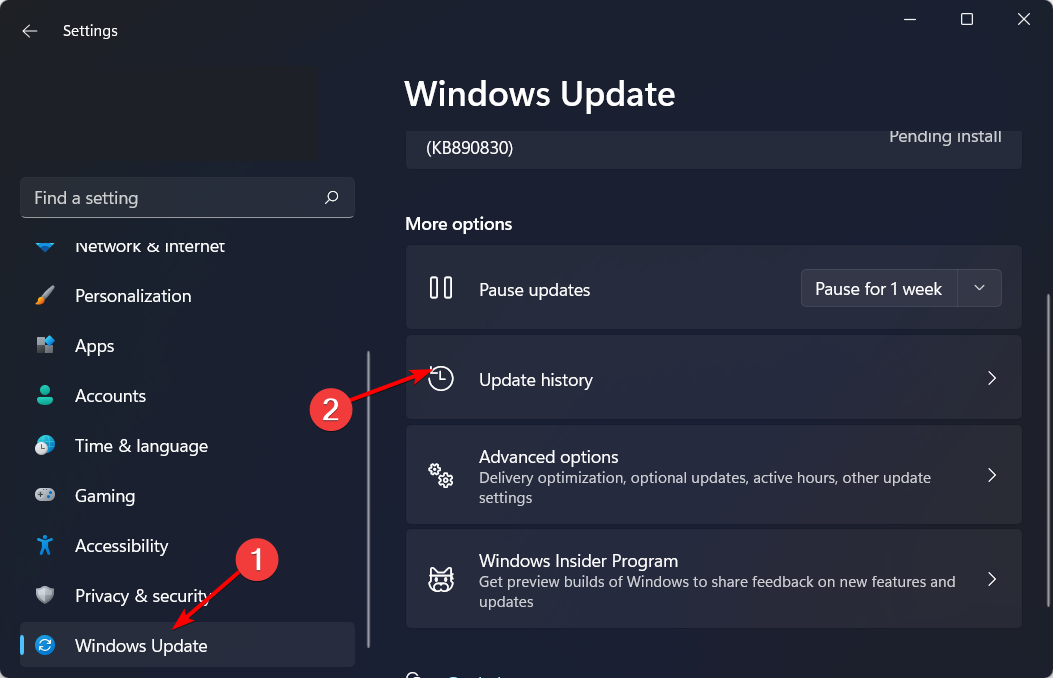
- Hit the Start Menu and select Settings.

- Click on Windows Update and select Update history on the right pane.

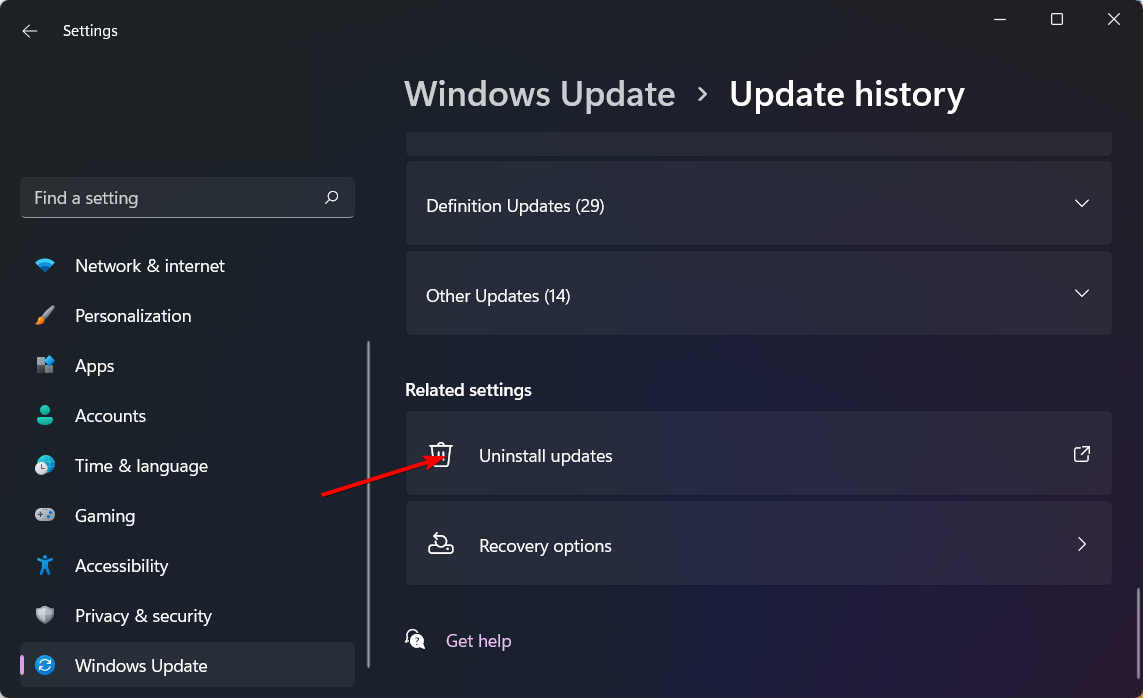
- Scroll down and under Related settings, click on Uninstall updates.

- This will take you to the most recent installed updates.
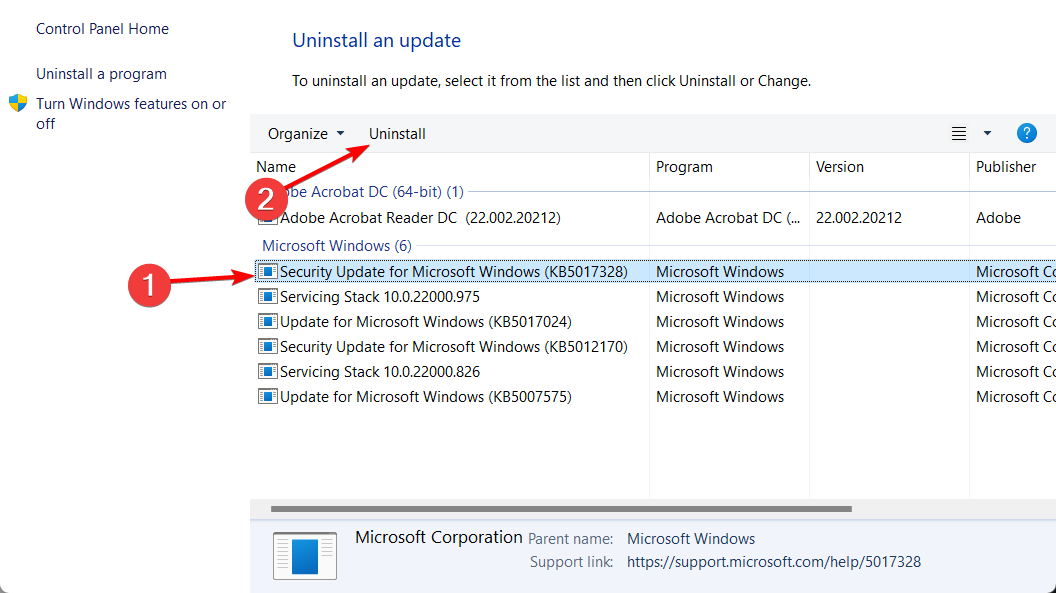
- Select the topmost update and click on Uninstall.

- Restart your PC and check if the problem persists.
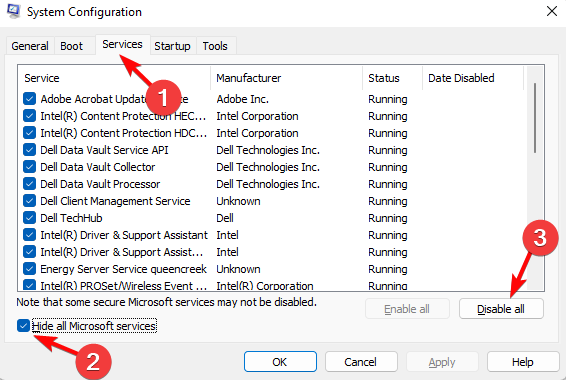
4. Perform a clean boot
- Hit the Start Menu icon, type msconfig, and open System Configuration.

- Switch to the Services tab.
- Select Hide all Microsoft services, click on the Disable all button then hit the Apply button to save the changes.

- Go back and click on the Startup tab.
- Select Open Task Manager.

- In the Startup tab of the Task Manager, Disable all the Enabled startup items.
- Close Task Manager and Restart your PC.

5. Perform a System Restore
- Click the Search icon, type create restore point and click Open.

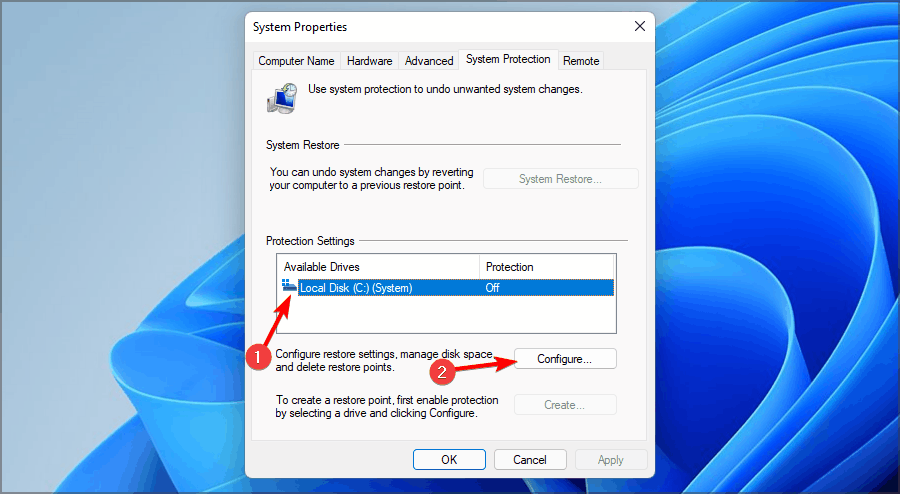
- Select the drive you wish to enable system restore for and click on Configure.

- Now select Turn on system protection. Set the Max Usage value and click on Apply and OK to save changes.

- Go back and repeat step 1.
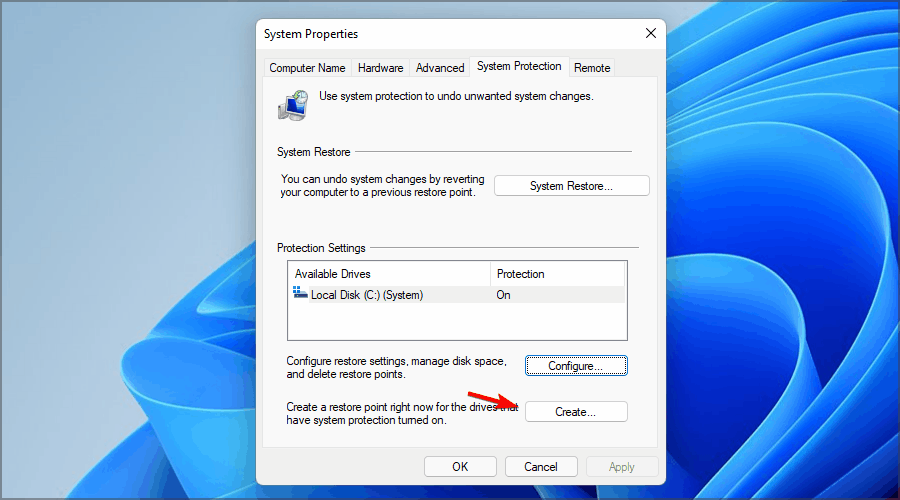
- When the System Properties window opens, click on Create.
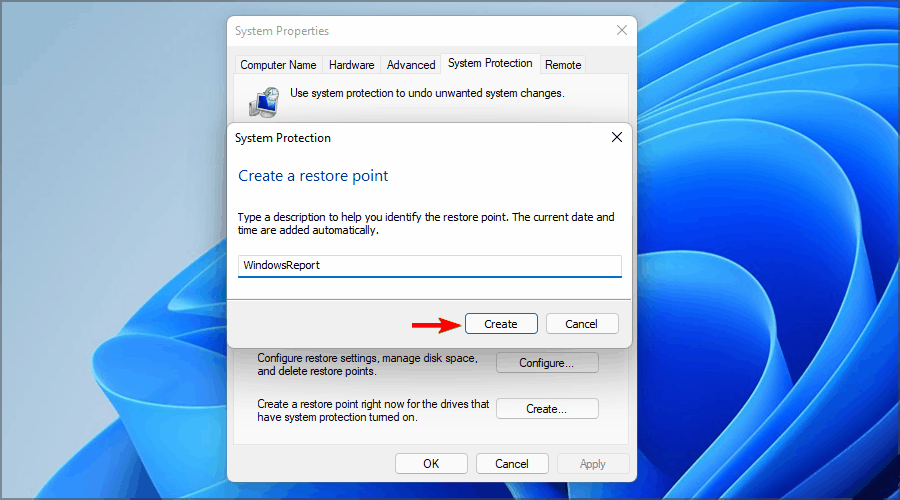
- Enter the desired name for the restore point and then click the Create button.
- Wait while Windows creates the restore point.
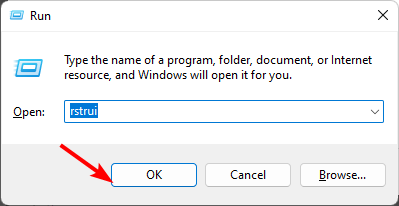
- Press the Windows + R keys, type rstui and hit Enter.

- Select the restore point you wish to revert to and click on Next.
- Now click on Finish.

A quicker and more efficient way of performing a System Restore is by using a dedicated third-party repair tool as it can automatically restore files from system malfunctions after running an in-depth scan to detect them in the first place.
If you’ve tried all these solutions but still can’t get your apps to resize or move, we recommend resetting your PC. This can help you establish whether there were any problems with installing your copy of Windows.
We also have an exciting article that can help you change your icon spacing if the default spacing is not ideal.
You can also change the Taskbar size if it is too small for you using our guided article.
Let us know which solution has solved this issue in the comment section below.