How to Create a Local Account on Windows 11 [3 Ways]
The fastest method involves using Command Prompt

Windows 11, like the previous iterations, wants you to use a Microsoft account to sign in.
However, you can still create a local account on Windows 11, in case you are skeptical of a Microsoft account, like many others. Or, you may be sharing the system and want a dedicated account for everyone.
When creating a local account, you are bound to miss out on some of the features that are exclusive to a Microsoft account.
But, if you have made up your mind, there are a bunch of ways to create a new local account on Windows 11. Go through them all, identify the one that you are comfortable with, and get the job done.
Should I switch to a local account on Windows 11?
You will be missing out on a bunch of services that are exclusive to the Microsoft account, but on the other hand, it’s perfect, in case you want to use your PC as a standalone device.
The features that can only be accessed on a Microsoft account are paid purchases on the Microsoft Store, and the option to sync settings so as to access them from any other device when signed in using the same account, OneDrive, amongst others.
Although switching to a local account doesn’t offer the same set of features as a Microsoft account, it’s not such a bad idea either.
Creating a local account is beneficial from the point of view of security since it doesn’t allow tasks and programs to run with administrative privileges, thereby reducing the chances of harm due to viruses or malware.
Can I create a local account without a password?
Yes, you can create a local account without a password on Windows 11 and that’s one of the best parts about it.
If you are the only one using the PC, entering a password each time when logging in may seem like an unnecessary task. Creating a local account would be an ideal approach for such users.
How can I create a local account on Windows 11?
1. Create a local account via Settings
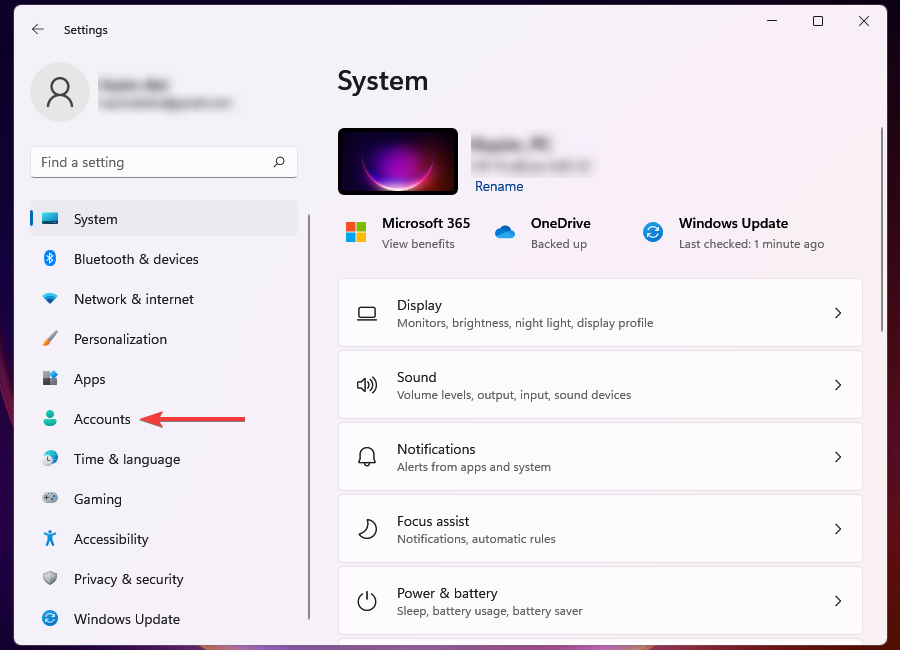
- Press Windows + I to launch Settings.
- Select Accounts from the tabs listed on the left.

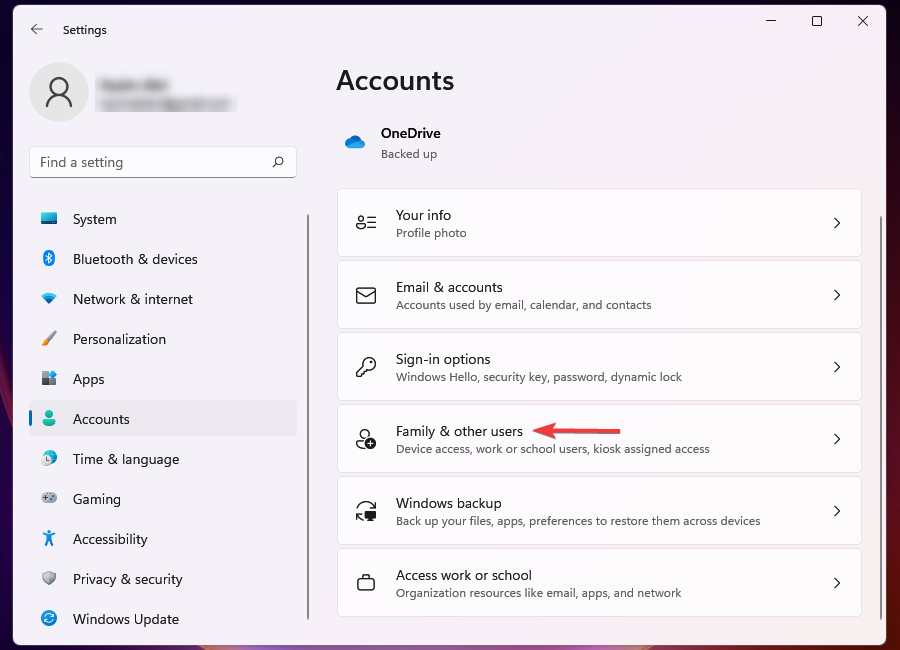
- Click on Family & other users on the right.

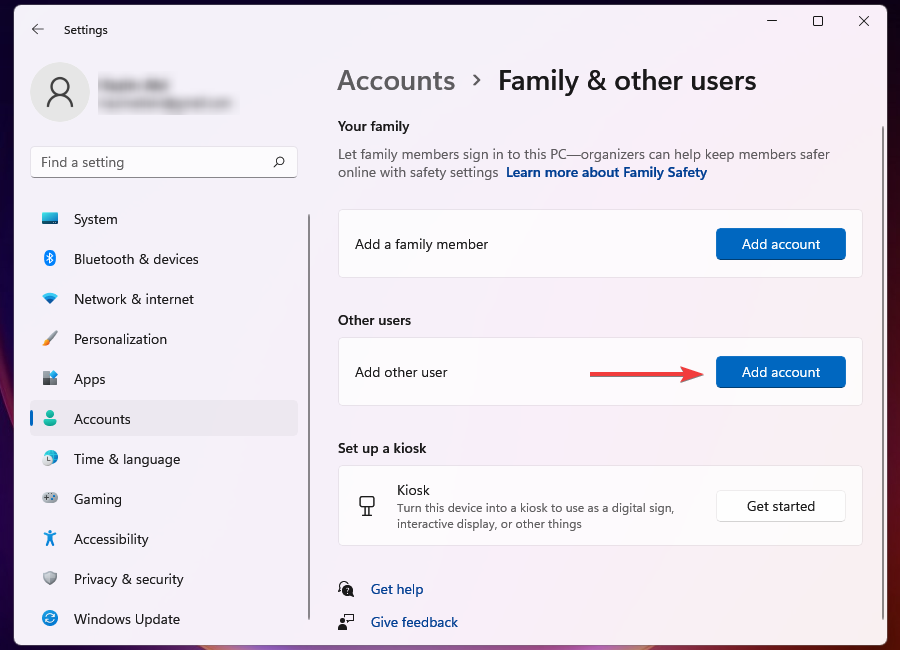
- Click on Add account button next to Add other user.

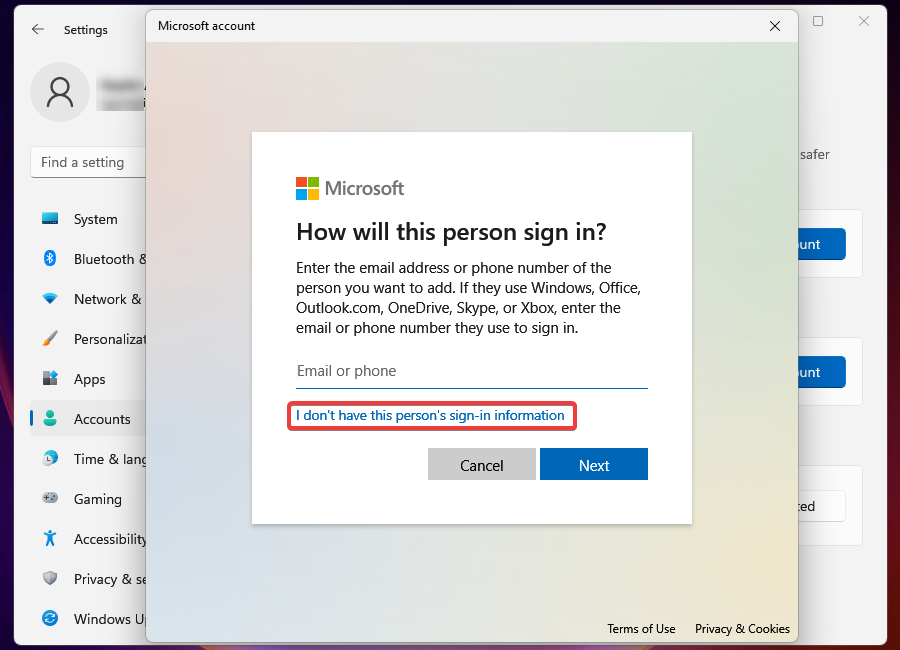
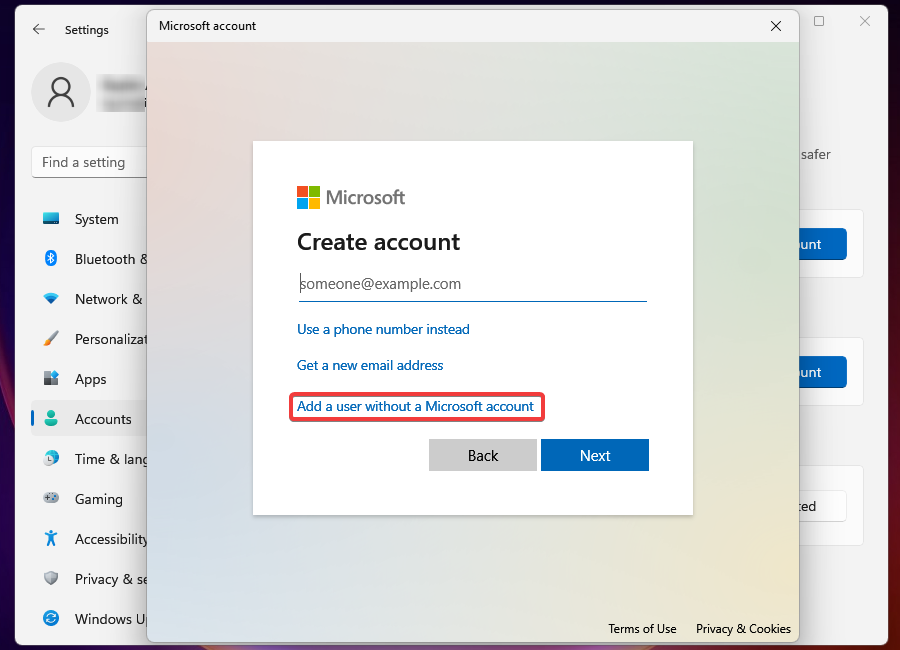
- Select I don’t have this person’s sign-in information.

- Click on Add a user without a Microsoft account.

- Enter the user name, password, and answer the three security questions (if you enter a password) in the respective fields, and click on Next to create the local account.

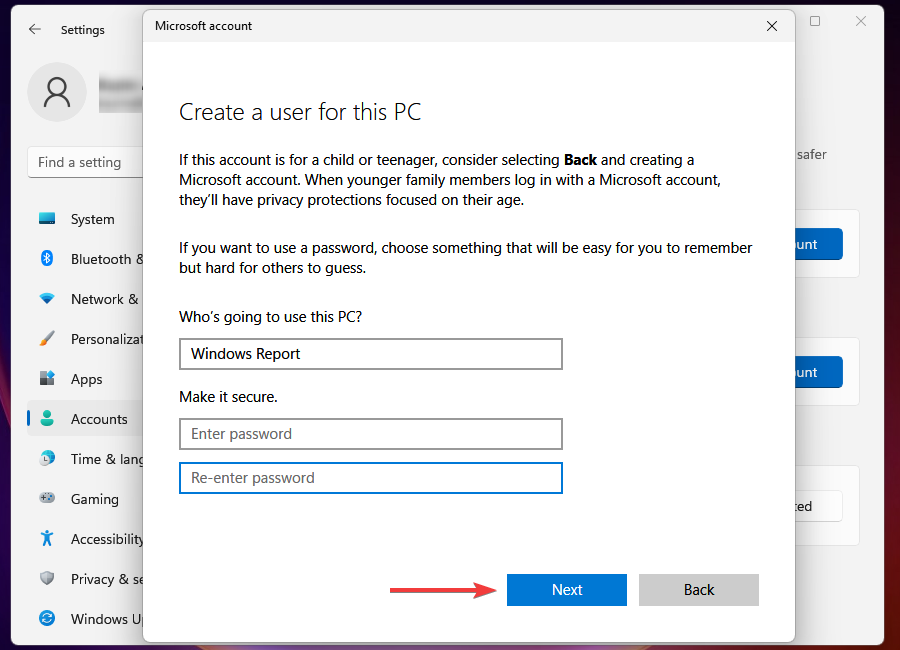
If you don’t want to create a password-protected local user account, leave the password field blank in the above step.
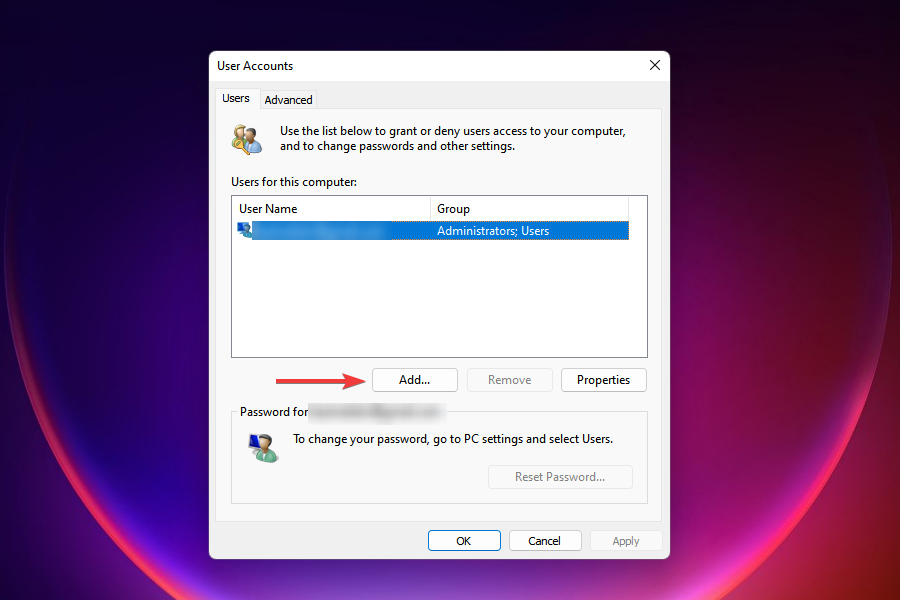
2. Use the netplwiz command to create a local account
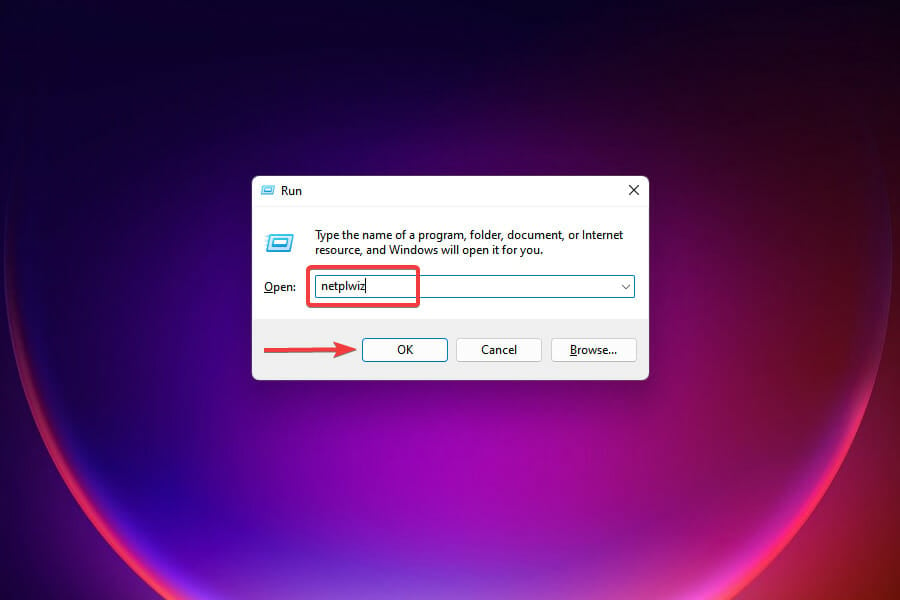
- Press Windows + R to launch the Run console, enter netplwiz in the text field and click on OK.

- Click Add in the User Accounts window.

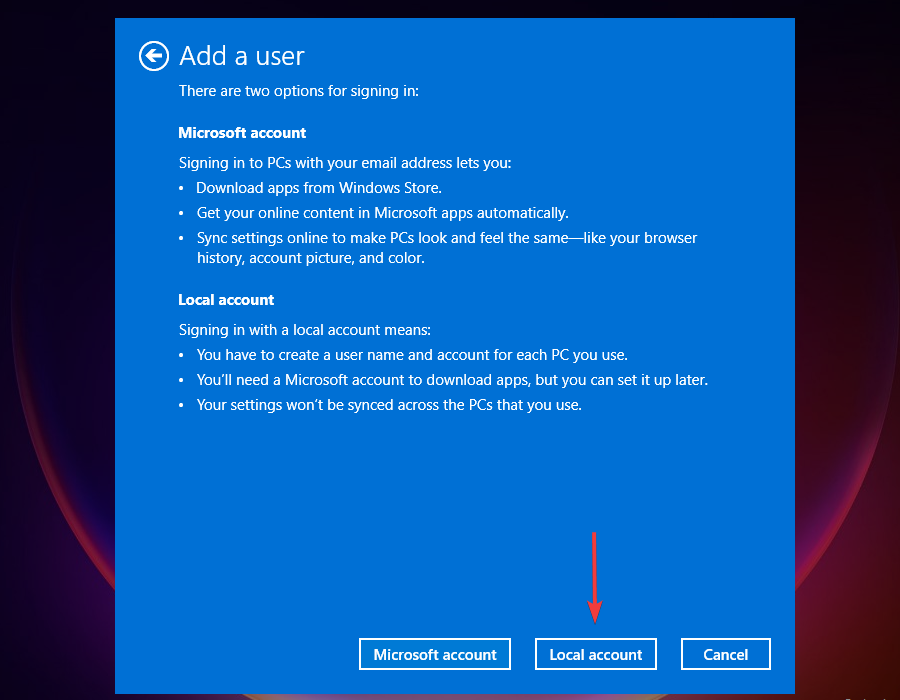
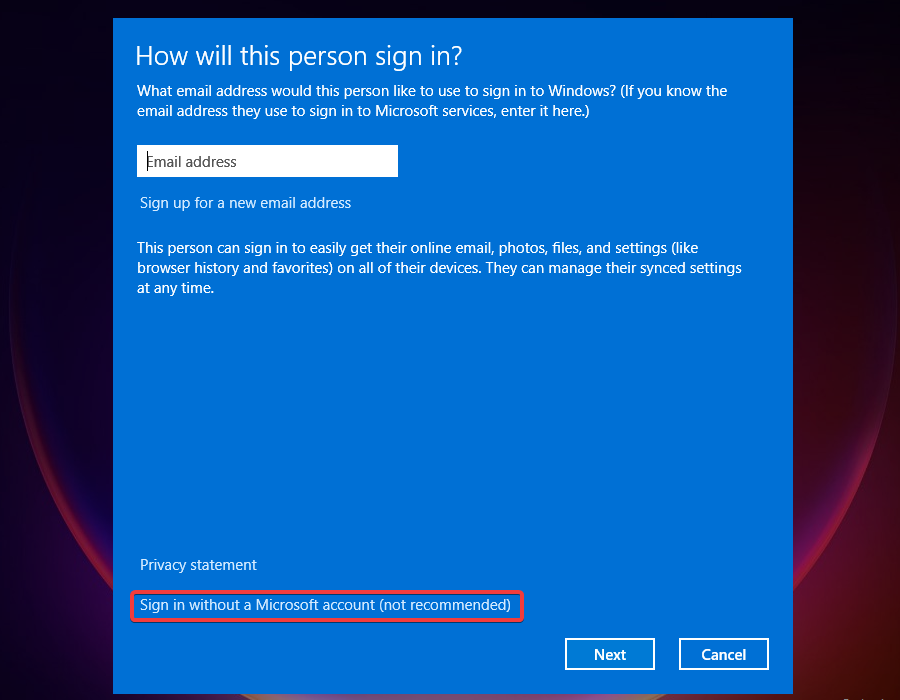
- Select Sign in without a Microsoft account (not recommended).

- Click on Local account button.
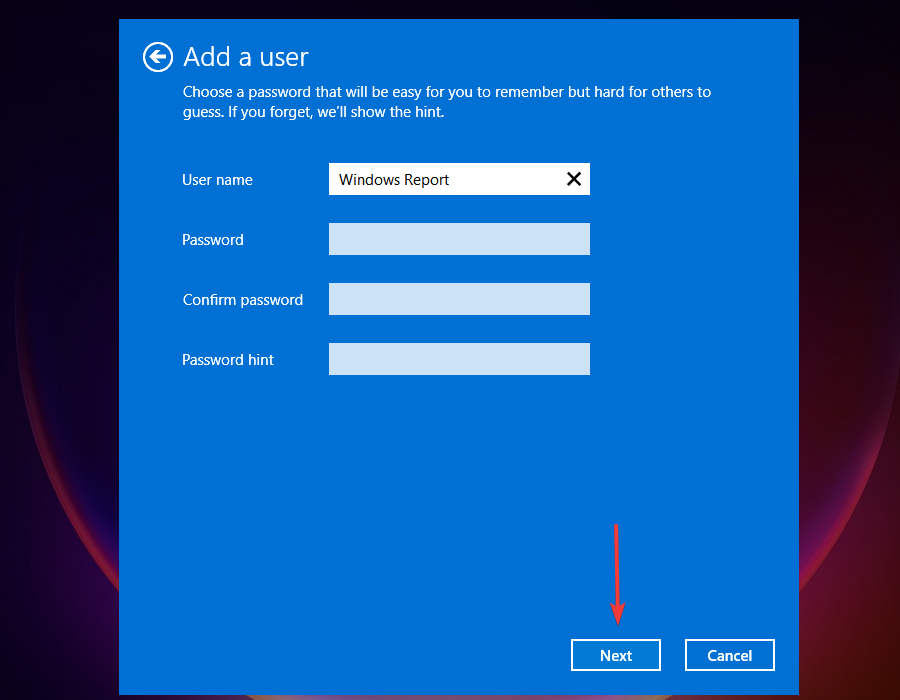
- Enter a username and password (optional) for the new user account, and a hint, in case you set a password. Once done, click on Next.

- Click on Finish to create the Local account.


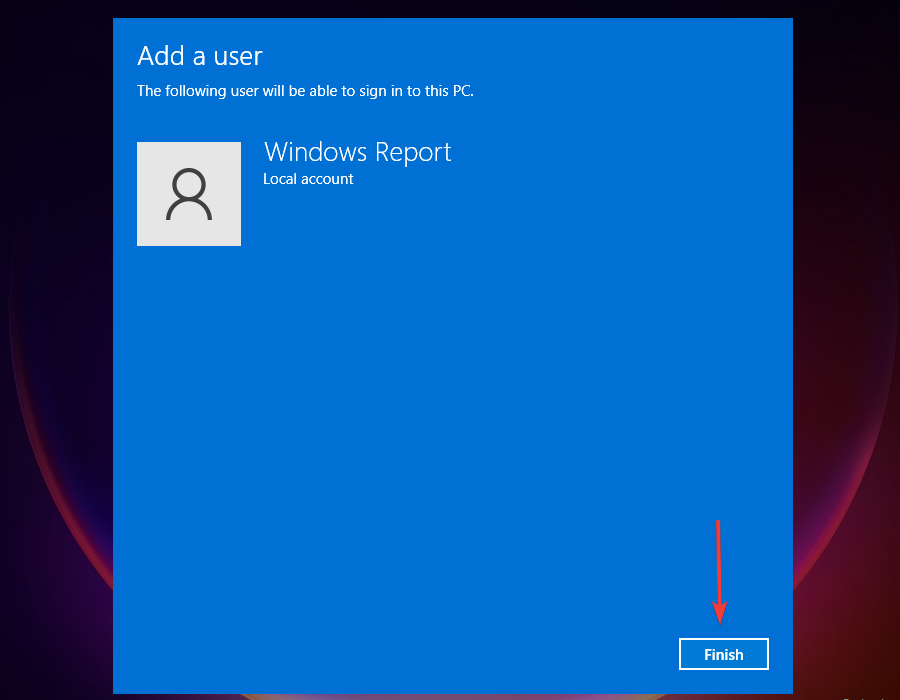
The local account is now created and you can start using it right away.
3. Use Command Prompt
1. Press Windows + X to launch the Quick Access/Power User menu.
2. Select Windows Terminal (Admin) from the options.

3. Click Yes on the UAC prompt.

4. In the command line tool, click on the downward-facing arrow at the top, and select Command Prompt.

5. Type or paste the following command and hit Enter (replace UserName and Password with the actual ones you want to use):
net user <UserName> <Password> /add
6. After the account is created, close the command line tool.
A fast and easy method to create a local account on your Windows 11 device is to use your built-in command tool.
Through Command Prompt, you can set up a local account with or without a password in just a few lines.
Can I change the account type from Standard to Administrator?
A local account is created with Standard privileges by default, but you can change it to Administrator with a bunch of methods.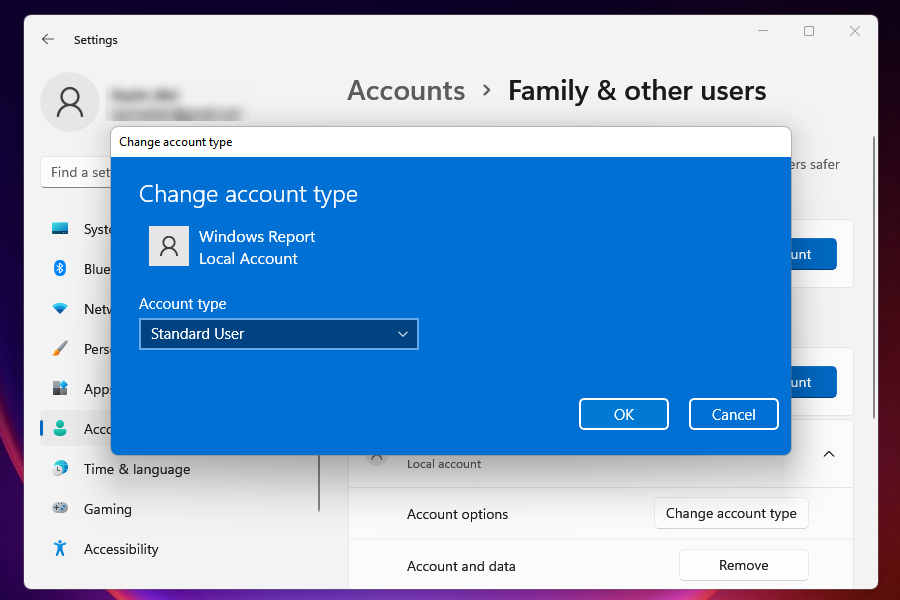
Administrator accounts offer a lot more options and permissions to users and allow advanced troubleshooting.
However, whether to set up a local account as an Administrator is purely a personal choice based on your requirements.
If Windows 11 is not allowing local accounts, make sure you have administrative privileges. If the machine is owned by an organization, this might be prevented by a local policy.
Can I remove a local account from Windows 11?
Yes, you can always remove a local account from Windows 11, in case it’s not needed anymore or you plan to get rid of the computer.
In the latter case, it’s actually recommended that you remove the local account and reset the Windows 11 PC to its factory settings.
These are all the ways you can create a local account on Windows 11. While the first two are relatively time-consuming methods, they are often preferred by users not acquainted with Command Prompt.
Now, with a proper understanding of each method, choose the one that suits you best.
If you run into issues with the Settings app, or an error reported by many users, check our guide to fixing errors preventing you from accessing the Settings. And don’t forget that you may choose to disable Local Account Security Questions on Windows.
Using a local account can help if the password hint is not showing on Windows 11, so you’ll might have to make the switch.
Let us know your experience in the comments section below.
Read our disclosure page to find out how can you help Windows Report sustain the editorial team. Read more


Improve this guide


User forum
0 messages