7 Tips to Fix CCleaner Duplicate Finder not Working
Key notes
- If the CCleaner duplicate finder is not working, the problem is usually related to file compression.
- Check your settings and always make sure that the desired folder is being scanned by the software.
- Corrupted entries in the registry can interfere with this process, so you'll have to remove them.
CCleaner is one of the best utility programs that can delete unwanted files from computers, but many claim that CCleaner duplicate finder is not working for them.
If you’re not familiar with this process, we have a great guide on how to remove duplicate files in Windows, so we encourage you to read it.
Keeping your PC free from unwanted files is important, so it’s important to fix this issue right away. Therefore, in this post, we have compiled a list of some workarounds that will definitely help you.
Is CCleaner duplicate finder safe?
CCleaner has been one of the best PC cleaners available for over a decade. But is it safe to use?
The answer here is yes. The company behind this software has a great reputation, and their applications are well-known for being both safe and incredibly useful.
Since this is a core feature of CCleaner, it’s safe to use, but we advise you to always double-check your files manually before removing them.
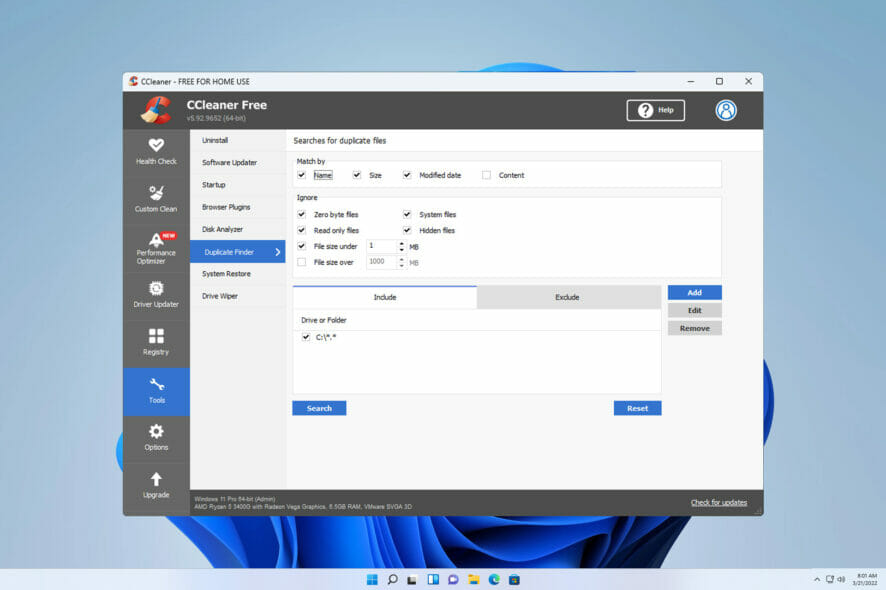
How can I fix CCleaner duplicate finder if it’s not working?
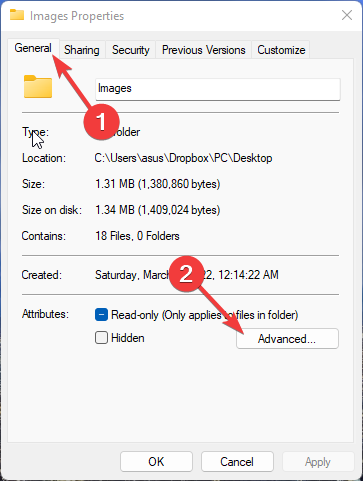
1. Turn off compression attribute
- Right-click on the file you want to delete and click Properties.
- Navigate to the General tab and click on Advanced.
- Under the Advanced dialog box, uncheck the option Compress contents to save disk space. This will disable the compress attribute.
- Click on OK to save the changes.
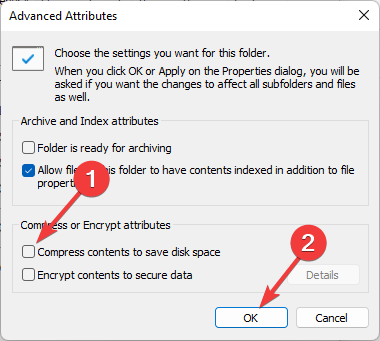
Duplicate files sometimes won’t delete even after using CCleaner duplicate finder. The reason for this is the file compression feature. Turn off the compression attribute and try deleting files again.
2. Turn off Read-only mode
- Right-click on the duplicate file you want to delete.
- Click on Properties.
- Navigate to the Attributes section and uncheck the Read-only option to disable it. Click on OK to save the settings.
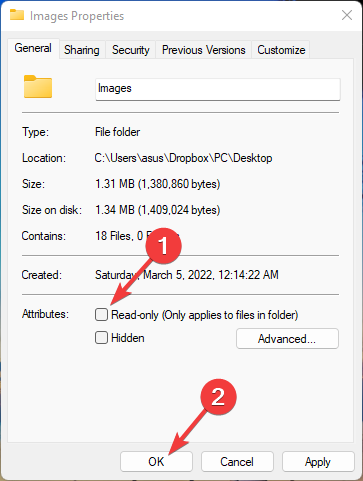
If the Read-only mode is enabled, you cannot delete or modify the files. So, disable the read-only mode and check if CCleaner duplicate finder works correctly.
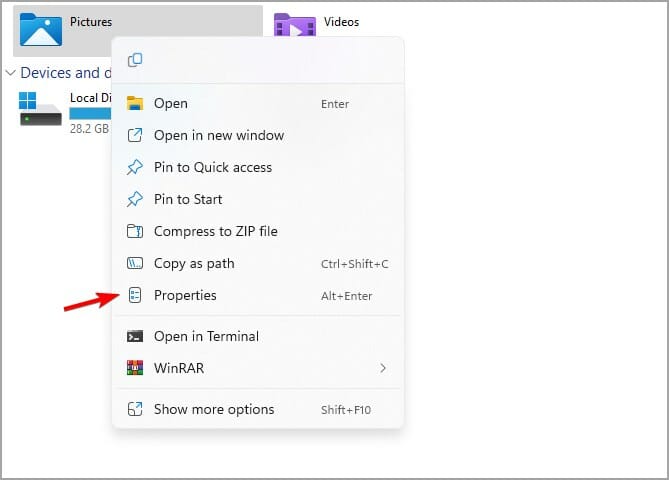
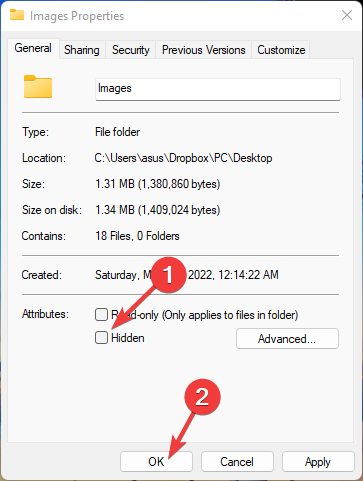
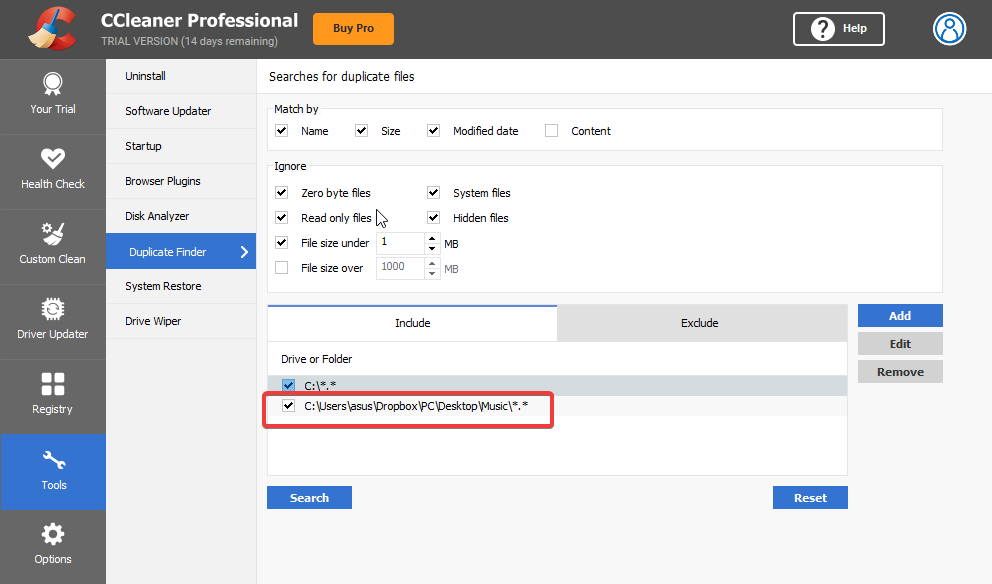
3. Check if the folder is in the include list
- Right-click on the folder you want to delete files.
- Click on the Properties.
- Look for the Hidden checkbox. If enabled, disable it and click OK to save changes.
- Open the CCleaner application, and select the Duplicate finder.
- To the Include list, add the folder which you want to search.
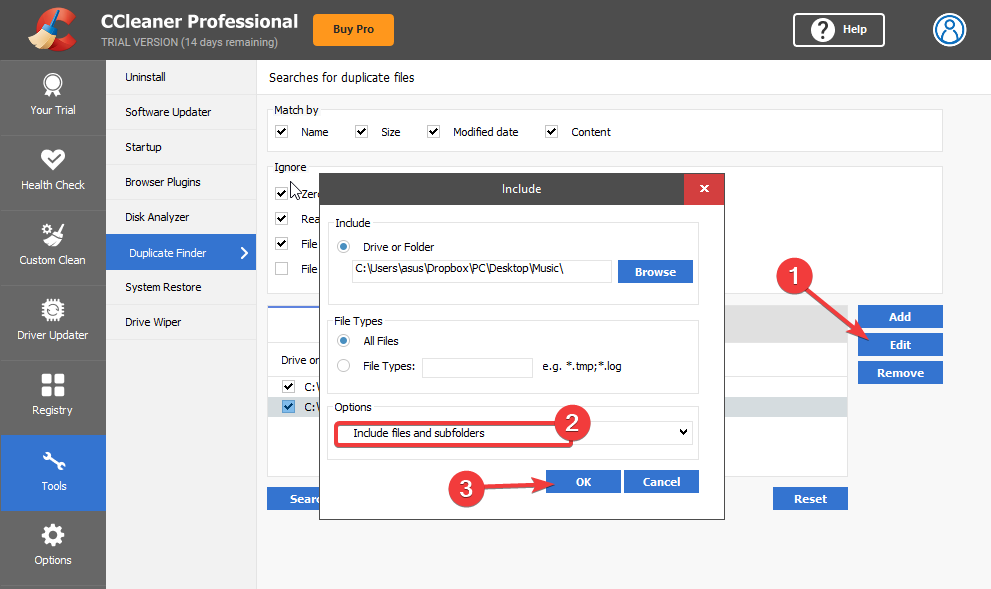
- Now, click on the Edit option. Select Include files and subfolders under Options. Click on OK to save the changes.
4. Run CCleaner as an Administrator
- Right-click on the CCleaner.exe file on your PC and select Properties.

- Navigate to the Compatibility tab. Select the option Run this program as an administrator.
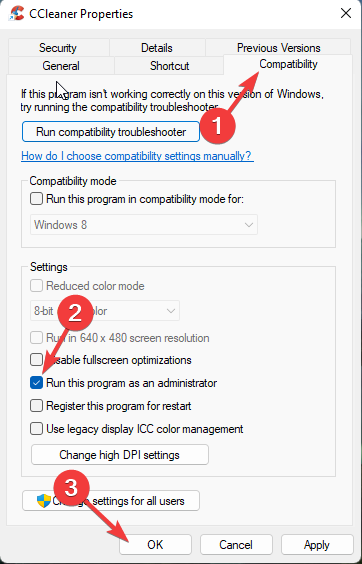
- Click on OK to save the changes.
5. Disable third-party antivirus
- Right-click your antivirus icon in the system tray.
- Now select the option to stop protection.
- After disabling the protection, check if the problem is still there.
If disabling didn’t work, uninstall it temporarily and check if CCleaner is still not finding duplicates.
6. Remove CCleaner Registry keys from the Registry Editor
 NOTE
NOTE
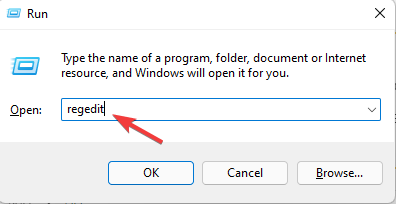
- Click Windows key + R to open the Run dialog box.
- Type regedit and hit Enter.
- Navigate to the following path.
HKEY_LOCALMACHINE\SOFTWARE\Microsoft\Windows NT\CurrentVersion\Image File Execution Options\ - Right-click the CCleaner entry key from the list of entries and select Delete.
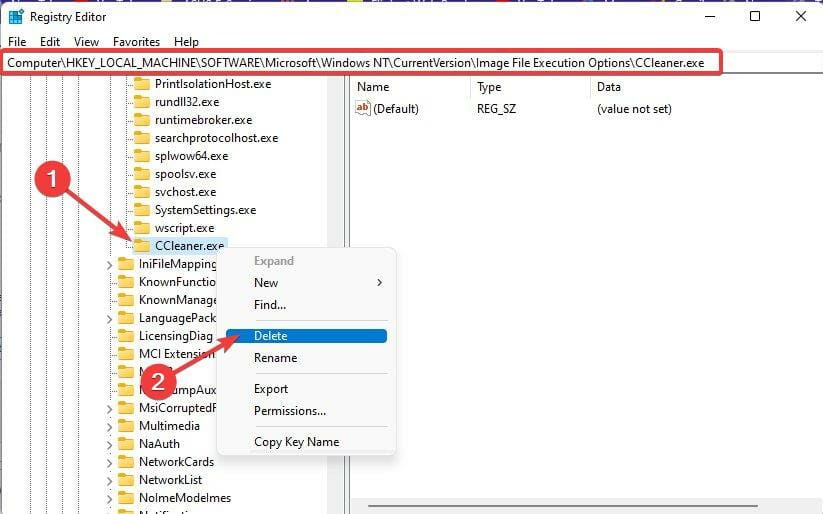
- Once done, Close the Registry Editor and check if the CCleaner not detecting duplicate files issue has been resolved.
Many users also complain about CCleaner keeps crashing. Rest assured that our guide shows you what to do in case that happens.
7. Reinstall CCleaner
- Press Windows key + X and select Installed apps.
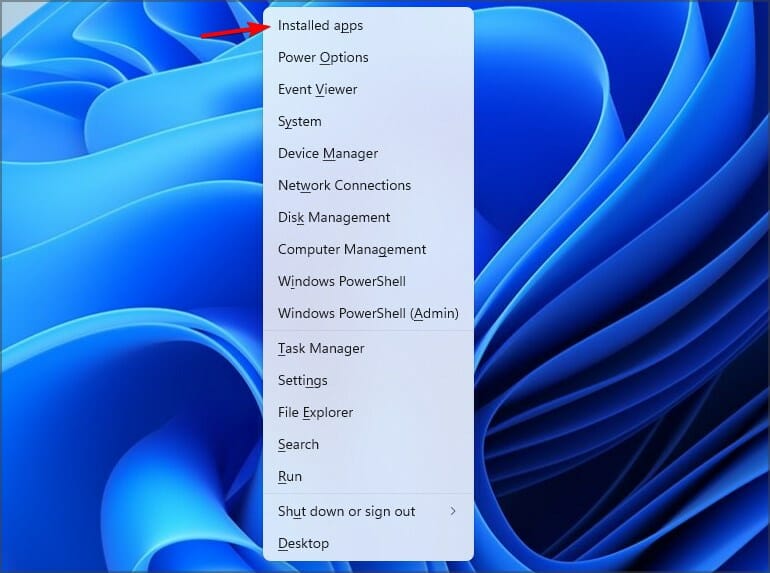
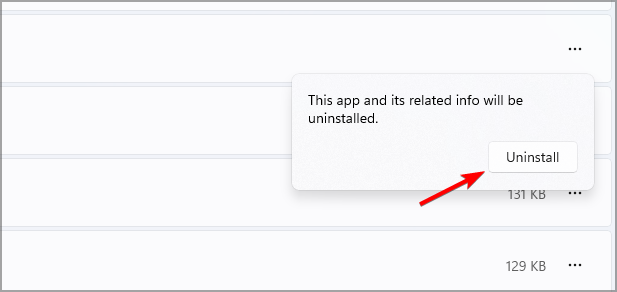
- Locate CCleaner on the list. Click the three dots on the right and choose Uninstall.
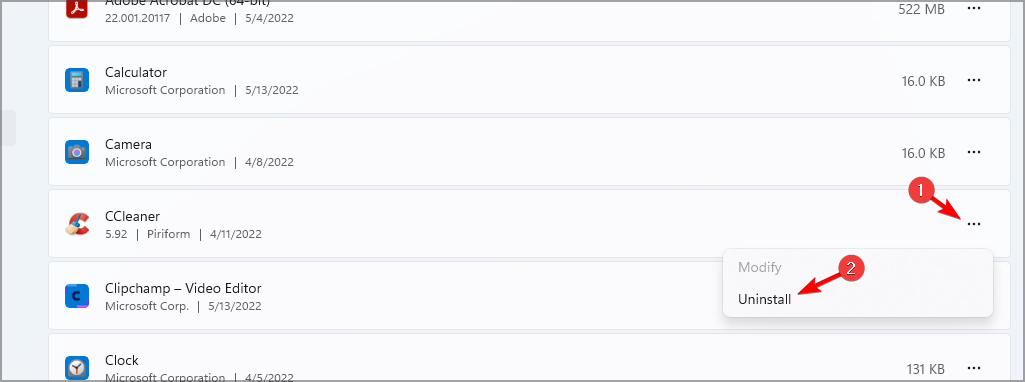
- Click Uninstall to confirm.
- Follow the instructions on the screen to complete the process.
Once you’re done, visit CCleaner website and download the latest version.
The most common reason this issue occurs is the Compression Attribute. However, running CCleaner as an Administrator has also been helpful to many users.
Follow the steps mentioned above to fix CCleaner not deleting duplicate files. If the troubleshooting methods mentioned above could not help you, try updating Windows to its latest version.
Also, take a look at our article on the best tools to find and remove duplicate files. If this guide was helpful, do let us know in the comments below. We’re eager to hear from you.
Read our disclosure page to find out how can you help Windows Report sustain the editorial team. Read more


Improve this guide


User forum
0 messages