How to Change BIOS Settings on Windows 11 Fast
Hardware settings can only be changed from BIOS
Key notes
- To change BIOS settings on Windows 11, you need to hold the designated key while your PC boots.
- You can do that from the Recovery options in the Settings app on your PC.
- To enable AMD TPM on Windows 11, you need to access the firmware settings and change a few security options.
- Read our article to find out exactly how to do these things.

Need to tweak your hardware settings? BIOS is where it happens. In Windows 11, changing BIOS settings lets you adjust boot options, enable virtualization, or manage system performance.
This guide shows you exactly how to access and modify BIOS settings – step by step. Whether you’re troubleshooting or optimizing your PC, we’ll make it simple.
Table of contents
How can I change BIOS settings on Windows 11?
1. Access BIOS using the shortcut key during the booting process
- While your system boots, keep pressing the Del key.
- Windows will now boot to BIOS.

This is the easiest way to access BIOS, but it’s not universal. Some motherboards use a different key, and you can do two things to find the right key.
- During the boot, look for the message saying Press Key to enter setup or any similar message. In most cases, pressing this key will allow you to enter BIOS.
- Check your motherboard manual and find the shortcut key.
You can find the correct shortcut for your hardware by checking this guide on how to get the BIOS key, which helps you confirm the exact key your PC uses.
2. Enter BIOS using the Settings app
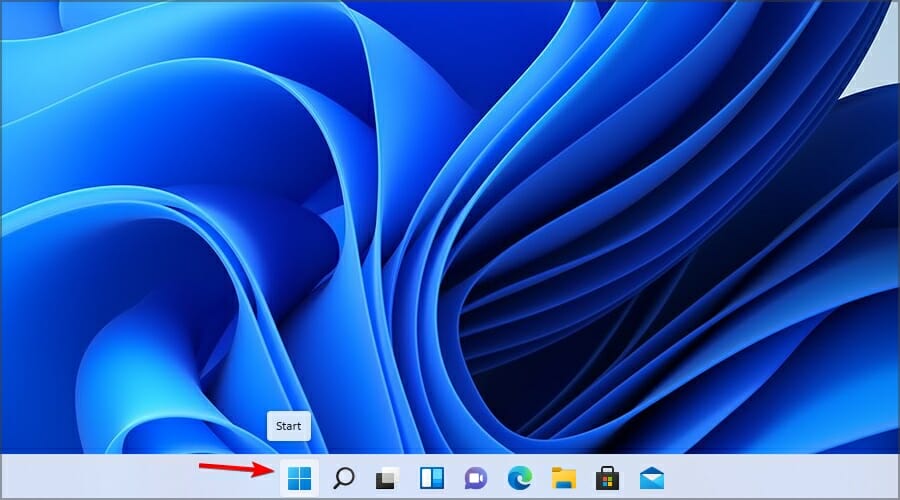
1. Click the Start icon in the Taskbar.
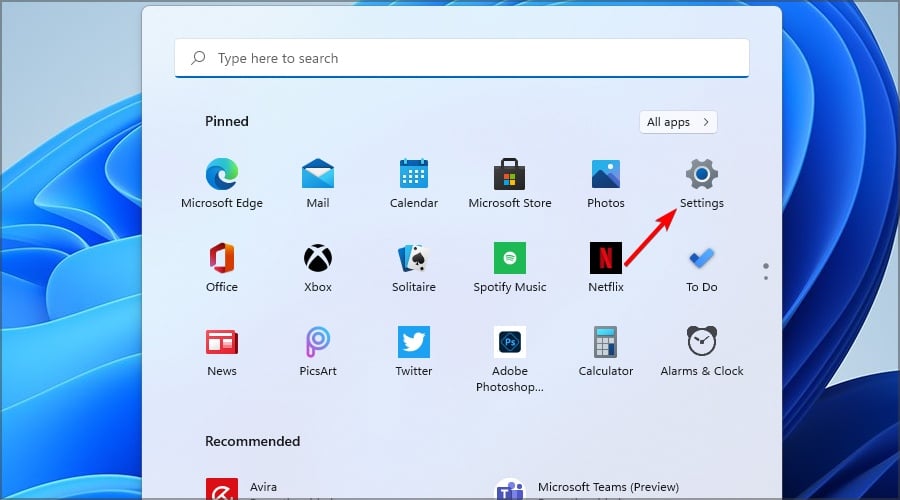
2. Now select the Settings app from the menu that opened.
3. Go to the Recovery options.

4. In the Advanced startup section, click on Restart now.

5. Select Restart now to confirm.

6. Go to the Troubleshoot center.
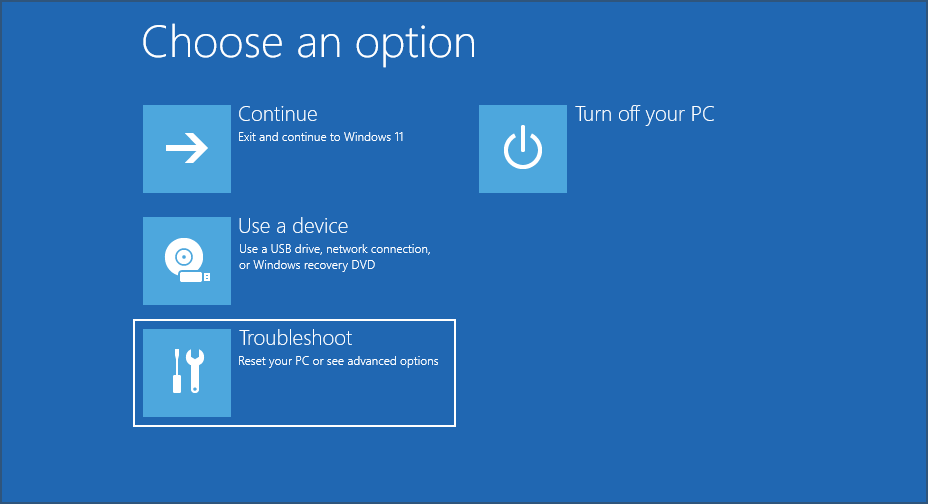
7. Select Advanced options.

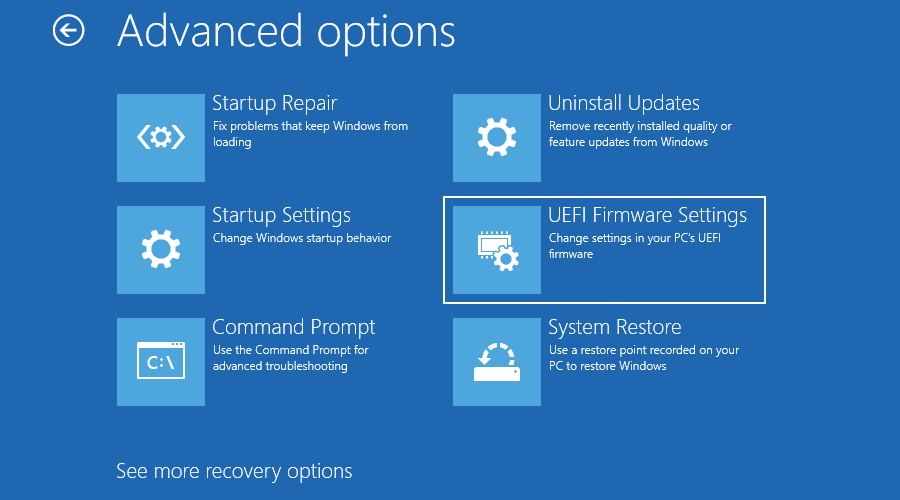
8. Now select UEFI Firmware Settings.
9. Finally, click Restart to confirm.
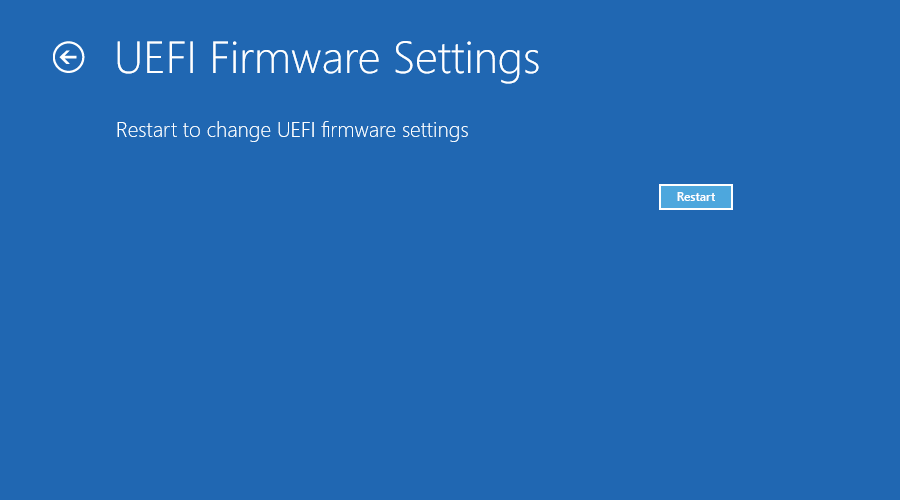
10. After the restart, Windows should boot directly to BIOS. From there, you can make all the BIOS changes you want.
There is a method to enter BIOS on Windows 11 without having to use a keyboard shortcut. Instead, you can access BIOS via Settings.
You should only update your BIOS if you have a clear reason to do so. If your PC is working fine, there’s no need to install the latest version. Most BIOS updates fix specific bugs or add support for newer hardware like CPUs. So, unless you’re upgrading components or dealing with hardware issues that the update addresses, it’s better to leave it alone. Keep in mind that updating the BIOS carries some risk. If the process fails, your PC might not boot anymore. Only proceed with an update if it’s absolutely necessary.
BIOS and UEFI are both firmware interfaces that help your PC start up, but UEFI is the modern replacement for BIOS. While BIOS is stored on a chip and has a basic interface, UEFI lives on a dedicated partition and often includes a graphical UI with mouse support. UEFI also enables faster boot times, Secure Boot, TPM integration, and support for larger drives. Most modern systems use UEFI by default, even though they may still refer to it as BIOS in settings.
Short Video Explainer ▶️
Read our disclosure page to find out how can you help Windows Report sustain the editorial team. Read more


Improve this guide


User forum
0 messages