How to change the cursor speed in Windows 10 version 2004
1 min. read
Updated on
Read our disclosure page to find out how can you help Windows Report sustain the editorial team Read more
Key notes
- In Windows 10 May 2020 update, the cursor speed setting moved from the Control Panel to Settings.
- You can easily access the Mouse Settings page if you type mouse in the Windows Search window and click on Mouse Settings from the results.
- If you have any problems with your mouse, or you just need more information, check our Mouse section.
- The Tech Tutorials Hub is the point of reference if you need almost any type of guide you might think of.

Until now, the cursor speed setting for the mouse was in the Control Panel. Now it moved in the Settings.
How can I change the cursor speed in Windows 10 May 2020 update?
To change the cursor speed in Windows 10, follow the next easy steps:
- Press the Windows button and click on the Settings button (the cogwheel on top of the Power option).
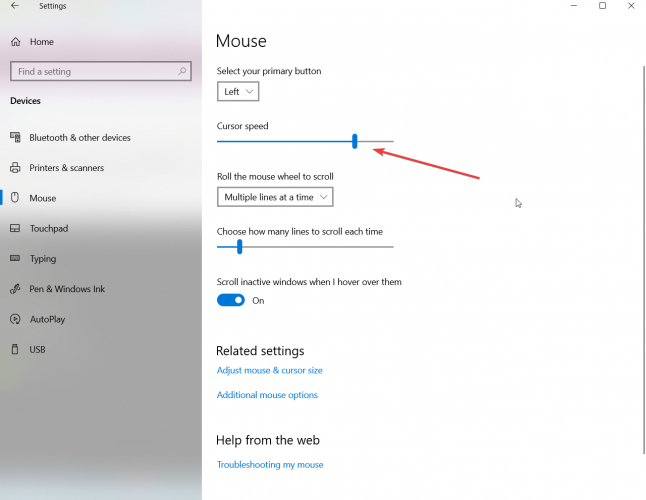
- Click on the Mouse option from the left pane and adjust the Cursor speed from the right pane to your liking.
Other mouse settings
While you are at it, you might also adjust the scrolling speed for your mouse wheel. You can choose how many lines you want it to scroll each time you move the mouse wheel.
You can also change the color and size of the cursor if you click on the Adjust mouse & cursor size from Related settings.
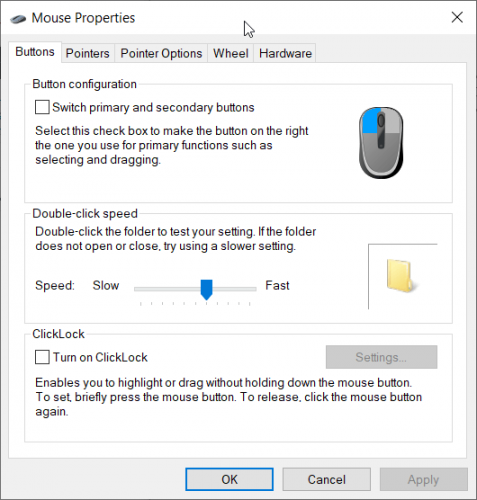
If you click on the Additional mouse options, you will get to the Mouse Proprieties screen where you have additional settings.
You can easily access the Mouse Settings page if you type mouse in the Windows Search window and click on Mouse Settings from the results.
[wl_navigator]

