Solved: 0x000000B9 CHIPSET_DETECTED_ERROR in Windows 10 and 11
First, check hardware compatibility of your machine
8 min. read
Updated on
Read our disclosure page to find out how can you help Windows Report sustain the editorial team. Read more
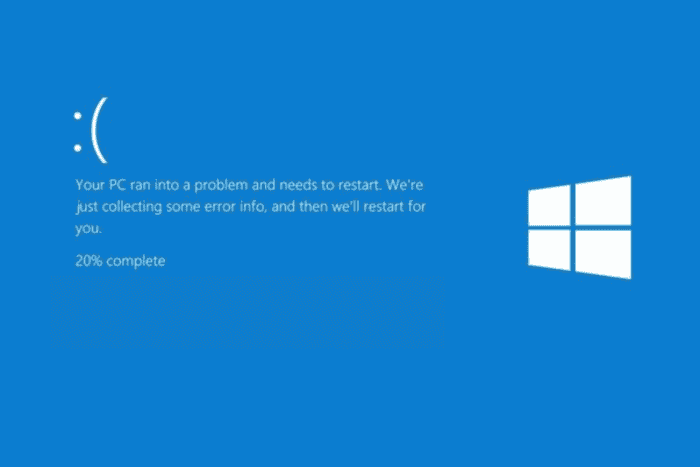
The 0x000000B9 CHIPSET_DETECTED_ERROR is a blue screen error that usually indicates a problem with the chipset driver or chipset itself, which acts as a communication hub for various computer parts. The error can appear because of outdated or corrupted drivers, BIOS problems, or hardware malfunctions.
To begin with, inspect the physical connections of all the hardware components, including RAM, CPU, and expansion cards.
How can I fix the 0x000000B9 CHIPSET_DETECTED_ERROR?
1. Verify hardware compatibility
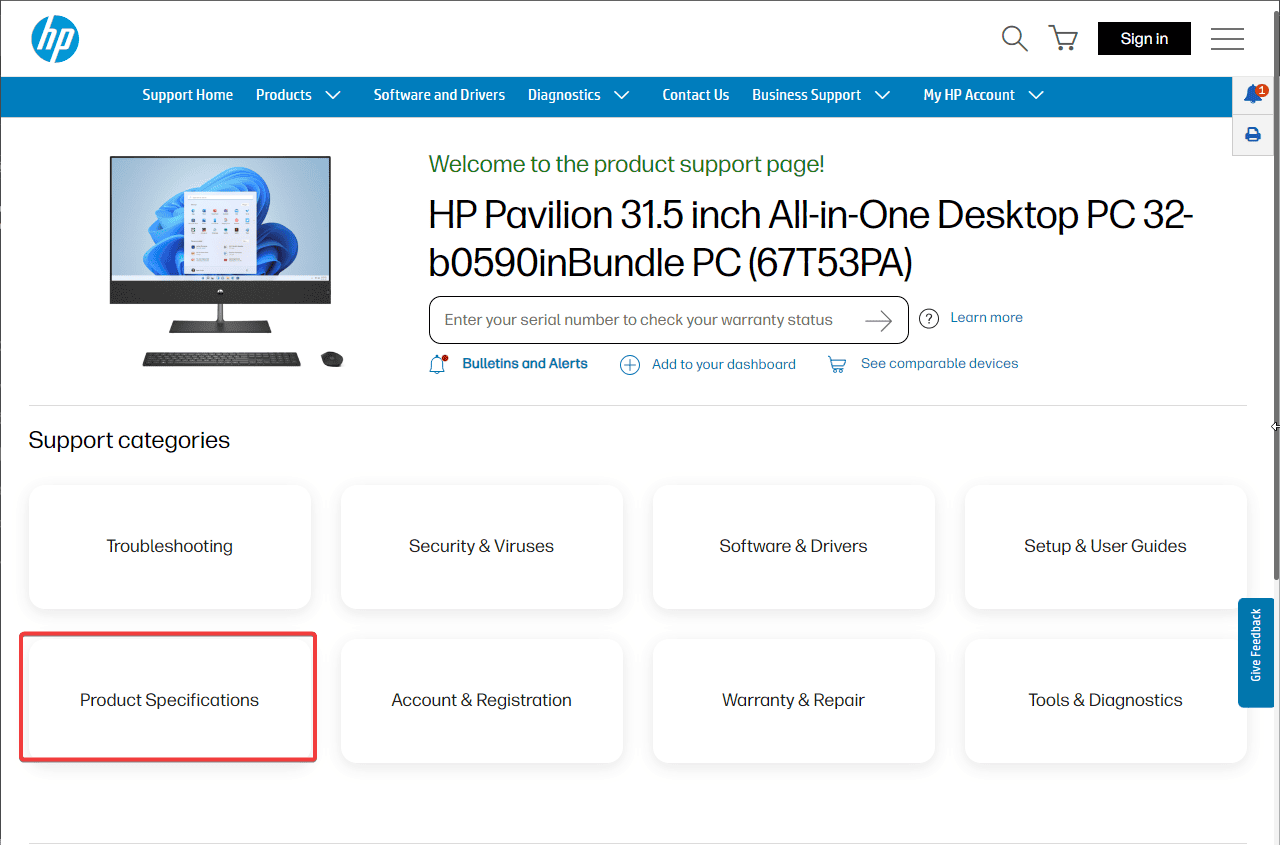
- Visit the manufacturer’s website of your computer or motherboard. For instance, we are taking HP as the manufacturer. Open your preferred browser and navigate to HP’s official support page.
- In the search bar, enter your HP computer’s model number (Serial number, & product number). You can find it on the back panel of your device.
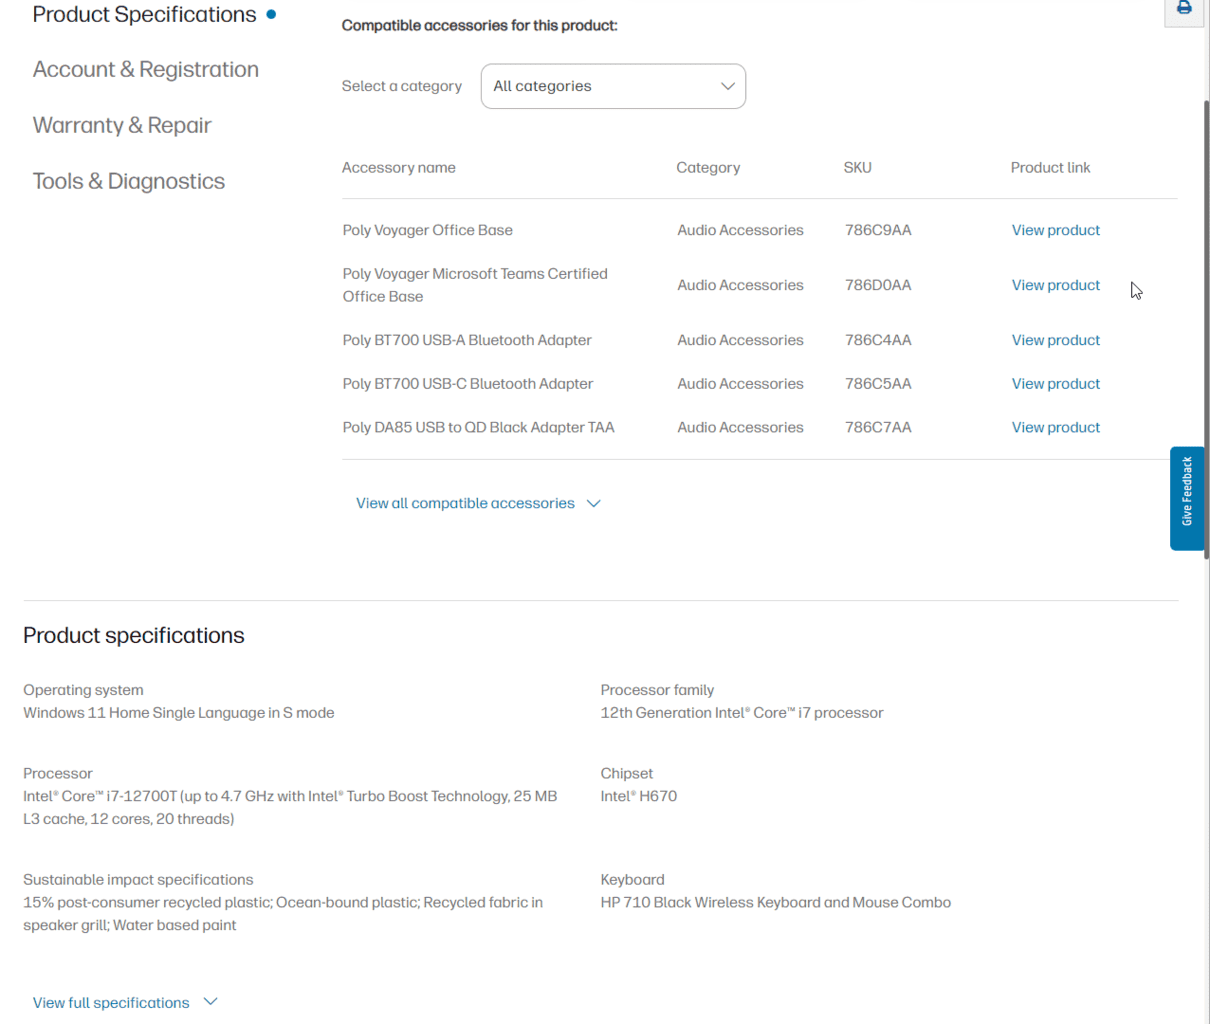
- Click the Product Specifications tab to open the specifications page or compatibility list.
- Check if the hardware components, including the chipset and processor, are compatible with your Windows version.
2. Update Windows
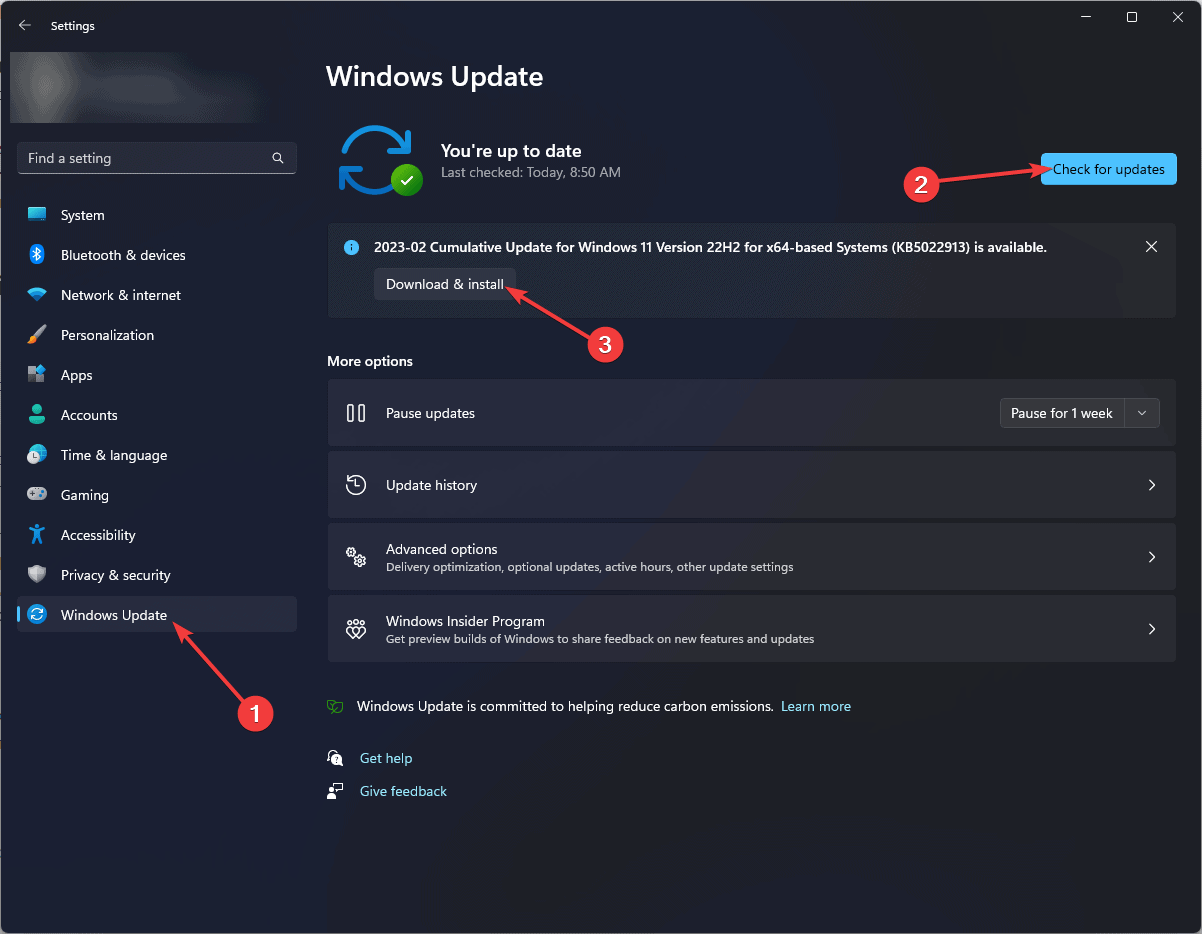
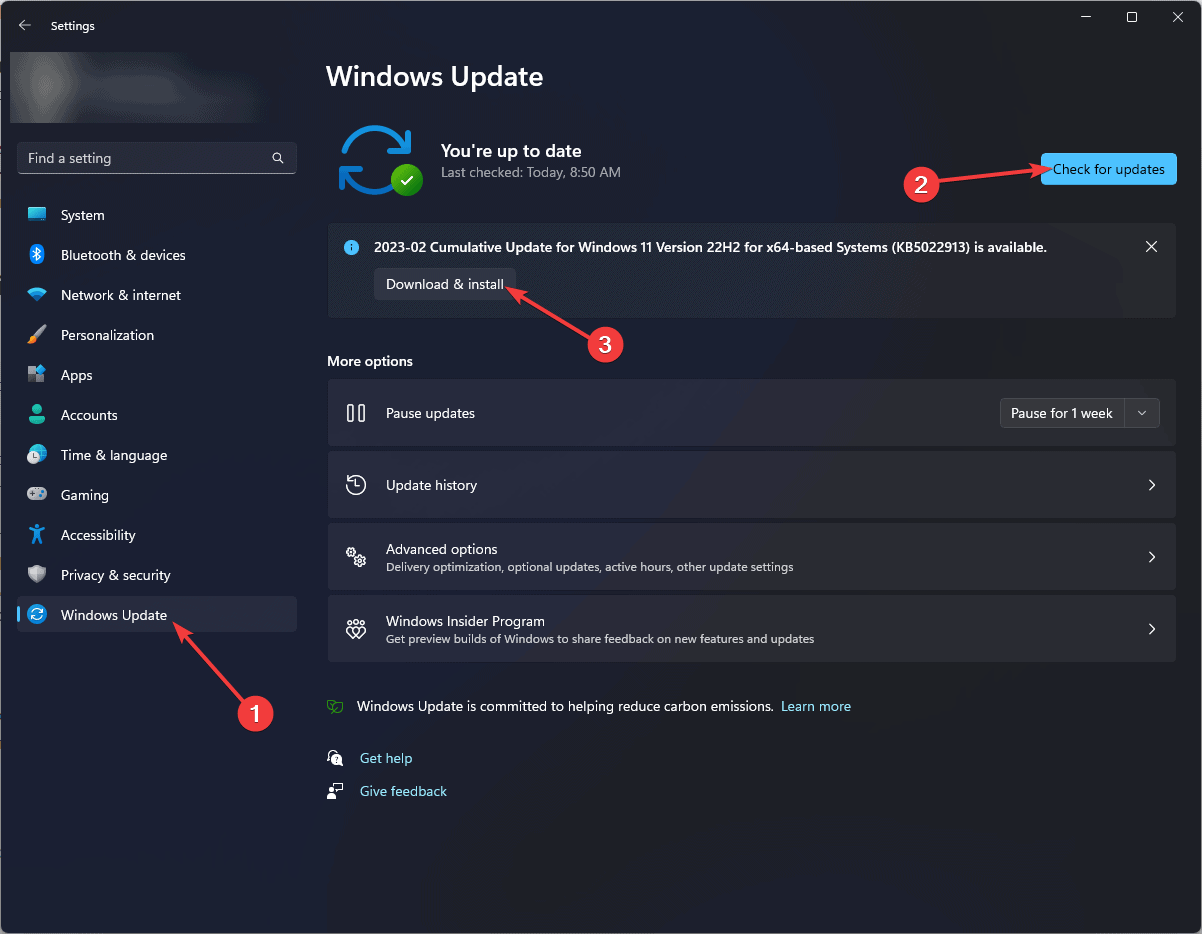
- Press Windows + I to open the Settings app.
- Go to Windows Update, then click Check for updates.
- If an update is available, click Download and install to get it. Now, restart your computer, then check if you see the CHIPSET_DETECTED_ERROR again.
3. Update or reinstall the chipset driver
3.1 Update the driver
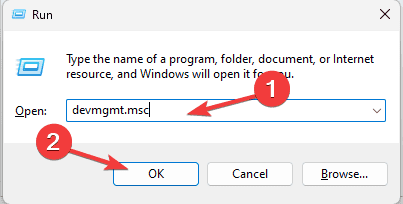
- Press Windows + R to open the Run window.
- Type devmgmt.msc and click OK to open the Device Manager app.
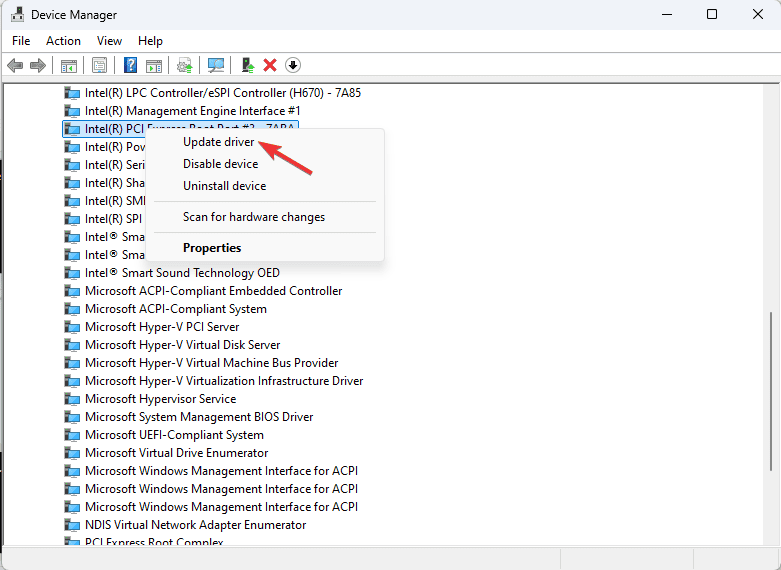
- In the Device Manager window, expand the System devices category, right-click the chipset driver and choose Update driver from the context menu.
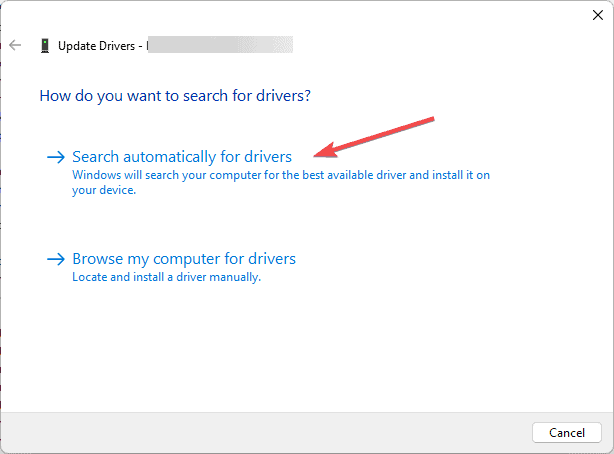
- Select Search automatically for drivers, and Windows will search for the latest drivers.
If Windows cannot find a better driver version, you can use a third-party driver updater tool to update the drivers on your PC safely, or you can also visit the manufacturer’s official website and manually install the driver.
3.3 Reinstall the driver
If no update is available for the driver, you can try reinstalling the driver to fix the CHIPSET_DETECTED_ERROR. To do that, follow these steps:
- Open the Device Manager app using the steps from the above method.
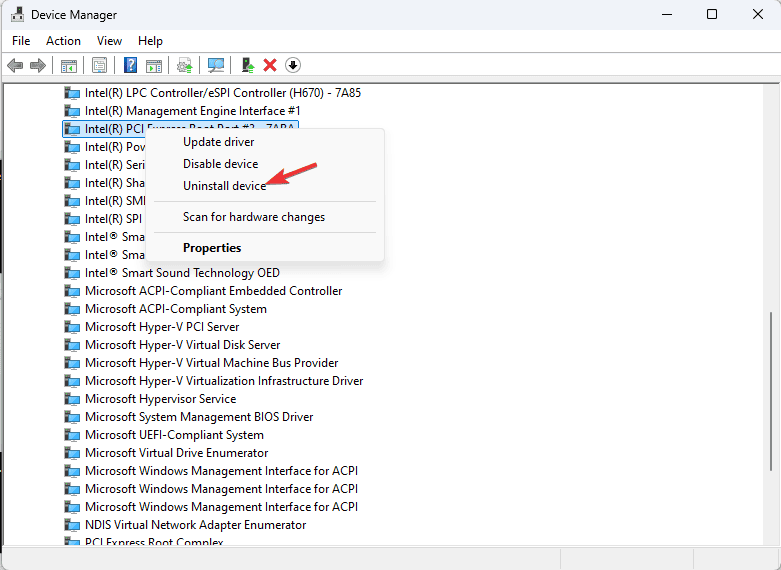
- Expand the System devices category, right-click the chipset driver, and select Uninstall device from the context menu.
- Click Uninstall again to confirm the action.
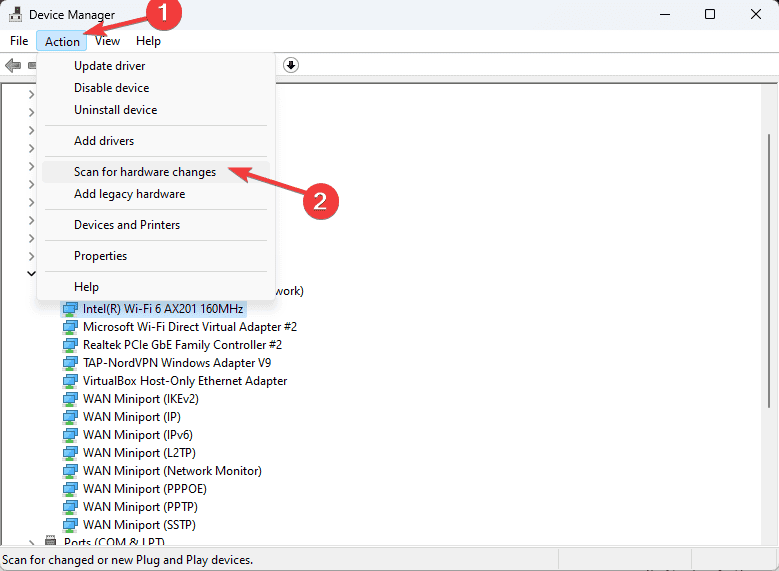
- Once uninstalled, go to Action and select Scan for hardware changes to reinstall the driver.
- Restart your computer to complete the process.
4. Run Check Disk on the system drive
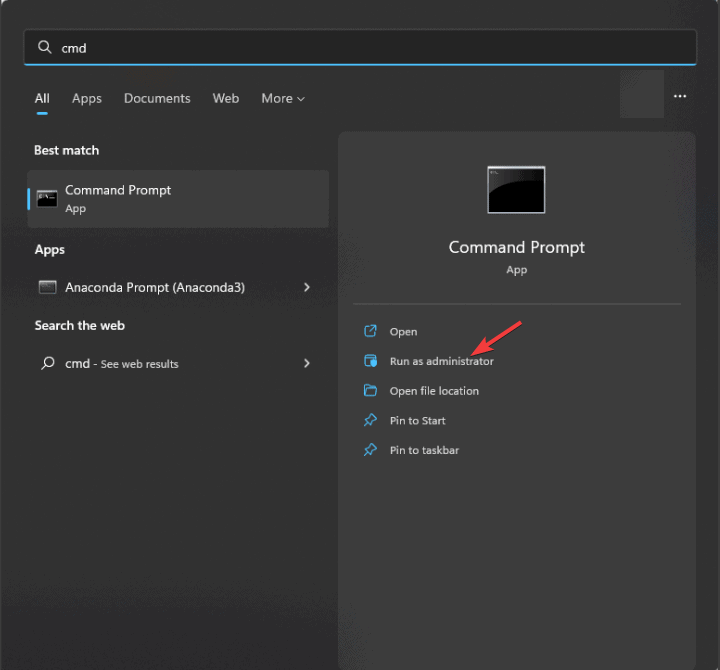
- Press the Windows key, type cmd in the search box, and click Run as administrator to launch Command Prompt with admin rights.
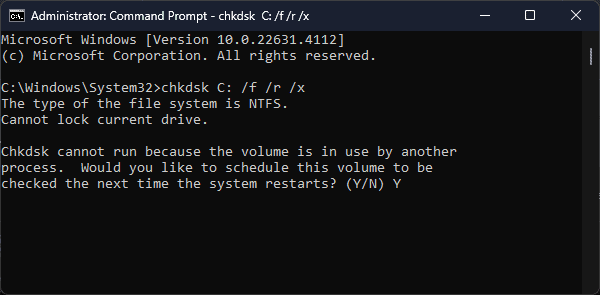
- Copy & paste the following command to fix errors on the disk, locate bad sectors, and force the drive to dismount before the process starts and hit Enter:
chkdsk C: /f /r /x - As we are trying to scan the system drive (usually denoted by letter C:), you will get a prompt to schedule the scan on the next restart. Type Y and press Enter to proceed.
- Reboot your PC to start the CHKDSK scan. It will run before Windows loads and check for errors & bad sectors.
- After the scan is complete, you will see the scan summary and actions taken to fix the CHIPSET_DETECTED_ERROR.
5. Run SFC & DISM scans
- Press the Windows key, type cmd in the search box, and click Run as administrator.
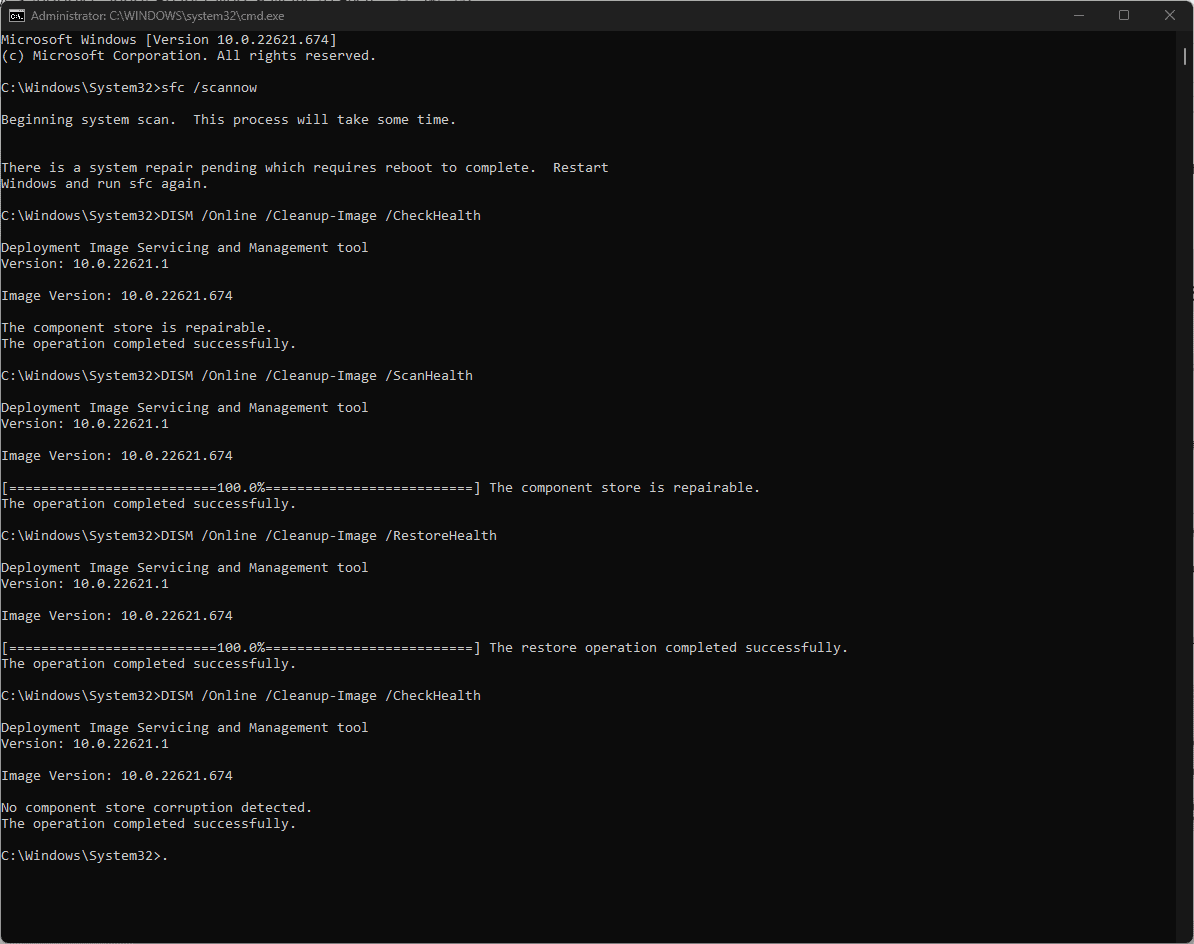
- Type the following command to repair or restore the system files, then press Enter:
sfc/scannow - Once the command is executed, copy & paste the following commands one by one to repair Windows OS image files, and hit Enter after every command:
DISM/Online /Cleanup-Image /CheckHealth
DISM/Online /Cleanup-Image /ScanHealth
DISM/Online /Cleanup-Image /RestoreHealth
- Wait for the command to be complete, then restart your computer to save the changes.
6. Run the Windows Memory Diagnostic
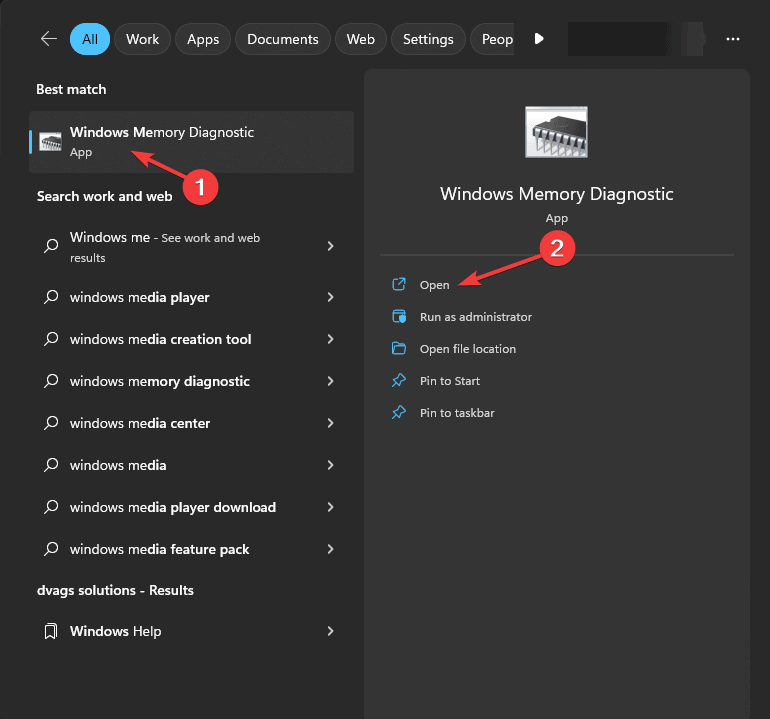
- Press the Windows key, type memory diagnostic in the search box, and click the first result to launch the Windows Memory Diagnostic tool.
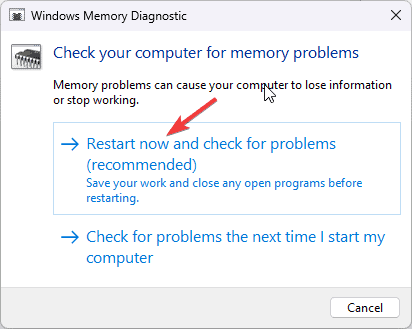
- Click Restart now and check for problems.
- Your PC will restart automatically, and the scan will start.
- During the scan, press F1, then select the type of scan you want to run. To customize more, you can switch between different sections with the Tab and then use the F10 key to save the changes.
- You can choose between Standard or Extended scan with at least five passes for best results.
- Once the diagnosis is complete, your PC will restart, and you will get the results.
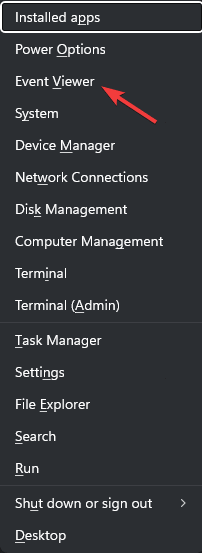
- If the results don’t appear, press the Windows key + X and choose Event Viewer.
- Go to Windows Logs>System. In the right pane, choose MemoryDiagnostics-Results, to see the mdsched.exe log.
7. Perform a System Restore
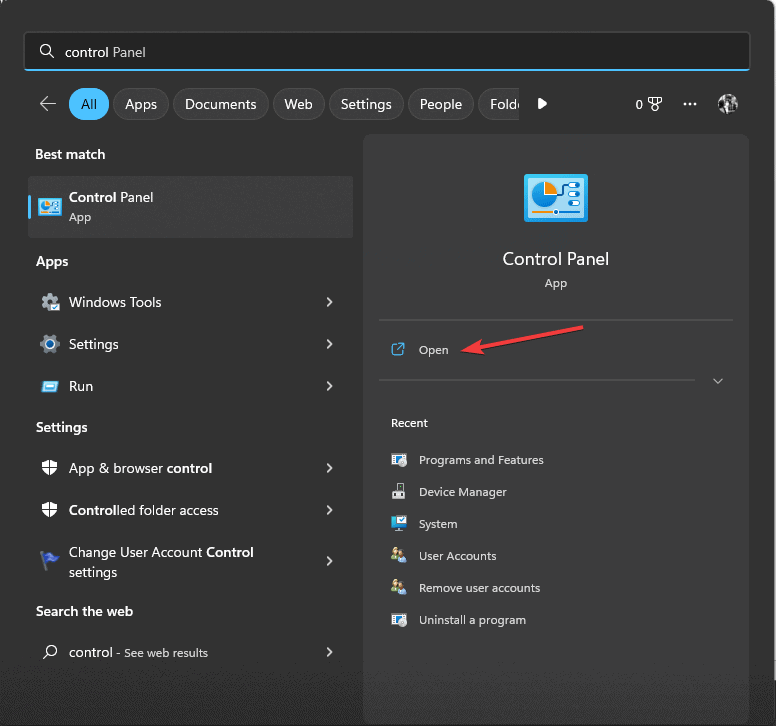
- Press the Windows key, type control panel in the search box, and click Open.
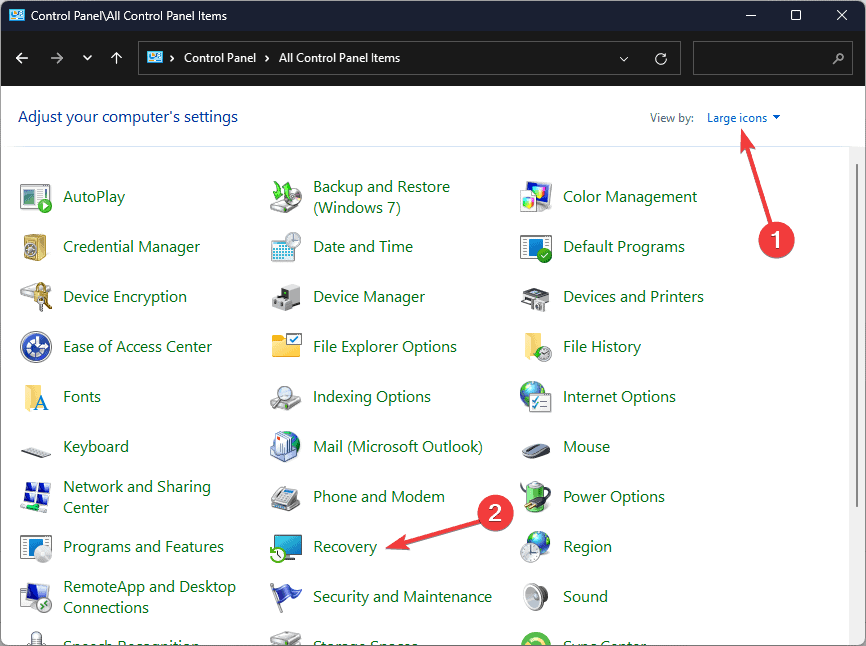
- Choose Large icons for View by, then select Recovery.
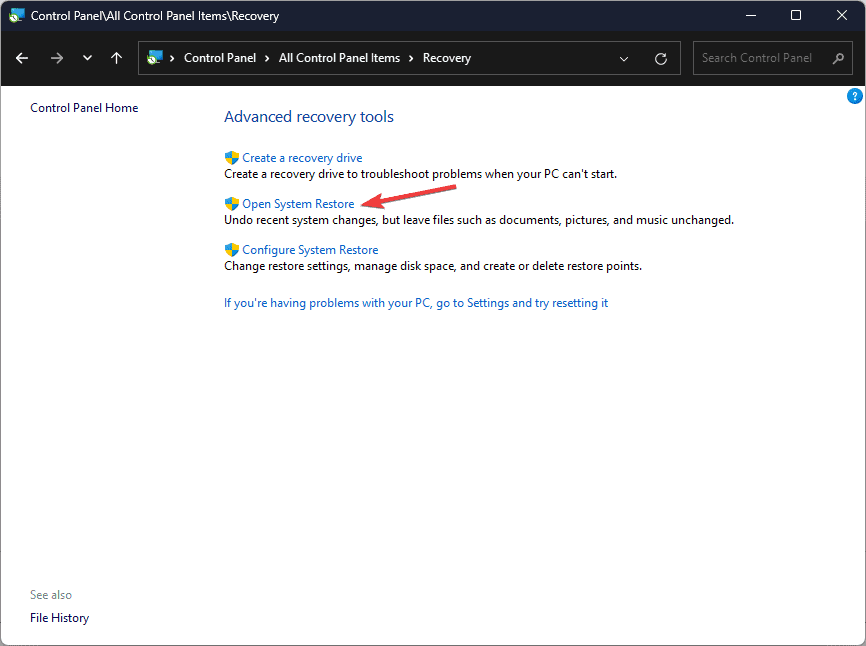
- Click Open System Restore.
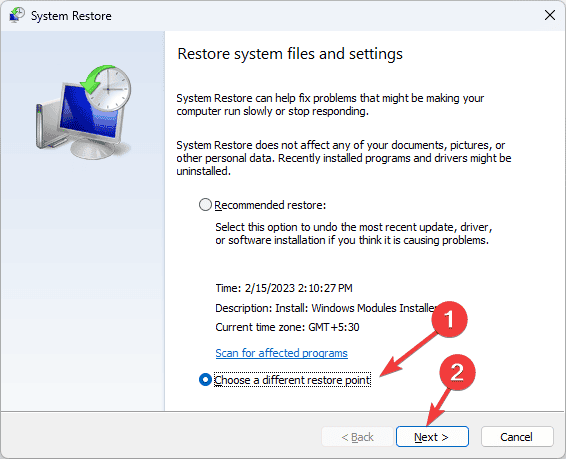
- Select Choose a different restore point in the System Restore window and click Next.
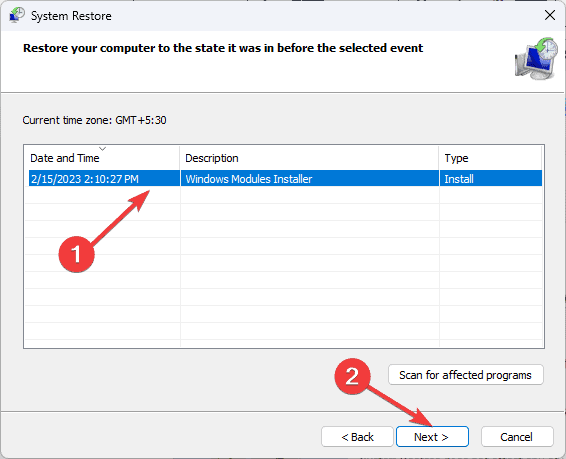
- From the list of all the available restore points, select the oldest or most recent one from when your computer was functioning correctly, and click Next.
- Click Finish to initiate the process.
Your computer will restart and restore the system settings to the chosen version. If System Restore fails and you get the System Restore wasn’t completed successfully message, we advise you to check out this detailed guide for quick fixes.
8. Reinstall Windows
 NOTE
NOTE
8.1 Create an installation media
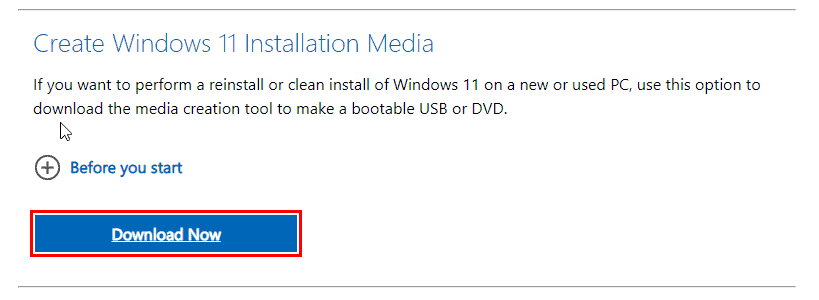
- On another computer, visit the Microsoft Windows 11 download page, locate Create Windows 11 Installation Media, and click Download Now.
- Once the Media Creation tool file is downloaded, connect the USB drive, double-click the file to run it, and click Yes on the UAC prompt.
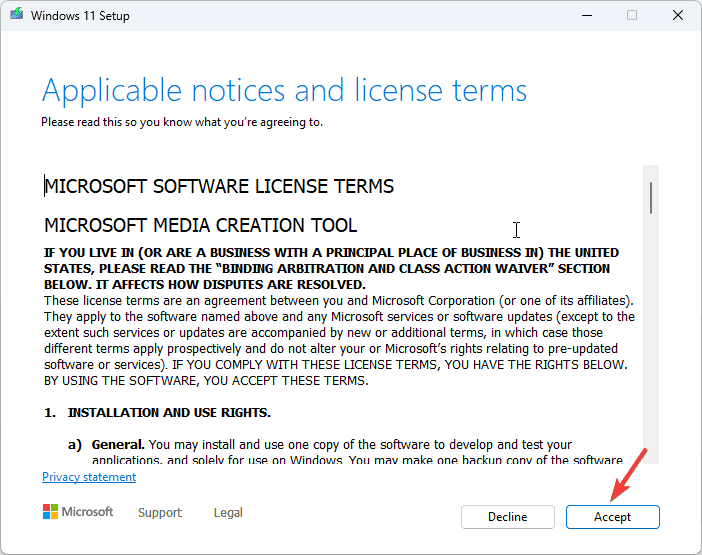
- Click Accept to agree to the license terms and agreements.
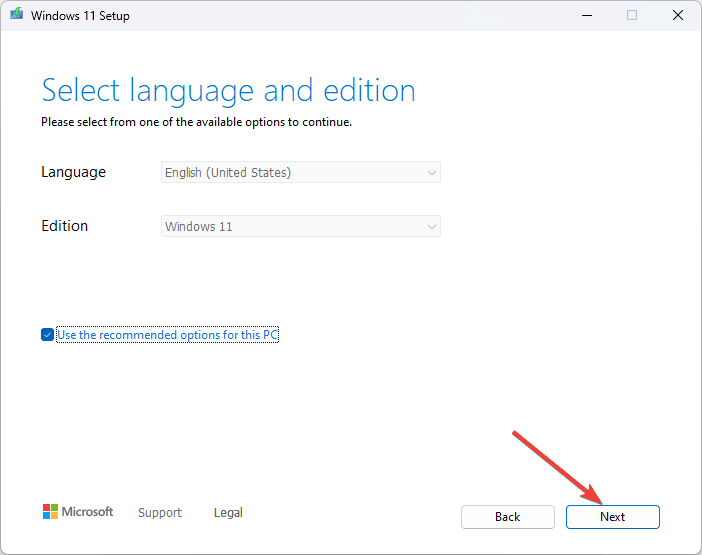
- On the Windows 11 Setup page, select language and edition for Windows 11, and click Next.
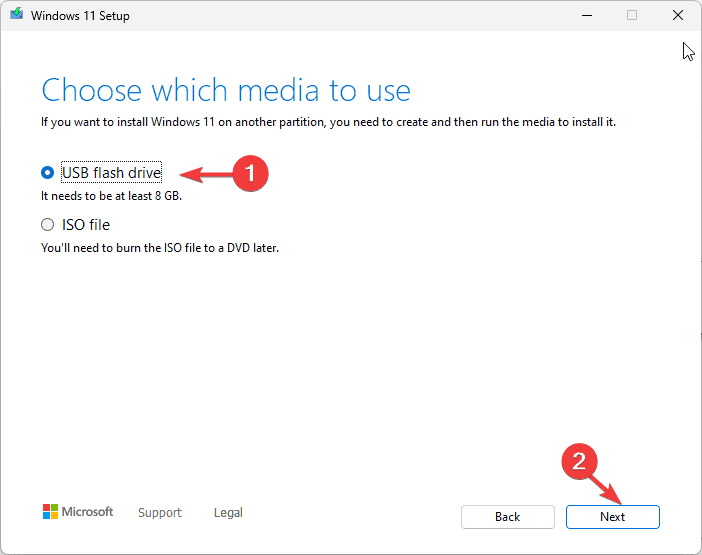
- Choose the USB flash drive option and click Next.
- You will see the USB drive you want to use and click Next.
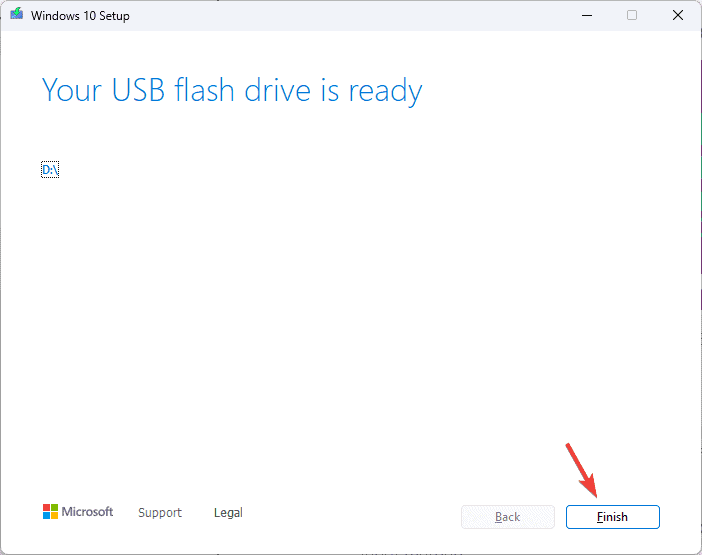
- Wait for the process to complete. Once you see Your USB flash drive is ready message, click Finish.
8.2 Install Windows 11
 NOTE
NOTE
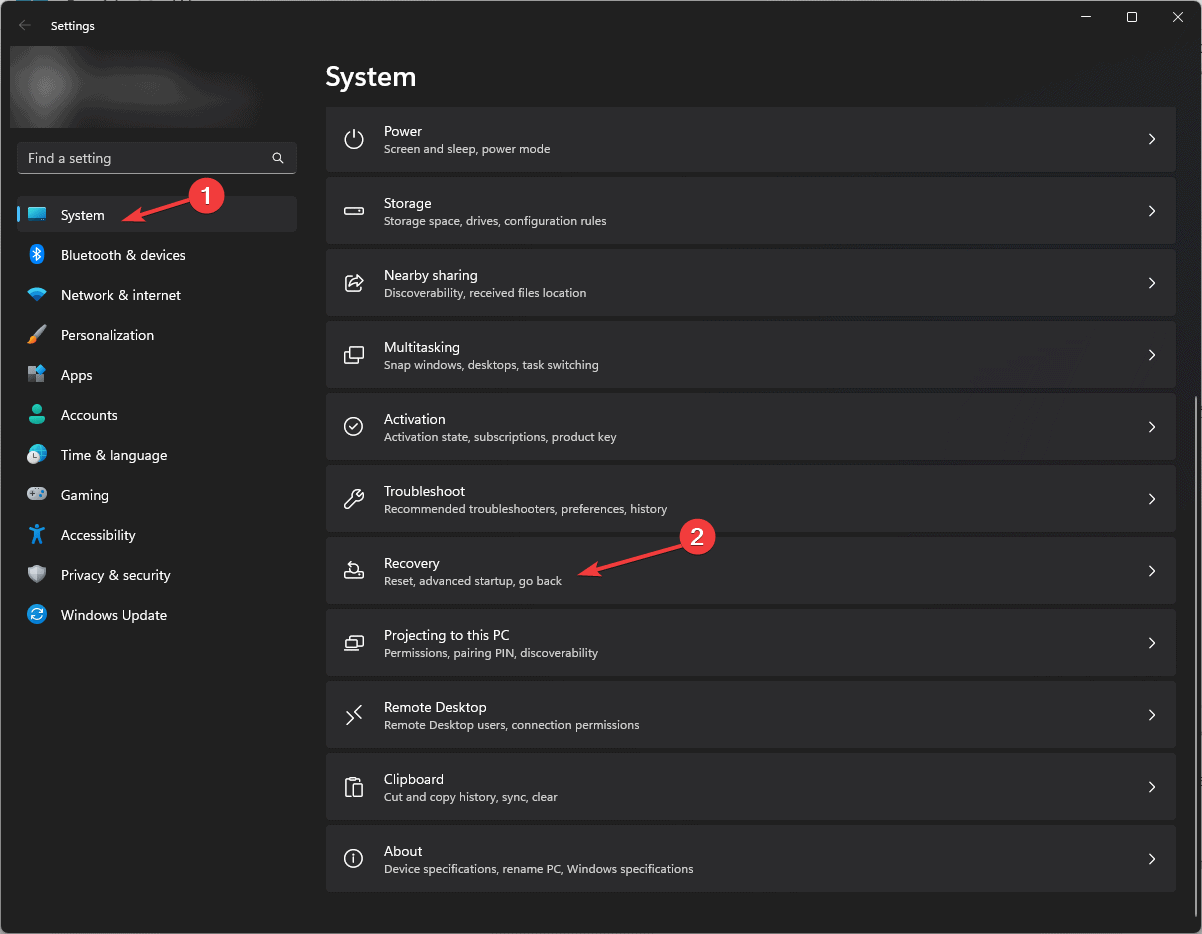
- Plug the USB drive into the targeted computer, and press Windows + I to open Settings.
- Go to System, then click Recovery.
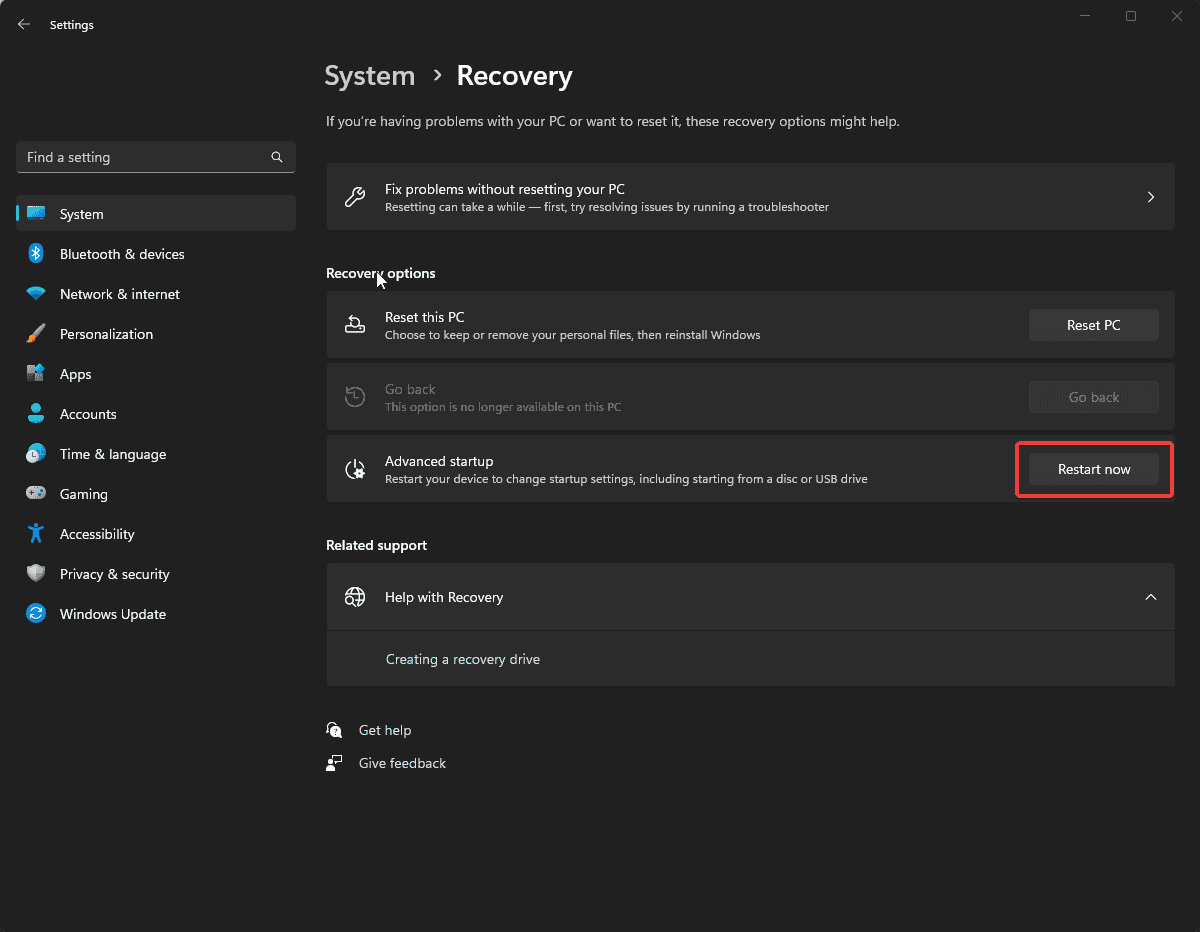
- Go to Advanced startup, and click Restart now.
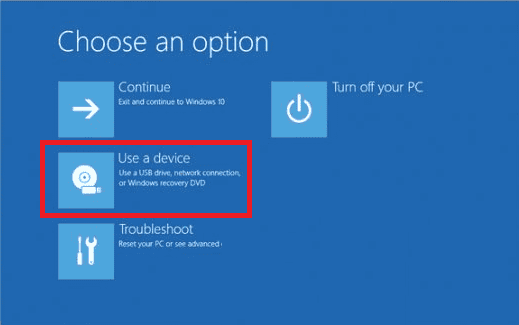
- Your computer will restart; on the blue screen, select Use a device. If you don’t find it, restart your computer in BIOS mode and choose your USB device to boot.
- Select language and other suitable options on the first screen, and click Next.
- Click Install now.
- Read the license terms and click Accept to move forward.
- Choose Custom: Install Windows only (advanced).
- You’ll see a list of drives and partitions. Select the ones you want to remove and click Delete. Afterward, click OK on the prompt to confirm the changes.
- Click Next.
The installation will start now, and it may take some time to complete. During the process, your device might restart multiple times, so don’t remove it from the power source.
8.3 Configure Windows settings
- Once the installation is complete, choose the region and keyboard layout.
- Connect to the Wi-Fi network when prompted.
- Next, sign in with a Microsoft account or create one if you don’t have one already.
- Select the privacy settings per your preferences, then follow other prompts to set up more features.
- Once the setup is finished, press Windows + I to open Settings and go to Windows Update.
- Click Check for updates.
- If an update is available, click Download & install to get it.
Performing a clean install or repair upgrade on Windows 10 can also help you fix this and other similar issues on your Windows 10 computer; read this guide to learn more.
To address and fix Blue Screen of Death (BSoD) errors like CHIPSET_DETECTED_ERROR, you must carefully review the information provided with the error code. This will help you take more informed steps to troubleshoot and resolve the problem. If you are stuck with a similar error, INVALID_WORK_QUEUE_ITEM, we have a separate guide.
If you have any questions or suggestions about the CHIPSET_DETECTED_ERROR BSoD error, feel free to mention them in the comments section below. We will be happy to help!






User forum
0 messages