CMD Keeps Popping up on Windows 11? Stop it in 5 Steps
Perform a clean boot or try running the SFC scan command
5 min. read
Updated on
Read our disclosure page to find out how can you help Windows Report sustain the editorial team. Read more
Key notes
- Users have been complaining that the CMD prompt keeps popping up on their PCs, even after closing them multiple times.
- This issue could be because your PC is infected with a virus, or it can be a file corruption problem.

The CMD prompt popping up is not a new issue and has been reported by users for quite some time. This is why many users want to change the default terminal in Windows 11.
Thankfully in this guide, we will give you 5 ways via which you can easily fix the CMD prompt that keeps popping up issue. Let us get right into it.
What causes the CMD prompt to keep popping up?
After some research, we have found some common reasons the CMD prompt is popping up on your PC.
- CMD.EXE might be added to the startup folder: By accident, you might have added CMD.EXE to the startup folder because of which it is starting up randomly.
- Your PC is infected with virus: A virus or malware-infected PC can cause it to malfunction and throw multiple errors. You should always install an antivirus on your PC to keep it safe.
- Some system files are missing: If a system file is missing or corrupt, then this could cause multiple issues with your PC.
- The latest Windows update isn’t installed: It could be because of a bug in the version of the Windows update you are currently operating.
- Scheduled task is running in the background: The most common reason this issue gets triggered is that the scheduled task is running in the background.
What can I do if the CMD prompt keeps popping up?
Here are a bunch of general solutions that you can apply before heading over to the advanced procedures:.
- It could be because there is a temporary glitch or bug in your PC that is causing the problem. To fix this, you can simply try a restart and see if this resolves the issue or not.
- Try creating a new user account. Often such glitches are associated with faulty account profiles. You can either try creating a new user profile or try using an admin account to see if the problem exists there or not.
Let us check out the advanced solutions to resolve the error.
1. Disable Office tasks
- Press the Win + R keys to open the Run dialogue.
- Type taskschd.msc and press Enter.
- Expand the Task Scheduler Library.
- Double-click the Microsoft folder.
- Select the Office folder.
- Locate the task named OfficeBackgroundTaskHandlerRegistration.
- Right-click on OfficeBackgroundTaskHandlerRegistration and select Disable.
In case you see that the Office task isn’t the one causing problems for you like others, then you can click the Task Scheduler Library from the left pane and look at the scheduled tasks on the right.
You can disable any one of the tasks that you might find odd or unnecessary.
2. Scan your PC for viruses
- Open the Start menu by pressing the Windows button.
- Search for Windows Security and open it.
- Click on Virus & threat protection.
- Hit the Quick Scan button.
- The system will be scanned and if found any virus, will prompt you to perform necessary actions.
- You can also click on Scan options.
- Click on Full Scan to perform a deep scan of your PC.
The above options are shown for the in-built Windows Security tool. But even if you have a third-party antivirus installed on your PC, it gives you an idea that you need to perform a virus scan on your PC. You can choose from our best antivirus solutions listed and see what suits your needs best.
3. Run SFC Scan
- Open the Start menu.
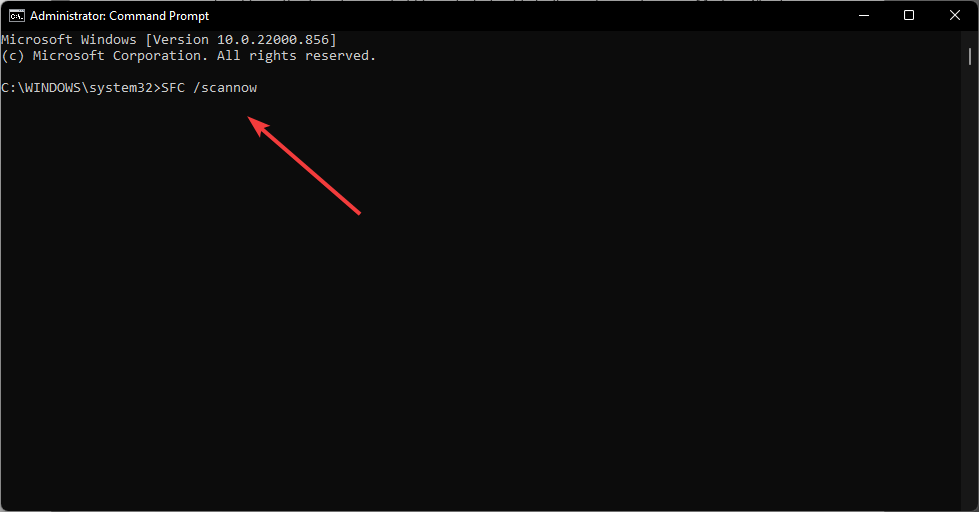
- Search for Command Prompt and run it as an administrator.
- Type in the the following command and press Enter:
sfc /scannow - The tool will check for missing or corrupt system files and will replace them with working ones.
- After the process completes, restart your PC.
SFC Scan is an inbuilt command line that scans your PC for corrupt or missing system files. You can easily fix all the problematic files by running this simple command on your PC and also correct the CMD prompt issue.
If you want an easier and quicker solution then you might want to try a dedicated tool that can perform this process automatically.
4. Perform a clean boot
- Open the Start menu.
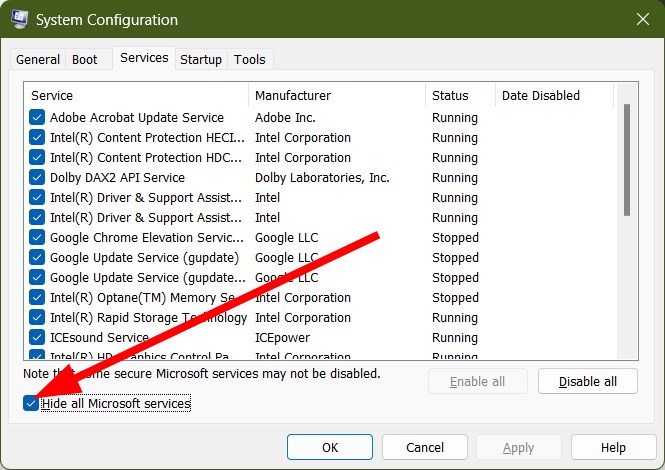
- Type msconfig and open System Configuration.
- Switch to the Services tab.
- Select Hide all Microsoft services.
- Click on the Disable all button.
- Hit the Apply button to save the changes.
- Click on the Startup tab.
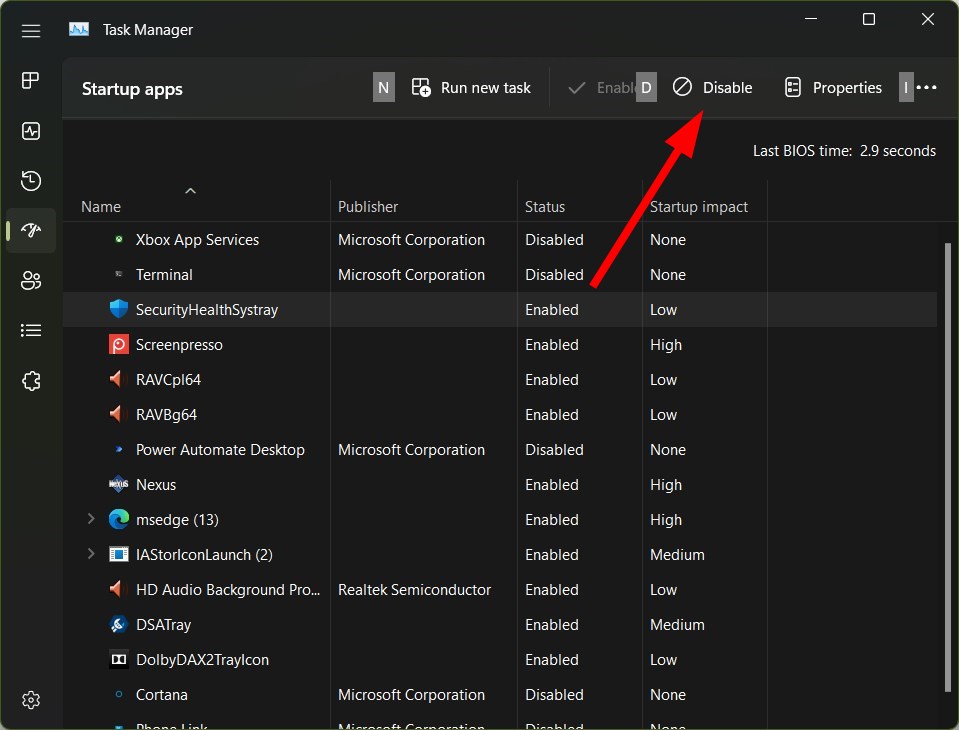
- Select Open Task Manager.
- In the Startup tab of the Task Manager, Disable all the Enabled startup items.
- Close Task Manager.
- Restart your PC.
This can help you determine if a Microsoft service was causing the CMD prompt keeps popping up an issue or not.
5. Remove CMD.exe from the Registry Editor
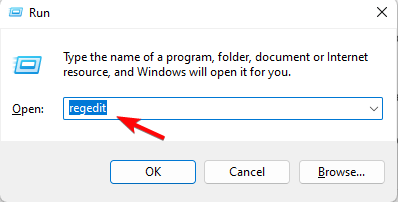
- Press the Win + R keys to open the Run dialogue.
- Type regedit and press Enter.
- Navigate to the below path:
HKEY_CURRENT_USER\SOFTWARE\Microsoft\Windows\CurrentVersion\Run - If you find CMD.exe on the right side, then right-click on it and select Delete.
That is it from us in this guide. In case you can’t run the Command Prompt as an administrator, you can check out our guide that gives you some easy steps to resolve the issue.
If you can’t view the product key in the Command Prompt, then you can refer to our guide that gives you a proper solution to fix the issue. Consequently, you may want to disable CMD altogether so here’s how to go about it.
Let us know in the comments below, which one of the above-mentioned methods helped you resolve the CMD prompt problem.


User forum
0 messages