Computer starts up with Devices Diagnostic Level set to Basic [FIX]
3 min. read
Updated on
Read our disclosure page to find out how can you help Windows Report sustain the editorial team. Read more

A wide range of users have reported that their computer starts-up with Devices Diagnostic Level set to Basic. More than this, it seems like the files that were stored both in the local accounts and apps installed were removed as well.
This is an extremely annoying problem, as you can’t get access to your main account, and all files seem lost a never-ending loop of moving from one profile to another.
The issue seems to arise when computer experience a power cut and shuts down instantly without any chance of saving the session. This can cause Windows 10 to enter a never-ending loop of creating a new temporary backup profile, without access to the original files.
What to do if your Devices Diagnostic Data level has been set to Basic?
1. Restart your computer
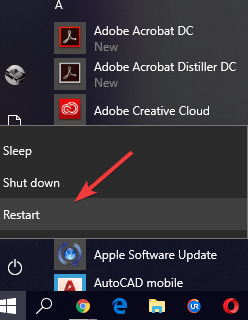
- Click the Start button.
- Select the Power button and choose Restart from the menu.
- Once your PC restarts, check if the problem is still there.
- If the issue is still present, try restarting your PC a few more times.
2. Create another public profile in order to try and access the files on your hard-drive
- Press Win+X keys -> select Settings.
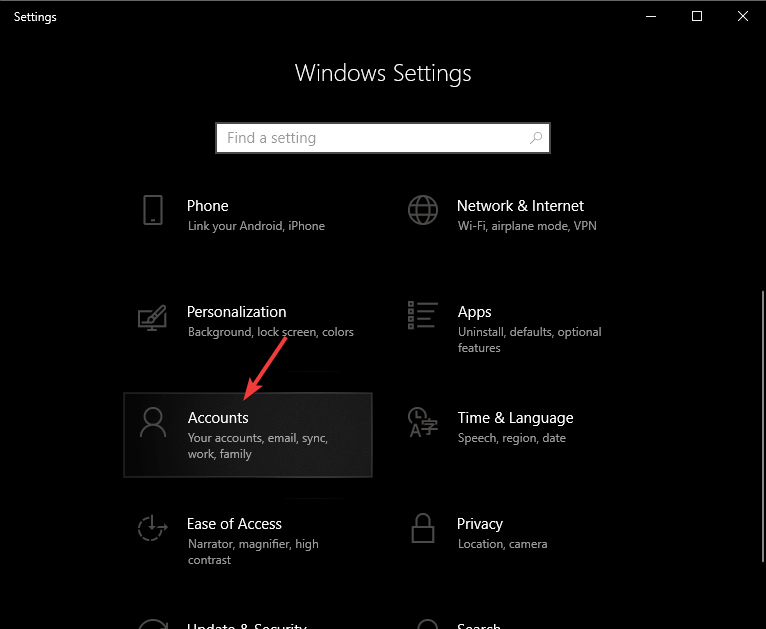
- Click on Accounts -> select Family & other users.
- Select Add someone else to this PC.
- Choose I don’t have this person’s sign-in information.
- Select Add a user without a Microsoft account.
- Enter the credentials required (username and account password).
- Log into that new account.
- Search your computer (usually the: C drive), for a folder called Windows.old, or named after the user account that you encountered the issue in.
- Select all the files stored there and move them to an external hard-drive.
- Log into your administrator account, and follow the next method.
Want to remove Windows.old folder and free up space? Check out our in-depth guide!
3. Change Diagnostic and Usage Data Settings
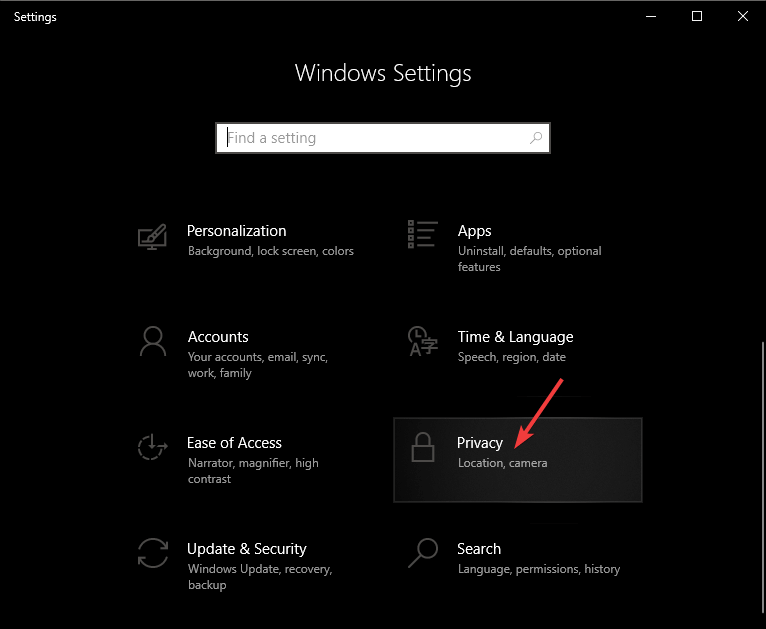
- Press Win+X keys -> choose Settings -> Privacy.
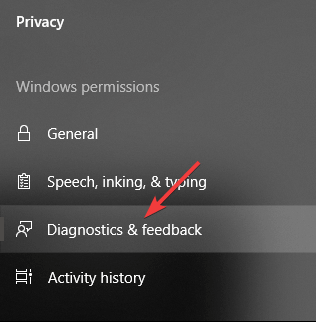
- Select Diagnostics & Feedback.
- Change the Diagnostic and Usage Data Settings to Full.
- Restart Windows and log into your administrator account.
- Delete all other profiles from your PC.
In this article we explored some of the best troubleshooting methods available for this issue. We would love to know if this guide helped you solve your problem.
Please feel free to let us know by using the comment section below.
READ ALSO:


User forum
0 messages