How to Create and Use Categories in Outlook: Boost Your Productivity
Learn how you can best use Outlook categories to your advantage
Key notes
- Creating categories in Outlook is different from that creating folders.
- Categorizing your Outlook messages helps you identify them in one glance and stay focused on them.
This is a comprehensive guide on how to create and use categories in Microsoft Outlook. We have explained all the details that will help you understand the benefits of using categories, and step-by-step instructions on how to create, rename, and delete categories.
Apart from this, you will also learn how to assign categories to emails, meetings, contacts, and tasks. The article will also provide tips on how to sort and filter messages by default category.
What are Outlook categories?
Many people are confused between what is an Outlook category and what is an Outlook folder. Although, they know that there are multiple ways of customizing Outlook and the app itself provides different ways to sort messages, search folders, sort folders, and much more.
However, there is always some confusion between Outlook categories and folders. Outlook folders let you organize your inbox and store messages.
When you move messages into your folders, you are moving them from the inbox into these folders. Then to locate the messages, all you need to do is enter the category folder and search it.
On the other hand, Outlook categories are a way to visualize and change the color code of the messages in your inbox.
When you assign a category to a message, it doesn’t leave the inbox instead they are assigned a category color. Using the color category, you can easily find out the message that you are looking for from the category list.
And if you regularly use Outlook, find out how to import vCards or VCF files to Outlook.
Why can’t I use categories in Outlook?
Many users have reported that they are unable to use categories in Outlook. One of the main reasons the Category button is not available for IMAP accounts is that they do not sync back to the server.
Besides, you won’t be able to assign a color category to IMAP accounts as Outlook 2016 has a limitation on the color categories feature. To fix this, you need to change the IMAP account to a POP3 account.
How to create and use Outlook categories?
1. Create Outlook categories
1.1 Desktop client
- Launch the Outlook desktop app.
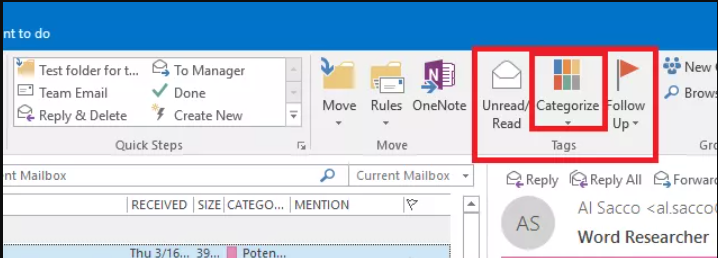
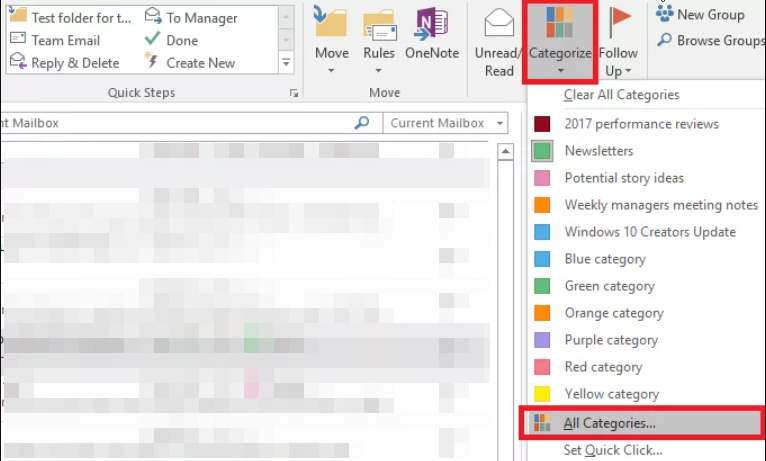
- In the Tags section click Categorize.
- From the drop-down list select All categories.
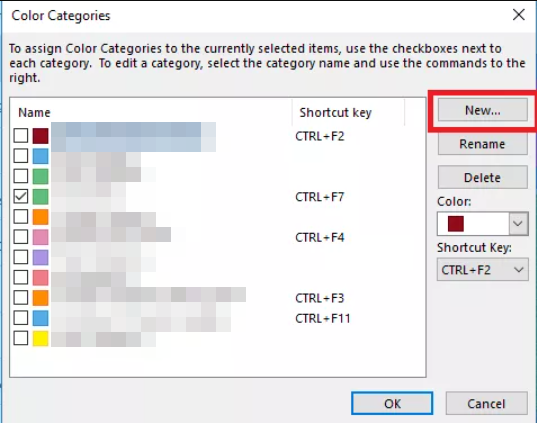
- Hit the New button in the Color Categories box.
- In the Add New Category box, name your category by typing it in the text field.
- Choose a custom color from the Color drop-down menu.
- Using the Shortcut Key, add a shortcut key for your category.
- Click OK to close the Add New Category box and again click OK to save your preferences.
1.2 Web app
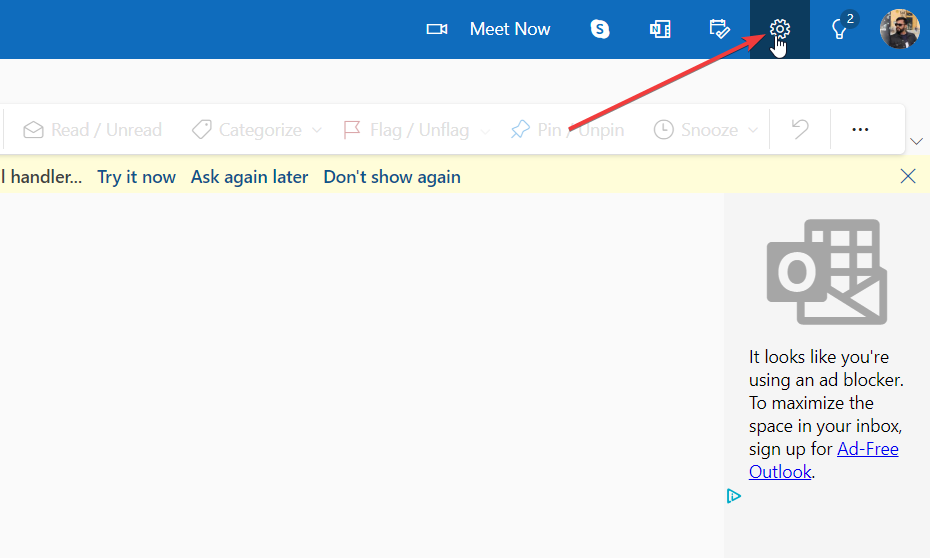
- Visit the official Outlook login page.
- Click on Settings.
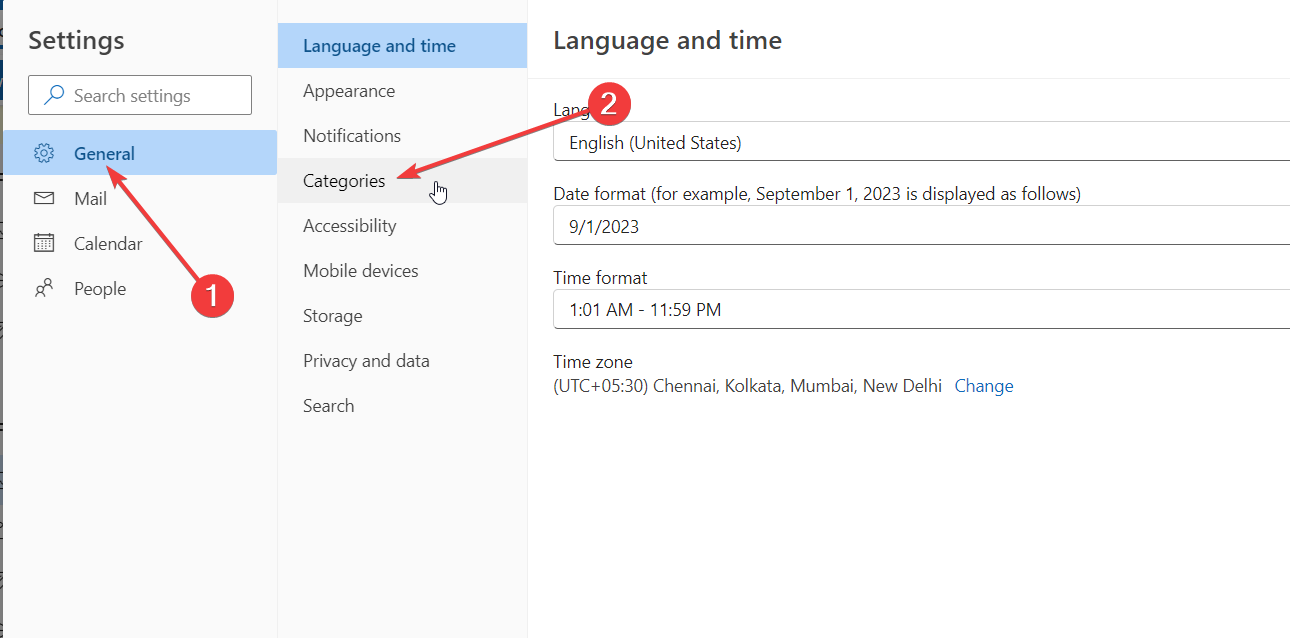
- Select General and then Categories.
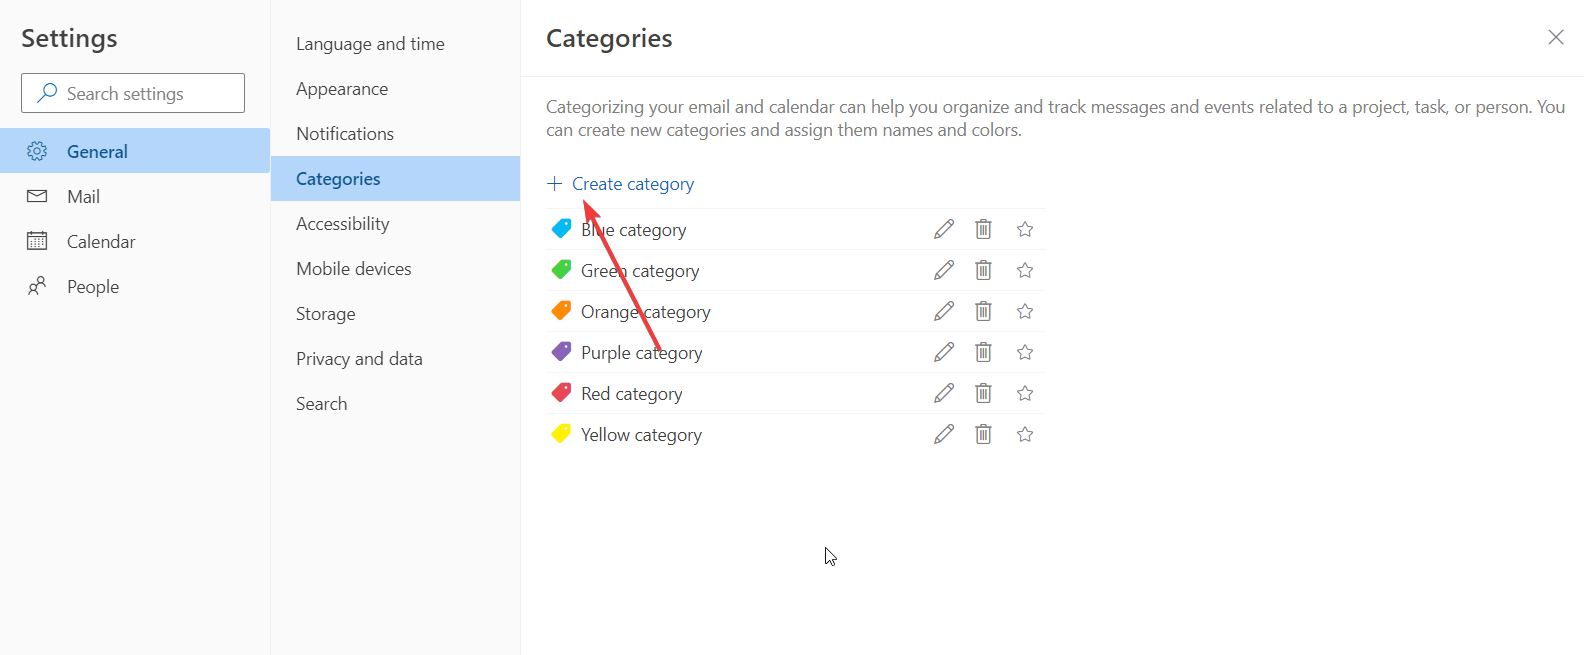
- Press + Create Category at the top of the category list.
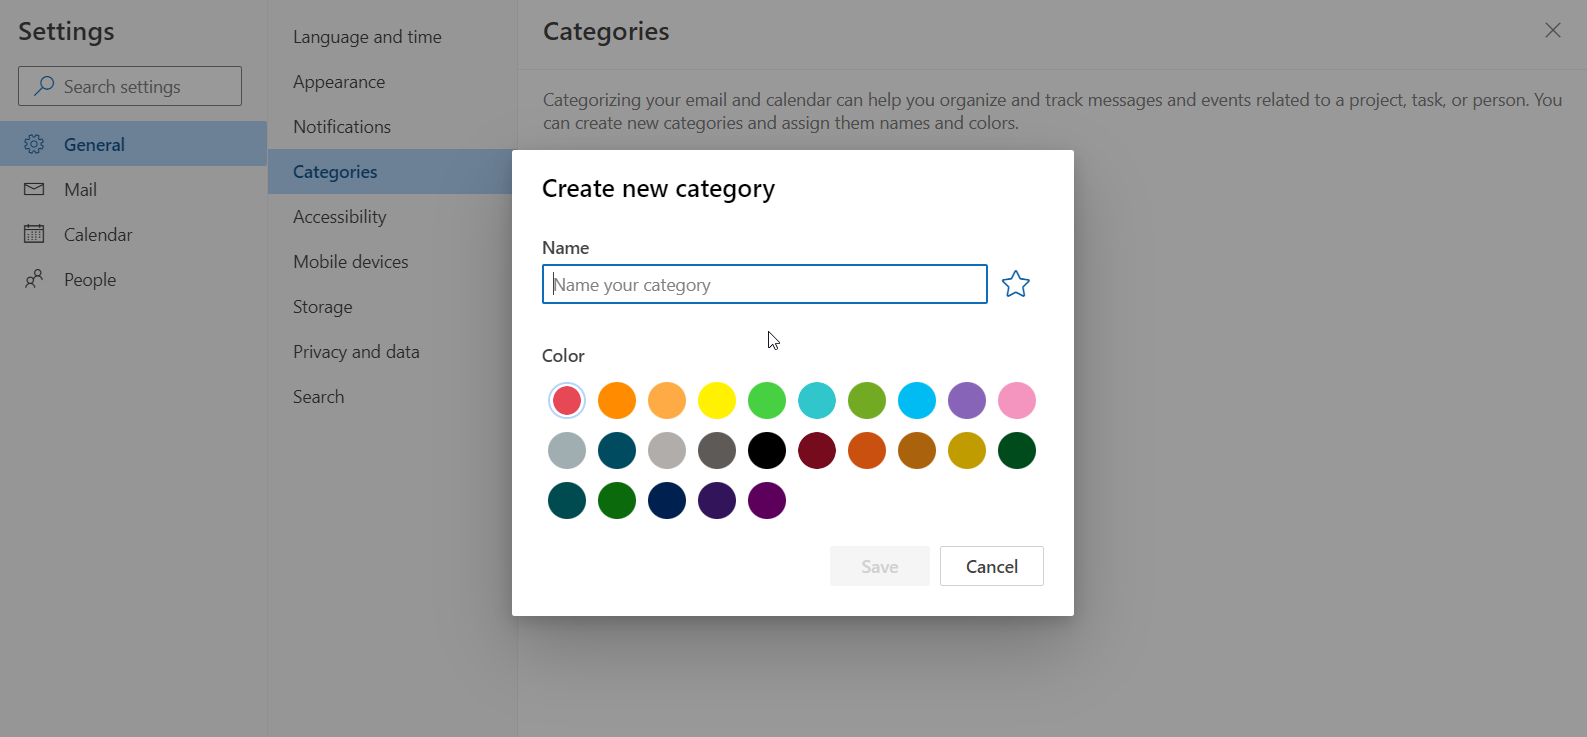
- Name the category, select a color for it, then click on Save.
2. Rename Outlook categories
2.1 Desktop app
- Launch the Outlook desktop app.
- In the Tags section click Categorize.
- From the drop-down list select All categories.
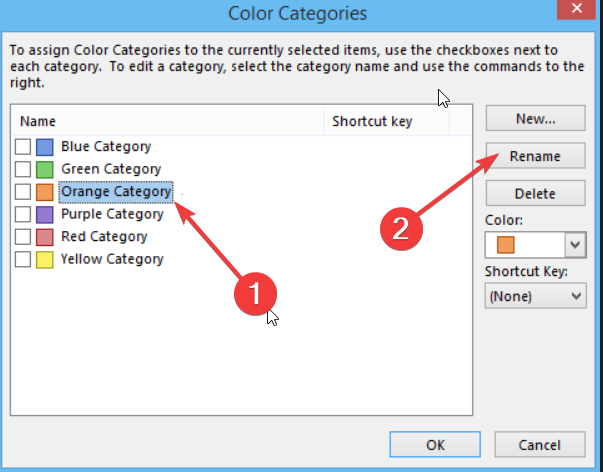
- Select a category that you wish to rename and hit the Rename button.
- Enter a new name in the text field and click OK to apply the changes.
2.2 Web Client
- Visit the official Outlook login page.
- Click on Settings.
- Select General and then Categories.
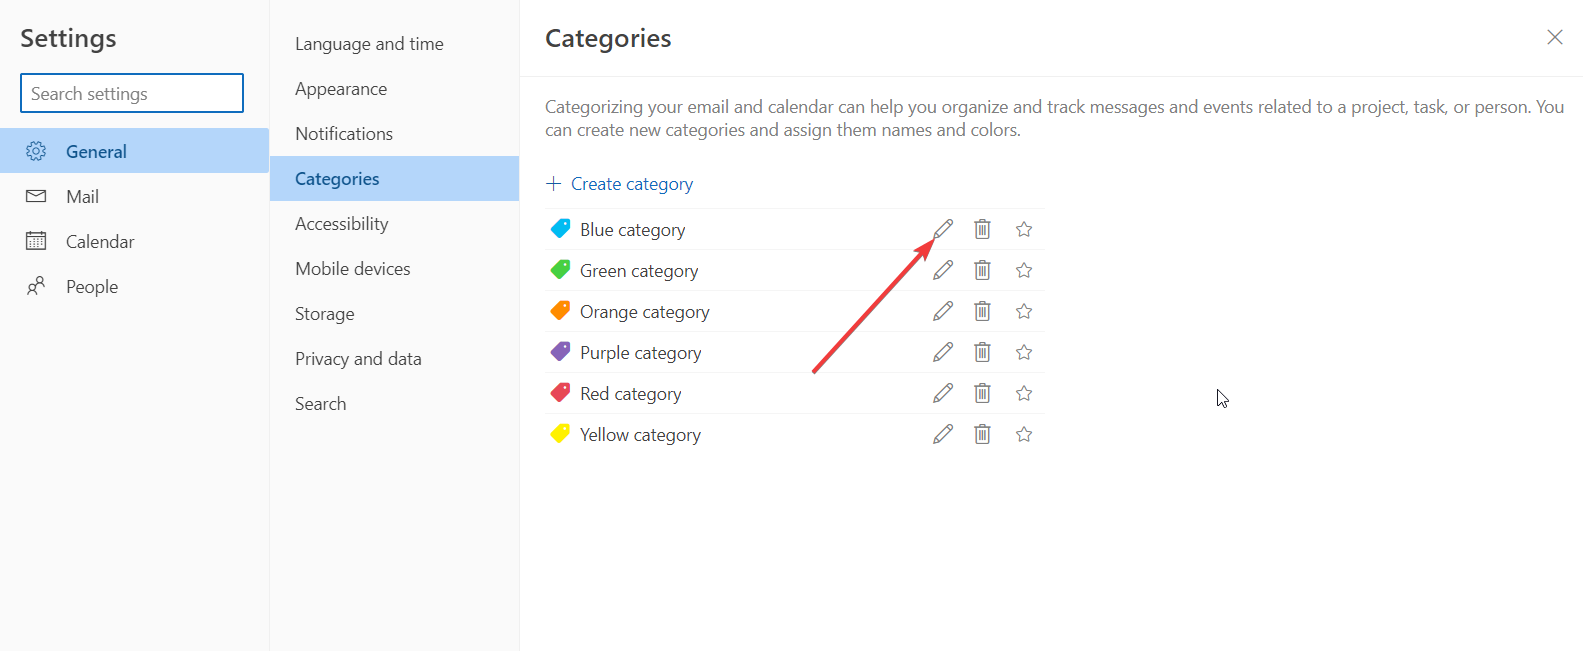
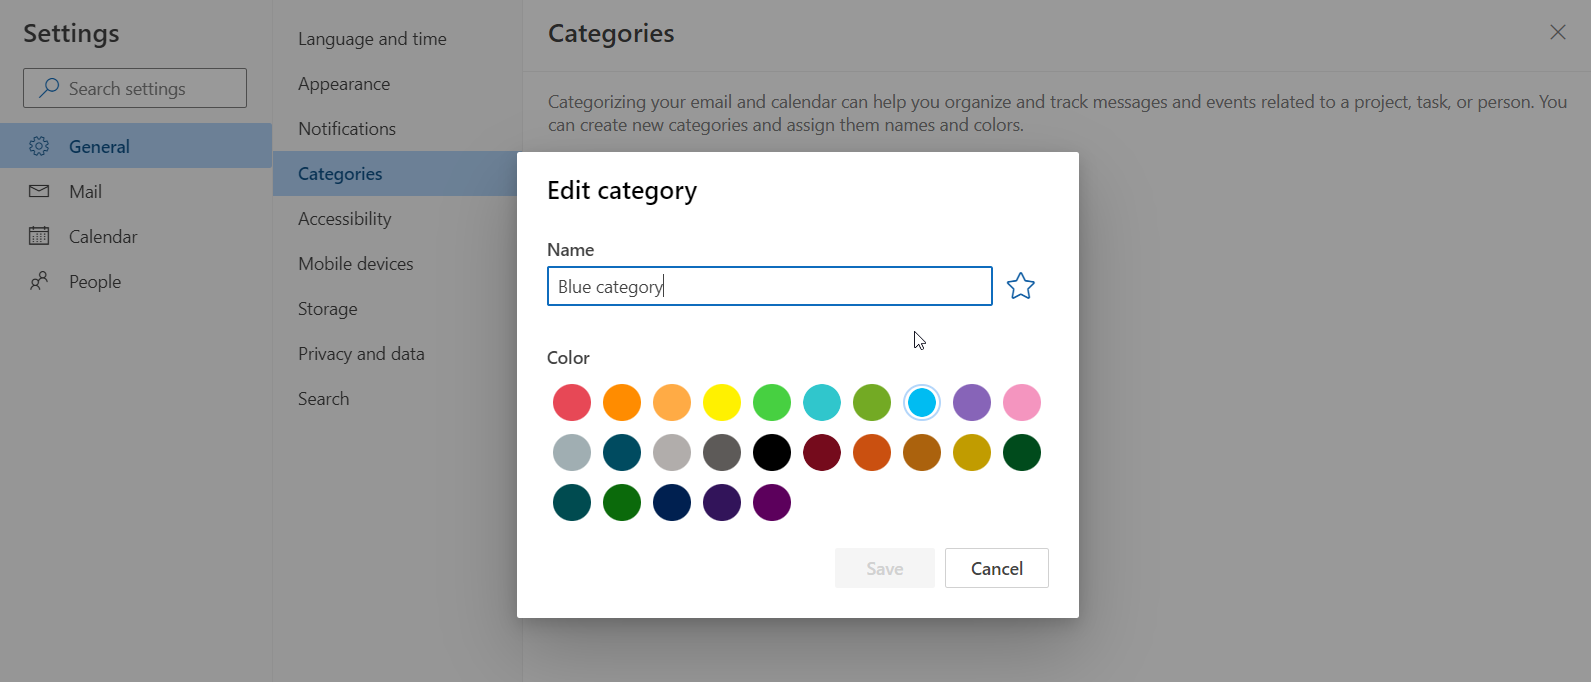
- Click on the pencil button next to a category to edit it.
- Type the preferred name of the category in the text field and click OK. You can also change the color of that category.
Following the above method, you can easily rename the Outlook category and assign it a name of your choice on both the desktop and the web app.
3. Delete Outlook categories
3.1 Desktop app
- Launch the Outlook desktop app.
- In the Tags section click Categorize.
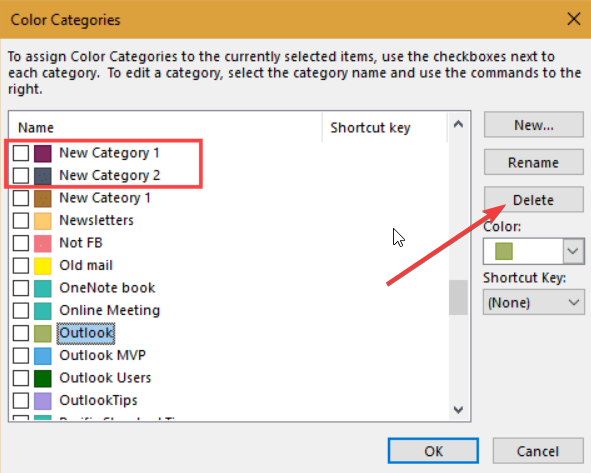
- From the drop-down list select All categories.
- Select a category that you wish to delete and hit the Delete button.
3.2 Web Client
- Visit the official Outlook login page.
- Click on Settings.
- Select General and then Categories.
- Click on the Trash button next to a category to delete it.
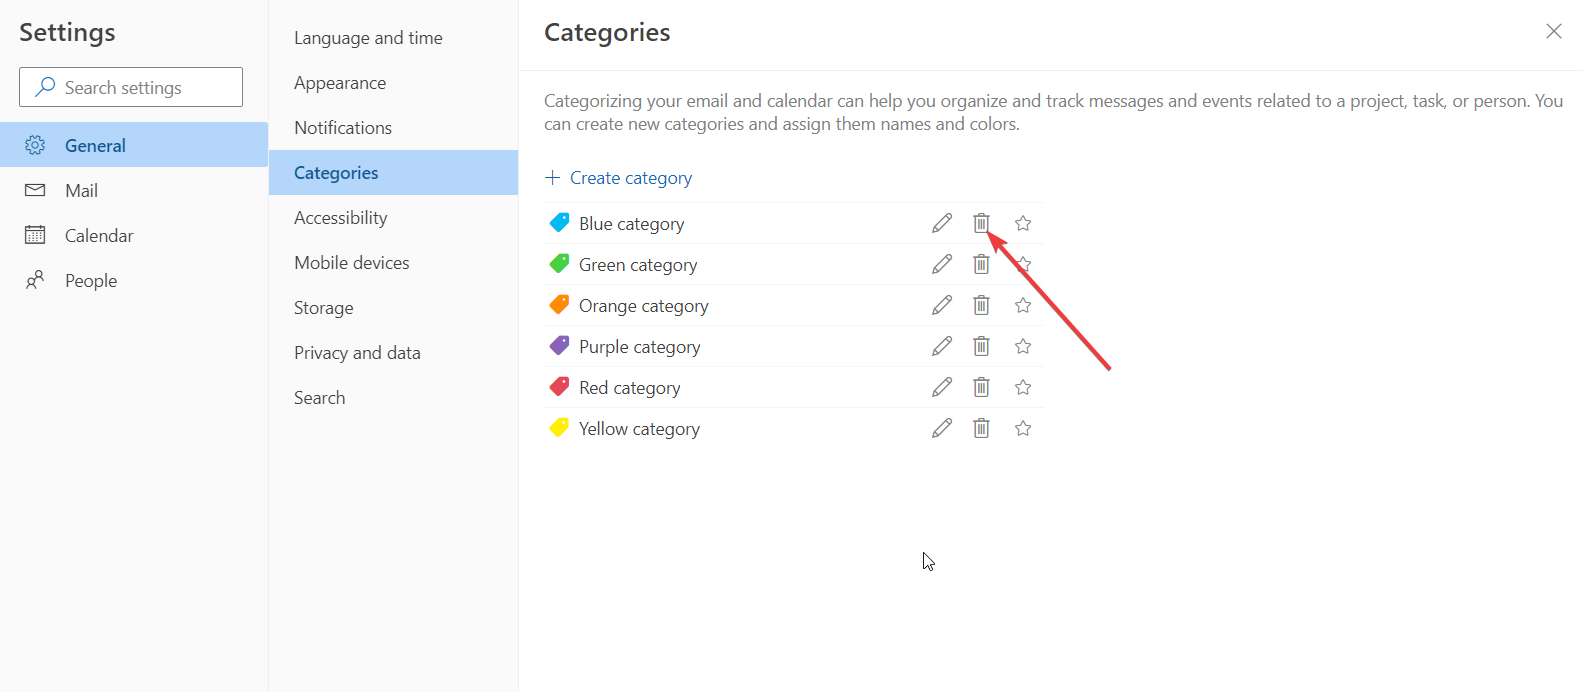
Using the above methods, you can easily delete categories on your computer as well as the web client app of MS Outlook.
4. Use Outlook categories
4.1 Assign Outlook categories to your email
- Go to the Home menu of the Outlook app.
- Right-click on the email, click on Categorize and select a category from the pop-out menu.
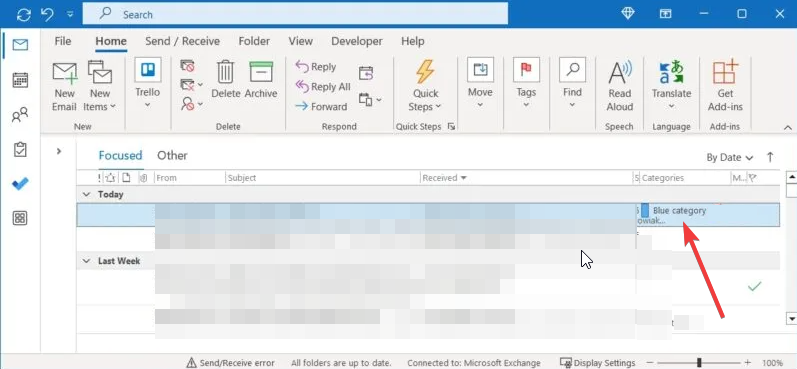
- Once assigned, you can view the color of the category as well as the name of the category in the Categories column of your inbox.
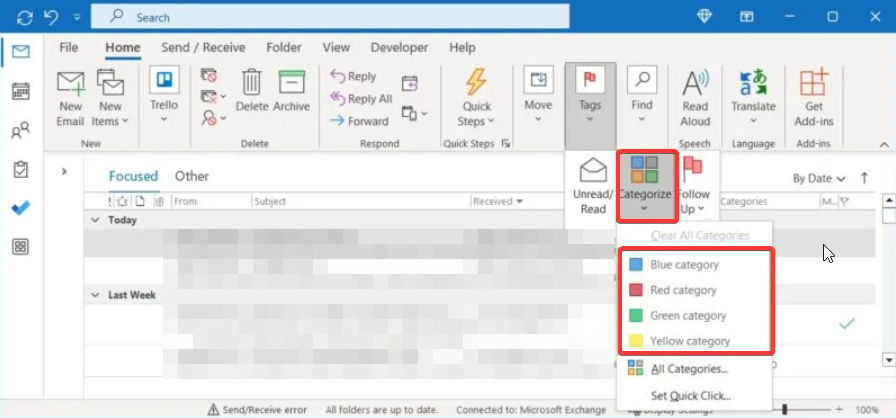
Following the above method, you can easily assign Outlook categories to one or multiple messages. This will help you focus on the messages related to a category. For example, you can focus and deal with work-related messages when inside the Work category.
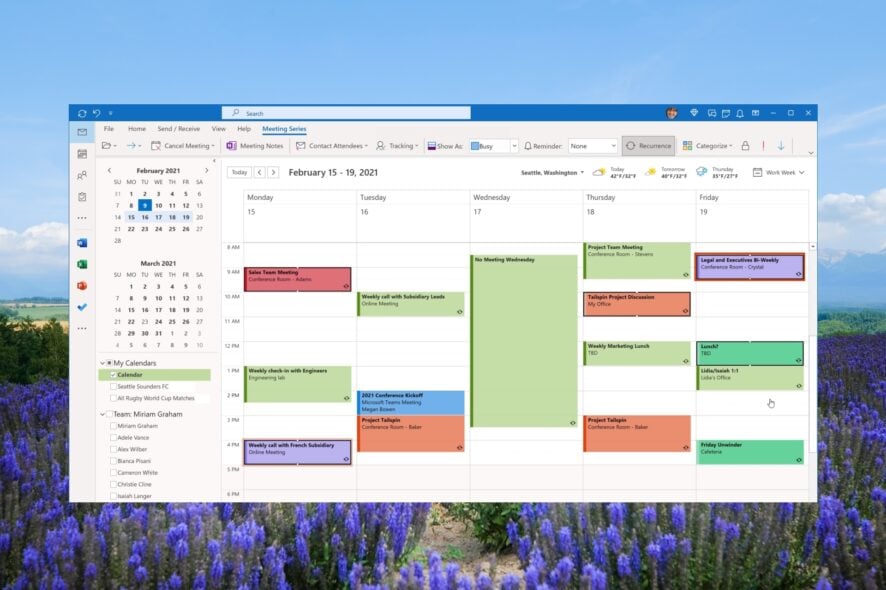
4.2 Add a category to your calendar event
- Launch the Outlook app on your PC.
- Right-click on the calendar event and select Categorize from the drop-down list and choose a category. If you do not see your preferred category, click on All Categories.
- After selecting the category, you will see the name of the category and the color applied to the calendar event.
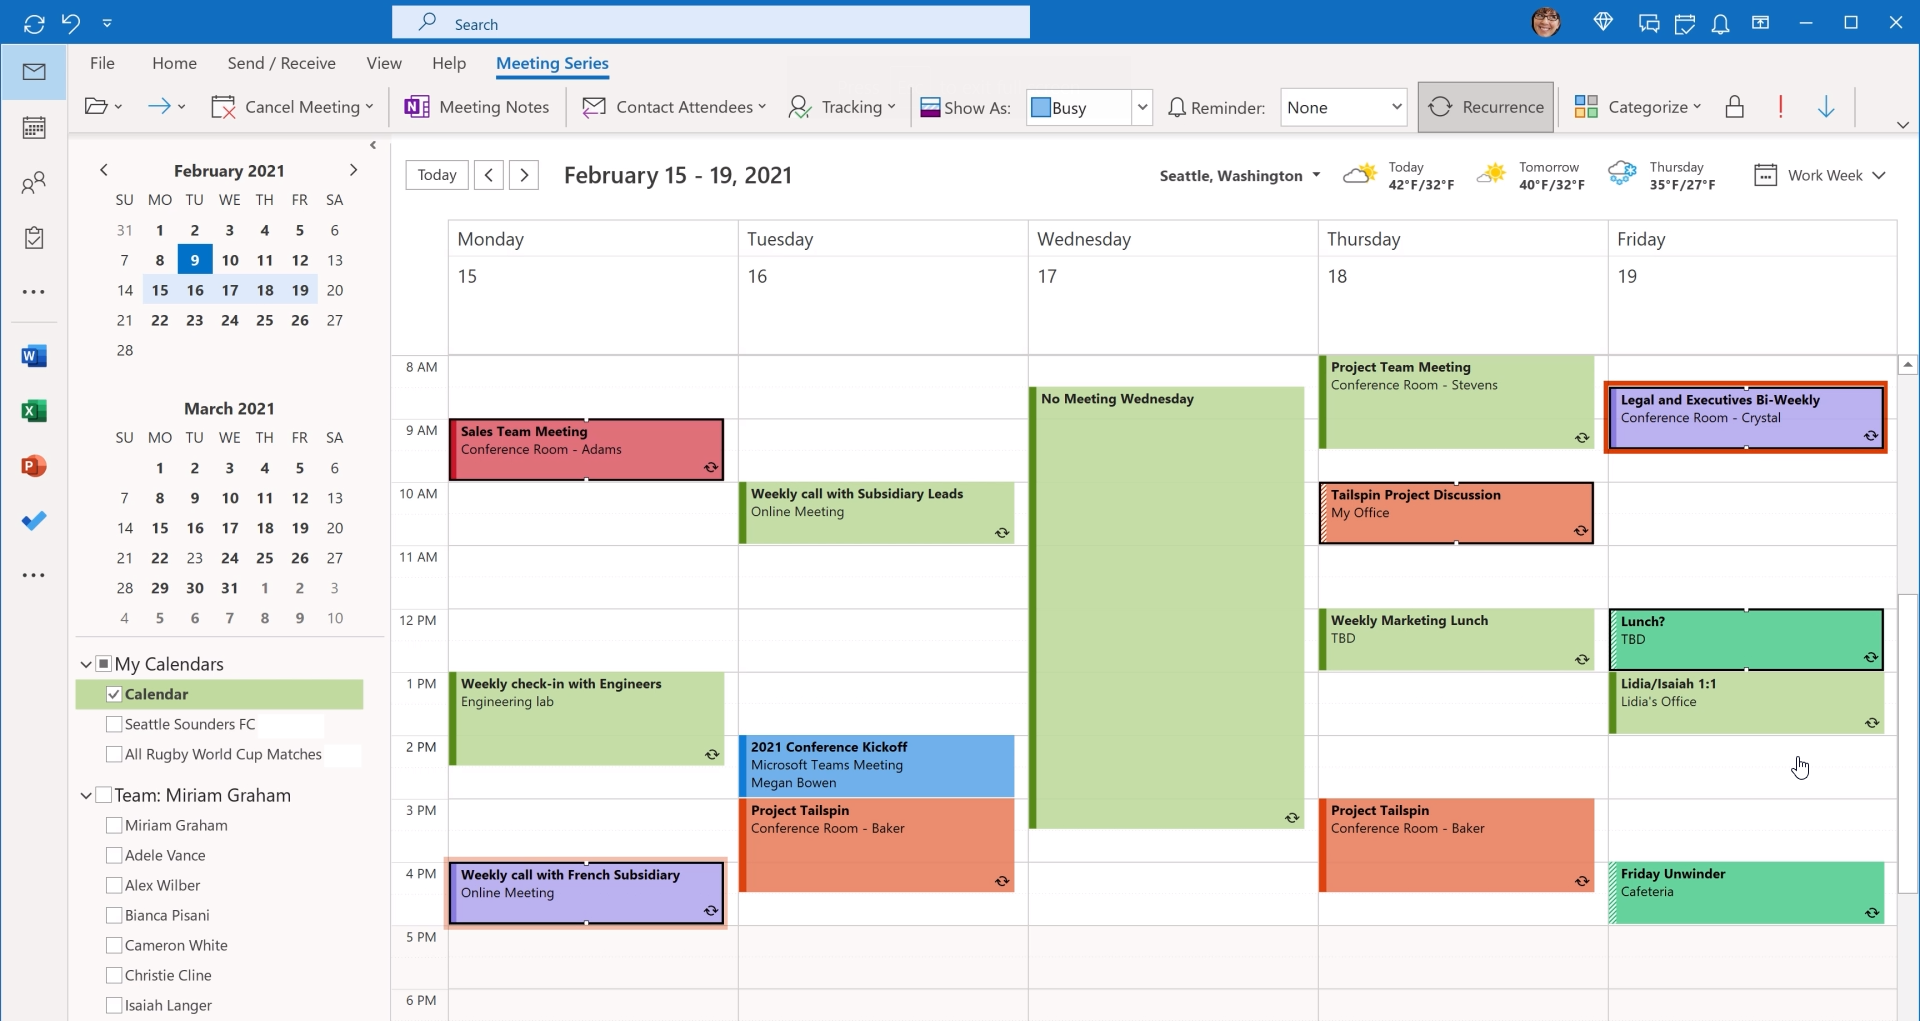
You can apply the categories to your contacts, appointments, and other events in the Outlook desktop app or the web app.
How to Sort and Filter Messages by Category?
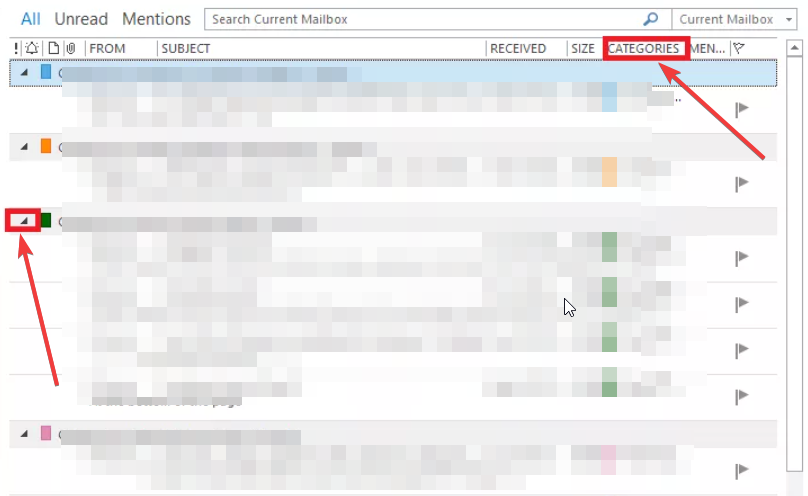
- After assigning a category to your emails, you can simply sort the messages by hitting the Categories column in the horizontal bar that appears above the Outlook messages.
- Under the Categories section, you can expand or close a certain category using the small triangle button in the Category header.
The above steps will help you sort and filter the Outlook inbox categorically. Some of the important benefits of the category feature in Outlook are listed below.
- Categories let you quickly find a specific message related to a specific topic
- You can easily locate a particular message by looking at the category color if it is assigned a category
- You can keep your Outlook inbox organized by assigning a category to your messages, calendar events, or even contacts
- Categories are more beneficial for users than folders, as you can assign multiple categories to a message
- Once assigned, it is easy to categorize
- There is no limit to how many categories you can have in Outlook
That is it from us in this guide. You can check out our guide that explains in detail how you can perform a search for a blank category in Outlook.
We also have a dedicated guide on how to check what folder an Outlook mail is in. Also, you can refer to our guide that will help you resolve the Outlook not moving emails to folder issue.
Feel free to let us know in the comments below if the above guide helped with your query on how to create and use Outlook categories.
Read our disclosure page to find out how can you help Windows Report sustain the editorial team. Read more


Improve this guide


User forum
0 messages